How to use a DSLR shoulder rig:
While I was filming outdoors with my Dslr camera I missed having a shoulder rig to help me stabilize the footage, as well as making focusing more comfortable.
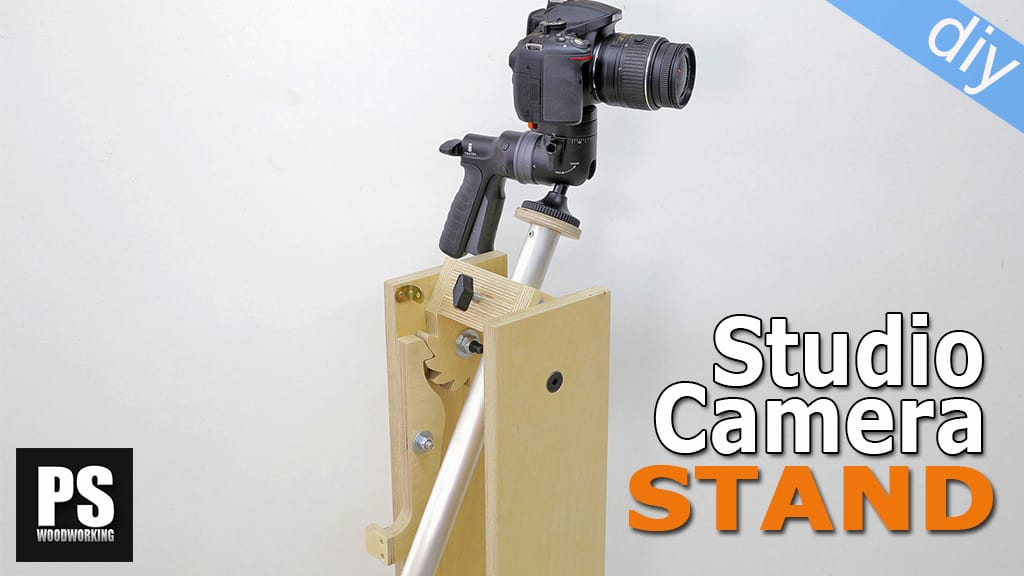
It is true that a good lens with a stabilizer also helps, but recording with camera in hand can get tiring and uncomfortable, so I have decided to make a shoulder rig. As you can see it’s collapsible, making transportation easier, and also allowing greater ease of use on a tripod.
Shoulder Rig Plans

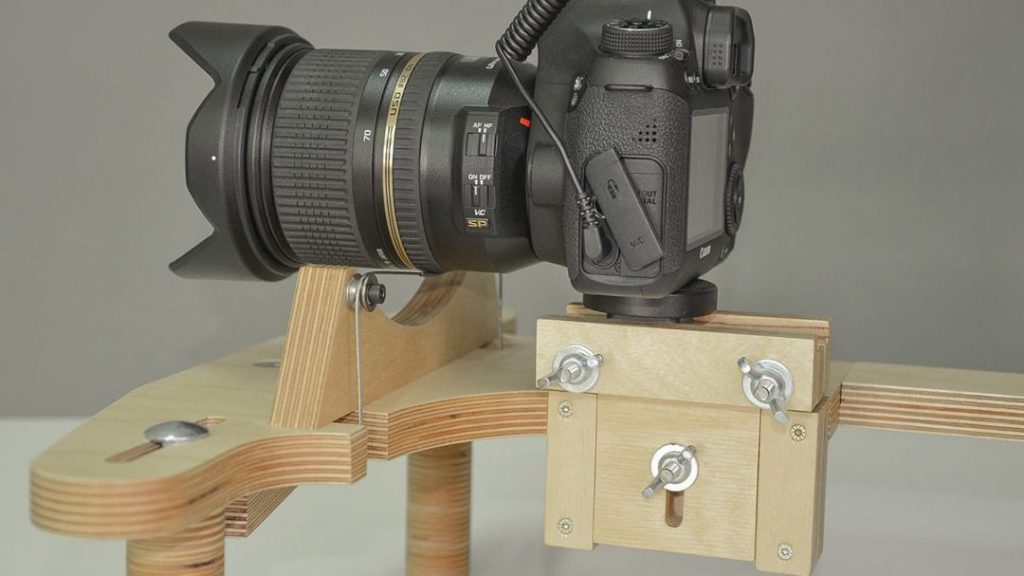
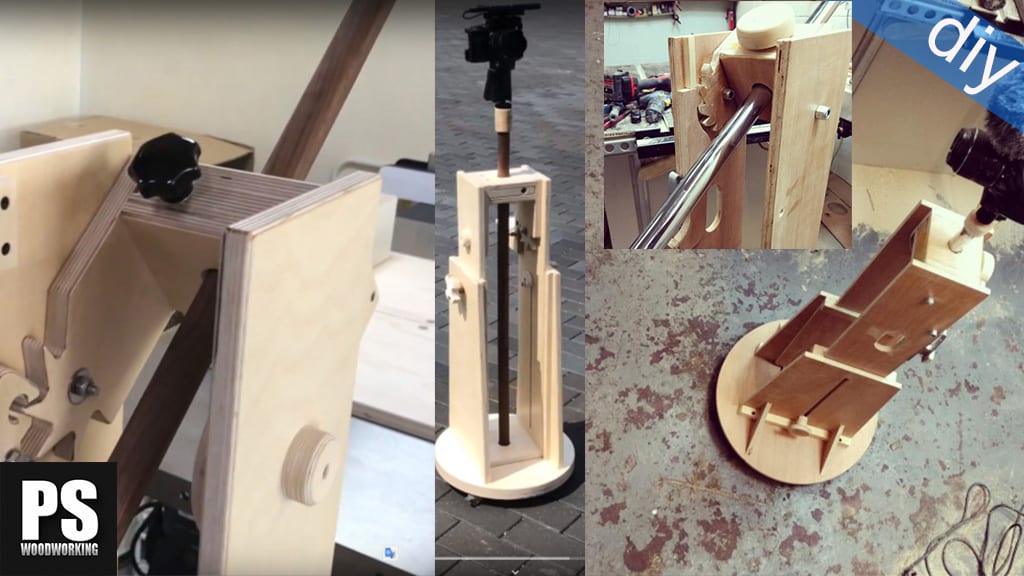
I’ll assemble it to show you how it works. This is the follow focus calibration tool (second pic) When I turn it, I move a bicycle brake cable from side to side over “624VV V” bearings, focusing without taking my hands off the handle. Other systems I’ve tried force you to take one of your hands off to focus, making footage more unsteady.
It’s a very simple system, I came up with the idea by testing it with a simple electric cable on the adjusting wheel of the lens and after a few tests it’s turned out to be quite efficient.
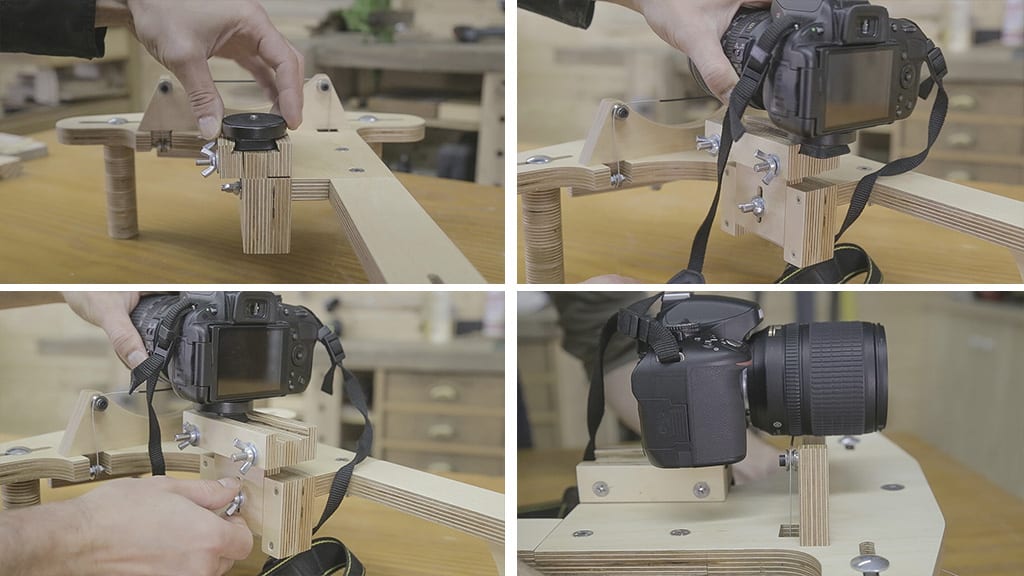
I’ve developed this attachment system for my tripod’s quick release plate so that I can swap cameras without changing the plate. Mounting the camera is quite easy. We only need to insert it from behind, place the focus wheel over the cable and lower the camera until the cable is a bit tighter.
I’ve left some leeway in order to use lenses of various sizes and several brands. I tried it with the one of the image, with a Tamron and a Canon 24/70mm and with a fixed one of 50mm and all of them work quite well. To remove the camera it is only necessary to repeat these steps in reverse!

Here I can adjust the distance between the eye and the camera screen, and also the counterweight. Although this does make the set a bit heavier, it also makes the recording process easier and more stable by distributing the weight on the shoulder.
I can also adjust the distance between the handles and the follow focus control for my convenience. It depends on how big your hands are. Another interesting feature is that I can remove the battery without having to detach the camera.
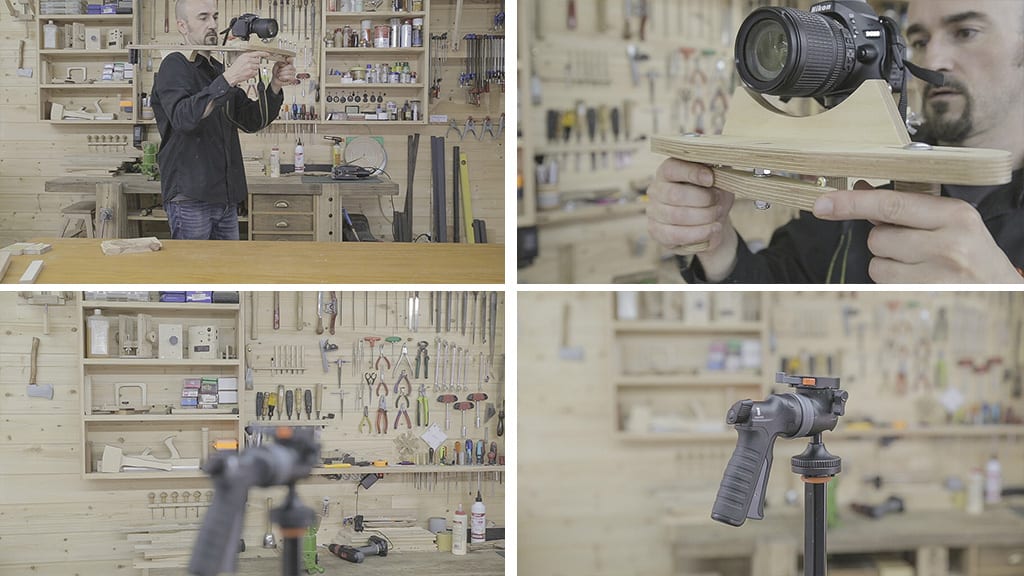
I’ve made a few tests in my workshop and I’m finding it very easy to use. The weight is more distributed, causing less vibrations, and I can focus without making any abrupt movements. I’ve tried mounting a directional microphone on the camera and it barely picks up any noise when I’m focusing.
It’s important to buy a good mic, not just because of the audio quality, but also because they have a system on their base that muffles any unwanted noise when handling the camera, unlike cheaper mics you’ll find online.
The cable movement is enough for almost the entire focal length of my 24/70mm lens, although I rarely use the whole length in a single take. At any rate, we should try to focus automatically on the halfway point of the depth of field we’re working with, with the focus control in the middle position. This will give us enough leeway to focus as we record.
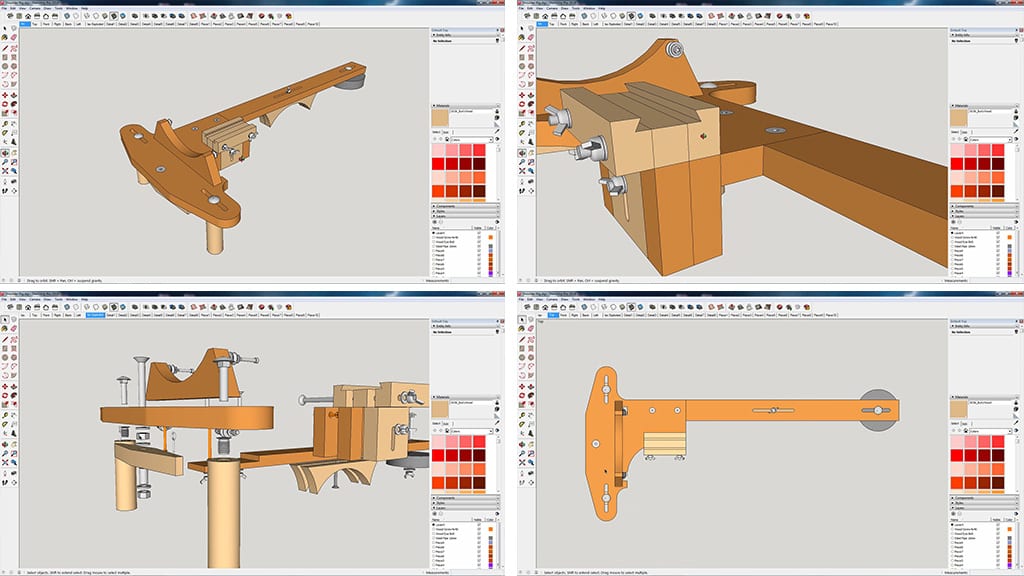
This is the 3D SketchUp file included in the plans on my website. You can see how simple the design is. All we need to build it is some pieces of plywood, four V-groove bearings and a few screws.
If you are interested in collaborating with my web or building your own shoulder rig, here you can buy and download the plans.
How to make a shoulder rig:

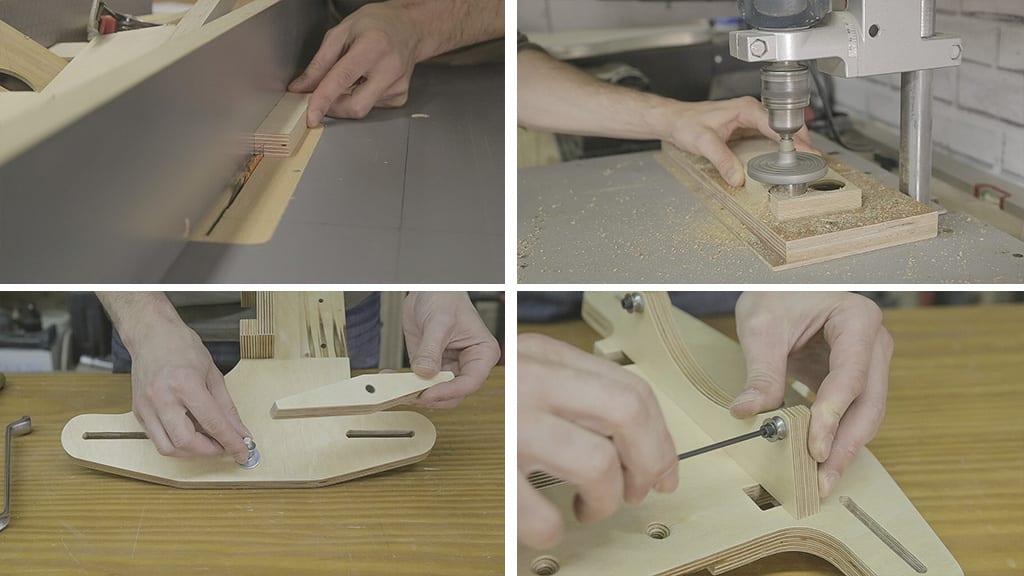
Now I will show you how I made it. First I printed the templates to glue onto the wood and cut more easily. I mark and drill all the holes with drill bits of the appropriate width. I also countersink where necessary.
With my jigsaw I machine all the adjustment canals and cut along the outline. Also now would be a good time to sand the edges with a disc sander.

I mark the rebate on the bottom to couple the two parts, adjust the height of the column drill and using a 40mm bit I drill a few holes that will help carving out the material. I finish the process by hand.
With the table saw I cut the remaining necessary pieces. This is the part that rests on the shoulder. I mark its adjustment grooves and machine them just like before. Now I’ll cut the rest of the pieces with the jigsaw. I glue two pieces together to make the shoulder rest thicker.
I machine the follow focus control and then I drill the bearing holes with a bit 0.5mm less wide than the inner diameter of the bearings I’m going to use. These rebates (third pic) are for the threaded rod of the lower bearings. And now I screw in the piece onto which I’ll screw the upper bearings.
Now I cut and machine all the parts for the camera’s attachment system. With these pieces I can lift up and lower the camera without risking it falling. The system must run smoothly to make this easier.
Now it’s time to machine these pieces at an angle to fasten the quick release plate. The hole must be one millimeter less wide than the release plate, so we need to be very accurate. Using plywood leftovers I will make the handles with this hole saw bit. I drill two pieces for each handle with the diameter of the threaded insert, without drilling the whole way through.
After gluing all the pieces together I sand them a little with sandpaper. I finish making the hole and place the threaded insert. Of course, we can also make these handles with wood and in one piece
Now would be a good time to sand and varnish all the pieces with spray lacquer. And now I can start assembling the entire device. First the follow focus control. This piece of steel pipe will help me turn the control more easily. The last nut must be a locking nut. Then I put the bearings in place, first the upper ones, and now the lower ones. I’ll glue the threaded rod with cyanoacrylate.

I’ll make the hole in the wood eye screws smaller and put them in. Then I’ll put the bike stroke cable in place, I’ll use a clamp like this for convenience. I’ll use a bicycle brake cable, although I could also use any twisted steel wire.
At any rate, it should be very flexible and no more than 1mm wide. The stopper may make a slight metallic noise when we operate the lever. This is easily solved by placing a piece of plastic or another material between the two parts.
I put a brake in the control. Before moving on I inserted a piece of heat-shrink pipe and at the end of the cable I use this bicycle brake stopper. The inner mechanism of a choc strip could do the trick, too. Now I heat up the pipe so that it will shrink around the cable and try it to see if it works, I also glue a bit of cushioning material to protect the shoulder rest.
I will use these weights I had lying around in my workshop, although I think I’ll need more weight in the future, I could also use a 2kg weight plate, like the ones you’d find in a gym. It depends on the weight of your recording equipment.
Finally I’m going to line the handles with grip tape, the kind you put on tennis rackets. This makes shooting long takes safer and more comfortable, and less noise is made when moving our hands.

I like how the shoulder rig looks, in the third and fourth pics you can see what it looks like with a Canon 6D with a Tamron 24/70mm lens. Take a look at this other article to see it in action!


Your project looks very professional. You must have really been delighted when you first tried the remote focus system and it worked so well. Thanks. Cheers,
yeah! thanks mate
you must have been an engineer in a previous life ??. I would like to see a video on your process. From issue to solve, through conception and development of an idea including trial and error to a prototype and final version. Do you think this might be something you might do?
hi, it’s a good idea, I’ll try to make a video showing the whole process