A few days ago I made some new zero clearance inserts for my bench table saw, and while I was using the router table with a flush trim bit, I realized I needed to make some kind of dust removal system when doing these kinds of milling jobs.
When doing other kinds of projects where I can use the fence, I don’t have this problem because I can use the fence’s dust hose to remove the sawdust.
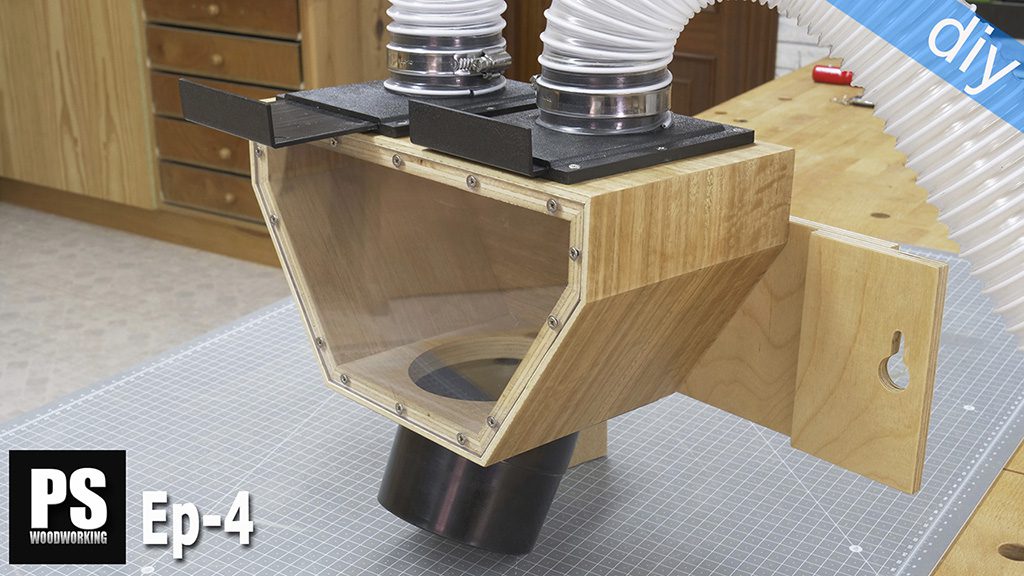
How to use a DIY Router Table Dust Hood?

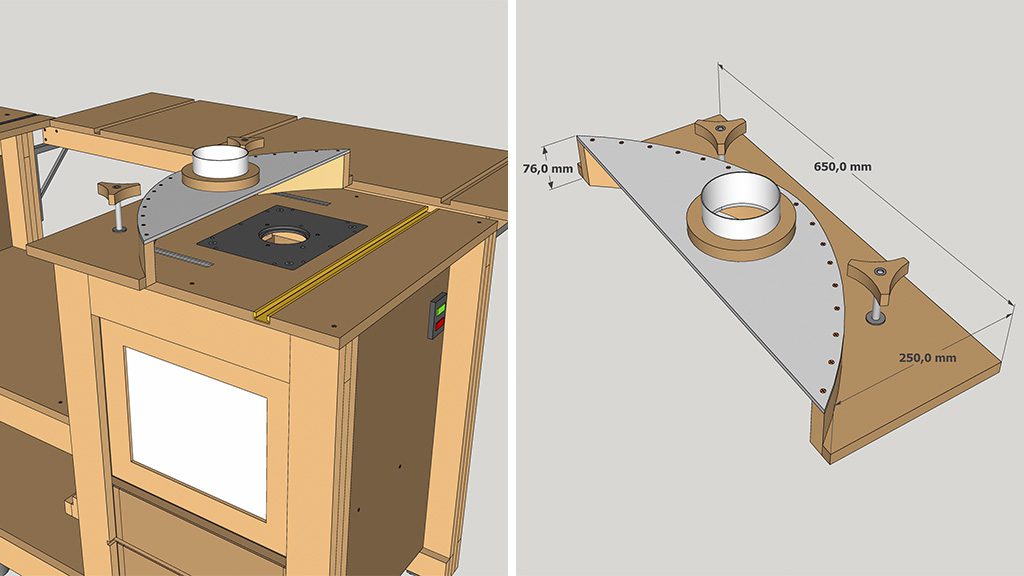
In order to attach the hood to the router table, I’ve used the same system as with the fence. I’ve used T bolts, which are inserted into some aluminum profiles screwed to the table itself. This system will let me adjust the depth or the distance between the bit and the hood.
I’m going to make a new insert to showcase how to use the hood. After cutting a piece of plywood, I stick it to the MDF jig I’ll use as a reference with double-sided tape. I remove the 100mm dust hose from the blast gate box to connect it to the dust hood.

I continue milling and, and looking at it, it seems to be working perfectly. Now I’m going to swap the router bit to make a rabbet on the underside of the insert. I’m going to some routing without the hood to better appreciate the difference.
Now I have the dust removal system connected to the inside of the cabinet where the router is, but this system is pretty much useless to remove sawdust in these routing projects. As you can see in the second photo, this way the sawdust gets everywhere. By attaching the hood again, you can see a huge diffeence.
Besides, this hood also collects the suspended dust that gets into every corner in the workshop and which can’t be seen in the video.
I’ve designed the dust collection hood with a relatively high inlet so that I can comfortably work with pieces up to 70mm in height. In the third photo you can see me milling a piece of pine 65mm high.
This hood could also be helpful in other kinds of jobs with the bench, such as collecting dust while sanding workpieces, or using tools that make a lot of dust when in operation. It’s best to orient the hood toward the dust outlet in the tools.
DIY Router Table Dust Hood Plans
If you’re interested in building your own dust hood, by clicking on the button below you can download them for free on my website. The plans include this 3D SketchUp model so that you can view or modify the design.
Router Table Dust Hood Plans
How to make a homemade Router Table Dust Hood?
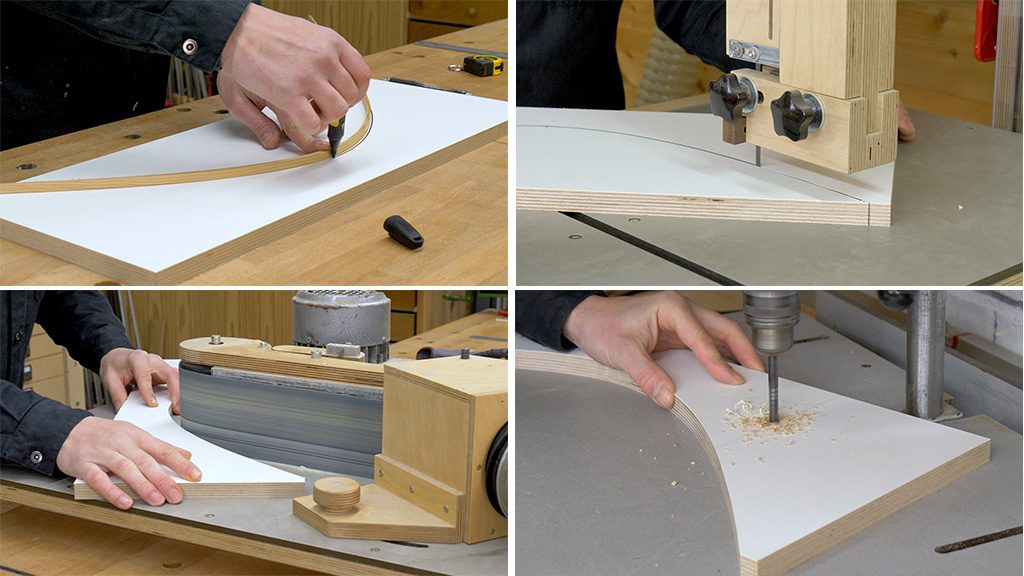
Now I’ll show you how to build this dust collection hood for your router table. First off, we’re going to cut the base of the hood. With two nails and a thin strip of wood, I’ll trace an arch and then cut it out with a bandsaw.
I finish adjusting the arch with the belt sander. I measure the distance between the router table’s T-track profiles in order to drill the holes in the base.
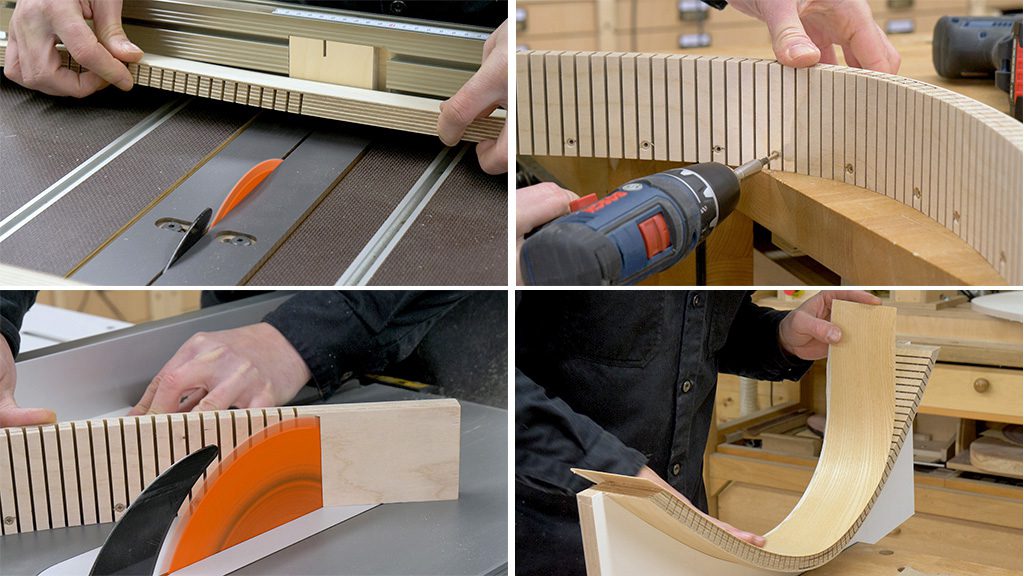
Now I’ll cut a piece of plywood for the back of the dust hood. In order to curve it, I’m going to make some cuts every 10 millimeters.
I’ll use the table saw sled and the same jig I use to make box joints. In these pictures you can see it’s a very convenient and accurate method.
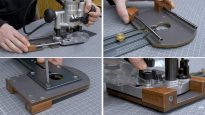
I’m going to drill some holes so I can screw this part to the base. We could also use wood glue here. I screw both pieces together and, with the table saw, I’ll cut off the leftover bit.
This step isn’t necessary either, but in my case I’ve decided to glue on an ash veneer which I had in my workshop to the front of the curved piece.
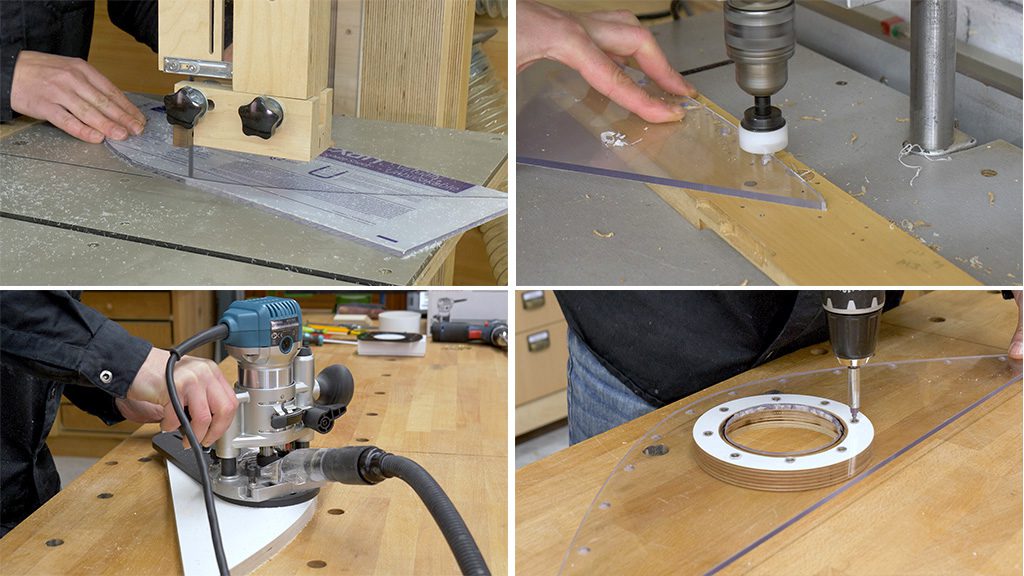
After tracing the arch using the hood itself, I cut a piece of acrylic to use as a top. I’m also going to cut a piece of a PVC pipe to use as a dust hose.
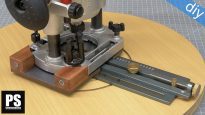
With the router and a jig to route circles, I make a wooden washer to add thickness to the hood top. I route it in several runs, about 6mm deep each. I’ve made some holes in the acrylic so I can fasten the wooden washer with screws.
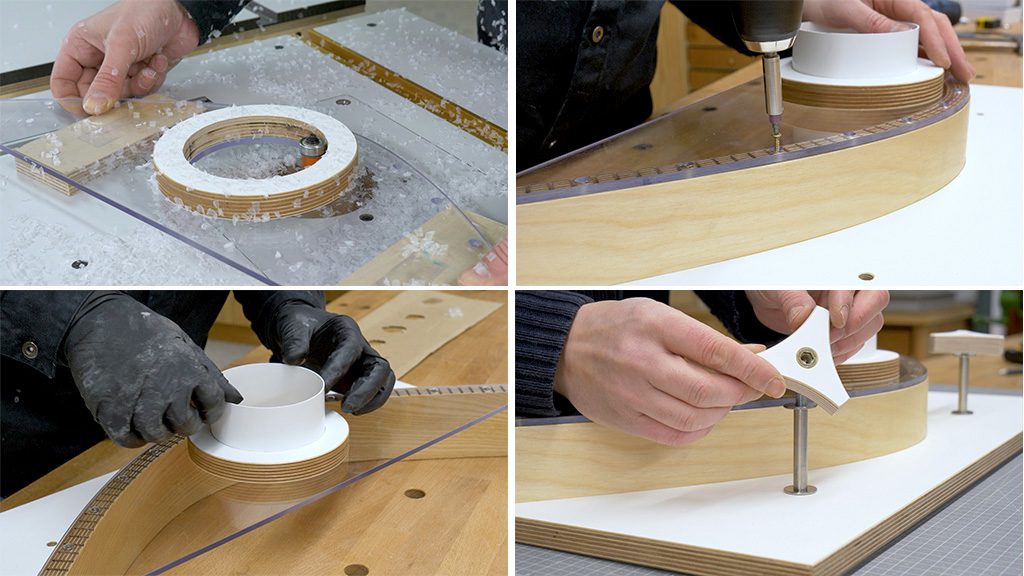
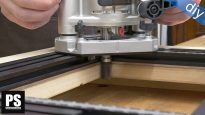
Now, I finish the hole in the acrylic with the router table and a flush trim bit. It’s time to fasten the acrylic to the base of the hood with screws. Finally, I’ll use some epoxy adhesive to secure the PVC hose to the wood washer.


Excellent!!! Thanks for plans!