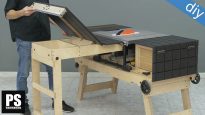
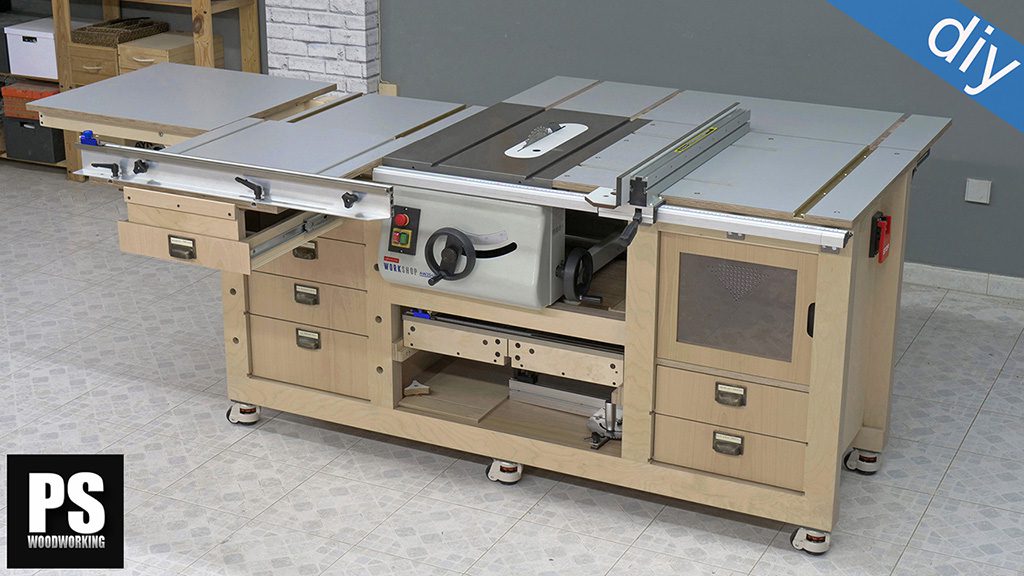
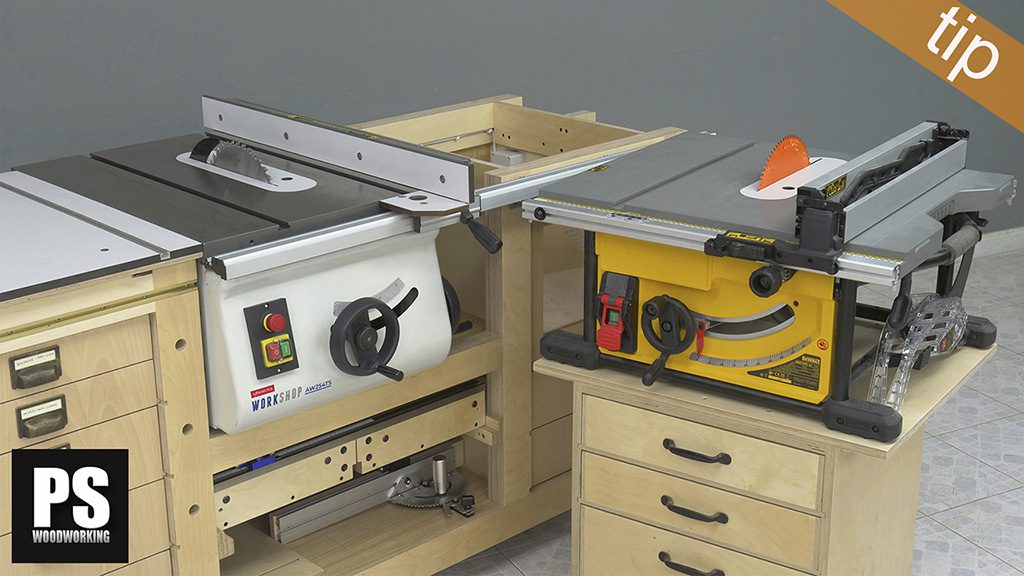
If you’ve seen any of my previous articles, you’ll know I’m building a new table saw station fitted with a bench table saw and a router table.
In this fifth video, I’ll show you how to build this side folding table and what it can offer. I will place it on the left side of the workbench.
DIY Workbench Side Folding End Table Specs
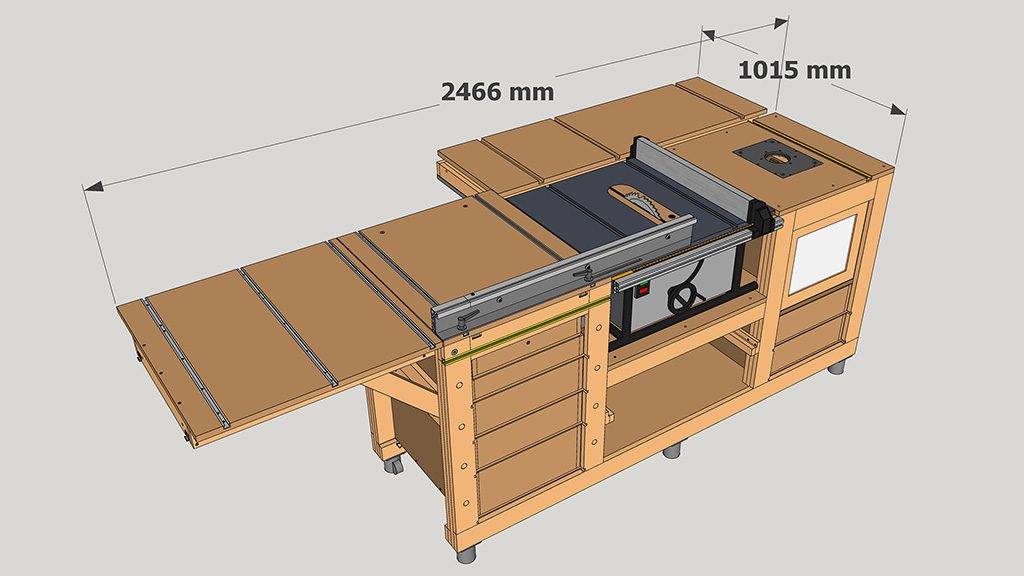
This is the 3D model that’s included in the plans, which can be purchased on my website. Here you can see I used only one hard plywood board to make the benchtops of the original design.
In my case, I’ve altered the design a little, so I got hold of a board that’s similar to MDF, but a little harder and with melamine on both sides, which I thought was perfect for this workbench. Both methods and materials are perfectly valid.
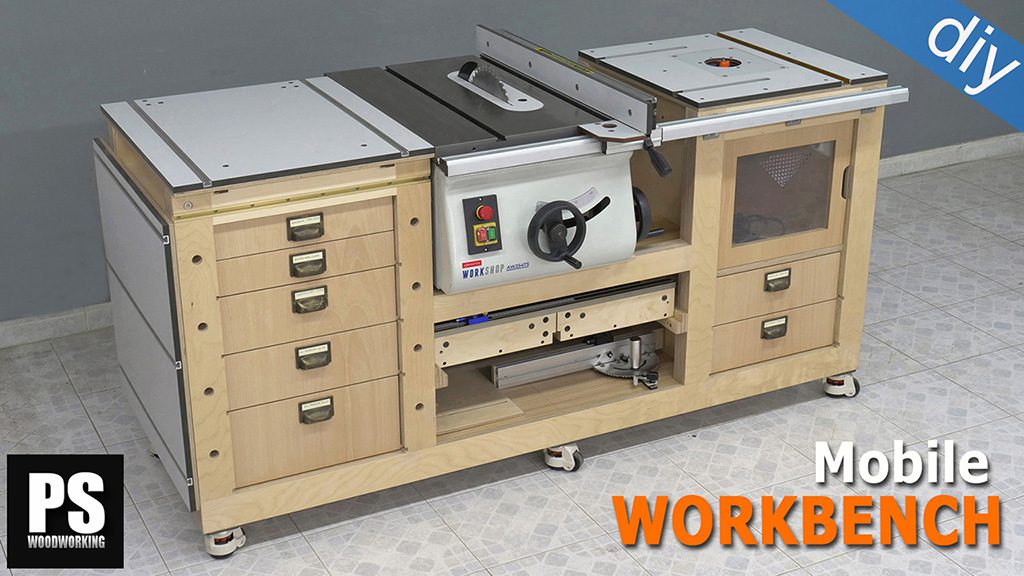
Mobile Workbench Plans
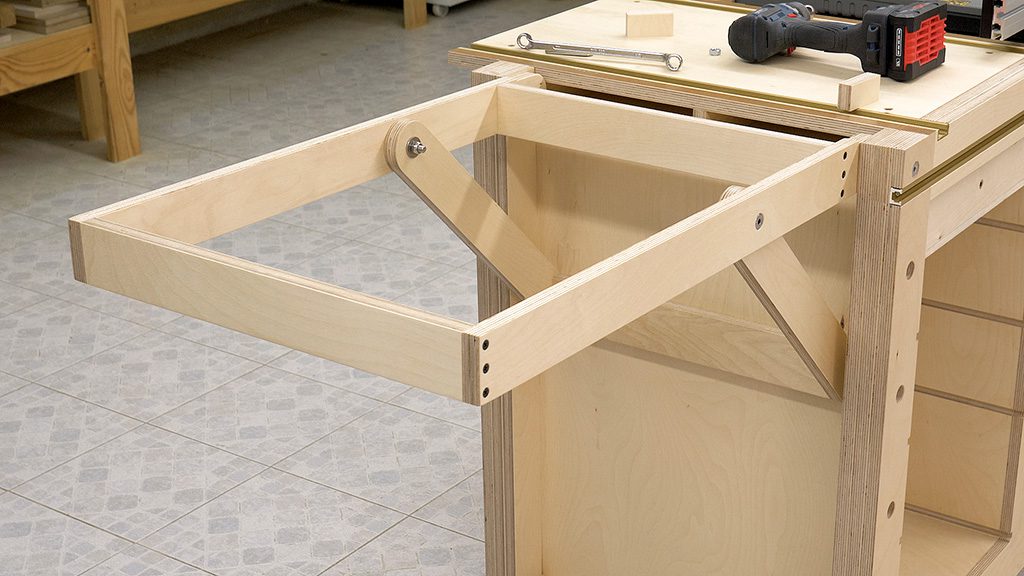
This is the frame, the most important part of the folding table. It will allow me to open and close the table in a fairly quick and convenient way, as well as making the table more ro-bust.
How to use the Workbench Side Folding Table
I’m going to run a few tests to show off what this folding table can offer.
First off, I’ll place this adjustable jig so that I can support and work with big workpieces when the table is folded. Once the clamps have been tightenend, the pieces are firmly secured to the bench.
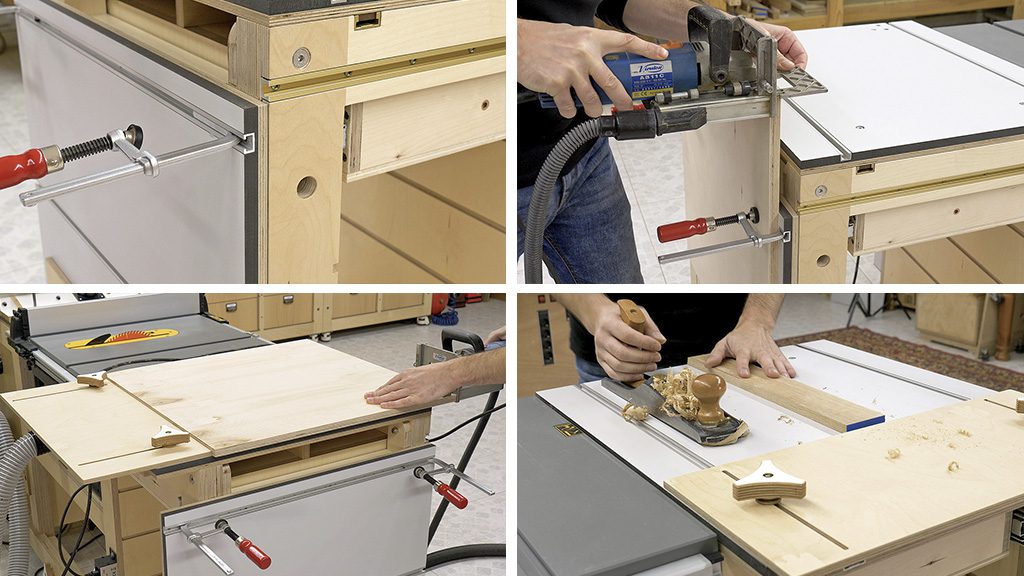
This combination of aluminum T-track profile and the right clamps is quite comfortable and versatile. These kinds of clamps never turn and can stay at the desired aperture, so you can swap workpieces very quickly.
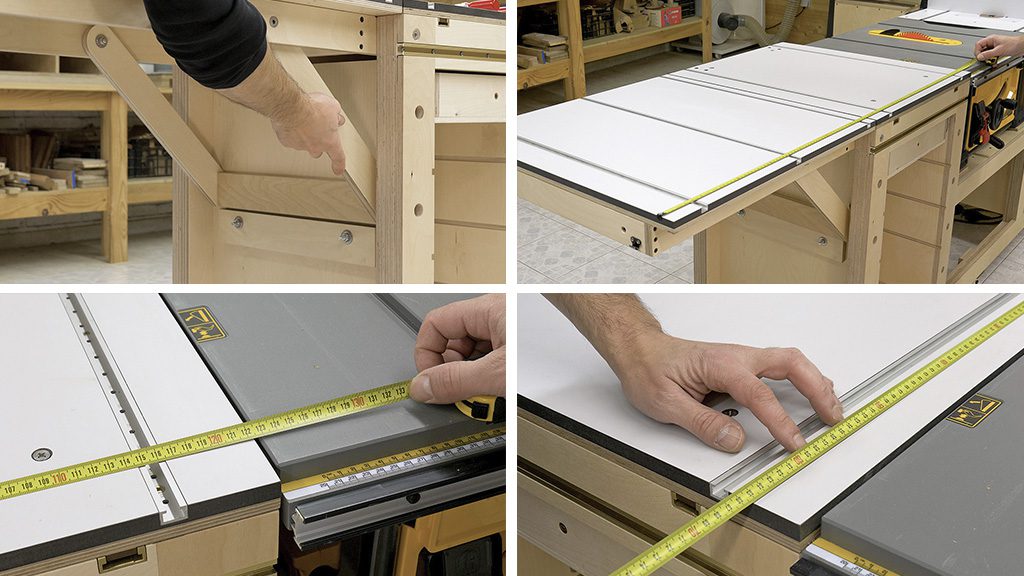
I can place the same jig on the benchtop so that it will act as a stop when cutting pieces horizontally. It will also allow me to do other kinds of jobs which call for a stop on the work-pieces, such as when using a plane and flattening workpieces.

The combination of T track profiles placed vertically and horizontally is very useful when making screw joints such as these. It will also let me hold small wooden workpieces to make dovetail joints, for example.
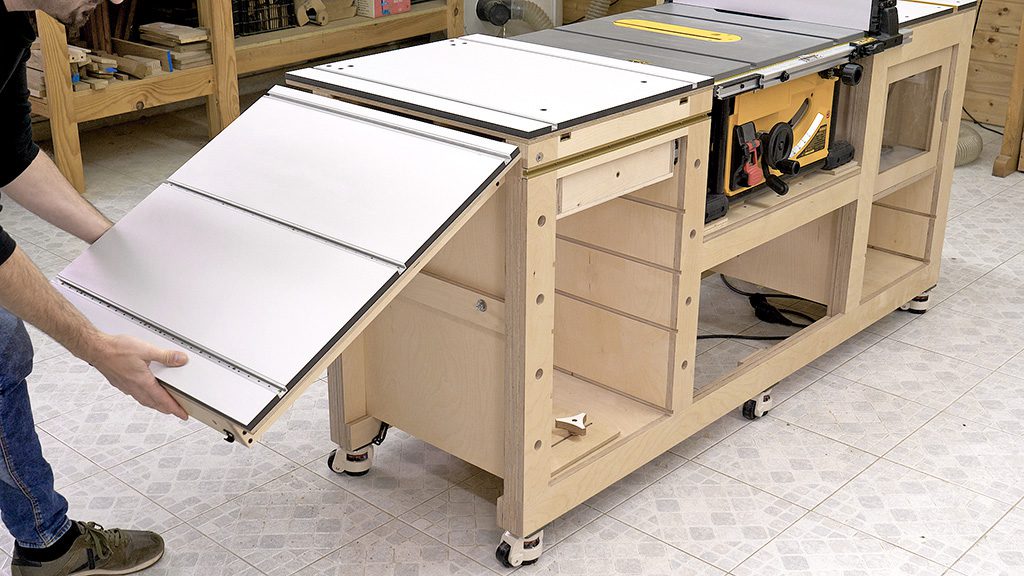
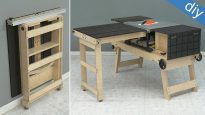
Now I’ll open up the table to show off more of its functions.
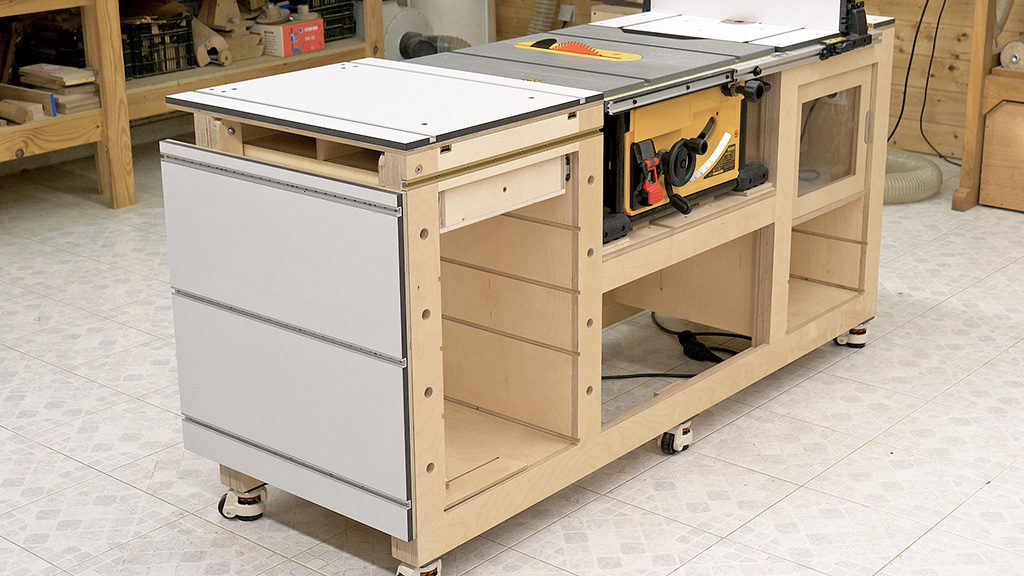
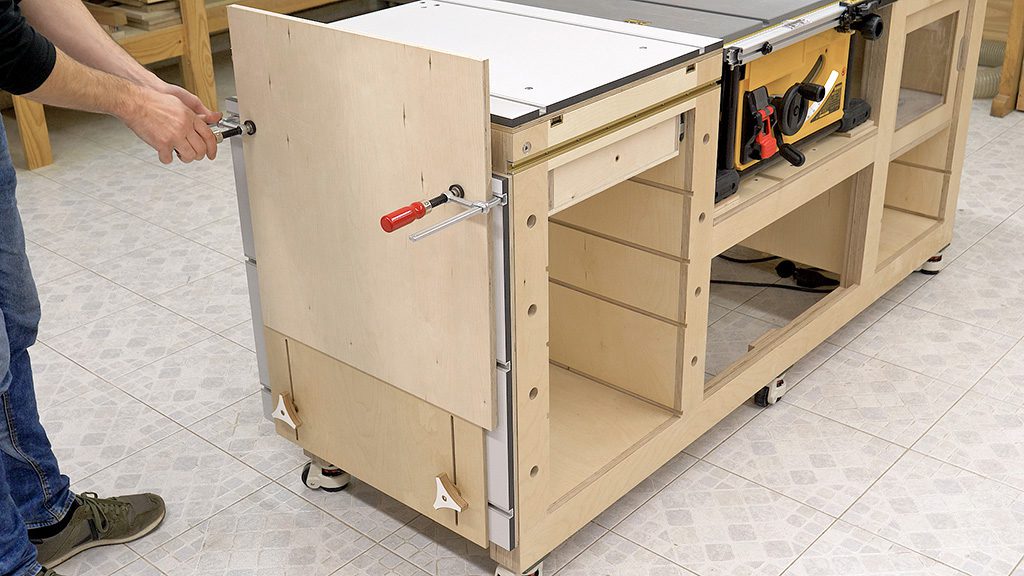
I’ve used some box clasp clamps to firmly secure the table when it’s closed. Once open, the table is fairly robust, but we should be careful not to apply too much pressure on the far end.
This part of the table should be used as a support or to assemble furniture or cut long pieces with the table saw. The table is 123cm long and 65cm deep when open.
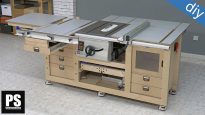
How to use the Side Folding Table with the Sliding Carriage
I’m going to unlock the sliding carriage to make some cuts. I’ll also set up its fence and the support that, along with this drawer, will allow me to use the carriage to cut large workpiec-es. I
‘ve left the sliding carriage and folding table at the same height, but when removing the screws that lock the carriage, it goes up a few tenths of a millimeter, just enough to make it work better.
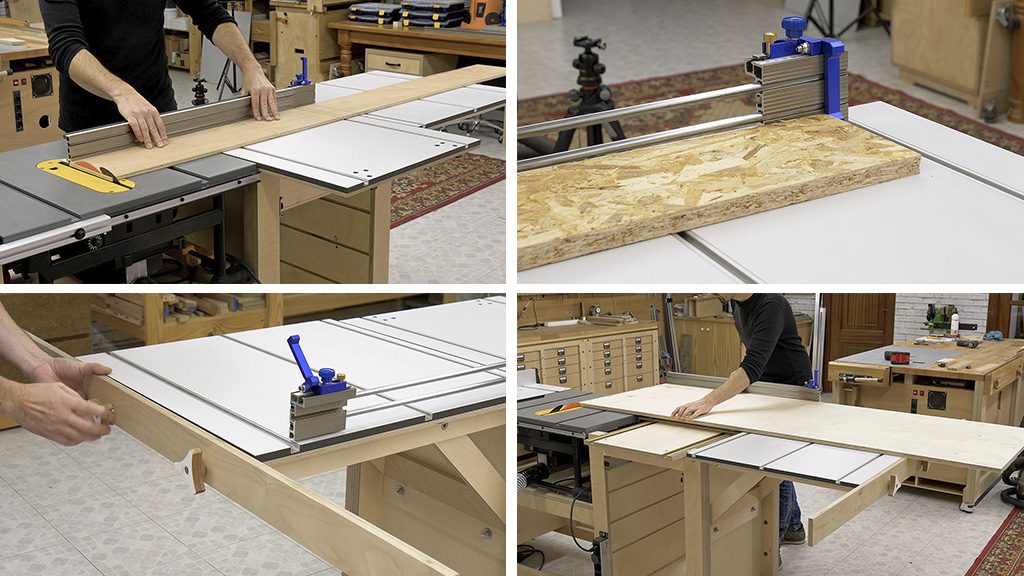
The first advantage of the folding table is, of course, the fact that it allows us to place longer workpieces to cut them in a more convenient way. Also when I need to use the extendable part of the sliding carriage fence.
I’ll use this strip of a board (third picture) to cut larger workpieces more accurately. I keep it in the back of the bench. Attaching it to the folding table is very easy with some tightening knobs.

The sliding carriage is detachable, allowing me to cut pieces using the table saw fence without the need to remove the sliding carriage fence.
I’ve put a piece of self-adhesive tef-lon on the bottom and base of the sliding carriage to make it slide more smoothly. It works like a charm! As you can imagine, closing the folding table is as easy as opening it up.
Click here to see the next article about this workbench where I’ll show you how to make the outfeed or extendable table for the table saw.

I love that it’s focused on function and not overstuffed with storage. It’s more a tool with function than a container. Impressed with how perfect your plywood looks; Sharp blades I guess.
thanks mate!
super high-tech workbench…….nice ⭐
thanks Julius!
Buen día, quedaría bien si lo fabrico en mdf, o no es aconsejable?
Como puedo adquirir los planos?
hola Edgar, puedes usar MDF sin problemas. Aquí encontrarás más información. Los planos están en la tienda.
Hi need to know if the plans include cut list and part list, thanks
yeah! in this article you’ll find more info about my plans:
Hi how can I get one for my self
hi Asare, here you’ll find the plans.
Good day,
can you please tell me what kind of material you used for the surface of your Workbench Side Folding table?
Thank you very much for the answer
Jan Vavrecka
hi Jan, here you will find it