
Welcome. If you’ve seen the previous articles in my web, you’ll know I’m doing some home renovations, and today I’m going to show you how I built this small European-style kitchen. I used an online application to make this design in order to get an idea of how the inside of the house will look after the remodel(first photo).
European Style Kitchen Plans
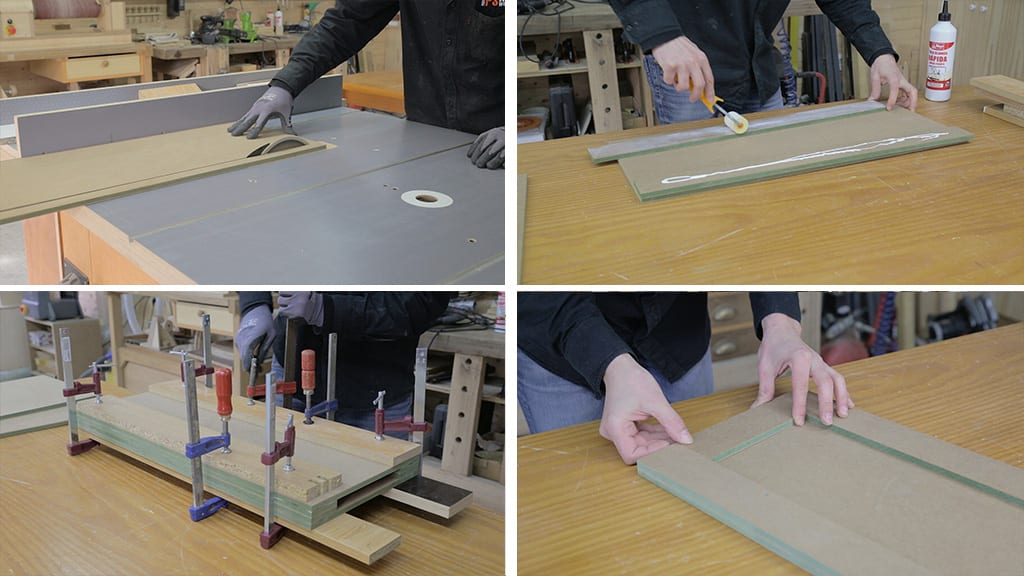
Since I don’t have a lot of space, I don’t want to cover the walls too much, so I won’t use tall furniture or columns to furbish the kitchen. This is the SketchUp file included in the plans on my website. The kitchen units are grouped by components, so adding and removing units to change the design is simple(third photo).
You may also modify the existing components to make them wider. In order to do that, you only need to add the difference between both modules and lengthen all the appropriate parts like this.(fourth photo).
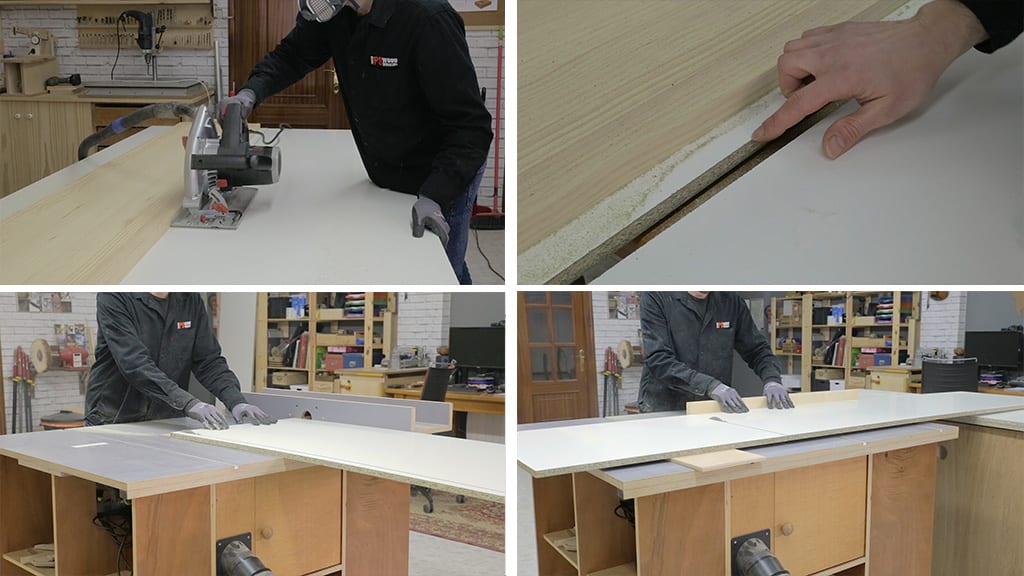
It’s easy to find kitchen cabinets on the market that are pre-cut and ready to assemble, but I want to see if I can get good results in my workshop using the handheld circular saw.
The main problem when cutting melamine particle board is that the cut won’t be clean on the side of the board where the saw teeth come out, but since one of the sides is not meant to be seen, this won’t be a problem. Furniture manufacturers use saws with two discs, one for each side of the board, to prevent this from happening.
After cutting the board in half with the circular saw, I cut strips of the required width to make the sides and bases of the cabinets with the table saw. I turn the strips and cut the sides of the cabinets to 700mm in length(fourth photo). I also cut the bases and the rest of the parts I need.

To cover and protect the sides of the board I’m going to use PVC edgebanding. There are many thicknesses available, I’ll use 1mm. I cut all the required parts and glue them to the edge of the board with contact spray glue. Then, I cut the remaining PVC with a chisel and round off the edges a little to make them smoother.
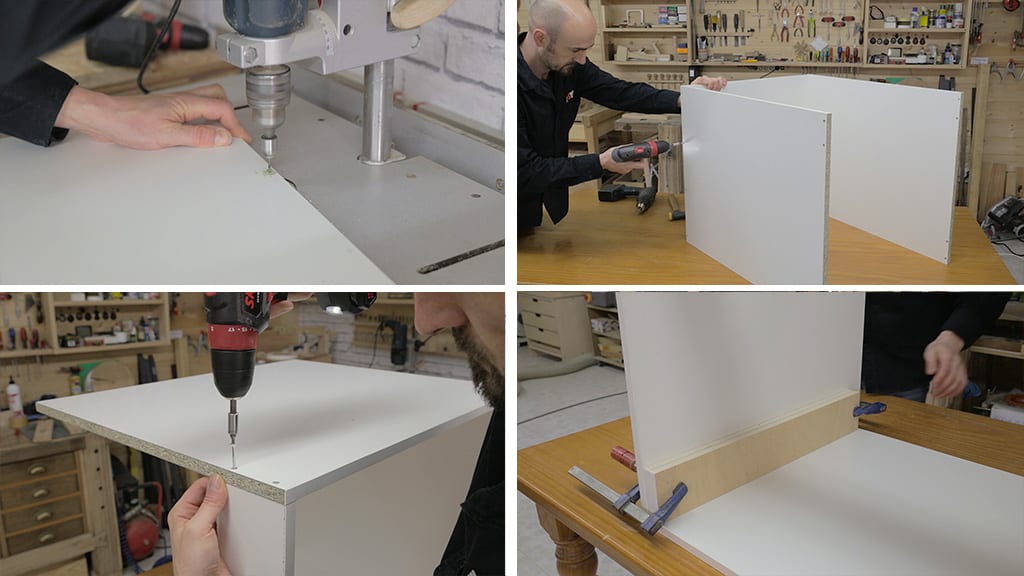
Now I mark and drill the position of all the screws in the parts, using a countersink bit. I must choose the best side of all the parts for the inside of the cabinet, due to the problem I mentioned earlier.
Now I’m ready to assemble the cabinets. I’ll start with the 600mm wide unit with drawers. I join one of the sides to the base of the cabinet, drill the base and place all the screws. Then I attach the top parts of the unit in the same way.
Next I’ll assemble the oven unit. The process is nearly identical, but I’ll also screw in some parts to support the oven(fourth photo). Then, I’ll build the sink module. Its base is slightly shorter to leave some space for the water pipes.
Also, two of its upper parts are turned on their sides to make room for the sink. Finally I go with the 300mm wide pull out unit. Like before, I screw the base and the upper parts on.

Now I put the corner cabinet together. It’s the hardest to build of the set. First I have to cut the unit’s base and shelf with the circular saw and a guide. I mark and cut a recess for the doors with the table saw. I finish the job with a jig saw and masking tape to ensure a better cut. I’ll also use PVC edgebanding.
I drill some holes that will allow me to move the unit’s shelf up and down and now I can start putting all the parts together with screws. I’ll screw a board strip onto the upper back corner and place the shelf supports. Now I cut the back parts using 10mm melamine board and screw them in place.
Lastly, I screw the upper parts on using a biscuit to join the two front parts
I’ll also attach back parts onto all the modules that need them. By turning the units I’ll screw the adjustable cabinet legs onto them. They’ll make it easier to install them in the kitchen at home. I give the plinth a 50mm setback. I have to keep this in mind when attaching the front legs.
Now I can start cutting the doors and fronts of the drawers. I’ll use 10mm waterproof MDF board. I’m going for a wooden frame effect, so I’ll cut a panel with the measurements of each board and 60mm wide strips which I’ll glue onto the panel, making a frame.
I apply glue on the frame parts and tighten them with clamps. I repeat the process with the upper and lower parts(fourth photo).

Now I’ll cut the fronts of the drawers, the filler strips and the plinths. In this case, I’ll use 20mm MDF. Once I’ve cut all the doors, I’ll drill holes in them for the concealed cabinet hinges. I screw them onto the doors momentarily with the help of a guide and then I secure the door onto the corresponding unit.
This type of hinges allow us to regulate the doors in all directions, and also to remove the door itself easily from the cabinet whenever it is necessary.

I repeat the same steps with the corner cabinet’s 170 degree clip hinges, and I also drill holes to attach rubber stops on all the doors.
I remove the hinges and cover any imperfections on the doors and drawers with filler to achieve a better finish. When this is done, it’s time to sand. I’ll use P220 grit, focusing above all on the edges of the MDF board, because those are the parts that will soak up more varnish. I’ll also round off the edges on all the parts a little.
Now I can apply some white matt water-based varnish. I’ll use an HVLP spray gun, although with the right varnish this could also be done by hand with adequate results. Once the first coat dried, I sanded all the surfaces with P320 grit, and then applied a second coat.

Finally I’ll cut all the parts that make up the drawers. I’ll use 15mm birch plywood, 10mm for the bottoms. I’ll cut canals with the table saw to insert the bases. Once all the pieces have been cut, I sand all their sides, again focusing on the edges in particular.
I mark and drill holes using a countersink bit. These holes will serve as a guide to drill the rest of the pieces, then I apply some glue and put the drawers together with black screws. I think they’ll provide a nice contrast to the birchwood,. Now I attach the drawers’ bases after making sure they’re perfectly aligned.

I applied a couple of coats of matt water-based varnish on the drawers and now I can place them in the units. I’ll use this full extension tandem drawer slide. I’ve cut a few strips of board to use as a template, by doing this I can screw the slides at the same height on both sides.
This kind of slides have a hook in the back and a pin in the front to hold the drawers. I place the drawer and, by hitting it gently a few times, I mark the positions of both parts so that I can machine it.

The top drawer will have a plastic cutlery tray. The one I have is a little too small for the drawer box, so I’ll cut a few more plywood strips with recesses where the tray will sit.
Now’s a good time to attach the fronts of the drawers in the workshop. I’ll use shims to leave gaps of the appropriate length between them. These slides have a kind of screw allowing for some vertical movement of the drawers, which is very useful to finish off adjusting the position of the drawers once they’re in place.
I’ll use these full extension drawer slides for the drawer under the oven(third photo). Since I don’t have a lot of vertical space to work with, this kind of slide will let me make the most of it. To install them, I simply have to screw them onto the side of the unit and onto the drawer box itself. I’ll also attach the drawer front like before.
I attach the rest of the kitchen drawers in the same way. I’ll put some board strips on this one to act as spacers so that bottles won’t move when I close the drawer(fourth photo).

Here you’ll find an article showing you how to install this kitchen at home.


Hi Paoson, It is a bit of time I follow you on youtybe. I have enjoyed your videos. I learned a lot of tips. I have a passion for wood working and I’m spending some of my free time on it. In your last video you’ve explained about cutting melamine with the portable circular saw may damage the melamine layer on the existing site of the cut (top side). You may solve this by making the cut in two steps. Step one you adjust the blade that protrudes just a couple of mm and you slide the blade from end of panel back to you. Then you protrude the blade for a complete cut and you slide blade normally. Maybe you already discovered, but I thought it could be of help. Kind regards Ciao Marco (you can find me on instagram as Mark.mywood)
thanks for the tip Mark! sure it works