Today I will show you how I built this stand with drawers and wheels for a band saw I’ve been developing, which I’ll show you in a few days. I’ve used birch plywood, although a lighter kind of plywood such as okumen or pine could work as well, or even MDF. The drawers will slide along a groove machined on the side of the stand, saving me the trouble of installing slides.

In its lower part I have left a hole under the drawers to place the sled of the bandsaw. If you are interested in collaborating with my web or building your own stand. here you can download the plans:
Band Saw Stand Plans
Approximate weight: 20kg
Total dimensions: 600mm High, 748mm Wide and 550mm Long.

This is the SketchUp 3D model you’ll find in the plans here on my website. As you can see, I’ve designed a foldable handle in order to move it round the workshop more easily. Of course, this stand can support other tools, such as a small jointer or any other machine as long as it’s not too tall.
Now let’s take a look at how I built it. As always, I started by cutting all the pieces to size as instructed in the cutting list. Then I’ll mark the better face of the sides and prepare my table saw to cut grooves for the drawers. I make several runs to cut the grooves and then I check that the board fits into the groove and slides properly.

I mark and drill the positions of every screw. I’ll also make this rebate with a jigsaw to give the stand better stability(second photo). This would be a good time to sand all the stand’s surfaces.
I’ll use these black screws I had lying around in the workshop to put the stand together. The stand will be more solid and they go well with the birch plywood. Since they have a big head, these screws provide good grip when using this kind of hard board. I don’t recommend using them with soft wood.
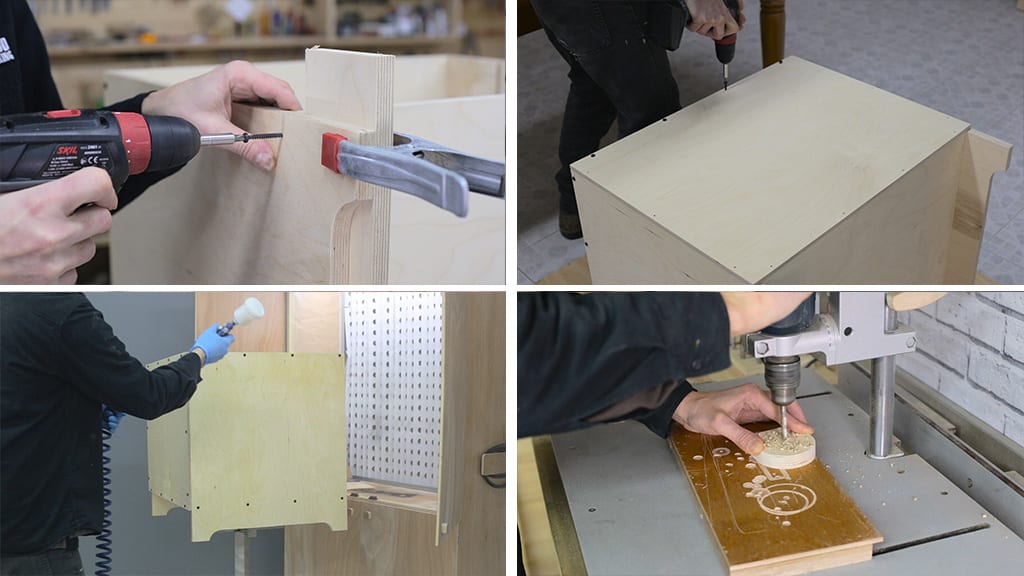
Now I’ll screw the base together with the help of this template to ensure proper alignment. And now all that’s left is to put the backside in place. I’ll apply a couple of coats of matte, water-based varnish to achieve a better-looking, more durable finish.
While I’m waiting for the varnish to dry, I’ll build the foldable handle. I mark all the pieces and shape them with the sanding disc. Here I drill a hole with a bit whose diameter is 1mm smaller than the diameter of the screw I will use(fourth photo).
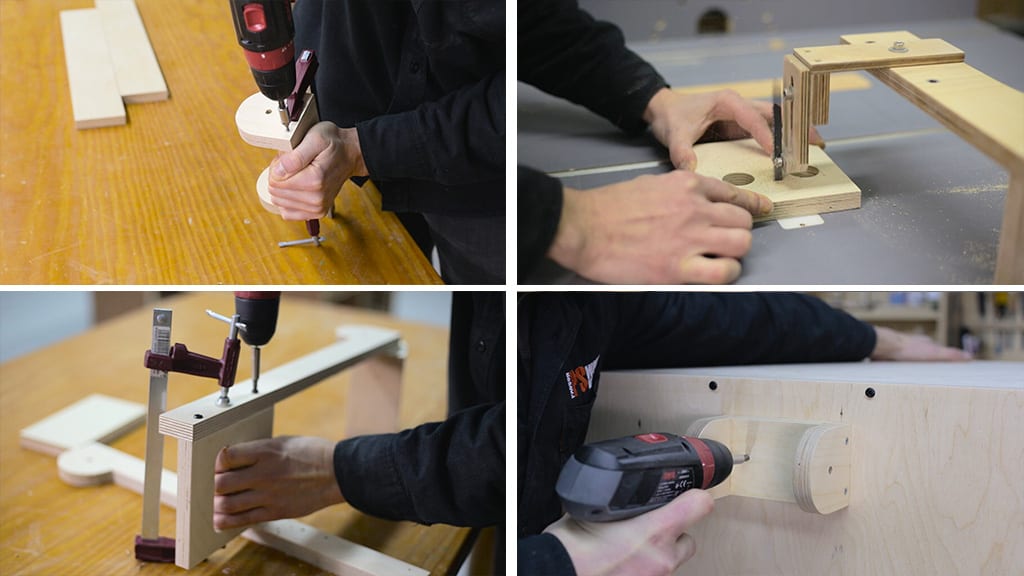
With the table saw I cut the two long pieces of the handle and finish shaping them with the inverted jigsaw and the sanding disc. I mark and drill holes for all the screws and machine this gap for the hand.
Once I have mounted the handle, I can screw it onto the stand(fourth photo). I’ll use a long screw from inside the stand to reinforce this union.
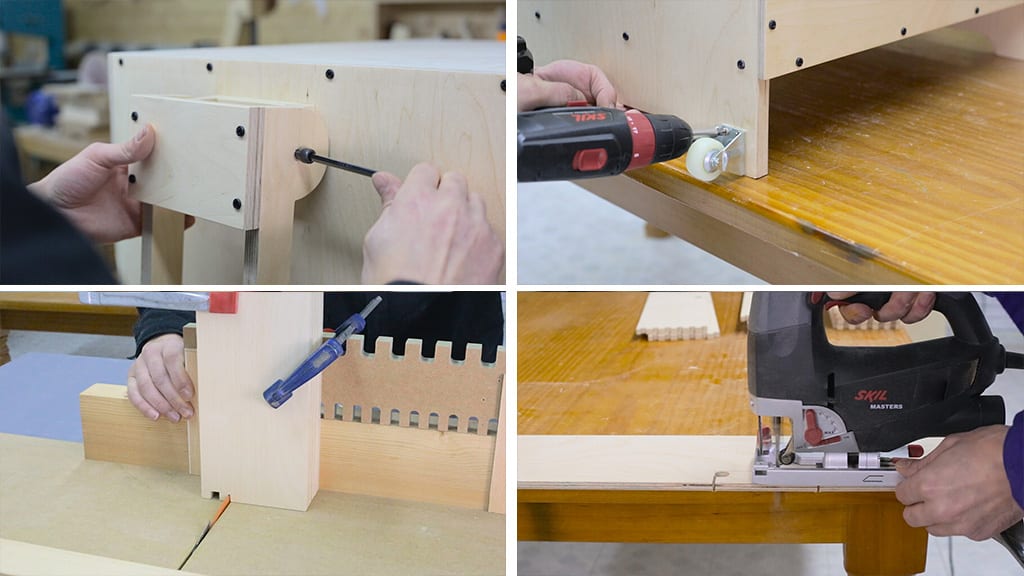
I place the screws that will act as rotation axis and also attach these wheels, making sure everything’s working correctly(second pic).
These pieces are for the drawers. First of all I sand all their surfaces. I prepare my box joint jig template on my table saw and once all the pieces are together, I start the process. This will save me quite a bit of time.
Now I’ll make the drawers’ handle with this drill bit, the table saw and a jigsaw. I also machine these grooves allowing me to easily divide the drawers according to my needs.

I apply glue and start putting the three drawers together. I’ll use this band clamp for a tighter bond. I make sure the drawers’ bases are the proper size and screw them in. To do so correctly, I use a template so that the parts that stick out on each end are the same length.
This stand will look great under my new band saw!


Can you show you DIY tool at 04:44? How it work? Thanks
hello, check this out: