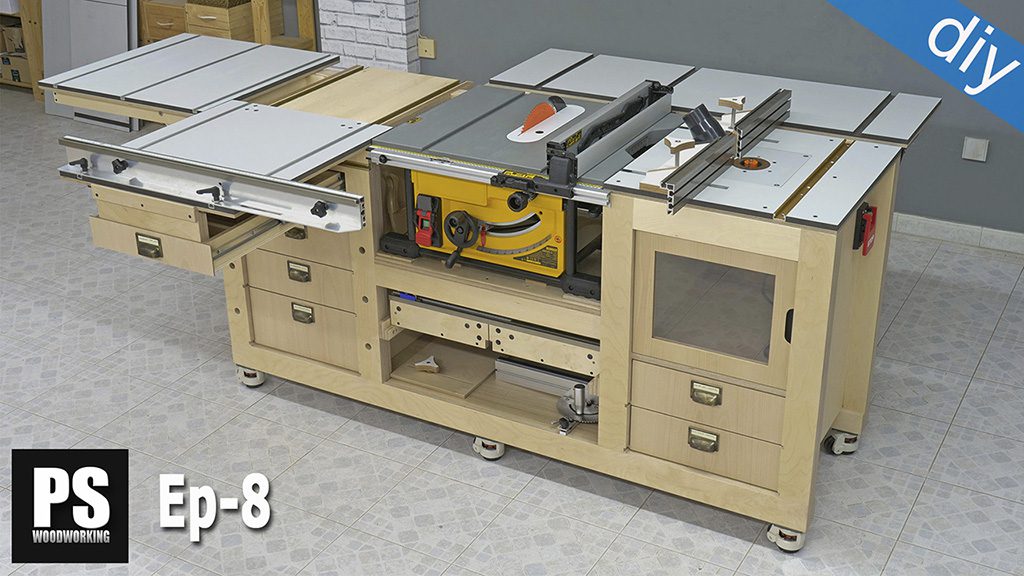
If you’ve seen my previous articles, you’ll know I’m working on a robust woodworking workbench, which I’ve equipped with a bench table saw with a sliding carriage. In this third article I’ll show you how to build and use this router table to get even more out of your workbench.
Here you will find another article related to this router table. How to make a folding table and increase the table top.
DIY Router Table Specs
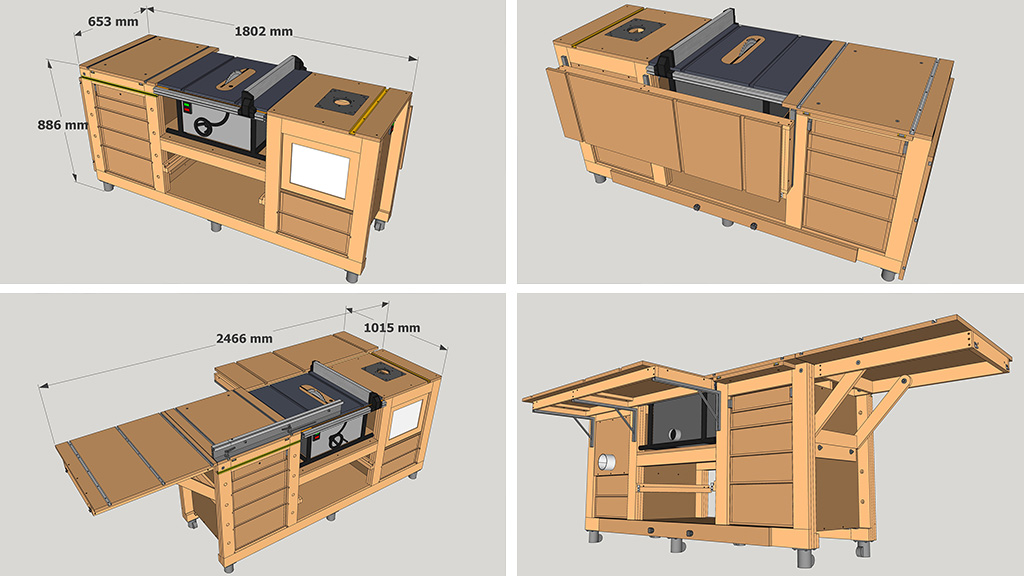
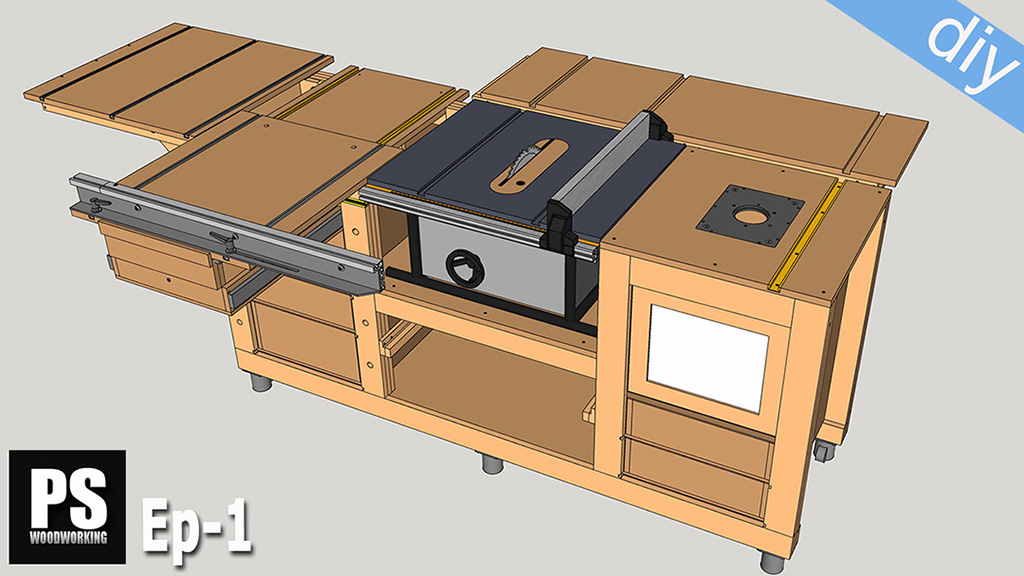
The router worktable measures about 570 x 560mm. As you can see in this 3D model, this design has a folding extension in the back of the bench that will provide me with a much larger worktable for cutting big workpieces.
Workbench Plans
This insert, the fence and the table could be easily adapted to whichever workbench you have at home, without the need to build the whole worktable. It can also be used with al-most any kind of router, such as the ones that have a fixed plunge base. If you’re interested in the plans for this design, here you’ll find them.
Router Table Plans

In this new design, I’ve decided to place the router table to the right of the table saw.

The router is encased within a module fitted with a door so that I can access it. Thanks to this I’ve managed to reduce the noise it makes almost by half.
In the inside of the module I’ve put a power outlet for the router which I can control with an emergency switch.

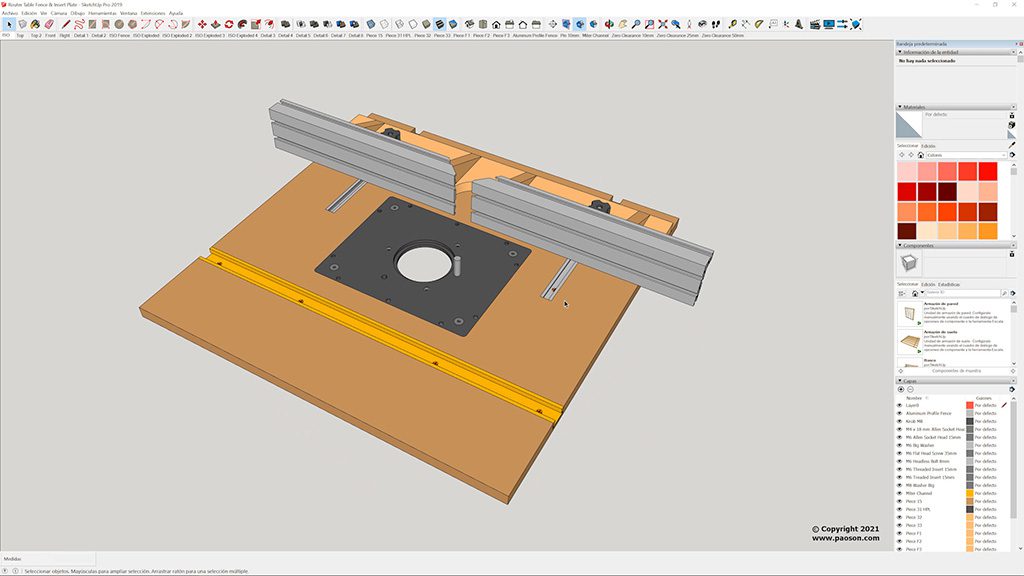
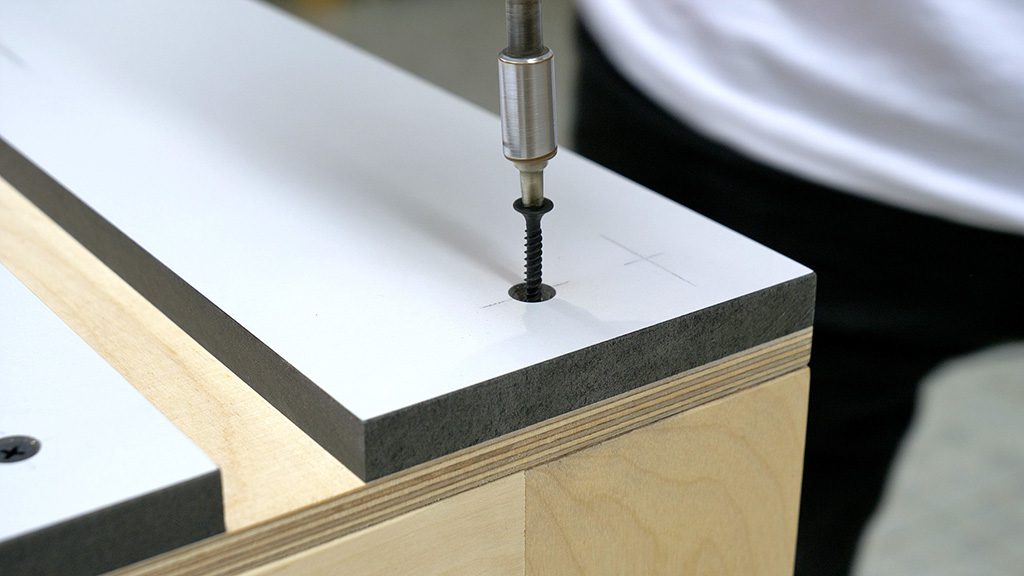
This is the insert plate for the router. I’ve made it with a HPL panel, but it could also be made out of aluminum or any plastic board that is tough and thick enough, around 10 mm. Another possibility would be to buy the insert—they’re very easy to find nowadays, and also pretty affordable.
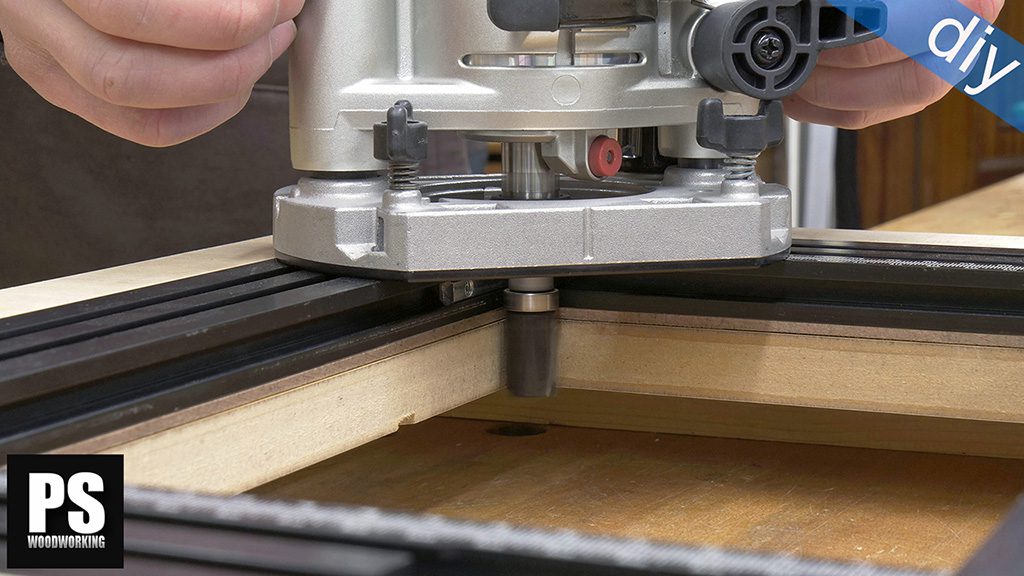
After removing the four screws on the top it’s easy to access the router and its fixed base, to which I’ve screwed the bottom part of the insert using the same screws that come with the base. This base has a screw for adjusting the height of the rout-er bits, by turning the screw from below and above.
In the third photo we can see the four pieces of board which allow me to fasten the insert to the bench-top. Each one of them has two screws which allow me to adjust the height of the insert to leave it at the same height as the benchtop.
I’ve changed the original design a little, making a rabbet in the table so that I can place the insert, and I’ve used headless screws, which are screwed to the insert itself to adjust its height. Both of these systems are perfectly val-id.
I’ve also made the central hole for the router moved 15mm towards the the back of the insert. I’m doing this because in the future I want to make a new and improved router lift, and I’m probably going to need some more space on the front of the insert to insert a screw that will make it possible to lift and lower the router.
How to use a Router Table

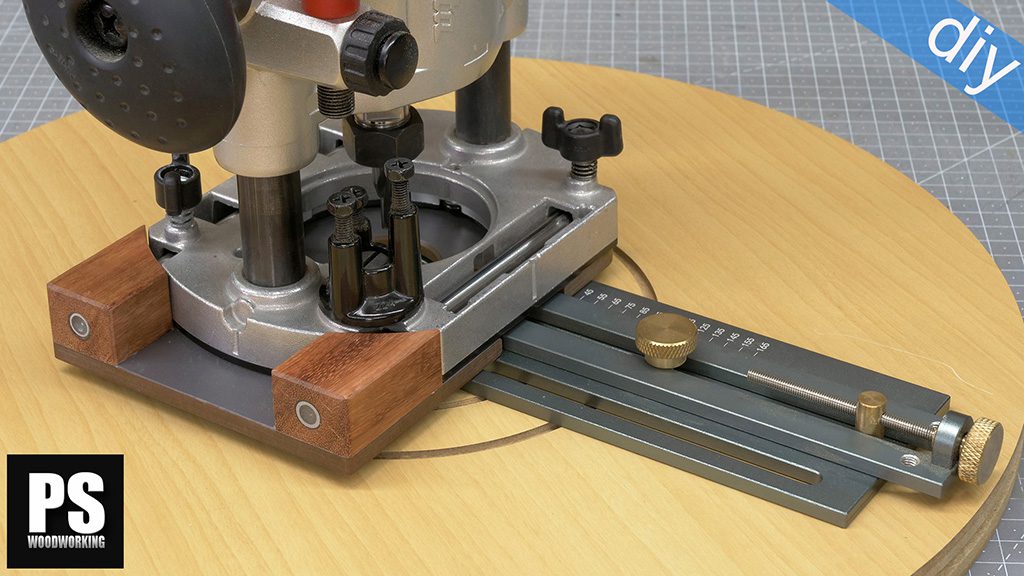
These are the insert rings, which can be swapped depending on the diameter of the router bit we’re going to use. I’ve also made them with a HPL panel that’s less thick. The rings could also be made from aluminum, plastic boards or hardwood.
And this is a hex key which I’ve fitted with a simple wooden handle. I’ll use it to raise or lower the router.
I’m going to run a few tests to show off some of the router’s functions. First I’ll place a chamfer bit with a bearing. I’ll also use the lead on pin to make it easier to mill small or curved pieces, such as these.

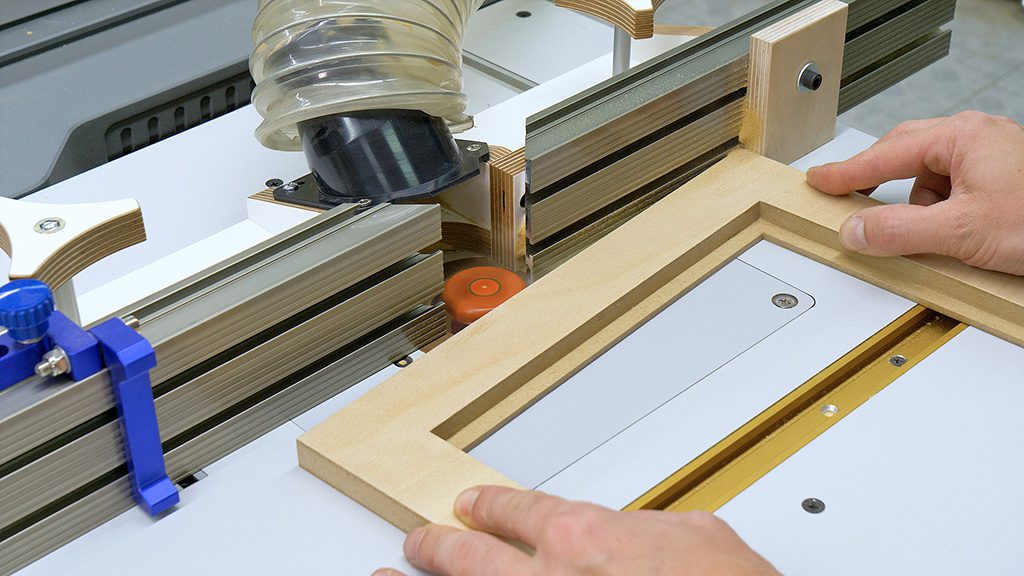
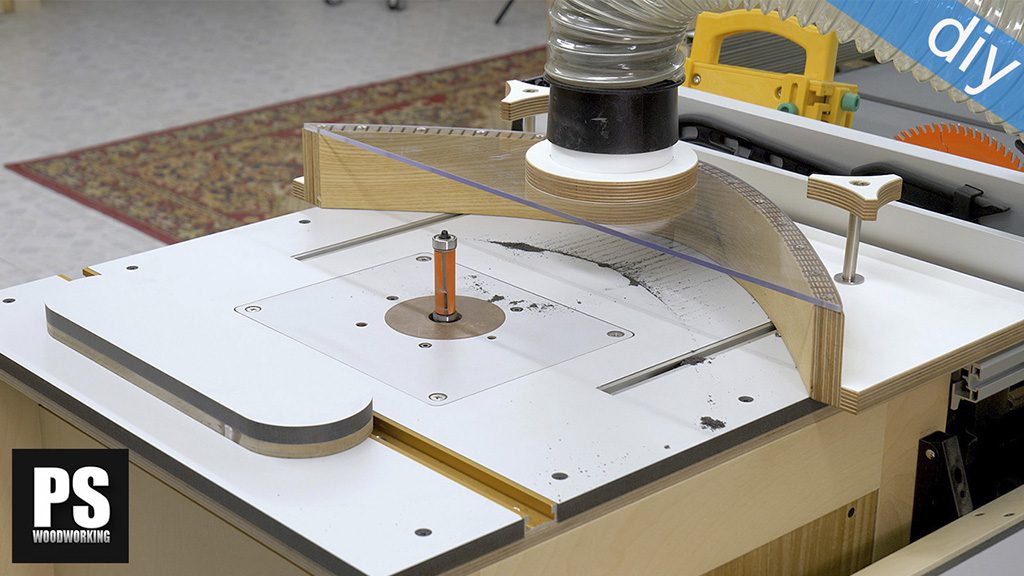
Now I’ll install the fence for making other kinds of cuts. I’ve used t-track profiles and t-screws to fix the fence to the workbench. I’ve also used two aluminum profiles which I can adjust by loosening two screws in the back.
These kinds of profiles are very versatile and work really well for these router fences, but you could also use boards or other kinds of aluminum profiles like the ones used for making CNC tools.
They will also allow me to use miter track stops for mills like these, where I’m making a pull for the router cabinet door.
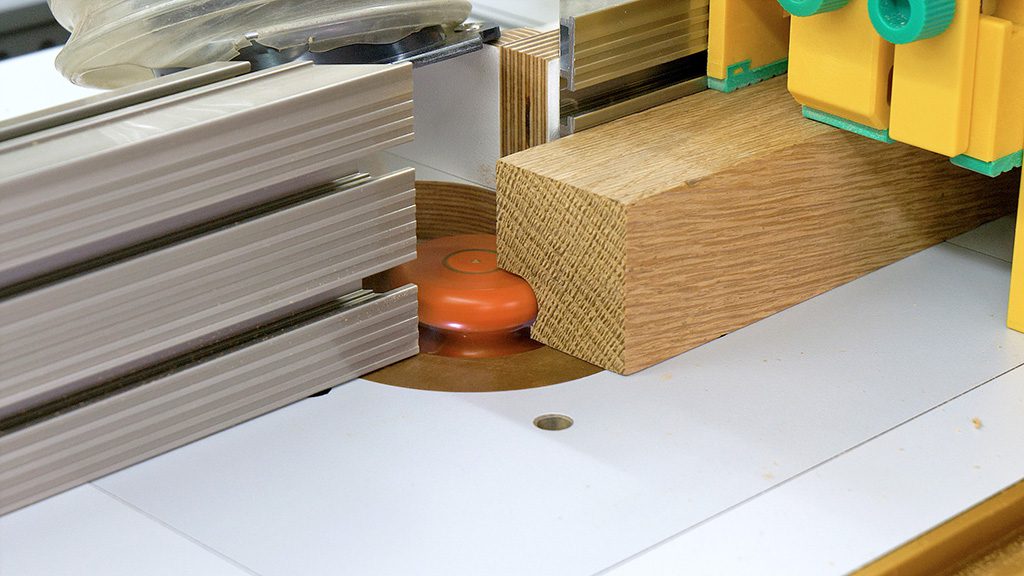
I bring the profiles up to the bit, lock the fence and make a fairly susbtantial cut in this piece of oak wood. I still need to finish installing the dust collection system, which I’ll do in the next video in the series. I’ve swapped the bit for another one with more diameter and try the router again with the same piece of oak.
Featherboard for Router Tables

As you may have seen, I’ve installed a miter channel on the workbench which will let me use a featherboard for complex or repetitive cuts. I’ll need a different featherboard for use with the fence. I’ll design one later.
Miter Gauge for Router Tables


The same profile will let me use a miter gauge for both straight and angled cuts.
How to make a Router Table
To build the bench, I’ve used a base of hard plywood screwed to another board. It’s a kind of MDF board, but harder and with melamine on both sides.
In the original design I used a single hard plywood piece, both options are correct. We could even use other kinds of boards, such as MDF or plastic boards.
Be careful with the expansion of the board you’re going to use as benchtop due to moisture. If you use boards that are very susceptible to changing size, such as MDF, you will need to make the holes for the screws holding the top to the cabinet a little bigger, and avoid tightening them too much to allow for wood movement. If you use plywood, you won’t have that problem.
Here you will find the following article about this mobile workbench where I will show how I made the blast gate box for the router table and the bench saw.


I love this workbench. You do great work. Thanks for making these videos. Could you please tell me where you got the aluminum profile for the router fence?
thanks! check this out:
Which router from Bosch do you use?
here you’ll find that router:
I want to know more about that mdf/melamine material you use. I cannot find it anywhere. Maybe not available in the US?
I don’t think so, but you can use standard MDF with melamine. Check this out:
Ola Suso, got impressed by your project. I think it is brilliant. I have a question related to the router you are using. If I am not wrong you use the Bosch GMF1600 under the table. Having read the specs it seems the router cannot be used with separate remote switch (like you do) for safety reason. How did you manage to make this work ? Thanks for your feedback
hola Sebastien! If we talk about safety reasons and legal regulations, I think that no power hand tool can be used with a remote switch, but you should not have problems if you make the correct electrical connections
Hi Suso, thnaks for your swift feedback. This is what I thought. The same router is on his way and I am planning to implement the same configuration. I found the switch, so I believe it will work like a charm… Again congrats for the first class work you are sharing. Cheers from france.
perfect Sebastien, send me some picture when you finish the routet table!