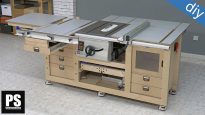
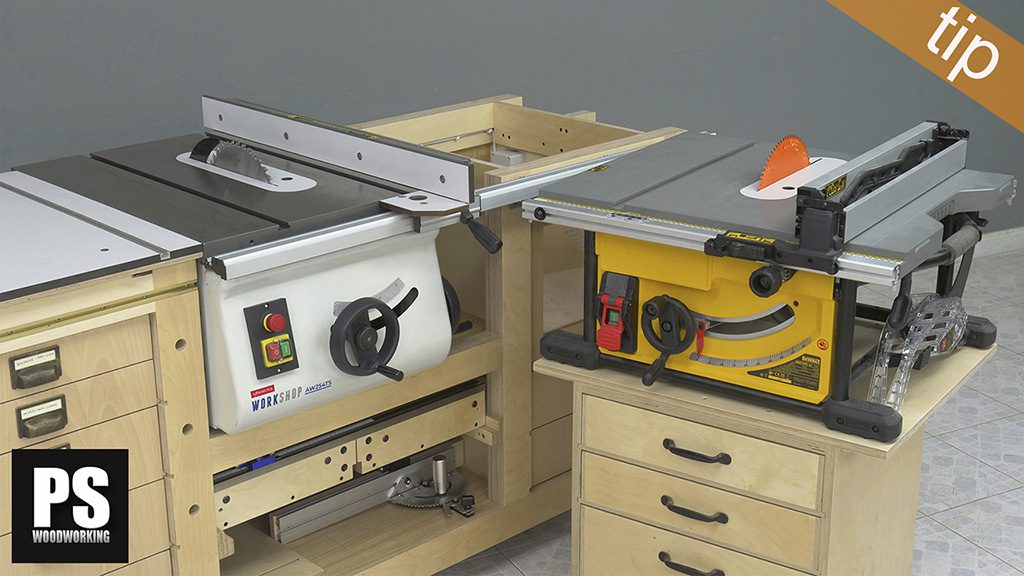
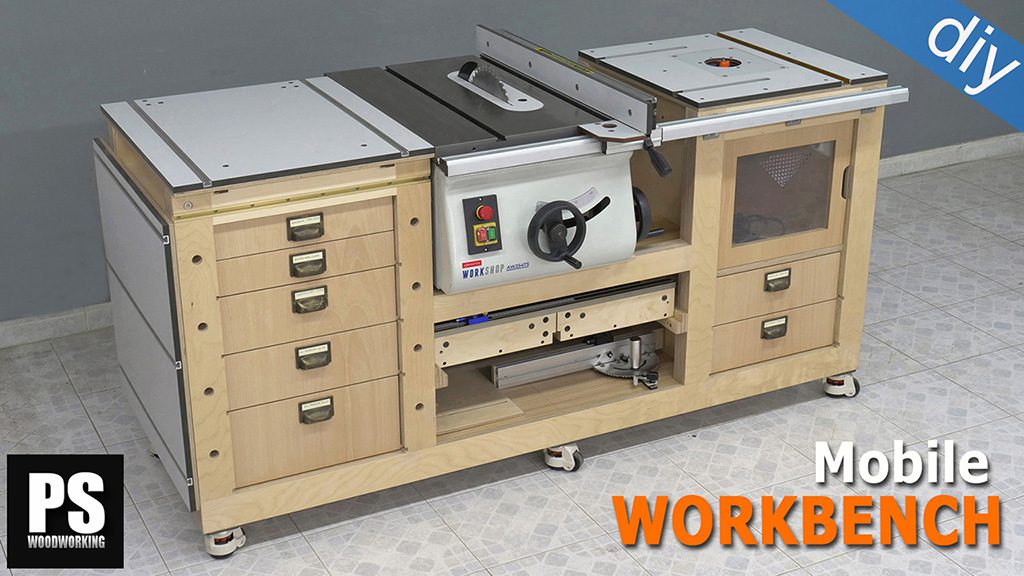
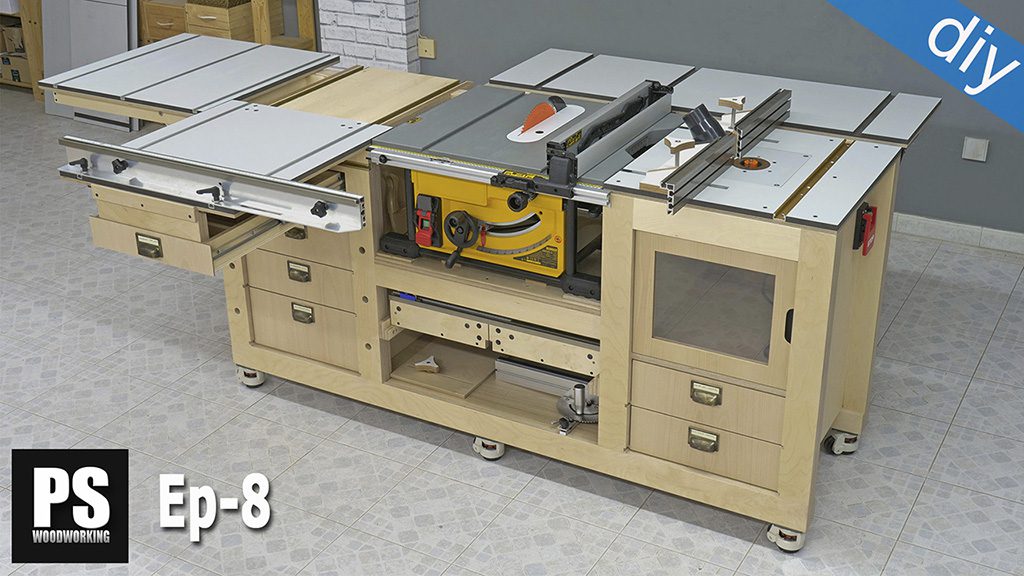
After posting my latest video about my new mobile workbench with a table saw and router table, many of you have asked me about the zero clearance inserts for the bench table saw which can be seen in the video.
Common table saw zero clearance insert problems
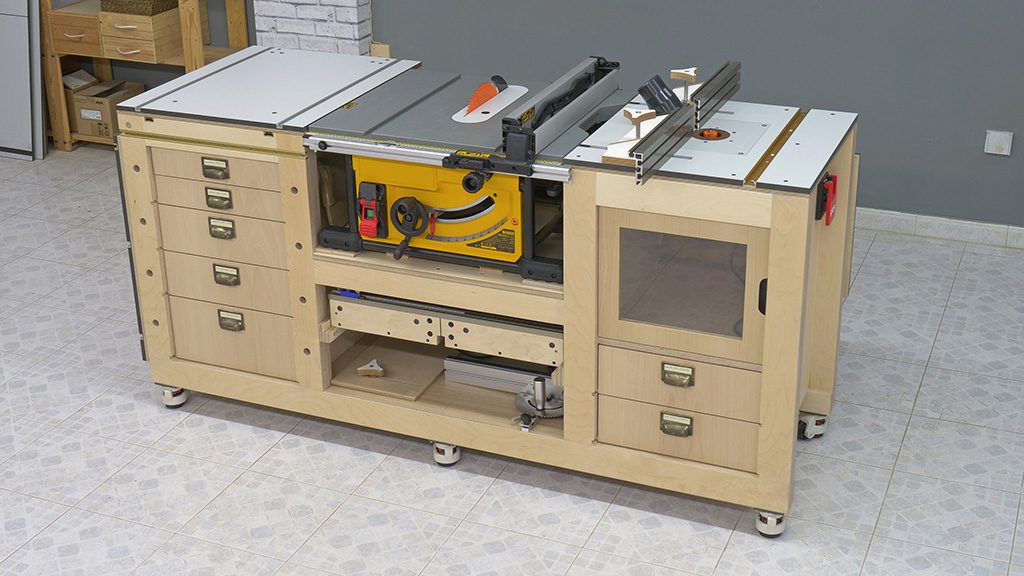
In this picture of my new mobile workbench, you can see the new insert which I’m using with the bench table saw. I made them using the same material as the benchtops, a kind of MDF that’s harder and more compact, and with melamine on both sides. It’s 13mm thick. We could also use normal MDF, plywood or almost any kind of board between 10 and 13 mm thick.
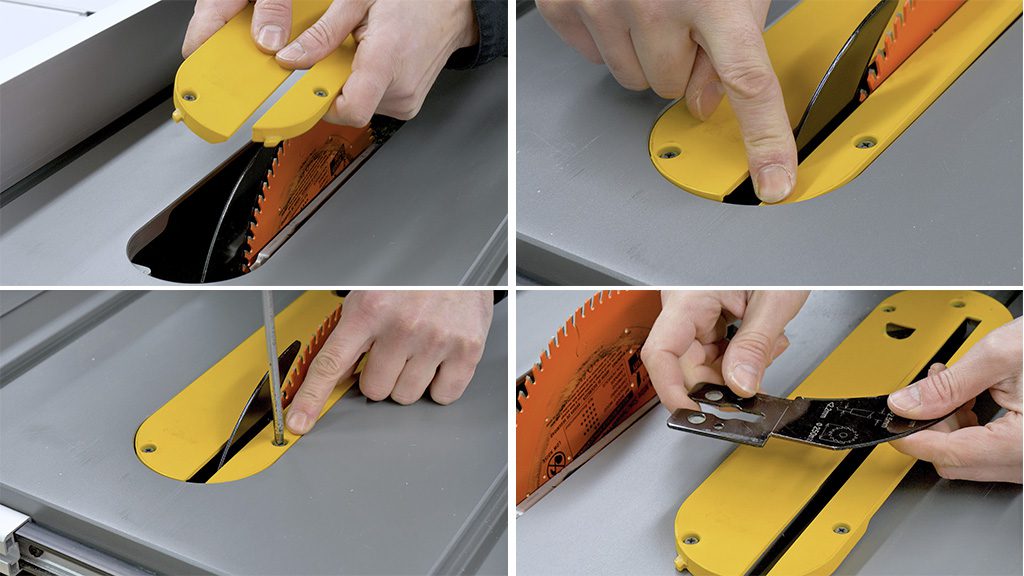
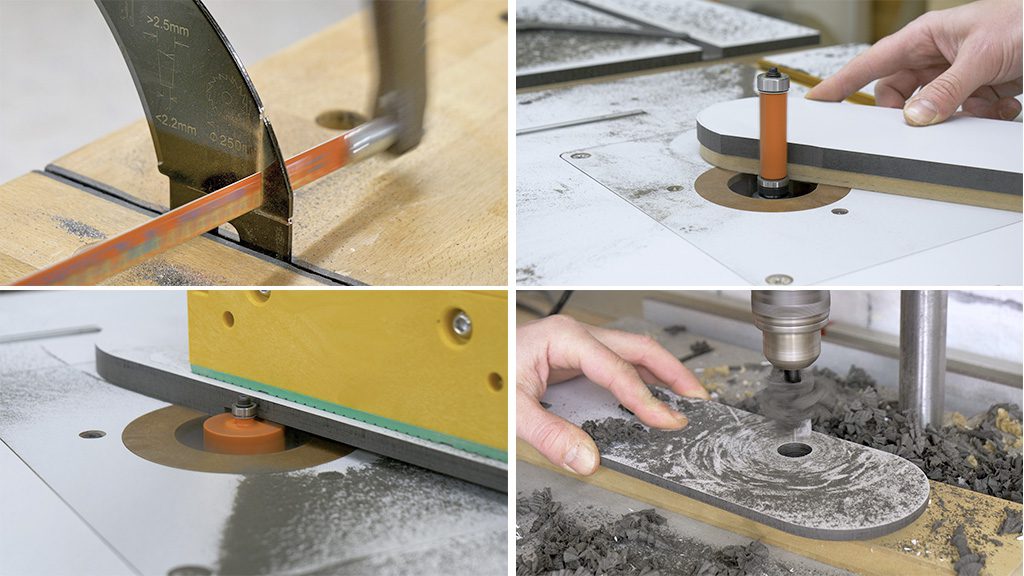
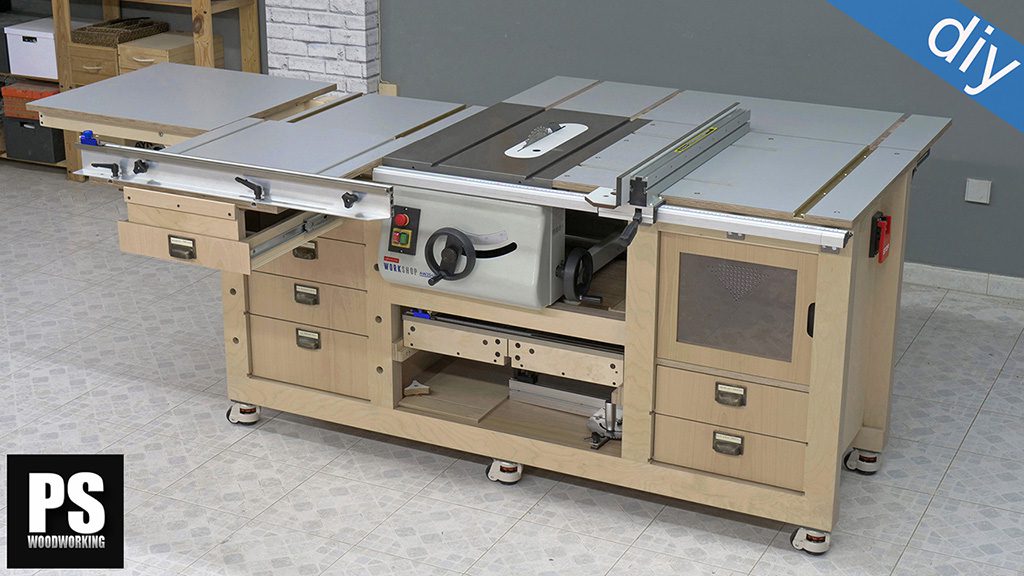
This is the table saw’s factory installed insert, made in aluminum. The main problem with this insert is the cut in the back that lets us use a riving knife. It makes the insert very unstable and difficult to leave it even with the rest of the worktable.
Here in these photos we can see that it seems as if both parts of the insert were independent and didn’t belong to the same part. This doesn’t happen with the new inserts, as they’re not cut. They’re also much easier to adjust.
As you can see in the fourth photo, in order to use the new inserts I had to trim the saw’s riving knife a little, but since it’s quite big, it’s still fully functional.
How to use homemade zero clearance inserts on a table saw
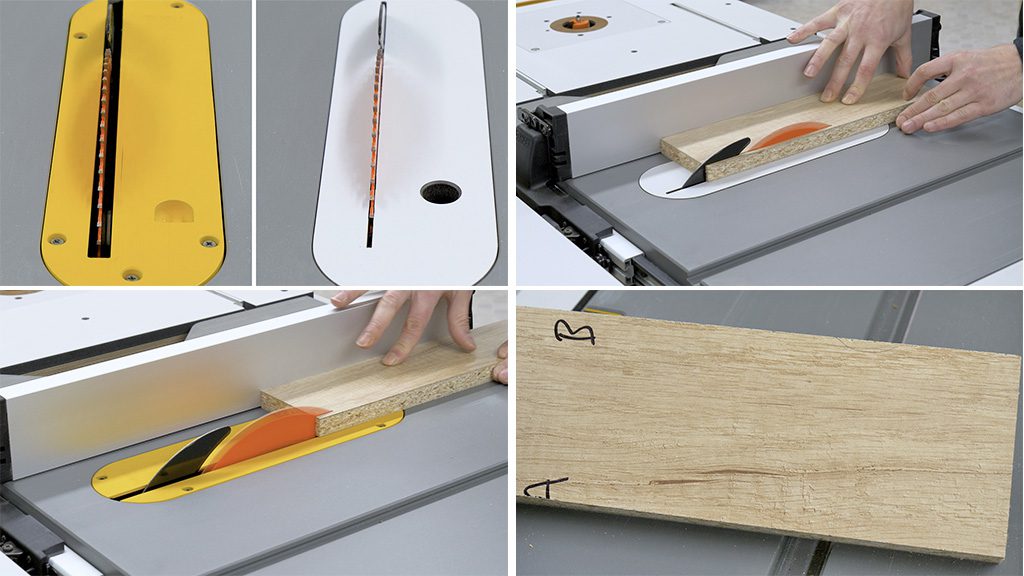
Another common problem with the inserts that come with the saws is the distance between the blade and the insert itself. When cutting delicate wood or boards, these splinter on the lower side, at the exit point of the cut. I’m going to make a few cuts on this piece of chipboard with melamine to see the difference.
As you can see in the last photo, the cut is cleaner when using the new zero clearance I made. I’ll put away and will continue to use the factory-installed insert when cutting wood that’s not very susceptible to splintering, or for jobs which don’t require a great deal of finesse. For everything else, I’ll use the new and improved inserts.
How to make DIY zero clearance inserts for a bench table saw
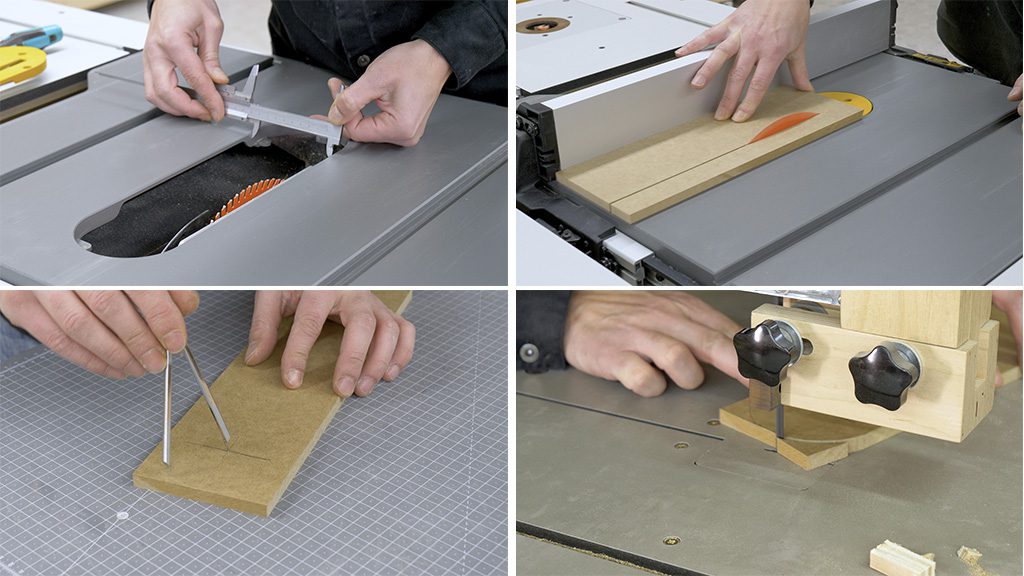
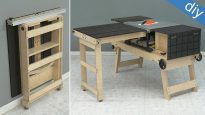
Now I’ll show you how I made the new inserts. First I’ll measure the gap for the insert and cut two pieces of MDF to size. I’ll use these as a jig to cut the new inserts. After locating the center of the piece, with a compass I mark the radius. I’ll cut it with the band saw, but you can use a jig saw, too.

I’ll smooth down the piece with the sanding disk. Then I make sure the jig is correct by inserting it in the gap in the table saw’s benchtop. If it doesn’t fit, we can correct it by using the sanding disk once more. I’ll also measure and mark the position two bolts that will let me adjust the insert’s height.
I drill the holes with the column drill. Now I’ll make the cut that’s needed for the riving knife. I work out its position and use my 3D Router. We could also use a handheld router and jigs.
It’s time to cut the riving knife so that we can use this type of insert without a cut in the back. I place the bolts that allow me to adjust the insert’s height and make a cut for the blade by raising the blade itself very slowly. All of these steps with these MDF templates will let me adjust all of the tools for when I have to make the final inserts and also spot any potential errors.
I’m going to use double sided tape to stick the other MDF jig to these pieces of plywood I’ll use to make the inserts. I’ve precut them, leaving them 2mm bigger than the jig. I’ll use a flush trim router bit. Its bearing touches the template, making the copying process easier.
You might be thinking I could have used this bit and the factory-installed insert as a template, but this insert didn’t fit the gap perfectly. Not only did it have slack, the cut in its back would make these milling jobs significantly more complicated. I’ll put away this jig I made out of MDF so that I can make new inserts when necessary.
I’ll also use another bit with a bearing so that I can cut the recess you can see in the third photo. It will allow me to place the inserts more easily, besides letting me use the height-adjusting bolts. This board is 13mm thick. If you use a thinner board, about 10mm thick, I think you can also skip this step. Now, with the column drill, I’ll make a hole that will allow me to remove the inserts more easily.
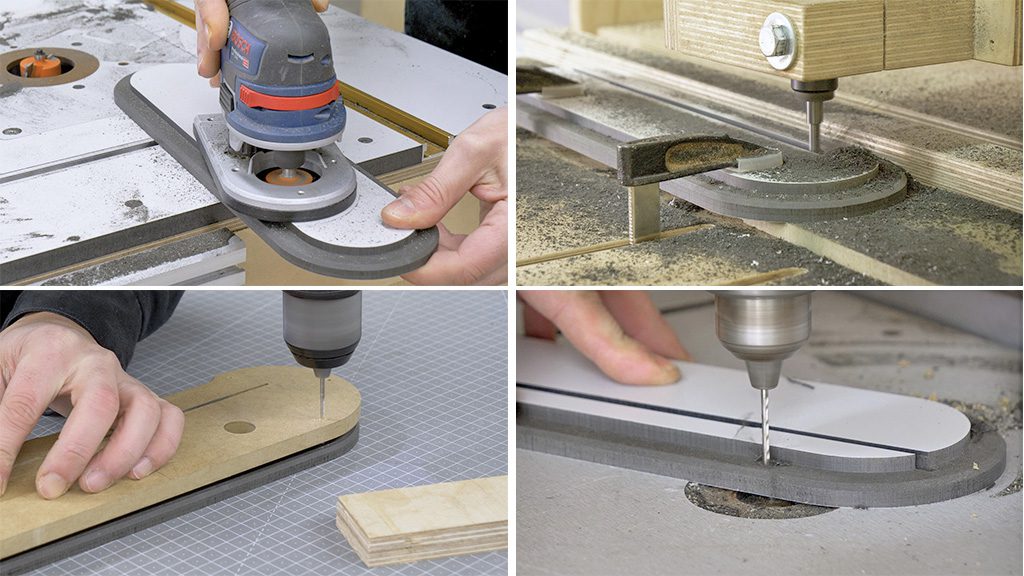
I’m also going to chamfer the inner edges of the hole and the entire underside of the insert. I’ll use the 3D router again to make grooves for the riving knife and another for the blade itself. This last groove won’t be necessary if you use a thinner board. In my case, the blade touches the underside of the insert even at its lowest position.
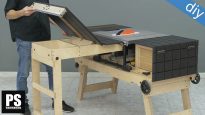
I’ll use the MDF jig again to mark the holes that will let me adjust the height of the inserts. I make the holes with the column drill being careful not to make though holes.

I place the screws and then put the insert in place and then I adjust the insert until it’s level with the benchtop. Now I can make the cut for the blade on the insert, using the blade itself by raising it little by little. I’ve made another hole in the back of the insert to place a washer that will act as a safety lock so that the inserts won’t eject due to the blade’s rotating motion.
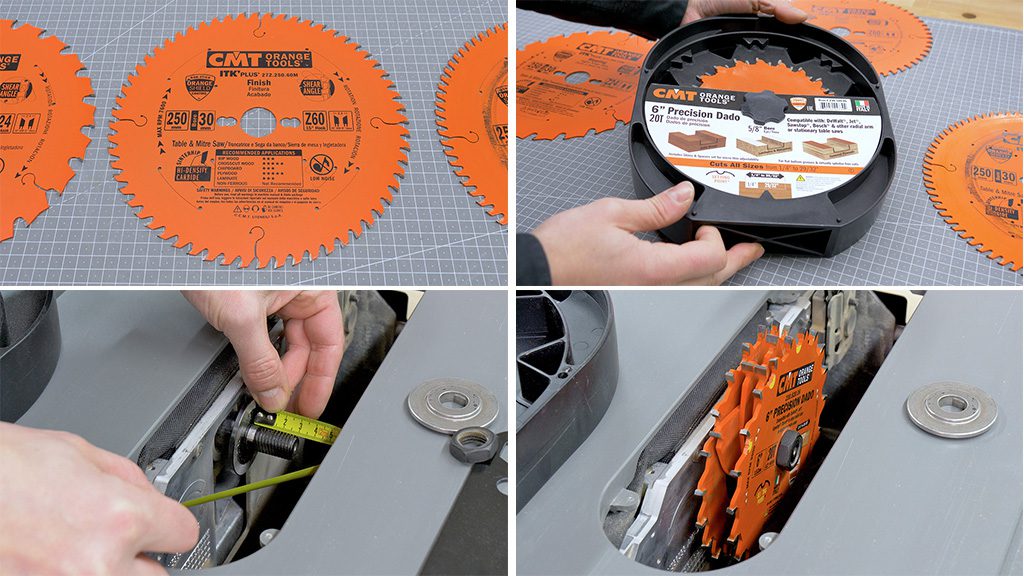
Finally, I follow the same steps with the inserts I made for use with the dado blade. I’m not going to make the cut in one go. For safety reasons, I’ll place the blades one by one. If you’d like to know more about the saw blades and dado blades this bench table saw uses, you’ll find more info in this article.

What is this material that you have made the insets out of? Is it a HPL? It appears to be the same material you used on the table saw station.
hi Jonny, yes it is the same. In this article I talk about that material