As promised in my last article, today I’m going to show you how to make this attachment for use with my jig for sharpening table saw blades, so that we can also take advantage of it to sharpen our router bits.
Just like with the saw blades, sharpening our bits is one of the most common problems in small workshops. Having them professionally sharpened can cost quite a lot, almost as much as the bits themselves.

This is the 3D SketchUp file that you will find in the plans. If you are interested in making your own jig and collaborating with my work, here you can download them.
Router Bits Sharpening Jig Plans

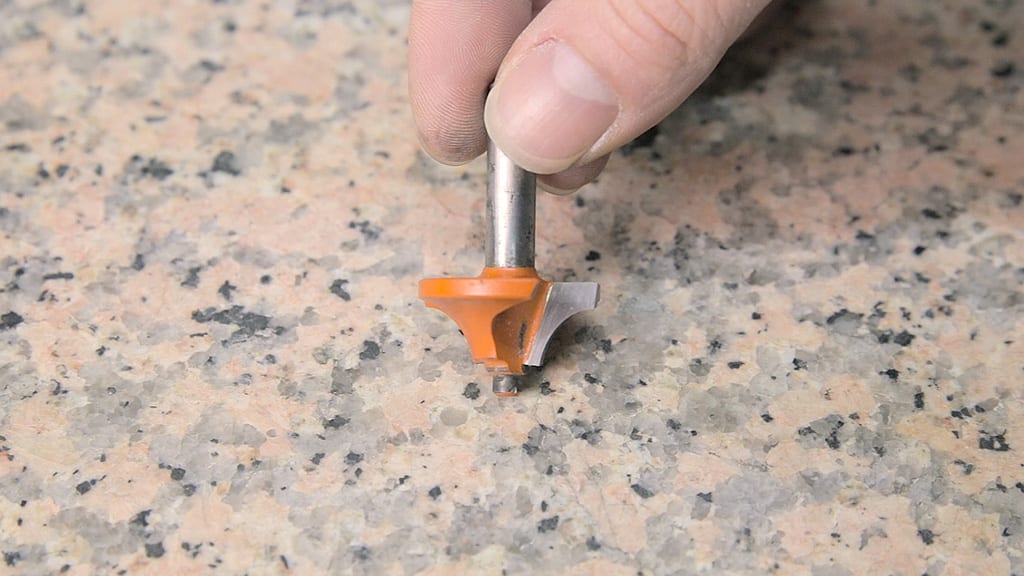
There are many types of router bits depending on the materials used to manufacture them. The cheapest ones are usually made of HSS steel. Other commonly used materials used to make cutting edges are carbide and diamond, these bits are more expensive, but they stay sharp longer.
I’m using a carbide bit. It’s a very hard material, so the ideal way to sharpen it is with a diamond wheel, which I’ve attached to the angle grinder.
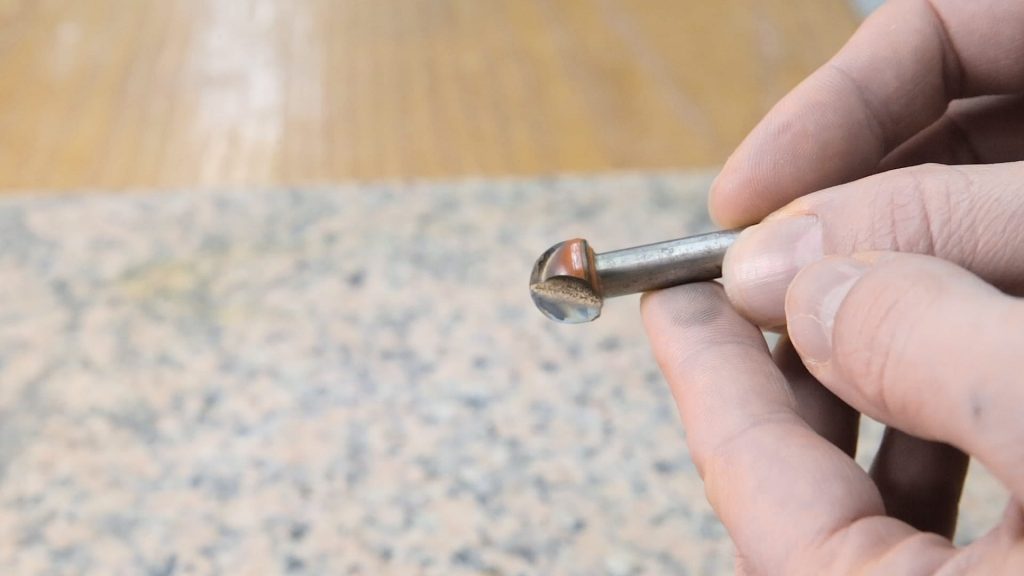
The first thing to take into account is the condition of our bits. These two bits have been used in my CNC, a tool which tends to strain them more than a hand held router.
You can see at first glance that they’re a little burned and besides, they no longer cut as well as they should. Nevertheless, their cutting edges are still in good shape and they don’t have nicks or chips, so after a good cleaning and sharpening, I’ll be able to continue using them.
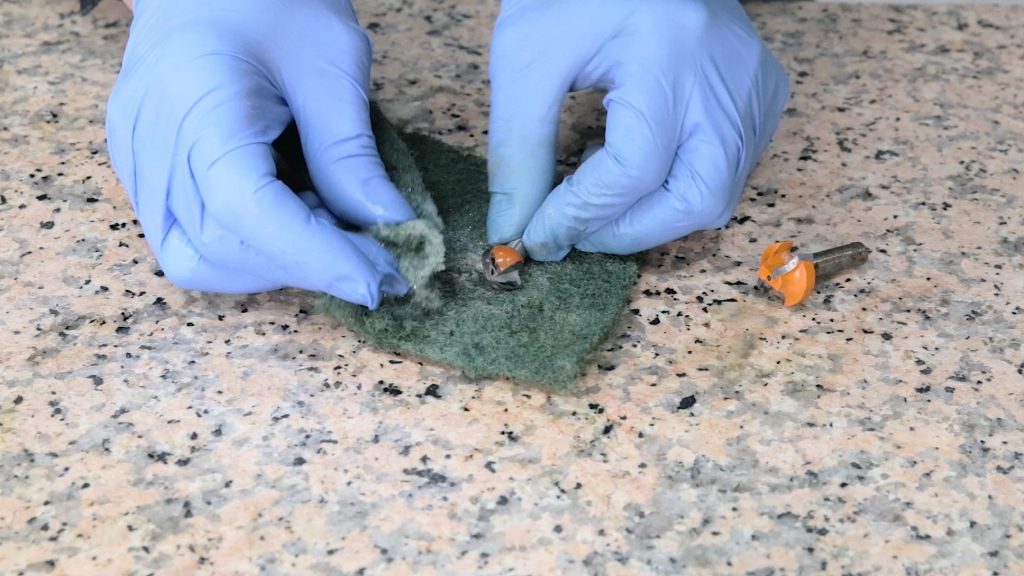
Like I did with the saw blades, I’ll use some industrial degreaser and a scourer to clean them thoroughly. It’s better to let the degreaser sit for a couple of minutes before using the scourer.
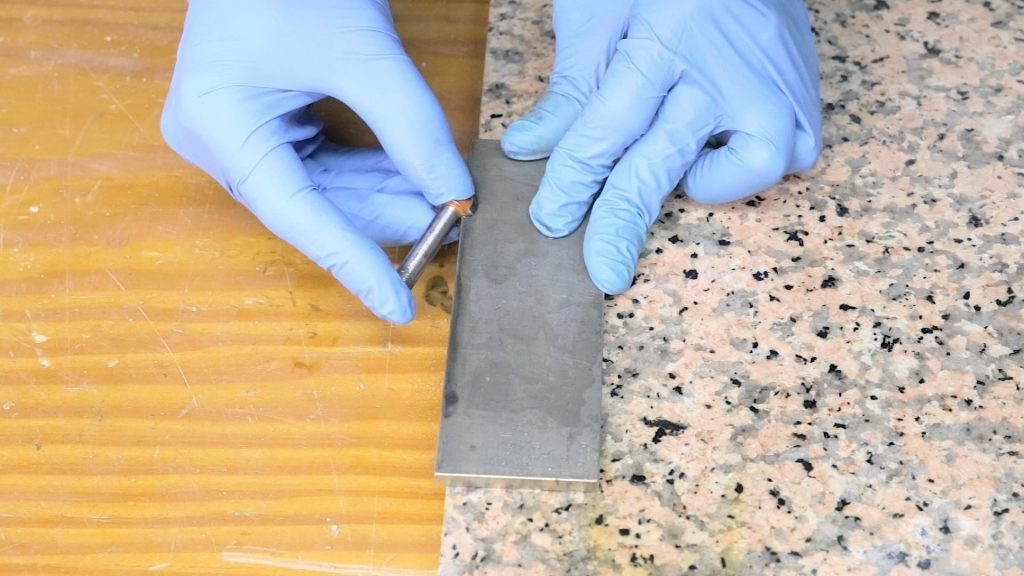
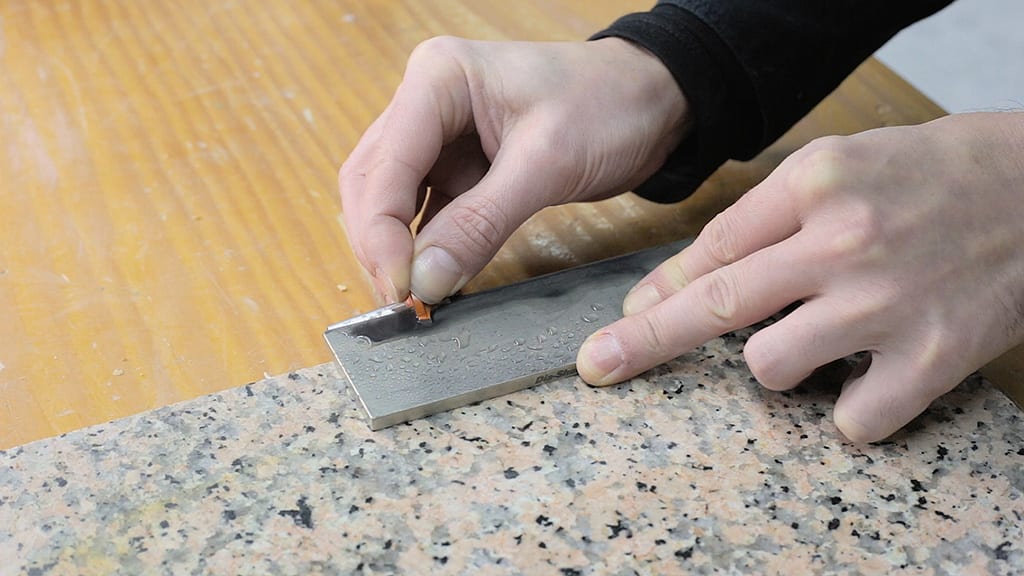
Now, I’ll sharpen their cutting edges with a fine-grit diamond stone. I’ll apply some water for lubrication and to wash away the shavings. Make shure the cutting edge is flat against the diamond stone.
We could also use dry-wet P600 sandpaper stuck to a flat surface, and finish with P1000. It is not necessary apply too much force, and 60 seconds per edge will be enough.

You can’t tell the difference visually and you’ll notice they cut much better now. I can continue using it and re-sharpen it in the same way two or three more times, and then the bit will need a more in-depth sharpening using my sharpening jig.

Another issue is bits which we’ve already sharpened two or three times with this method, or ones whose cutting edge is nicked, such as this one. In these cases we have to do a deep sharpening.

I’m going to do a test with this bit on a piece of hard plywood to check its condition and compare it later, after it’s been sharpened. While it’s true that this material is hard to work with, there are too many burnt areas on the plywood, and the router doesn’t move smoothly.
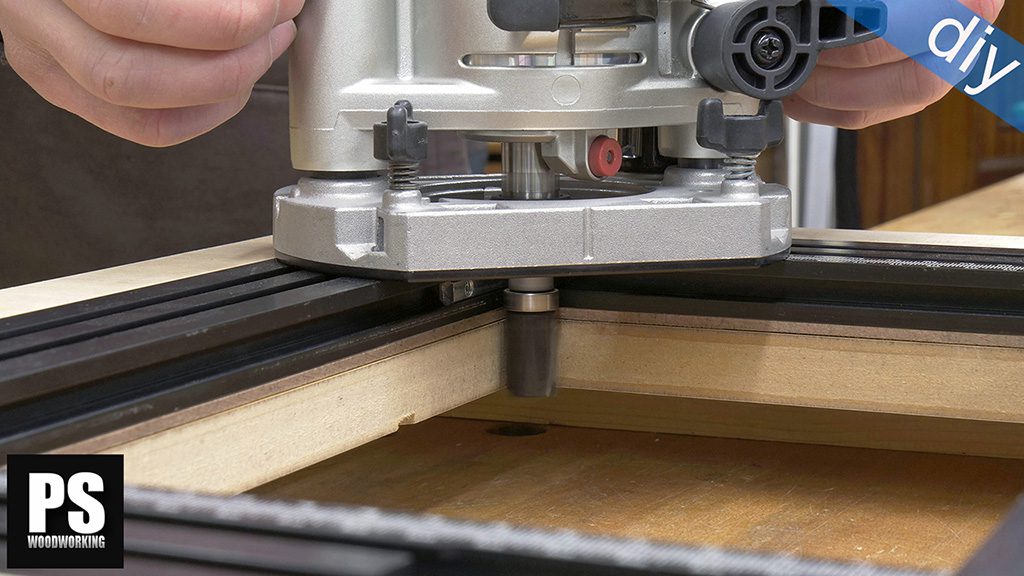
Besides, although you can’t see it in the video, the bit leaves marks on the wood due to the chips in its cutting edges. In order to sharpen the bits in my homemade sharpening station, I have to replace the round piece that holds the blades with the new attachment.
I’ve used a U-shaped aluminum bracket and a piece of HPL to allow horizontal movement. Due to safety reasons, I’ve also fastened two screws on the top, this way the attachment and the bit will never pop off the jig.
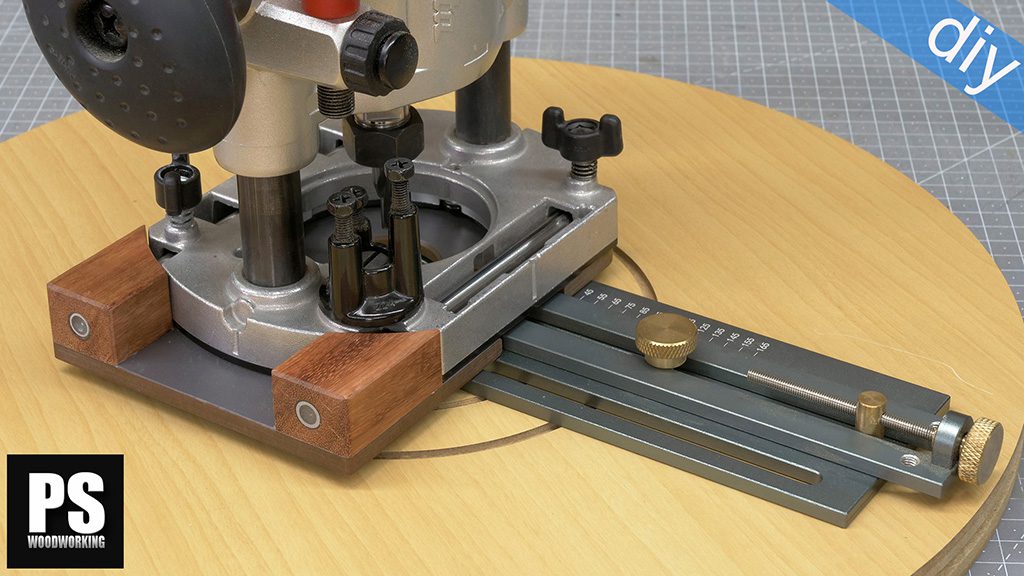
The most complicated part was coming up with a bracing system for the bits. Since these are small parts that require accuracy, it wasn’t easy designing an attachment that wouldn’t get in the way when sharpening the bits.
I’ve made four pieces, each for every shank width that the bits I normally use have. 6, 8, 10, and 12 mm. In addition, this jig will allow me to sharpen many different kinds of bits, both straight edge and tilted edge.
With this screw I can adjust the height and tilt of the bit. The cutting edge must be completely flat against the grinding diamond wheel.
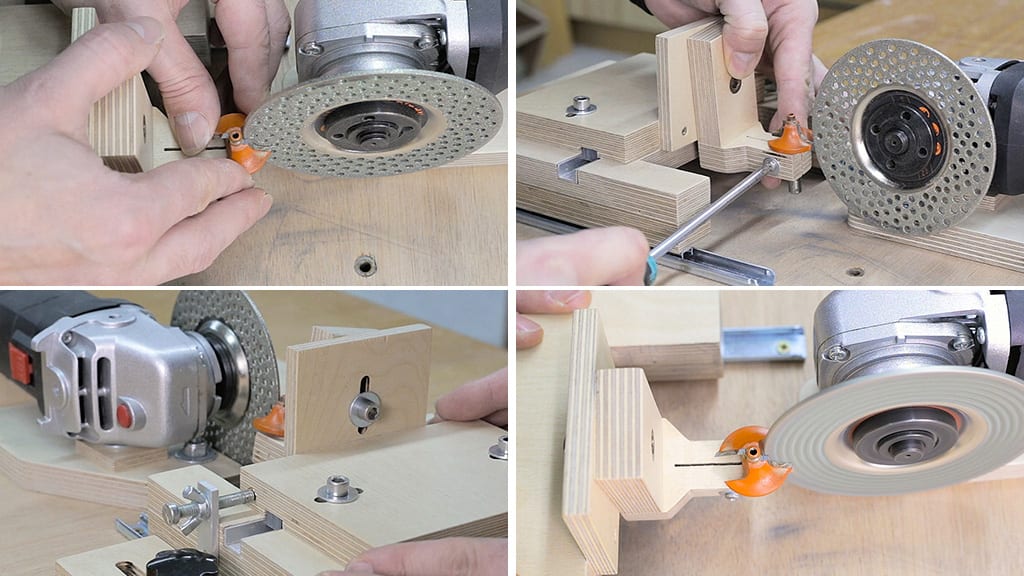
Here I adjust the path of the sliding table with the depth stop. We must make sure the wheel doesn’t touch the body of the bit, and at the same time get as deep into the cutting edge as we can.
And here with this screw and wing nut I also adjust the horizontal movement with this other stop. This way I can grind down all the cutting edges evenly.
Now all that’s left is to tighten this screw to firmly fasten the bit and check for the last time whether everything is properly adjusted.
I move the bit close to the diamond wheel very carefully, and make sure the wheel touches the entire surface of the cutting edge. It is advisable to wear eye protection and a good anti-dust mask while we’re sharpening. Here you can see I’ve ground all along the cutting edge. I repeat the process with the other edge.
After using the jig, we’ll obtain better results if we follow the same process as with the first bits. This time only four or five passes per edge on the diamond stone, and the bit is ready to be used.
This is the final result of the sharpening. I try the bit I’ve just sharpened on the same piece of plywood. It only burned the wood a little on the entry point, and it moves much more smoothly.
How to make the router bits sharpening jig:

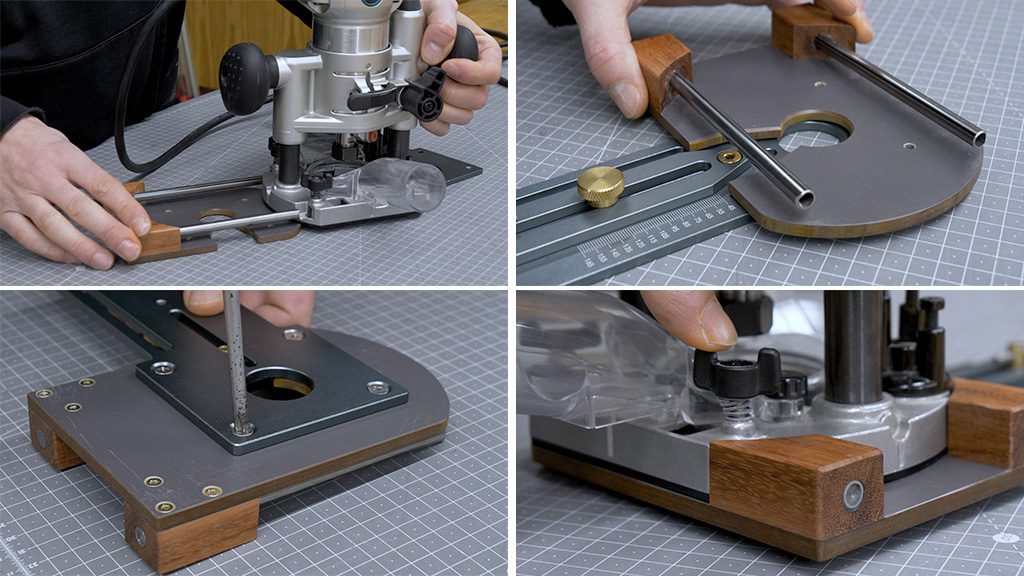
Now I’ll show you how I made the attachment for sharpening router bits on the jig. First I’ll cut all the required parts with the table saw. With the 3D router, I cut grooves used for adjusting. I glue the two pieces together.
Now I remove the round piece that holds the blades from the jig and try out the attachment for sharpening bits. After cutting the parts that will hold the bits, I machine them and place the threaded insert. I’ve used the printable template to speed up the process.

After drilling holes for the shank of each bit, with the band saw I shape the pieces where I’ll insert them, and make cuts in the center to obtain a better grip. I drill a hole for the locking screw using a wider drill bit on the side where I’ll insert the locking screw. I glue the two pieces together and attach the screw.

After making sure everything is working fine, the last step is to place the U-shaped aluminum part to ensure precise horizontal movement. I mark the two pieces to cut a groove with the table saw.
I use cyanoacrylate to glue the U-shaped aluminum piece, as well as the HPL slider that will go inside of it. Here we could also use a piece of hard wood.

Finally, we machine this piece of aluminum which I will use as a depth stop for the horizontal movement. I drill and thread one of the holes and screw it in.


I used to through them away as somebody mentioned the cheap bits are “single use” . Very impressed Thank you
thanks Stran!
Great idea. If it can save some money bi making bits last longer I’m for it
thanks!
Do you think that it would be possible to use jig to modify the angle profile of a router bit? The diamond blade would need to grind away both carbide and steel to allow for draft to prevent burning the wood.
hello Irving,
I think using two different diamond blades, the first one with coarse grain, it can work!
where I am, router bits are not well knowen so the only bits I can get here are the cheap ones made in china…. and oh they are sooooo bad and go blunt in minutes…. so now I have a cheap butchers steel and every 5 minutes of work I just run the steel up and down the cutting tips, and once I have finished it I will rub in on a very fine hone stone.
Its not ideal but these bits are like $2.00 each, I did find a good set of bits in town $300 for 4 peices.