Today I’m going to make a Japanese-style bed. These beds are lower than western ones, with the mattress embedded in a wooden frame.

This is the SketchUp file, I’ve tried to come up with a design that would be easy to make using plywood, although other kinds of wooden sheets could also be used. Besides, this design is easy to assemble and disassemble; quite convenient if we want to move.
Reusing the plans for different sizes of beds is quite easy. This design is for a 190x150cm mattress. We only need to add or subtract the exact length difference to the affected pieces and that’s it.
I’ve designed two types of bed. This one is meant to be adapted to a common metal bed frame which you can find in any store. As you can see, the bed frame rests on four plywood corners which, in turn, join all the pieces.

This is the other bed design, is of the same size. However, for this design we’ll use a homemade plywood frame. The two systems are valid, if you already have the mattress at home you can take advantage of it and do the first one, if you don’t have the mattress you can go with the second one.
In this article I’ll show you how I made the first of the two models, although both beds have similar makes. Here you will find the plans of the bed:
Tatami Bed Plans

Now let’s take a look at how I made it. This time around, in order to save time I’ve ordered some pre-cut pieces from the same warehouse where I bought the board, since the parts are quite large.
I’ll start by cutting these pieces at an angle with the table saw. They’ll be used to make the headboard thicker. I’ll also machine this rebate to work around the floor plinth. I’ll also glue these pieces together, onto which I will later screw the bed side rails.

Now I glue the three upper side rails together to make them thicker.

I machine these pieces like this and put them in place with glue. I sand these parts now that it’s easier and screw the bed side rails in like this.
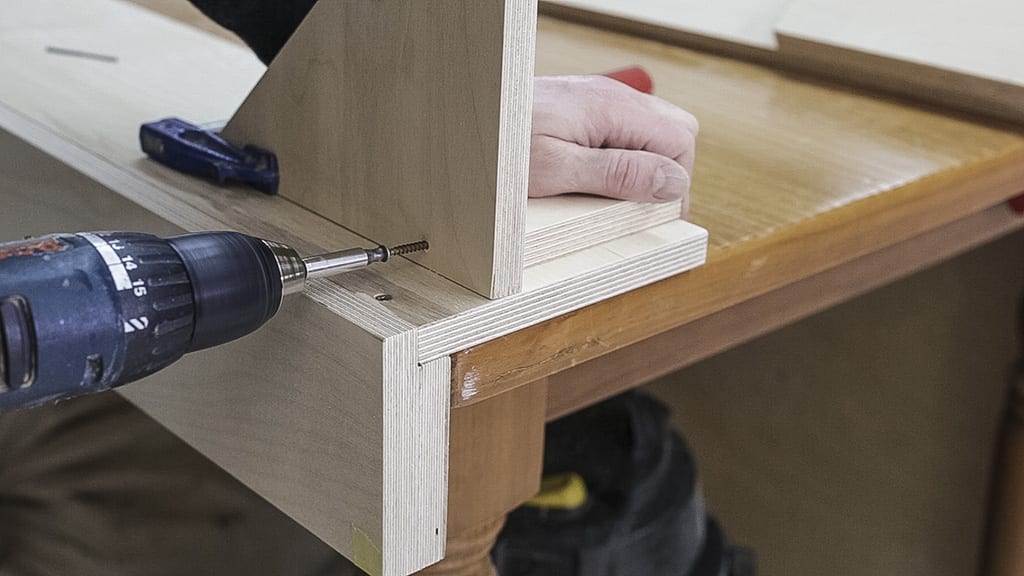
Now I can start assembling the bed. I cut these two pieces in half to make four supports for the bed frame. First I screw this one onto the side rails, keeping it 1mm away from the edge. I remove the piece and then screw it onto the headboard.
This way, when screwing it back on, the screws will put pressure and the joint between the side rail and the headboard will be tighter.

I’ll use the same system for the back. I’ve numbered all the corners to make future assemblies easier. With these last screws I finish putting the bed together.

Now it’s time to set up the nightstands. I glue these parts together and add a little salt to stop them from moving due to the glue’s viscosity.

Once the glue is dry, I sand the inner part now that it’s easier and continue assembling the nightstands. I finish sanding all the pieces that make up the bed and apply three coats of satin water-based varnish.

I’m going to put everything back together at the workshop to see what the finished bed looks like.
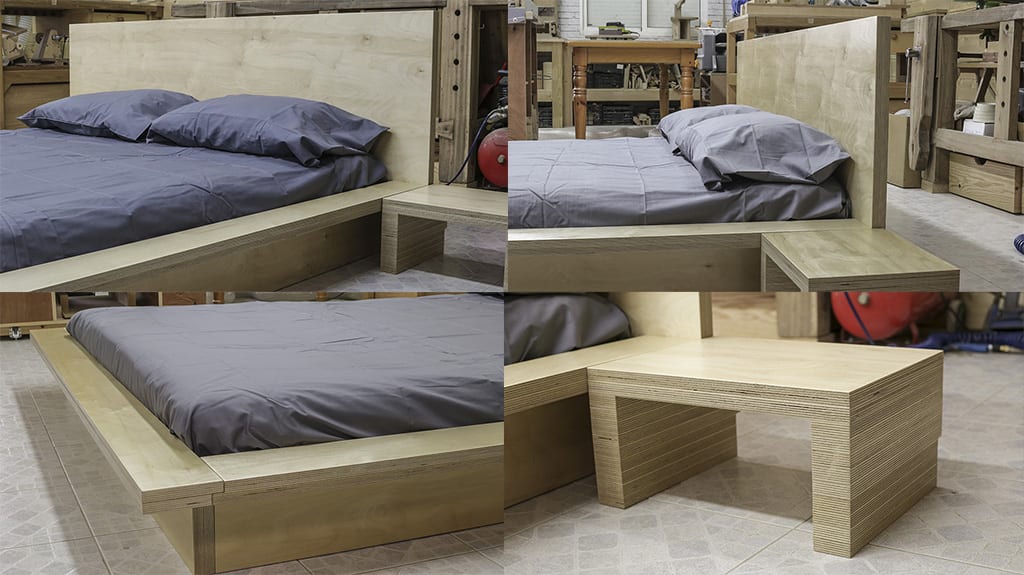
I love how the edge of the plywood looks. Of course, we could apply some dye to change the color, but I like the natural look of birch wood.


I love that notch feature on the nightstands so that they can circumvent baseboards and run flush to the wall.
thanks!
Thank you for the post. Awesome. This would also look sweet with bamboo ply. Thinking about doing it with that and with mitred corners
thanks, I think it’s a good idea, it sure looks nice.
Pls send me the cutting list