This is the last video in an eight-part series about my new woodworking workbench, fitted with a bench table saw and a router table.
A few months ago, when I made the first drafts for this project in my head, I thought of a robust workbench to work on that could be equipped with a bench table saw and a router table.
Apart from all that, I had a versatile, compact and portable design in mind, especially aimed at small workshops. I think in the end I managed to blend all of those features into a single, elegant piece of furniture.
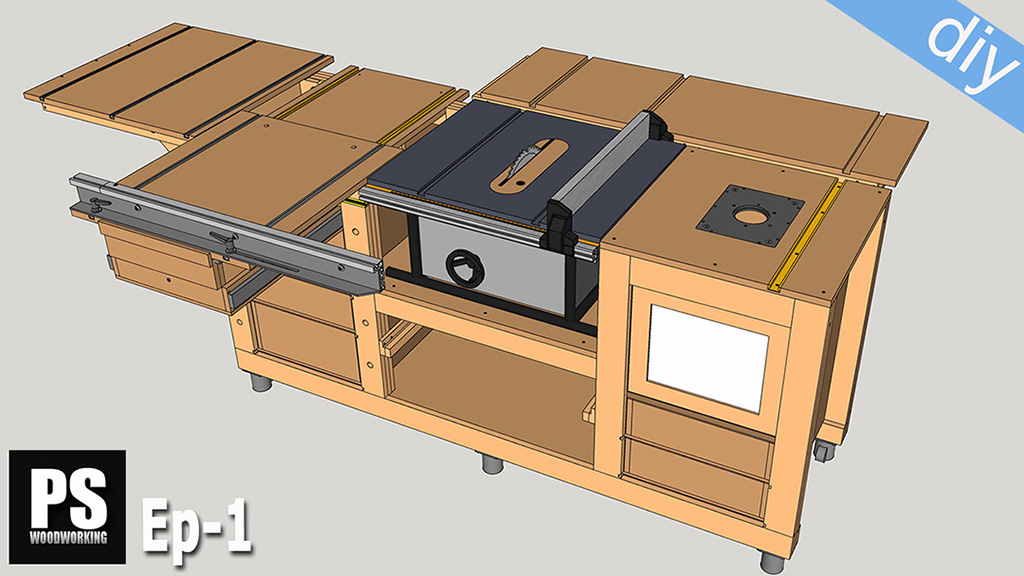
Plans for a Woodworking Workbench with Table Saw and Router Table
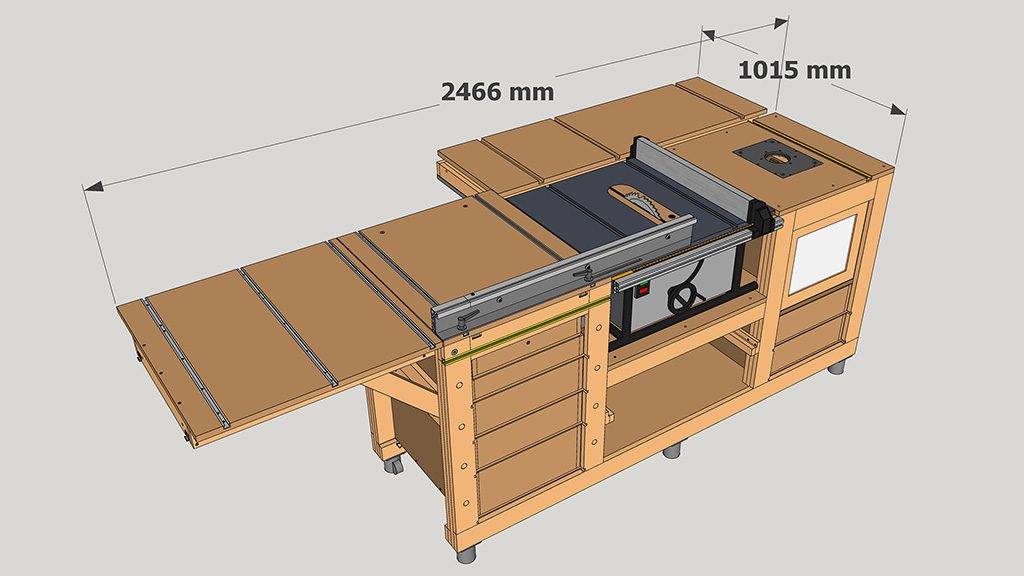
This is the 3D SketchUp file included in the plans for sale on my website. I have an article where I explain how to modify this design to use it with other bench table saws. I also explain how to use other types of boards.
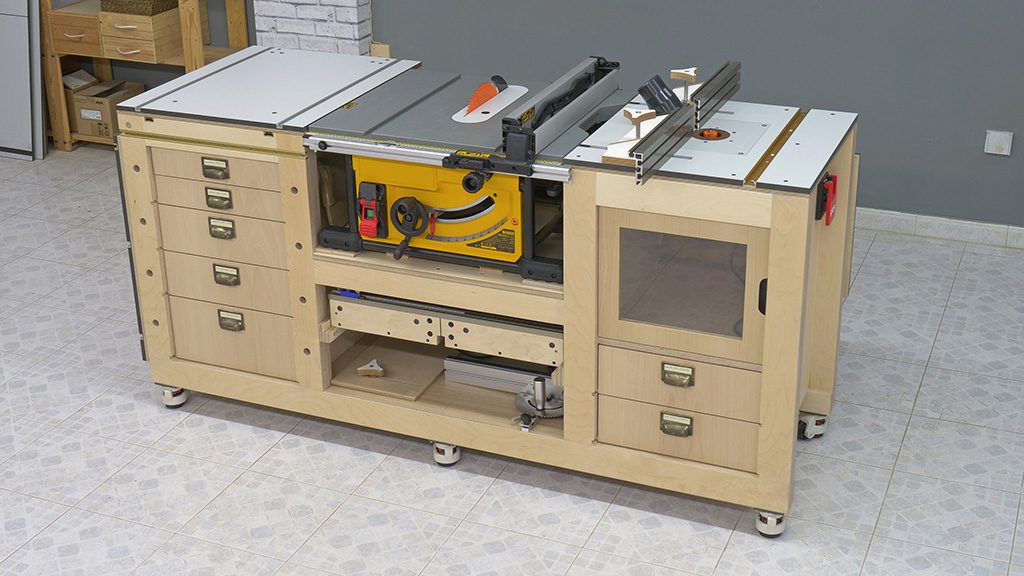
This design could even be used for an inverted circular saw or a new homemade table saw with a belt and an induction motor. As for me, I used a DeWalt DWE7492-QS bench table saw.
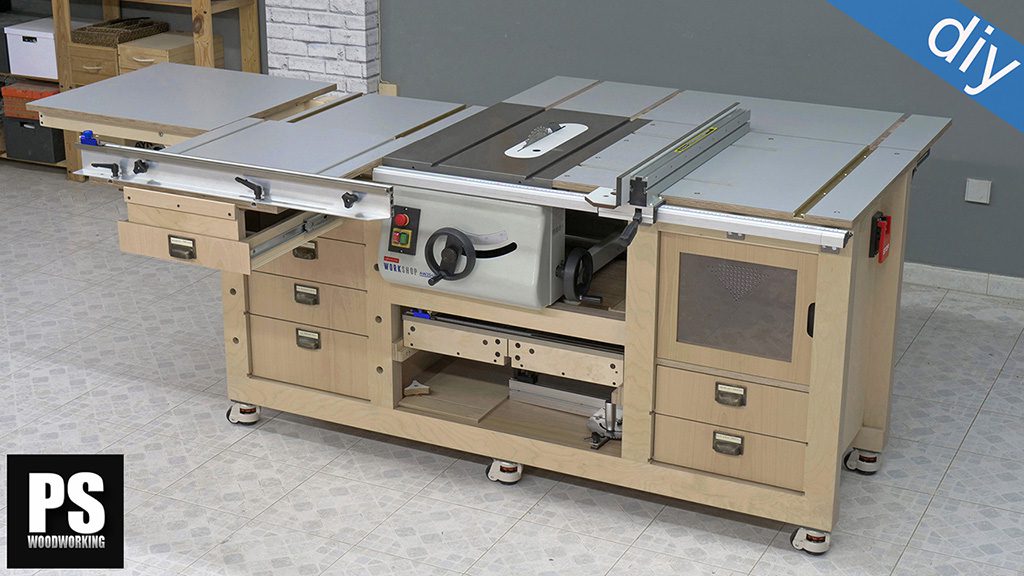
Mobile Workbench Plans
When it’s against the wall, with the side and outfeed folding tables closed, the bench is 70 cm deep and 180cm long. Its height is the standard for these worktables, around 90 cm. The design allows for relatively easy resizing of these measurements if you have some knowledge in this area. If you’re interested, there is an article on my website explaining all the necessary steps to modify it. Be careful, there are other, very similar bench table saw models but with other dimensions.
I’ve used the same construction by addition of parts method I used in my other woodworking workbenches. This means I glued plywood pieces together to achieve the required thickness, making it easier to build and requiring fewer tools. I’ve used hard birch plywood for the frames and inner cabinets, and soft poplar plywood for the drawers. Plywood will make this bench very stable and incredibly durable.
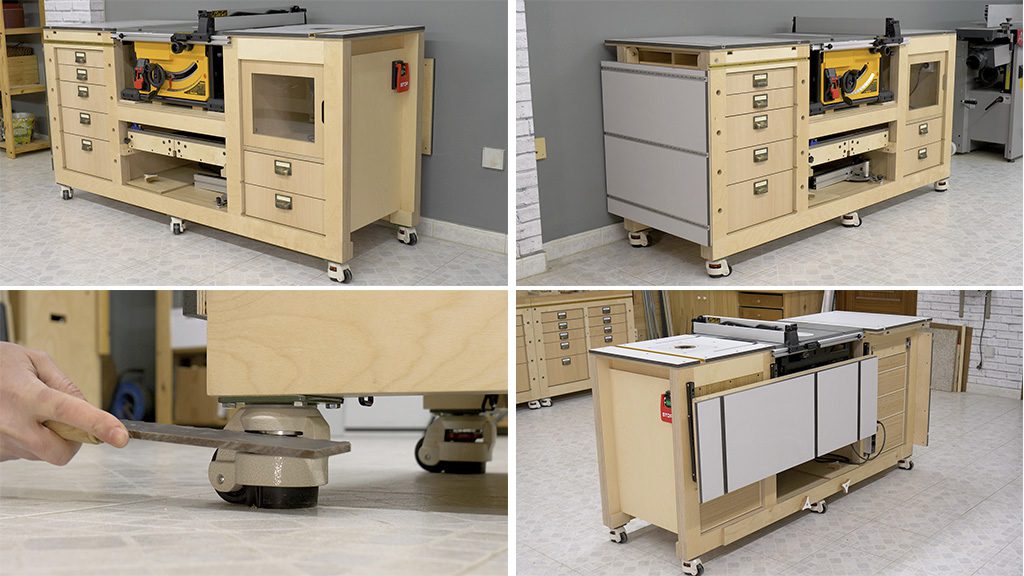
I’ve installed some retractable levelling casters, which I think are the perfect complement for this bench. They’ll let me move the bench around the workshop and lock it in place when necessary, as well as levelling it if the floor is in poor condition.
I’ve made a wrench to adjust these casters more easily. By turning a gear I can raise and lower a rubber leg to lock the caster and avoid unwanted movement while working on the bench, which can happen with other widely used wheels with a foot-operated brake.
This is what the bench looks like from the back and before opening the folding tables (fourth photo). I’ve designed the side table and sliding carriage with a little more depth than the workbench to leave them flush with the back folding table when closed.
DIY Sliding Carriage for a Bench Table Saw
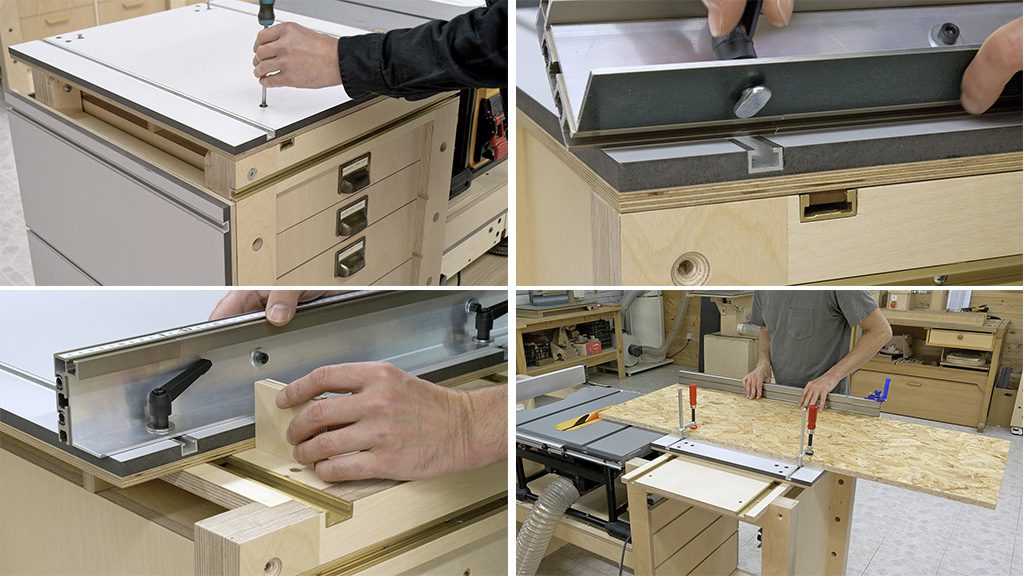
I’ve installed a sliding carriage to the left of the saw. To use it, I only have to remove the four screws that are locking it and attach this aluminum fence using the two T-track profiles. In these clips from a previous video -episode 2 in this series-, you can see it in operation.
This carriage will be perfect for cutting relatively large workpieces. It will also let me cut pieces at an angle and hold them down with clamps. The fence is extendable, allowing me to cut longer workpieces, up to 165 cm.
To cut deeper pieces, I came up with a system involving a drawer with slides installed underneath the carriage and a piece of plywood acting as a stop. With this setup I can cut workpieces up to 73 cm in depth. I’ve designed it in this way in order to not have anything jutting out from the front of the bench when I’m not using the sliding carriage.
It would have been easier to install linear bearings on some kind of support sticking out from the front of the bench, but if I were to do it that way, I don’t think this workbench would have been as comfortable to work on and would have taken up more space when storing it against a wall.
DIY Side Folding Table for a Woodworking Workbench
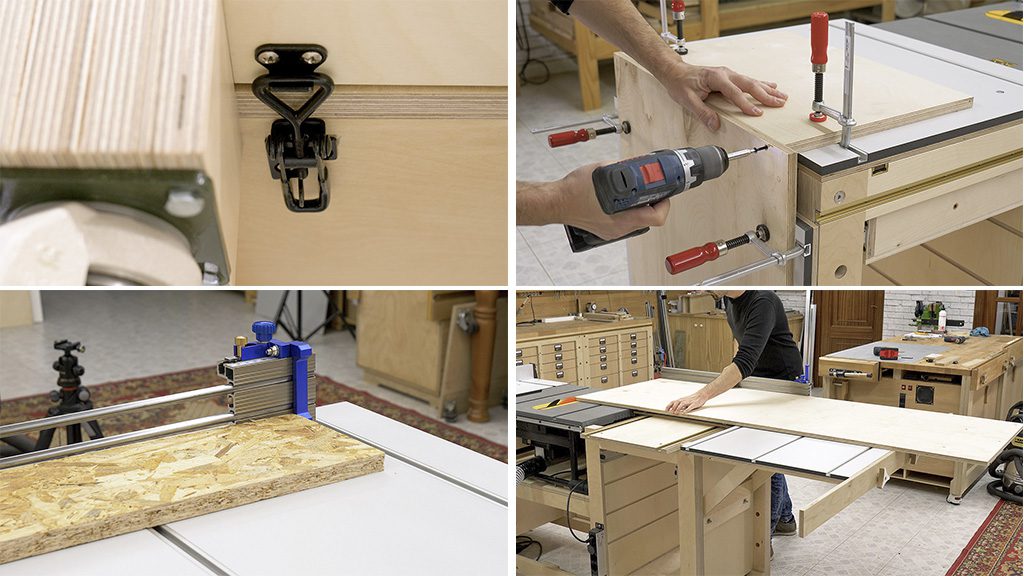
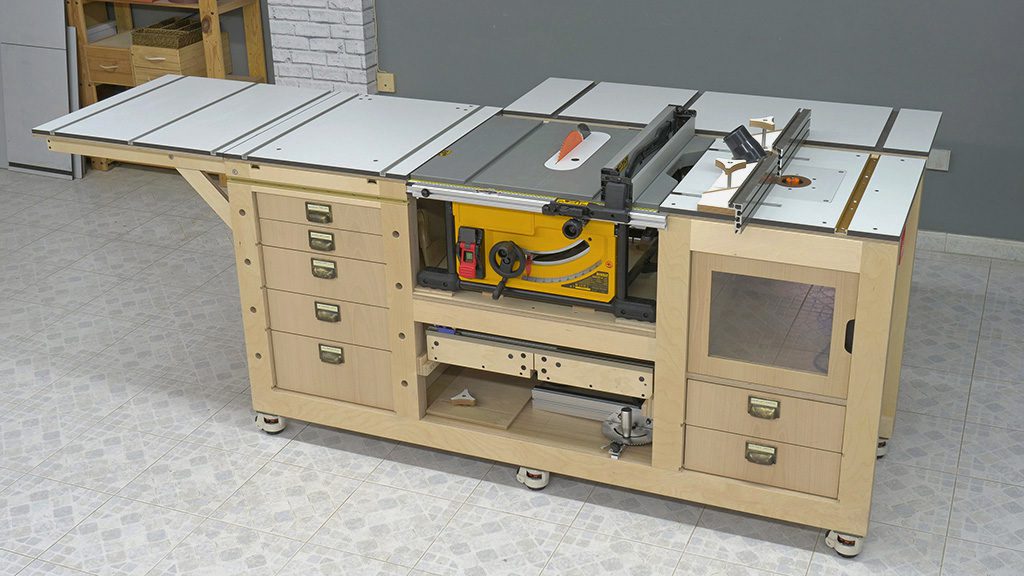
This is the DIY side folding table of the portable table saw workbench. As shown in episode 5, to open the side table, all you need to do is unlock the two box clasp clamps installed below the bench and place the stop the acts as a support for the table. This table will let me do various jobs, both when open and when closed.
Thanks to the T-track profiles, when it’s closed I can prop workpieces to make biscuit joints and other kinds of joints. Once open I can use it to expand the bench’s work surface or to cut longer pieces with the sliding carriage.
The other great advantage of using the carriage like this is that the workpieces are the same height as the entire surface of the bench, as well as the ability to use the table saw fence as a stop.
Here I can also use the DIY hold fast clamps I made for the other woodworking workbenches. Along with the clamps for the T-track profile, they will allow me to hold down workpieces on the front of the bench in several kinds of jobs.
DIY Outfeed Folding Table for a Bench Table Saw
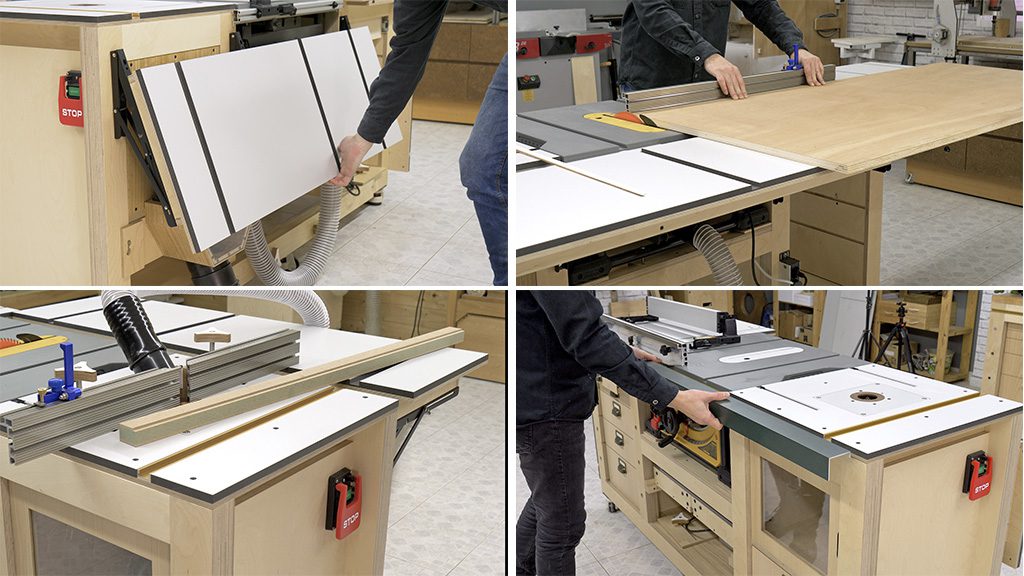
In episode 6 of this series of videos, I showed you how to make and use the DIY outfeed folding table in the back. I used folding shelf brackets; the kind used to make these kinds of tables. I think they’re the perfect fitting for what I was looking for in this folding table – a table that can be opened and closed in a fast and easy way, which is also sturdy and can hold the weight of the workpieces on the outfeed. This table will also let me increase the work surface of the router table.
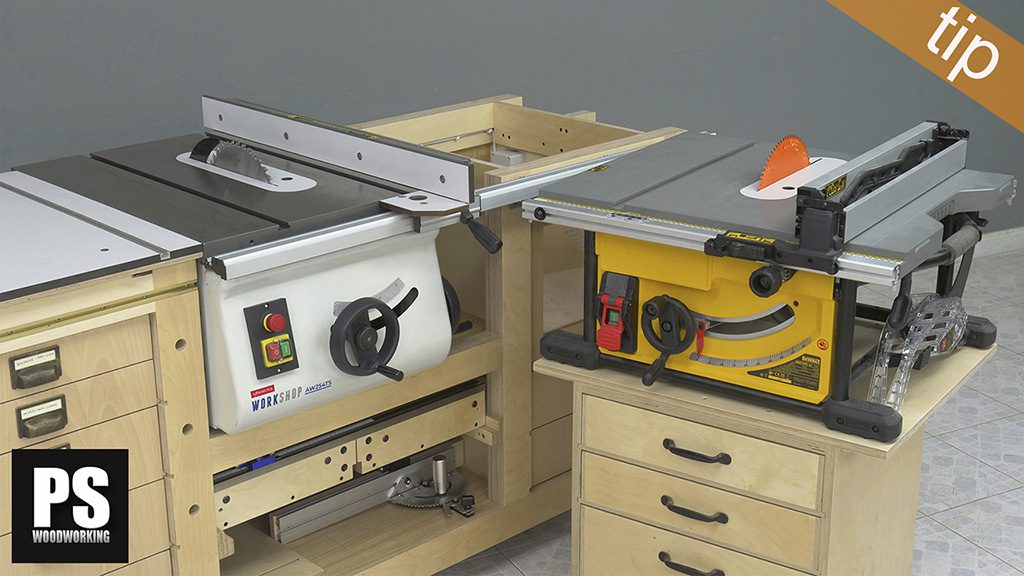
In order to remove the saw fence, I have to close the outfeed folding table, which I’m not too satisfied with. As I said in a previous video, I’m planning on making a new fence to use with this mobile workbench – more robust, more precise and with a larger support surface on the infeed and outfeed than the fence that came with this bench table saw. I’ve thought of screwing an aluminum profile to the three legs in the front of the bench onto which I can lock the new fence.
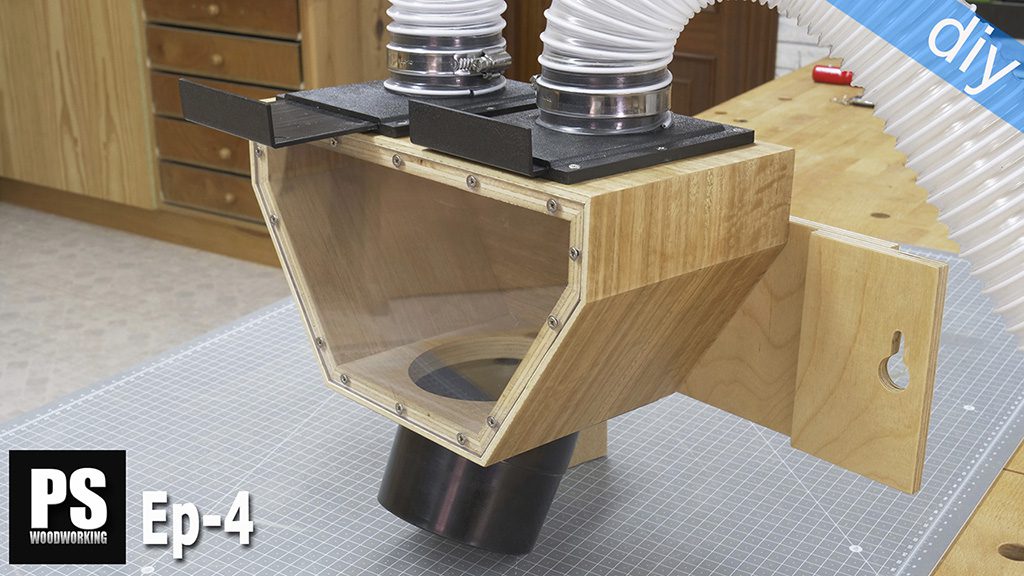
DIY Blast Gate Box for a Table Saw Station
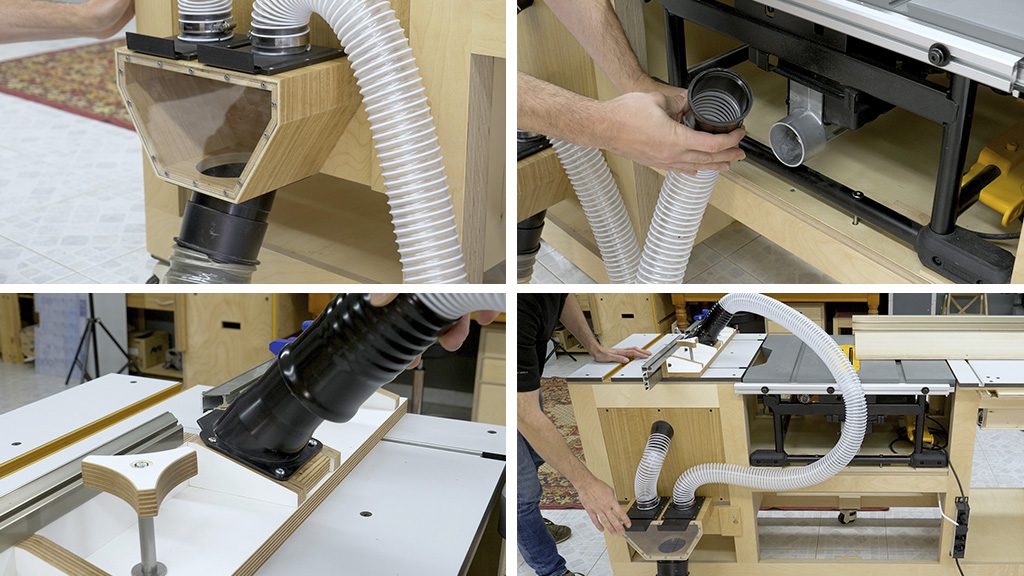
Now I’ll show you the DIY blast gate box I made for use with this saw station. It has a 100mm outlet to connect the main hose in the lower part, and two secondary 63mm hoses with blast gates, one of which is fitted with a hose cuff to connect it to the table saw, and another that goes straight into the router table cabinet.
In order to attach it, I have to lift the outfeed folding table. I’ve designed it like this so that I can attach it to the workbench when I want to use it, and then remove it so that the workbench takes up less space when stored against a wall. The table saw hose can be connected to the router table fence when necessary.
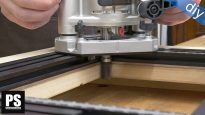
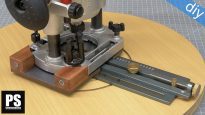
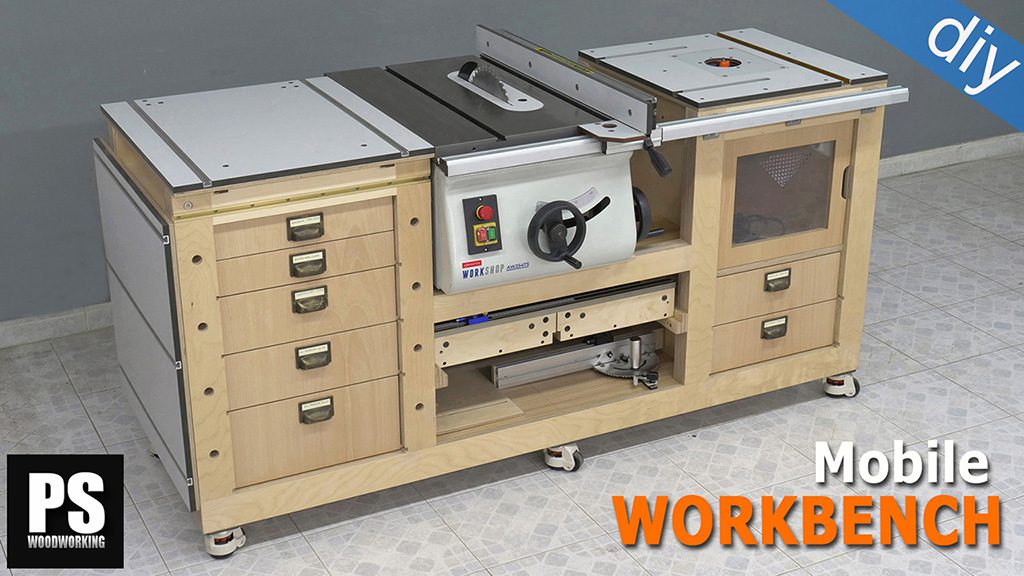
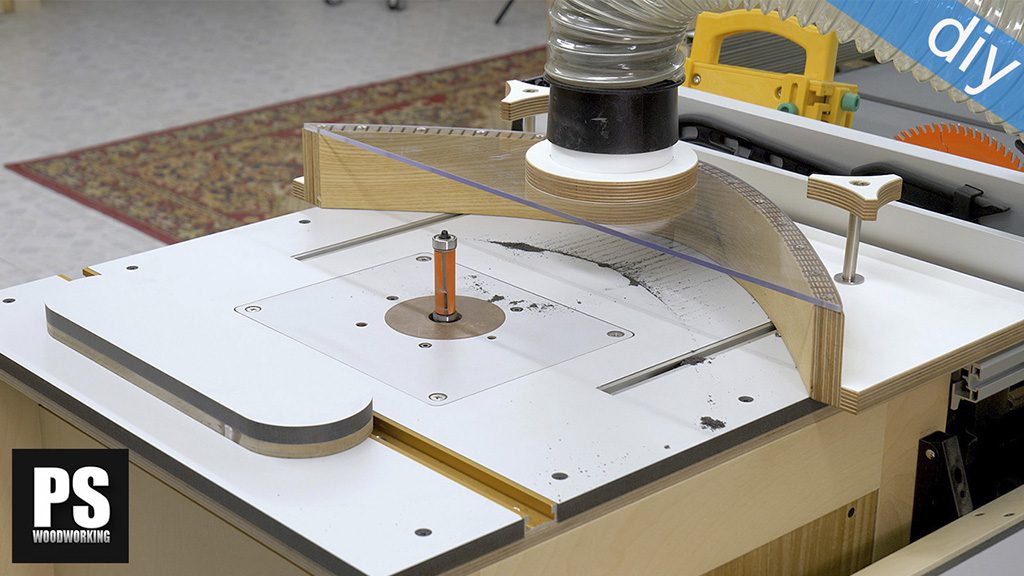
DIY Router Table for a Table Saw Workbench
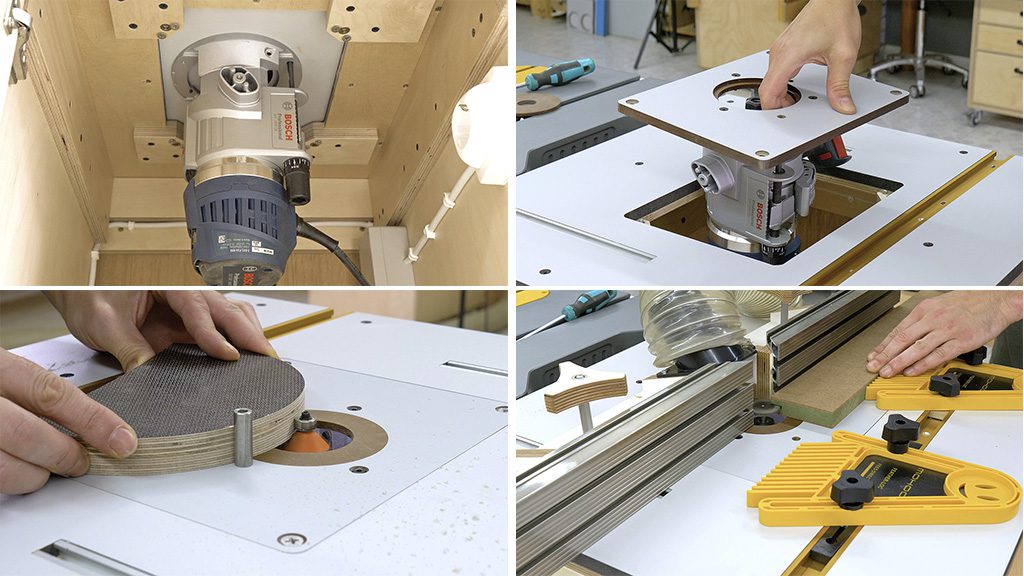
I’ve installed the DIY router table on the right side of the saw. The router is inside a cabinet with a door. This way I’ve manage to reduce the noise it makes while in operation. I’ve installed a switch with an emergency stop to activate it. In order to hold and lift the router, I’ve used a fixed router base which came screwed to an insert plate, but I’m planning on making a new and improved router lift.
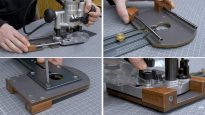
With this router table and its fence, I can make all kinds of milling jobs. In these photos from episode number 3 of this series, you can see some of the tests I made to show off how it works, with the fence, the miter gauge or the featherboards. I can use the bench table saw fence to accurately adjust the router table fence.
Drawers and Accessories for a Portable Woodworking Workbench
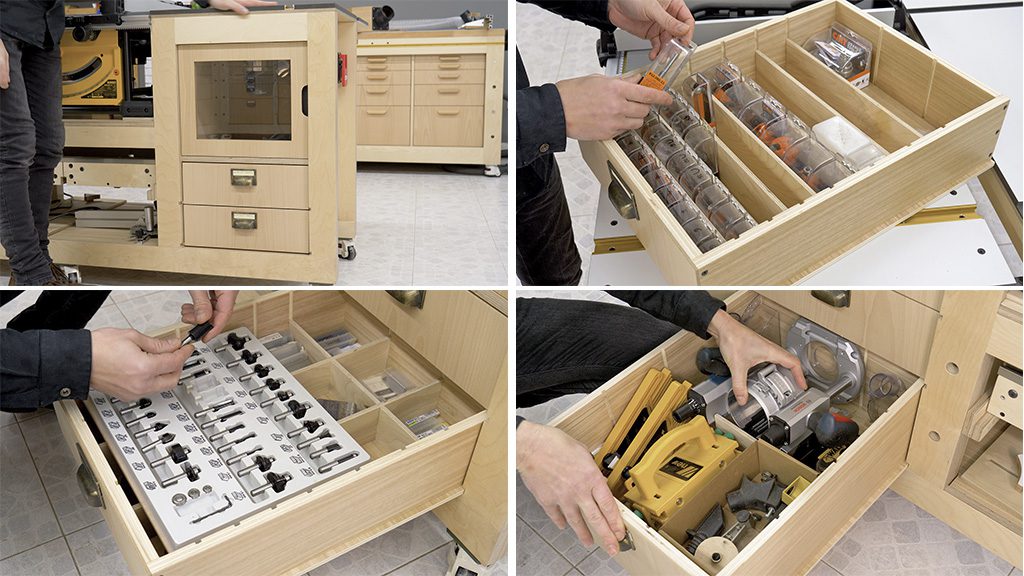
Under the router I installed a couple of drawers that slide on some grooves I made on the sides of the cabinet. This way I’ll be able to keep my router bits and accessories handy all the time. The advantage of making drawers like this without slides is that I can remove them from the workbench and carry the bits around the workshop, besides saving weight and money by not buying the slides.
Logically, they don’t open as smoothly as if I had used drawer slides, but it’s a matter of priorities. It’s easy to install some slides if you prefer; you’ll only have to subtract the thickness of the slides to the drawers. I’ve sorted the bits by diameter to locate them more easi-ly, and I’ve put them in small individual boxes to avoid damaging them if I ever want to take them with me to work outside the shop. In the bottom drawer, I’ve put some router accessories and a set of bits.
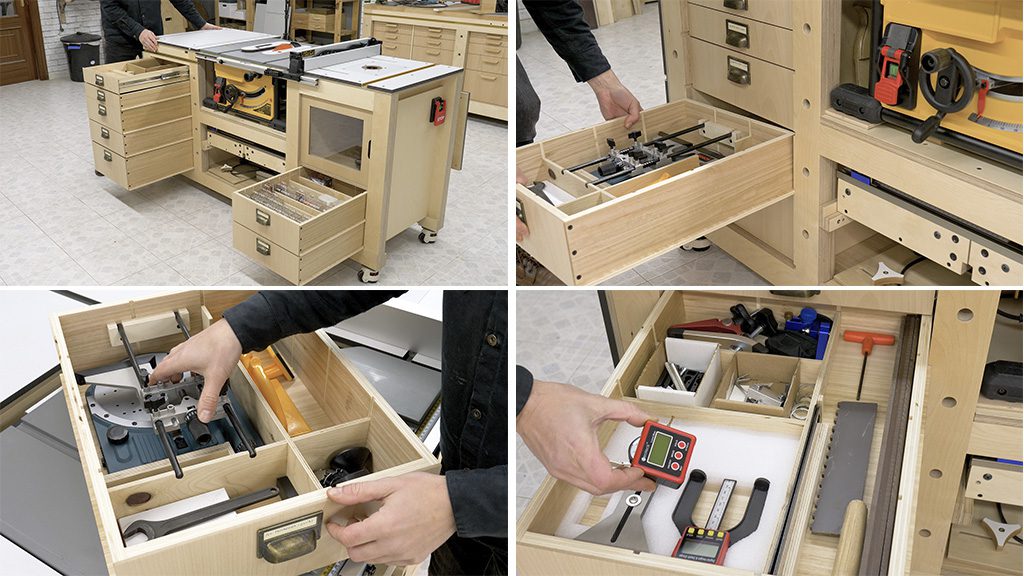
This bench’s drawers will be great to keep all my most frequently used table saw accessories handy. In the bottom left, I’ve put the router plunge base, the featherboards and the push sticks to use with the table saw or the router table.
In the next drawer I’ve put other router table accessories. And in the top drawer, I’ve put measuring tools such as the dial indicator to set up the table saw or the digital angle finder.
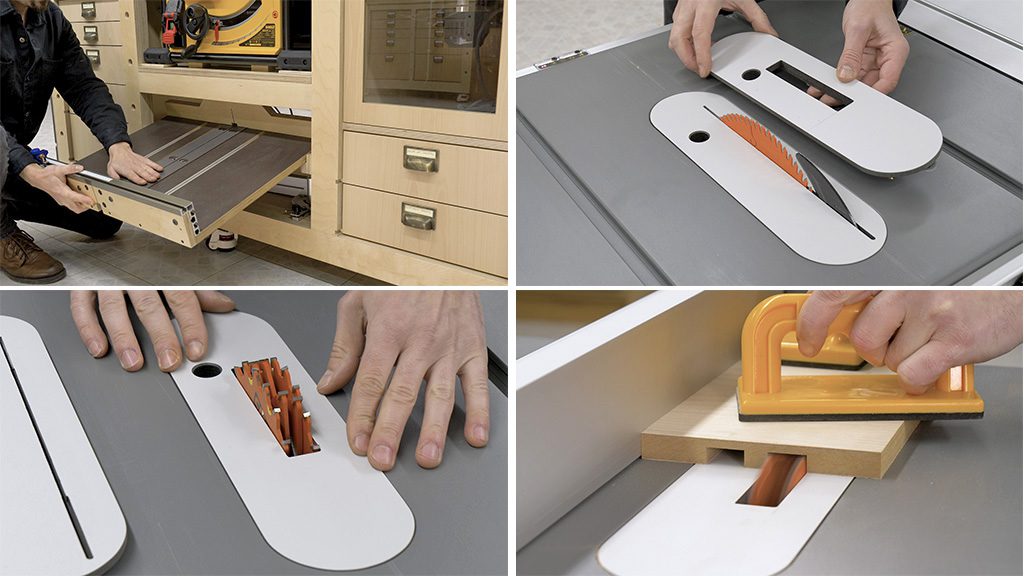
In the gap underneath the bench table saw I can save more accessories such as the miter gauge and, of course, the DIY table saw sled. This sled will allow me to do almost all kinds of cuts. I’ve designed it with a zero clearance so that I can use it with almost all blade types and sizes.
I’ve also made some new zero clearances for the bench table saw which will let me achieve more precise cuts without the typical splintering on the outfeed. The zero clearance that came with it was unreliable and I couldn’t adjust it properly.
I’ve used the same plywood board that I made the benchtops with, it’s a kind of MDF that’s harder and more compact. In the pictures above you can see me doing some tests, showing off how to use a zero clearance with a dado blade.
I think this is one of the few table saws that come with an arbor that can be used with dado blades in Europe. If you’re interested to know more about these kinds of blades and the regulations governing their use in this article you will find more information.
What material do you use for the top?
Thinking of getting the plans, want to make sure material is available in my area or where i need to get.
hi Charles, check this out:
Hey Suso, amazing bench design! In one of your videos you mentioned an improvement to the table saw fence, have you managed to work that out yet? If so are the designs available yet?
Hi Suso, I have downloaded your plans for the mobile workbench and it is progressing nicely. One issue is that I lose the extendable portion of the table on the right hand side of the blade to allow for extended fence position.
You mentioned above about making a new fence (my existing table saw fence is rubbish) which would extend across front of router table? Have you designed this yet and do you have the plans?
Thanks
hi Simon, I haven’t designed the new fence, so sorry. You have several options, one is to buy the same aluminum profiles that your saw mounts and screw them to the front and back of the workbench, as this user did:
Another is to make a new fence, like this user did.
The last option is to buy a new fence and profile, like this other user did. They are for sale although I think they are a bit expensive.
Bravo pour la qualité de vos vidéos Cependant les dimensions sont en partie fonction de votre scie sur table. j’envisage acheté vos plans de fabrication de l’établi mais je souhaiterais connaitre les référence de votre scie sur table
Merci d’avance de votre réponse
Gilles RENARD