Hi, in this video-article I’d like to show you some useful tips to make presentations with SketchUp and Layout, and how to print large drawings on multiple A4 pages. Some of the tools I am using including the layout application itself are only available in the Pro version of SketchUp.
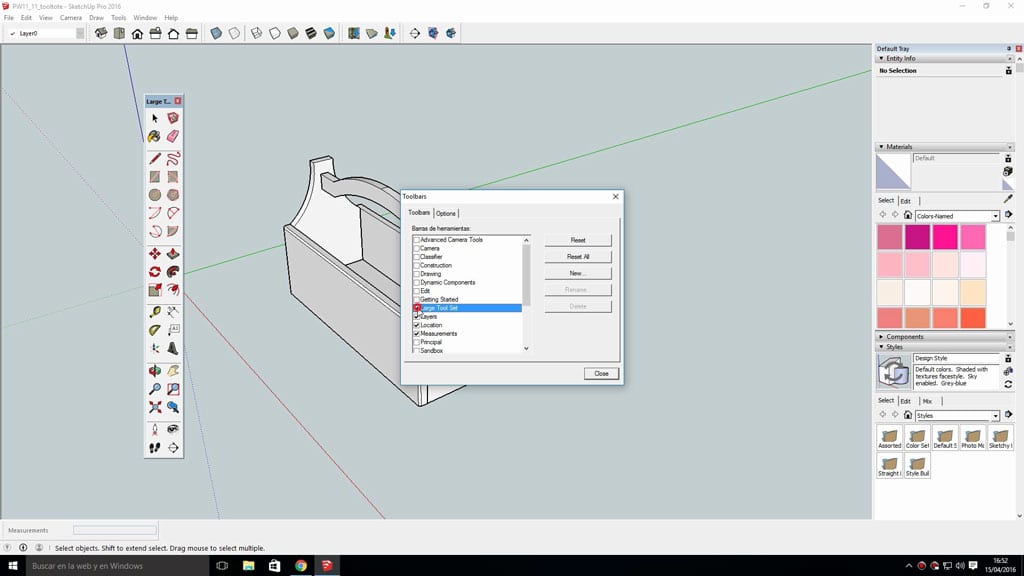
To do this I’ll open this 3D model that I downloaded from the warehouse and I’ll start displaying a tool bar with the most commonly used tools. for this, go to View / Tool-bars and select “Large Tool Set”, and place it to your liking.

Now I will prepare the model for making some presentations, first I will select the edge Style for a better visual aspect, we go again to “View / Edge Style”, and mark the “Only Edge” option, I am going to soften a bit the edges too using the “Soften Edges tool”.
The next step is to color it using the “Paint Tool”. Now I’ll duplicate the model with the “Move Tool” pressing “Control” while I move it, will show us now guidelines to help us keeping the component in the desired axis. What I want to do is to extrude one of the copies and draw some dimensions on it.

Select the top view and parallel perspective to make easy the work and the understanding of the steps to perform. Again with the “Move Tool”, displace 50mm all the parts. Once they are selected you can enter the distance with the keyboard and press enter to get the desired position.
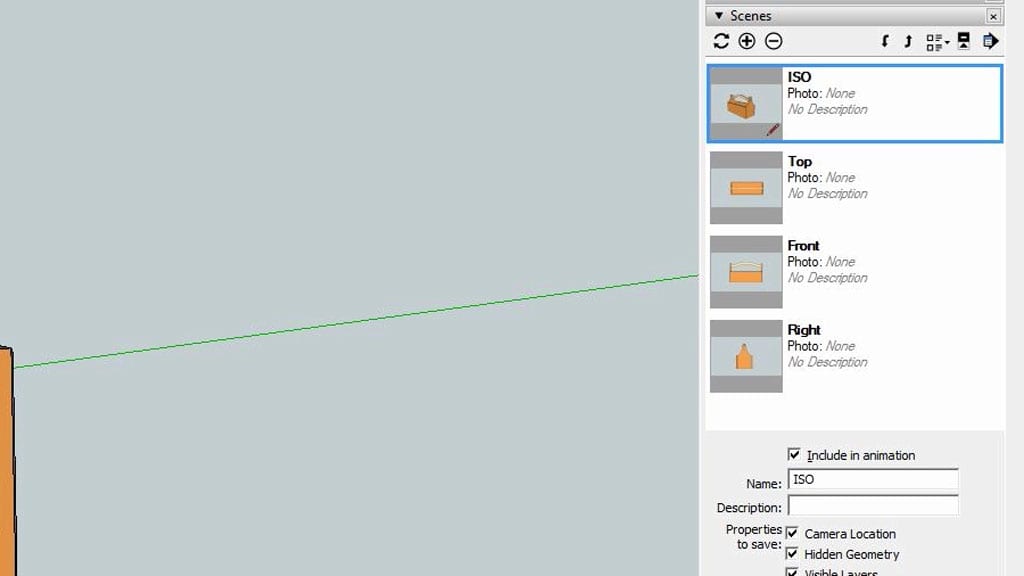
Now I can start to create scenes, first the “ISO view”. Then select the parallel projection and make scenes for each view.
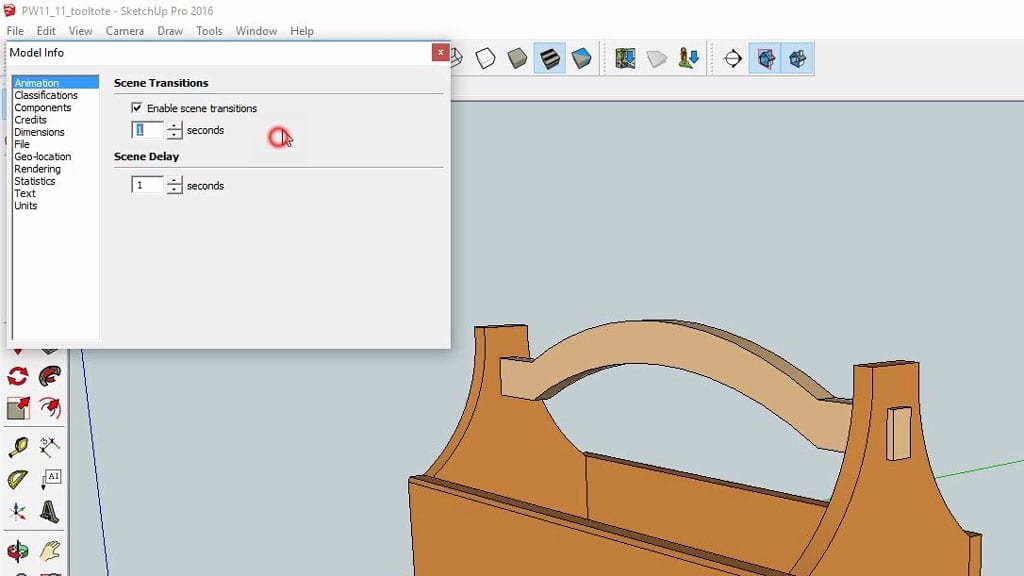
I am gonna change the scene transitions to make them faster. 1 second is OK for me.
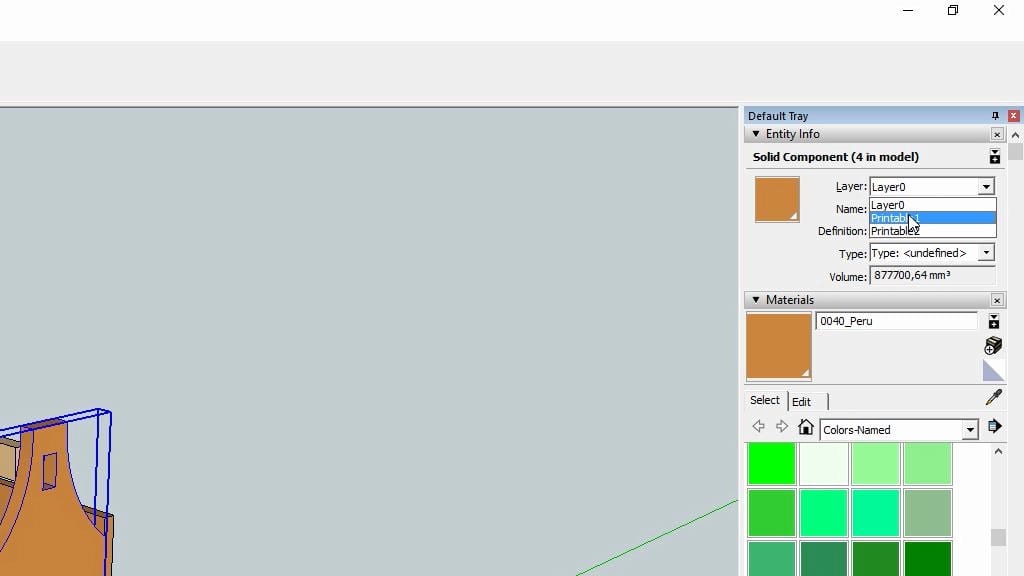
In the Exploded copy, I am gonna change the layer of every part in order to make printed templates. Select the component, then right-click and “Model Info”. Hide parts we you need, select the desired view and create more scenes to your liking.
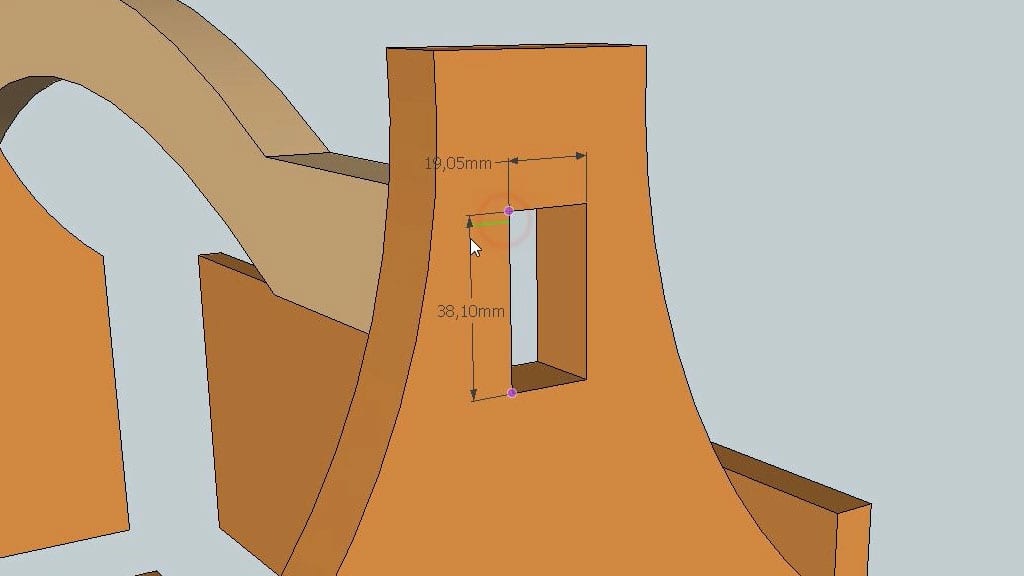
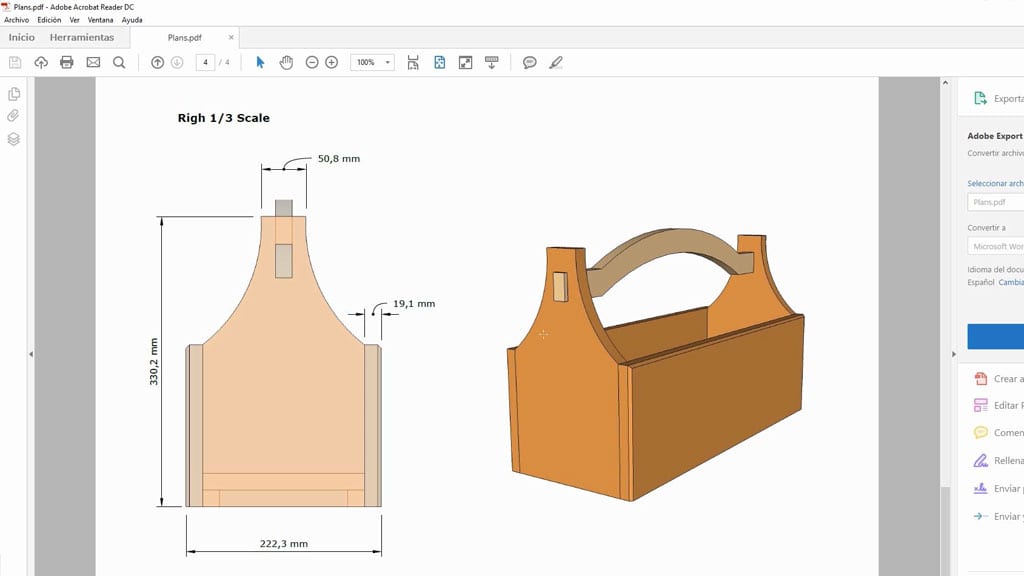
I will also create 3D model exploded scenes for a better understanding of the drawings. Create a new layer for dimensions and then select the “Dimension” tool. You can do this in Layout too, I’ll show you later how to.
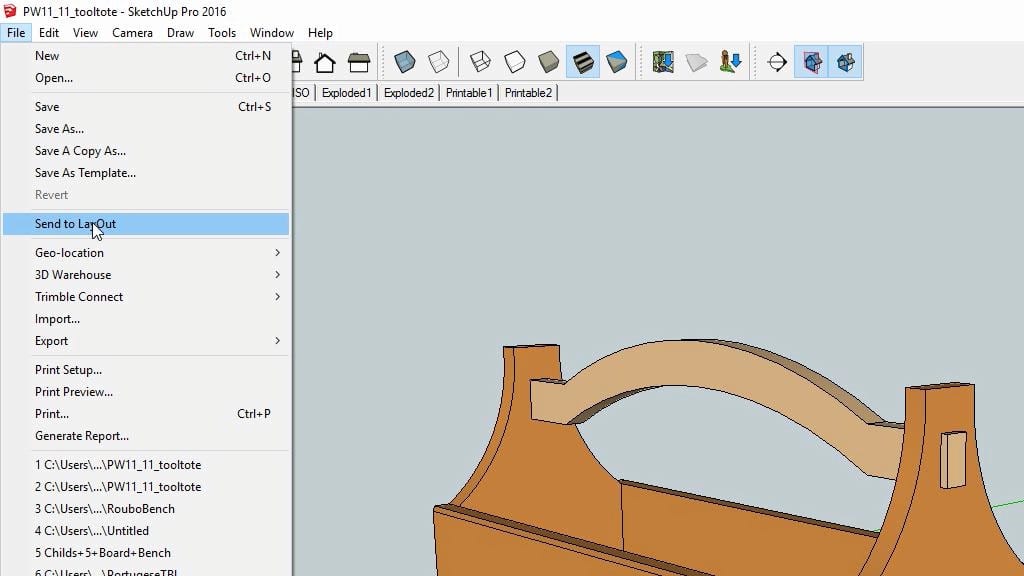
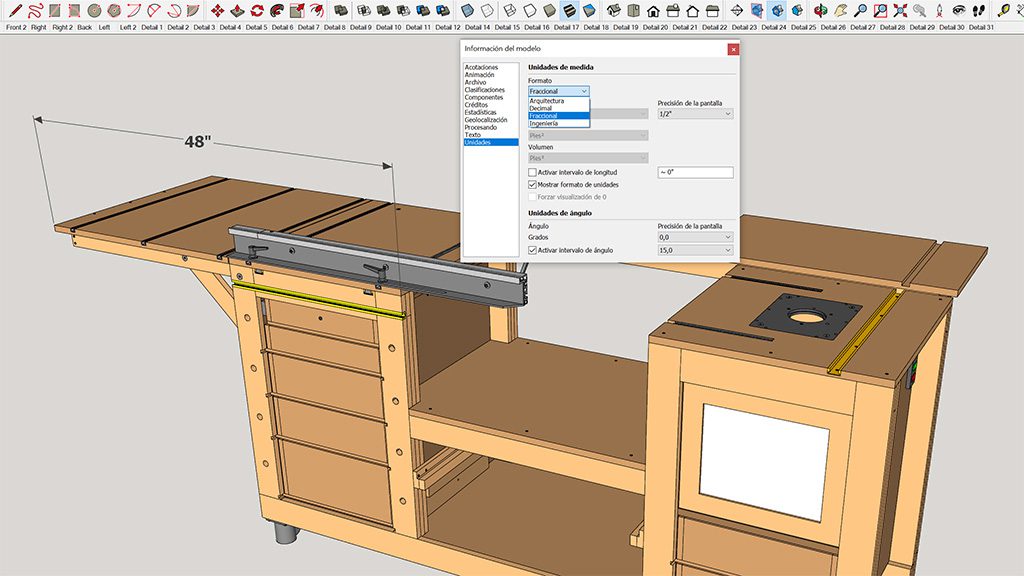
Save now the project and click on “File / Send to Layout”, which will open the second application I want to talk about. Select the paper size, I am gonna use now an A4.

I will remove the background going to “SketchUp Model / Styles / Background”. Adapt the viewport to the paper size, as you can see, by double-clicking here you can enter to the 3D model to change the view. Select the Text tool for naming it.
With these buttons you can add new pages and move through them. I’ll duplicate the first one using “Control C” and then “Control V”. Then right-click and select the next scene we’ve created before in SketchUp.
As you can see, if I do not select a scale, the model moves with the viewport. So I’ll select a valid scale for this A4. Edit the name and style, I like to use the X Ray.
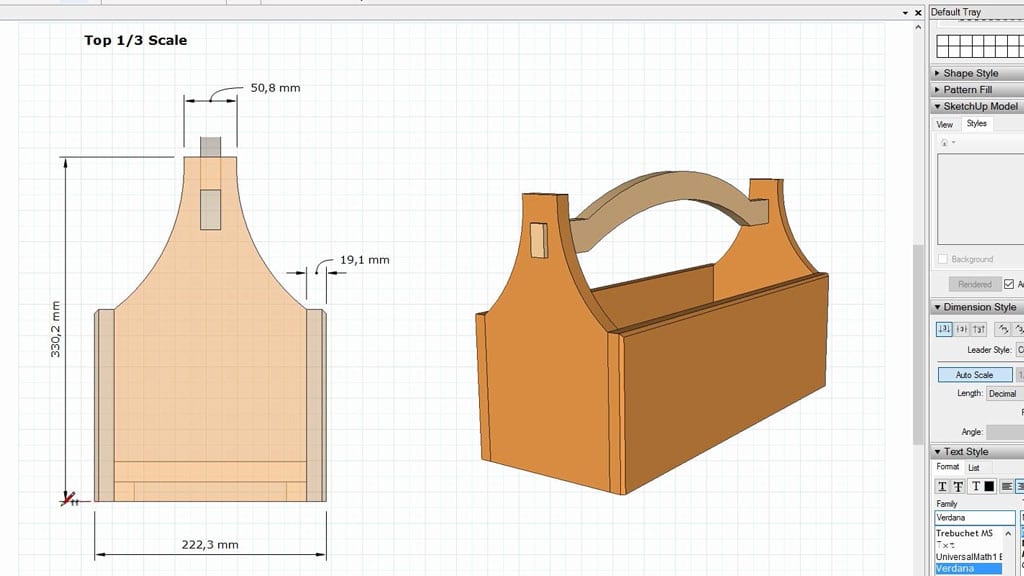
I am gonna draw now some dimensions for the views, we can choose mm or meters. They are so easy to do with Layout too. Repeat this process for all the views. We can also insert multiple windows with details on the same page.

Save the file, go to “File / Export”, and we can export to Image, DXF or as in my case, PDF. Select the quality, here we can also choose to export all pages or individual.
And this is how the file looks.
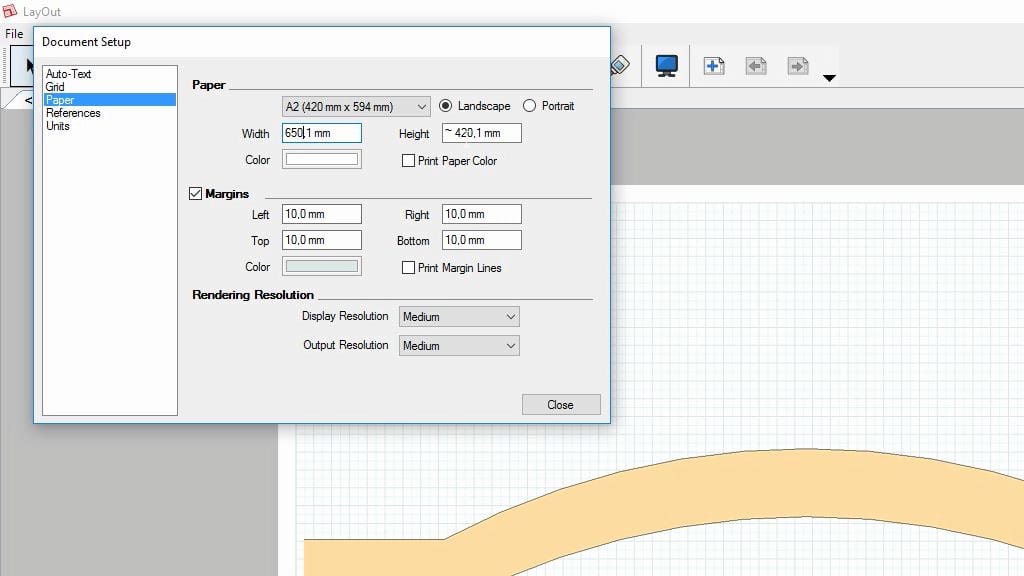
Go back to Sketchup and click “Send To Layout” again to generate the Printable Templates, as it will be a different size of paper I’ll need a new file. Select the scene you made before, place it and rotate it. As it is bigger than an A3 go to “File / Document Setup / Paper” where I can choose a custom paper, I am gonna make mine bigger in one direction.
Copy the viewport, select other view. Go back to “Document Setup” and select “Print Document Grid”. The grid won’t print if it is not checked. Here we can also select the color or spacing of the grid.
Move it towards one of the lines so once printed, it can be cut. It is easier if we set the Snap off. Going to “Arrange / Grid Snap / Off”

Name it and draw the dimensions. We can also write notes with the Label tool, and if we hold down after select we can create curved lines.
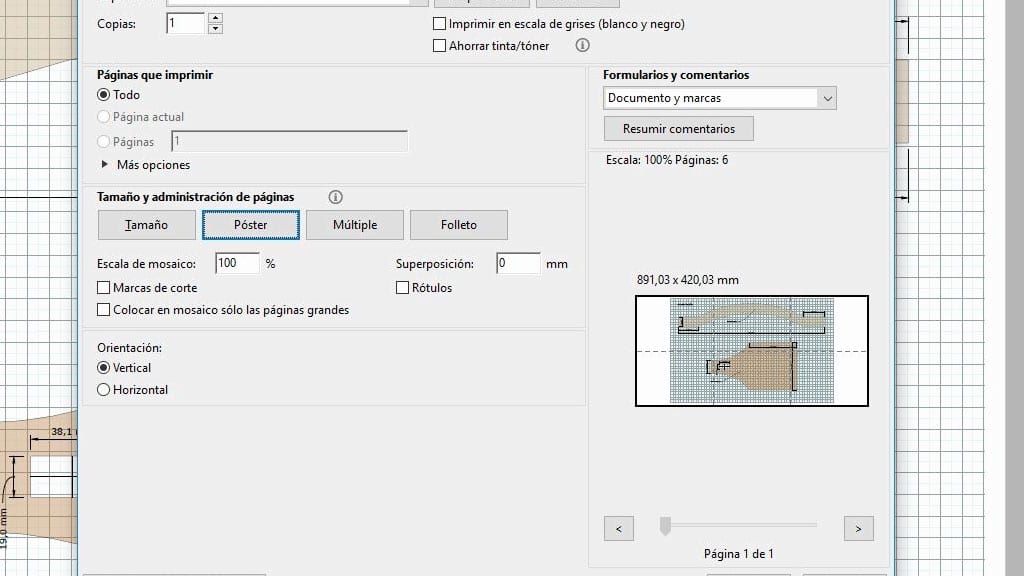
Export and check the if the PDF is ok, to print it on several A4 is very simple: choose your printer, click on Poster and make sure the scale is as 100%. Here we can see the layout of the pages, when printed we’ll only have to put them together by matching the grid.
Last I’ll show you another great advantage of this method. Any change you make in the model will update the Layout file, when you save the document. So you only have to generate again the pdf files and there’s no need to repeat the complete process from the beginning.
Actually there’re multiple ways to perform these tasks, after trying a few I ended up using this method, which for me, is the best and faster. But any other one can be as good if the result is the same and it doesn’t take much time.


Hi Suso, thank’s very much for this informative video! I’ve been wanting to use the Layout application but hadn’t started it yet because there’s so many options. But I will now!
Keep up the good work!
thanks mate!
Thank you so much for this interesting video… At 8:39 you are showing us exactly (what I was looking for) how to print over multiple pages. But; I my case pdf is printed as 1 very large page (2m by 2m)… it doesn’t break it down in A4 pages…What am I doing wrong… (Working on a Mac)
hello Bert, have you selected the “poster” option?
Thank you!!! I coudn’t figure out even how to move the project in LayOut (it was just double click!) and you guided through everything, including scales and scenes.