1- DIY Band Saw Demonstration:
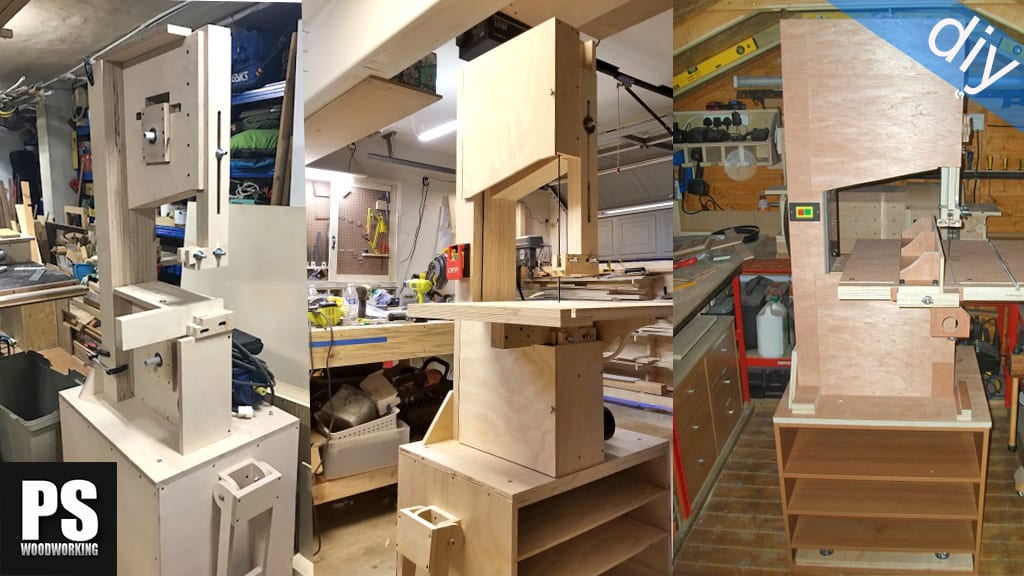
In this demonstration video-article I’d like to show you in detail the main features of the band saw I finished a few days back. I’ll also try to explain how to adjust it to achieve perfect cuts.
It’s made entirely of birch plywood, so after cutting all the parts to size, the only thing we have to do is to assemble it after machining the parts and making some rebates. We could use cheaper, lighter plywood or even MDF.
Using plywood has many advantages. We’ll need fewer tools than when using solid wood, work time is reduced, and replacing damaged parts (eg.: bearings) is quite easy. Another interesting feature of this design is the closed compartment for the belt and the pulleys. This will protect them from sawdust when we’re working.
I glued the calibrated rod directly to the wheels using a template and attached the bearings onto small pieces of plywood which are, in turn, screwed to the band saw’s body. This makes not only inserting the bearings easier, but also turning. Calibrating and balancing our wheels is also made easier thanks to this.

This is the 3D model of SketchUp included in the plans that you will find on my website. If you are interested in collaborating with my web or building your own bandsaw, here you can download them.
Weight approx: 55kg.
Dimensions: 1730mm high, 920mm width and 650mm depth.
Max Cut: 230mm high and 340mm throat depth.
Blade: 2490mm length and from 4 to 20mm width
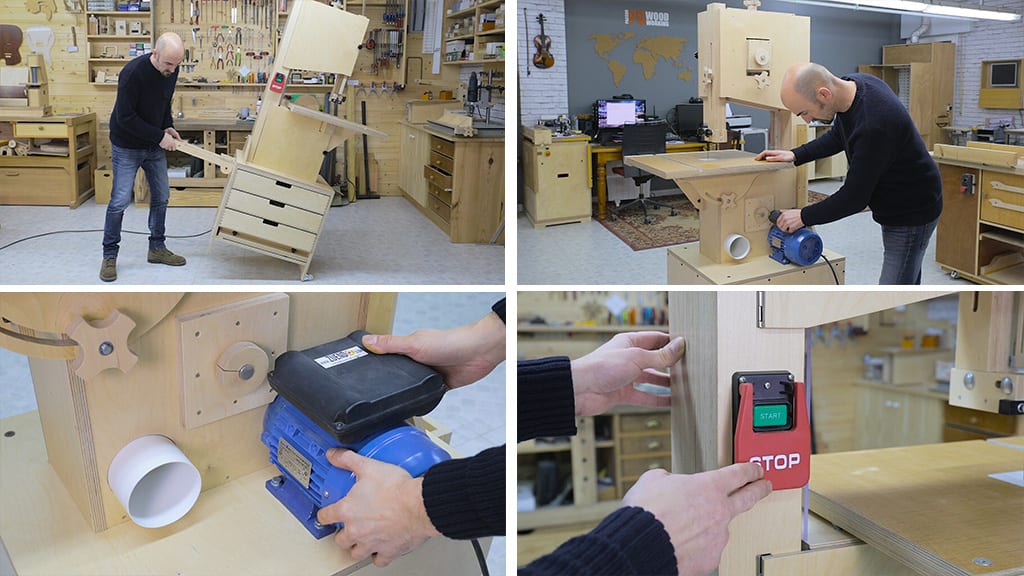
The plans of my web also include this stand with two wheels and a handle. I’ve come up with this system to make the saw more stable while I’m using it and so that I can move it around the shop.
If I had used only wheels, I would have to deal with being moved around constantly when cutting and pushing against the bandsaw, even with blockable wheels.
I’ve equipped it with a 1 horsepower, 1500 rpm motor, and lowered the revolutions to 1000 with pulleys. Since these wheels are 355mm in diameter I can get a cutting speed of a little over 1000 meters/minute, more than enough for this saw. To activate the motor and turn on the saw, I’ve installed an emergency switch.
We could use a less powerful motor, as long as it has at least 0.5 horsepower. If you have a different RPM motor, here you can work out the pulleys you’ll need to achieve the same cutting speed.
It is important to use a soft starter motor, the band saw should start slowly and take inertia. Otherwise you can break the pulleys or the screw pin that holds them to the shaft.
I’ve cut a slot in the cover that will make it possible to lift the top wheel a little higher up, because I bought 98 inch blades, which are slightly longer than their metric equivalents that I had in mind when designing the bandsaw.(2490mm).
When we open the bottom door, we can see the dust collection system. It’s quite efficient due to its location and after using the saw there’s barely any sawdust left. I’ve also attached an exercise band to the wheels, reducing the amount of noise when operating the saw.
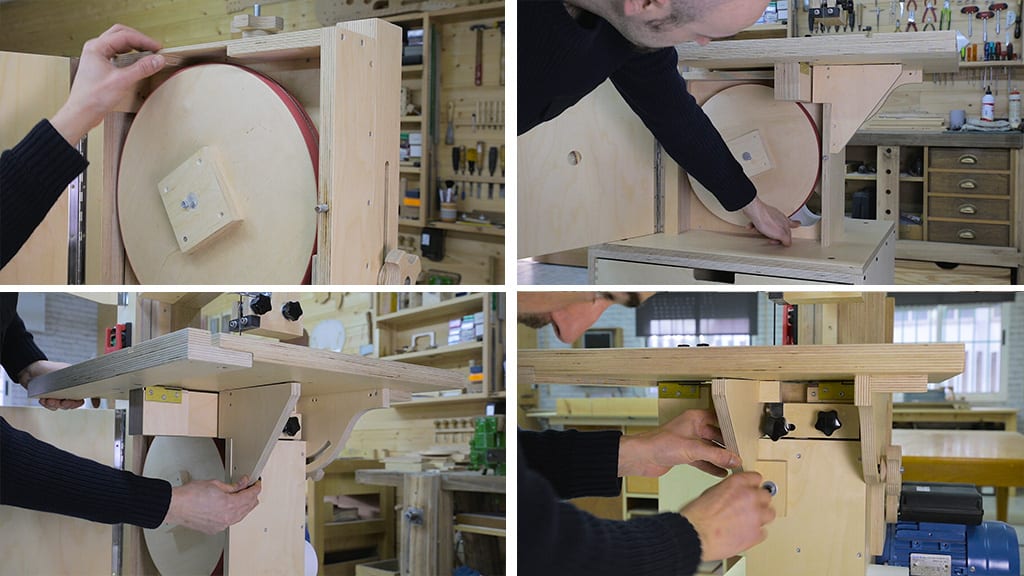
Finally, I’ve added this part which serves two purposes: reinforcing the work table and covering the blade on the lower part of the table for safety reasons. The table I’ve designed is larger than usual because I like having extra room when working. However, due to that, when applying pressure on it, it moved a little on the right.
Now it’s a lot more stable. You can see how easy the part is to remove whenever we have to change the blade or tilt the table.

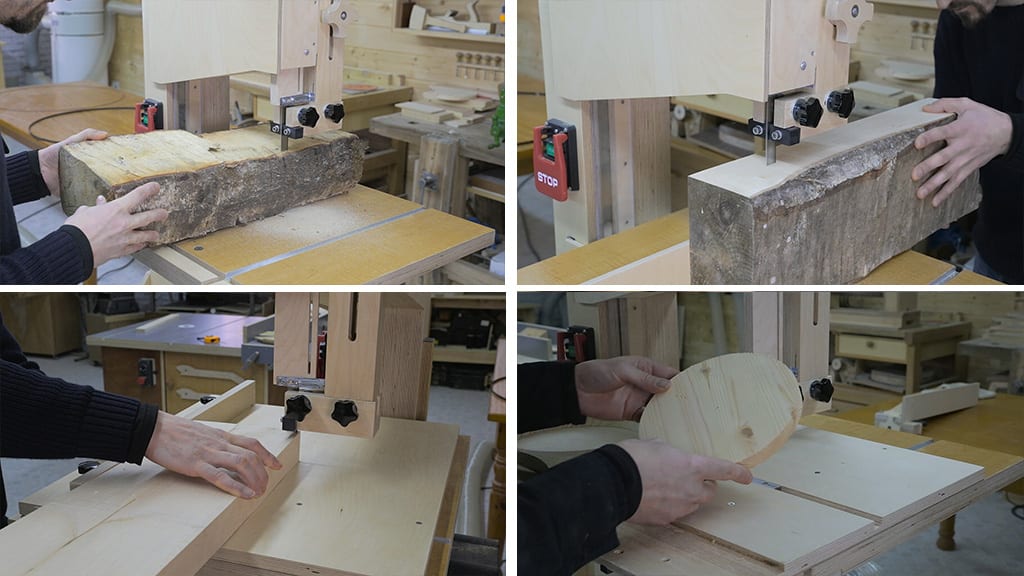
In order to tilt the table we must also remove the zero clearance. Turn the adjust knob and choose an angle. Because I placed this knob here, I can’t tilt it to 45 degrees, but I only have to cut a small recess on the underside of the table in order to solve that(third photo).
On the other side I put in this screw to adjust the table so that it’s always perpendicular to the blade.(fourth photo).

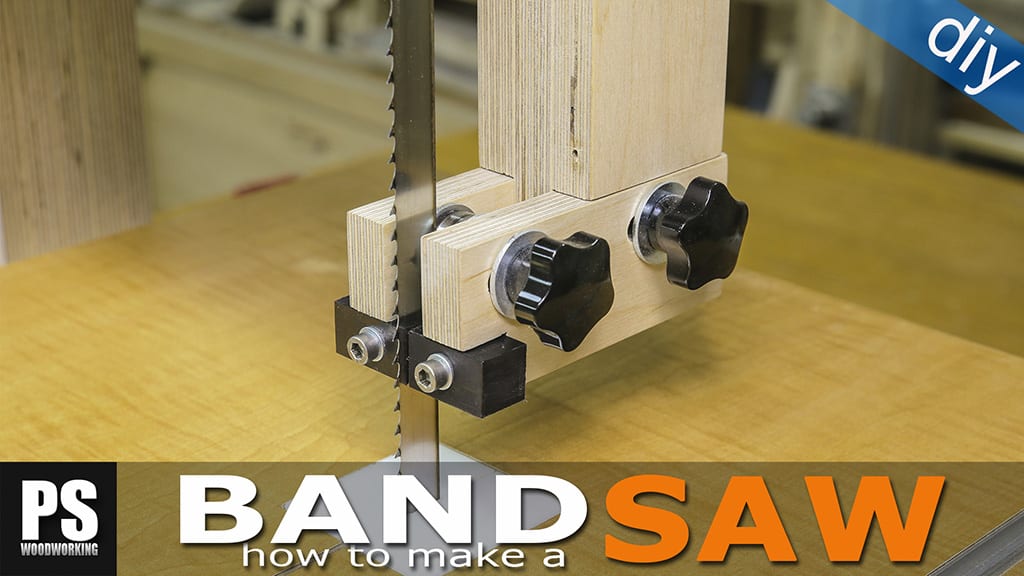
By raising the guide post all the way up, I can get a maximum cut height of 230mm, which can be easily increased by lengthening the parts that make up the frame of the saw. Before raising and lowering the post, the saw must be shut down to avoid potential accidents when touching the blade.
I’ve thought about redesigning the blade guard to cover the blade on the left side as well, but this would make the process of changing the blade too cumbersome.
2- Setting the band saw blade tension:
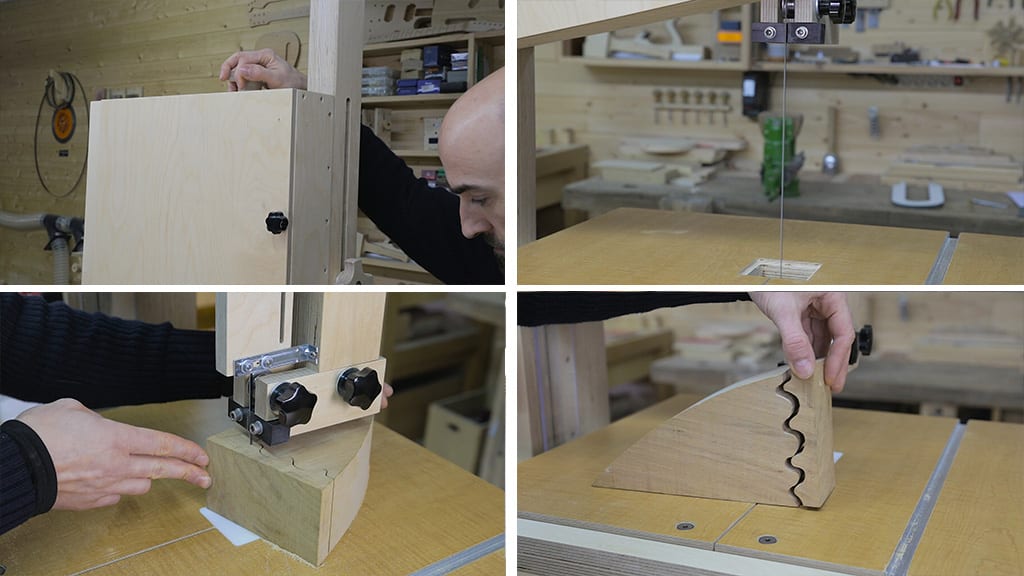
Now’s a good time to explain how to set blade tension according to our needs. We could use a tension meter but they tend to be pricey. There’s another effective method known as “flutter.”
We set the guide post all the way up. We tension the blade slightly and turn on the motor. While the blade is running, we loosen it little by little until it starts to flutter. When that happens, we gradually tension the blade again until it stops fluttering. This means we found the right amount of tension.
This method applies to all sorts of blades. We should of course do all of this with doors closed, for safety.
The blade’s contact tension will be similar regardless of type and width. Of course, the bandsaw’s frame will be able to withstand more tension the thicker and wider the blade is because in order to obtain similar tension, we have to apply more force.
If you’re going to cut a piece of wood more than 150mm thick, you can add some extra tension to achieve a straight cut. If you don’t plan on using the saw for a while, it’s a good idea to de-tension the blade a little so that the saw’s frame won’t deform over time.
I’m going to test the one that’s installed. It’s 3mm wide, making it suitable for tight curves. I set the top guides to about 10mm above the workpiece. The blade cuts smoothly, and we can see how well it can handle curves, even on a workpiece as thick as this one.(fourth photo).
3- Band Saw Blades:
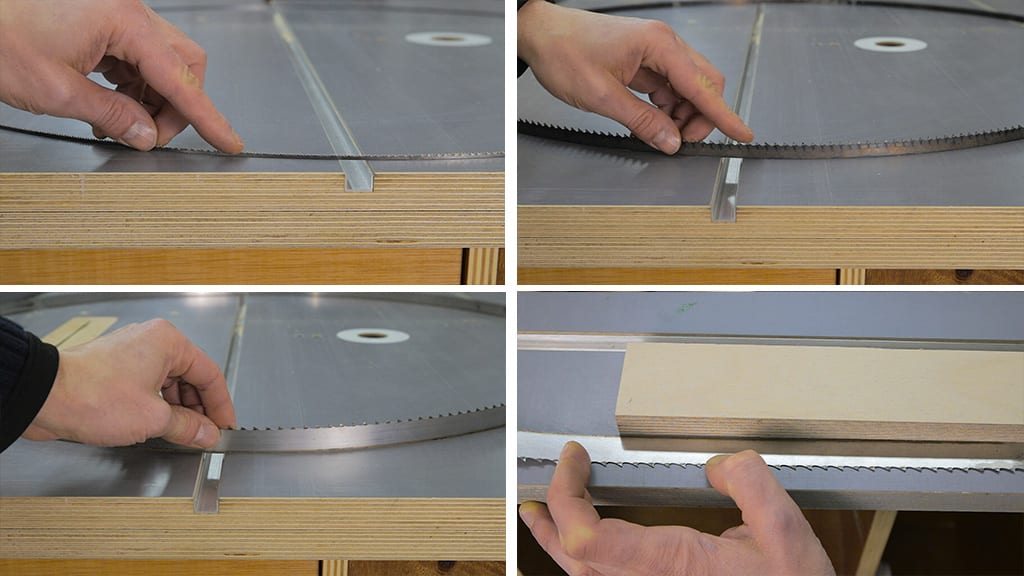
These are the three types of band saw blades I use most often, all of them 2490mm long:
This is the one I’ve just removed, which as I’ve said is 3mm wide, 0.6mm thick, with 14 teeth per inch. It’s perfect for tight corners.(first photo).
This one is medium-sized. It’s 10mm wide, 0.5mm thick, with 5 teeth per inch. It’s ideal for straight cuts on wood up to 120mm thick, and curves that are not too tight.(second photo).
This is the biggest size I use on a normal basis. It’s 20mm wide, 0.4mm thick and has 4 teeth per inch. It’s suitable for cutting wood over 120mm thick, such as big logs.(third photo).
You might have noticed that the wider the blade is, the less thick it is. This will help us obtain the appropriate tension more easily, regardless of blade size. Also, since this is a medium-sized bandsaw with wheels, if the blade were too thick it could break after continued use, since thicker blades are meant for bigger wheels.
Incidentally, a few days ago I received this blade that was not properly aligned when welded. I’ll put it next to this piece of wood so that you can see what I mean. I can still use it, but I’ll have to take some precautions.(fourth photo).

I’m going to install it in the saw. First I move the guides and bearings towards the back. I also loosen and separate the teflon guides and put the blade in the saw. I have to lower the top wheel a little and tighten the blade and make sure it’s in the center of the wheels… Looks like I’ll have to tilt the top wheel a little… This should do.
Also I’m going to demonstrate the problem I was just talking about. You can easily see(video) how the blade has been improperly welded, so it’s going to make more noise than it should when it rubs against the bearings

While I’m at it, I can also check how much the saw’s frame bends when tensioning the blade with a probe indicator. I put it under the guide post and set it to zero while the blade is completely slack.
Now I start tensioning the blade and once it’s reached the appropriate tension, we can see the frame has bent 0.2mm, an acceptable result considering this is the biggest blade I’ll be using. It seems plywood performs adequately in this kind of medium- sized bandsaw.
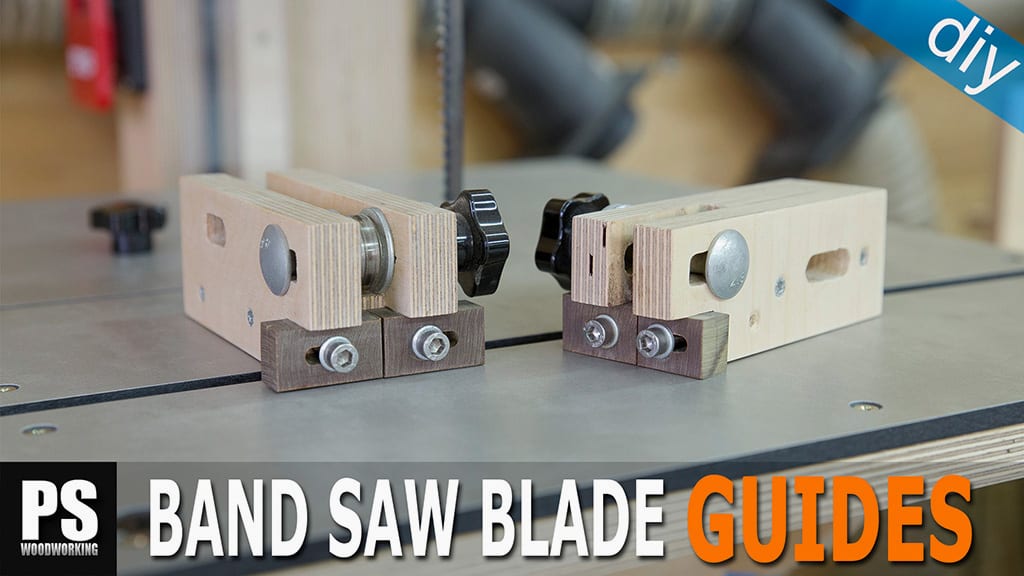
Now I’ll show you how to adjust the blade’s guide posts. I set the post to medium height, first I adjust the depth of the teflon guides in relation to the blade, until they’re just behind its teeth.
Then, I set the depth of the bearing until it touches the blade. Using a piece of paper I adjust the separation between the blade and the teflon guides like this. We must follow the same steps with the bottom guides.
Once the blade has been calibrated, I’ll try to cut this birch log I had in my workshop. Birch wood is of medium hardness, but if it’s very dry, as is the case with this one, it becomes a lot harder. First I set the height of the top guide post and start cutting carefully.
Although the blade is improperly welded, it seems to be doing its job well and I can cut the birch quite easily.
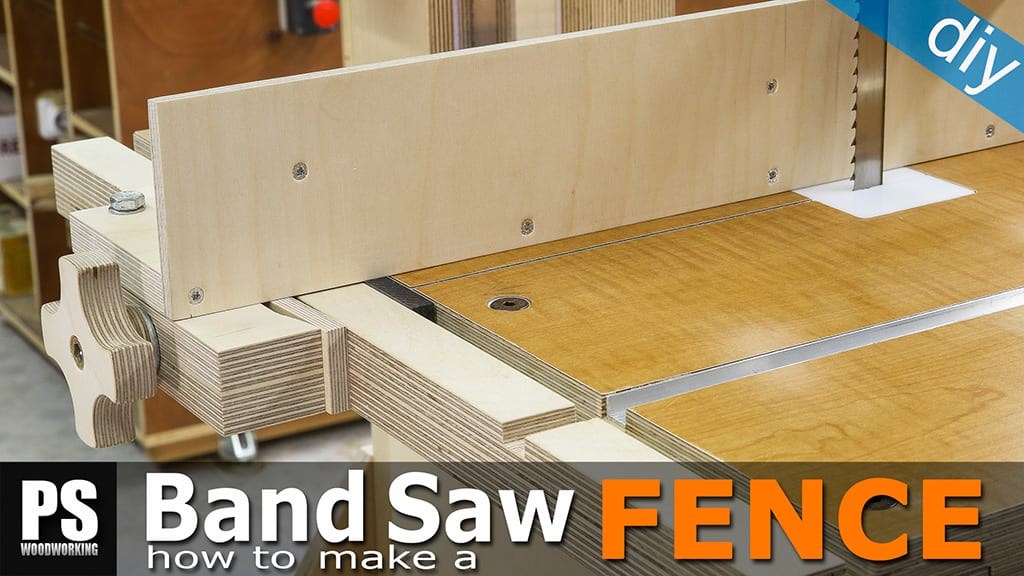
I turn the piece of birch on its side and set the guide post’s height again. This time the height of the cut is 200mm. Little by little I make the cut. It advances smoothly, without forcing the bandsaw too much(second pic). I attach the fence to cut two equal parts.
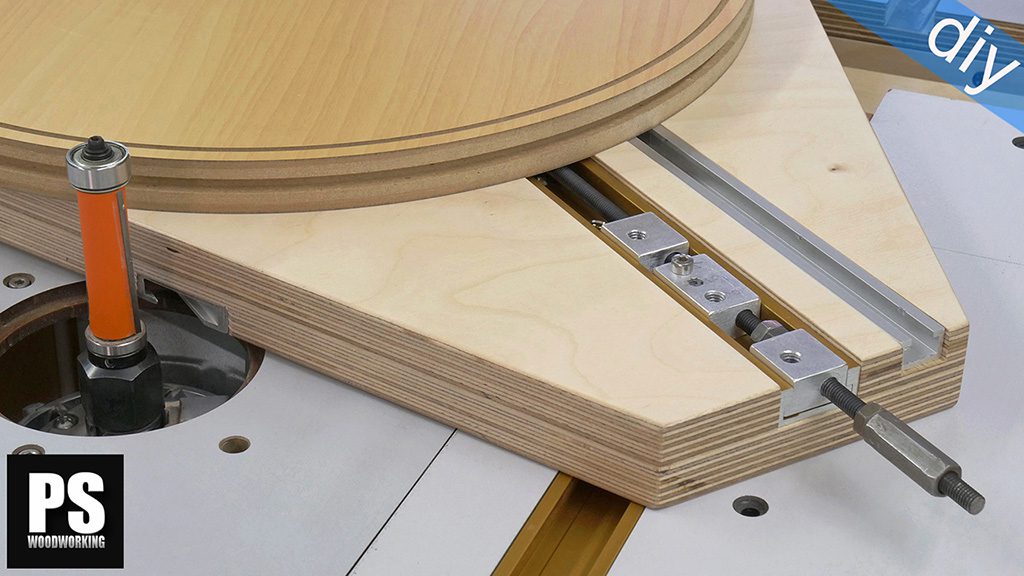
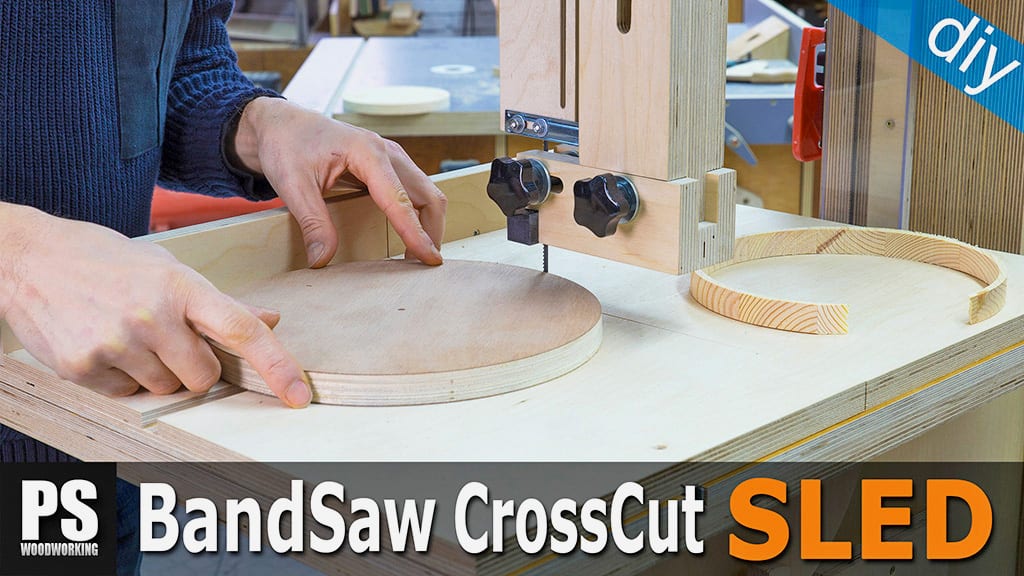
Again, I do it slowly, and I finish cutting it without a hitch. Getting straight cuts with big depth depends on three factors: having a sharp blade, choosing the right tension, and cutting slowly without forcing the saw. I’ve also made this sled for the band saw, which I’m going to use to cut both birch pieces. This sled can also be used to make circular cuts, as shown in a previous article.

A few days ago I made this miter gauge that will come in handy when cutting wood parts at any angle we desire. The collection system works perfectly. Even after making all those cuts, there’s barely any sawdust inside the saw.(second photo).
Finally, I’d like to show you how to fold your bandsaw blades for easier storage or transport. With the blade’s teeth facing forward, we step on the middle and move our hands to the sides, with index fingers outstretched.
Now we fold the blade by trying to bring our index fingers together. We lift out foot and the blade will coil up, making it more compact.


I really like your model. I made one last year using 2x4s. It was a prototype. As I am planning my next one, I think I will inspire myself with yours! Thanks! 🙂
thanks mate!
Any chance you wanna make another set of plans for the same saw but larger? 🙂
hello Rober, you can easily do it yourself, check this out:
And also this article: