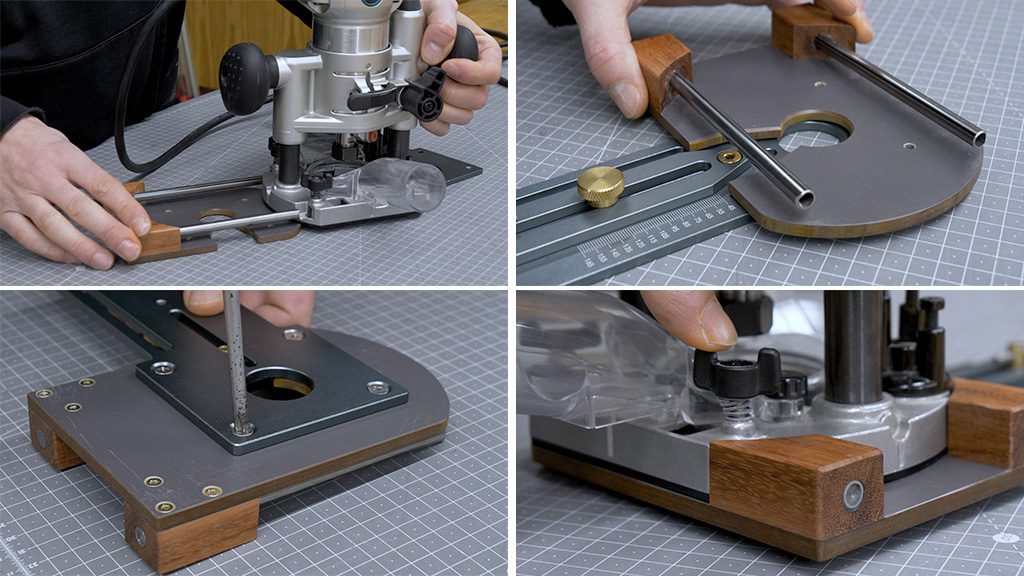
Welcome. This is the first article in a two-part series where I’ll be showing you how to build a 3-in-1 workstation for use with Dremel-type rotary tools. I’ve completed the plunge system, which will allow me to drill holes, make inlays and mill.
As you can see, it has a precise depth control system and a knob that locks the tool at the desired height.
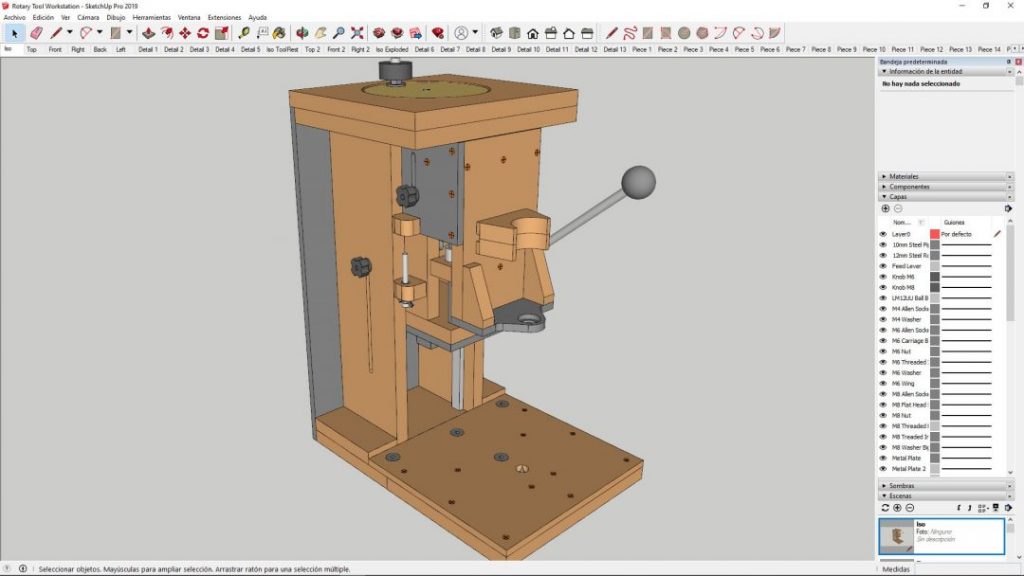
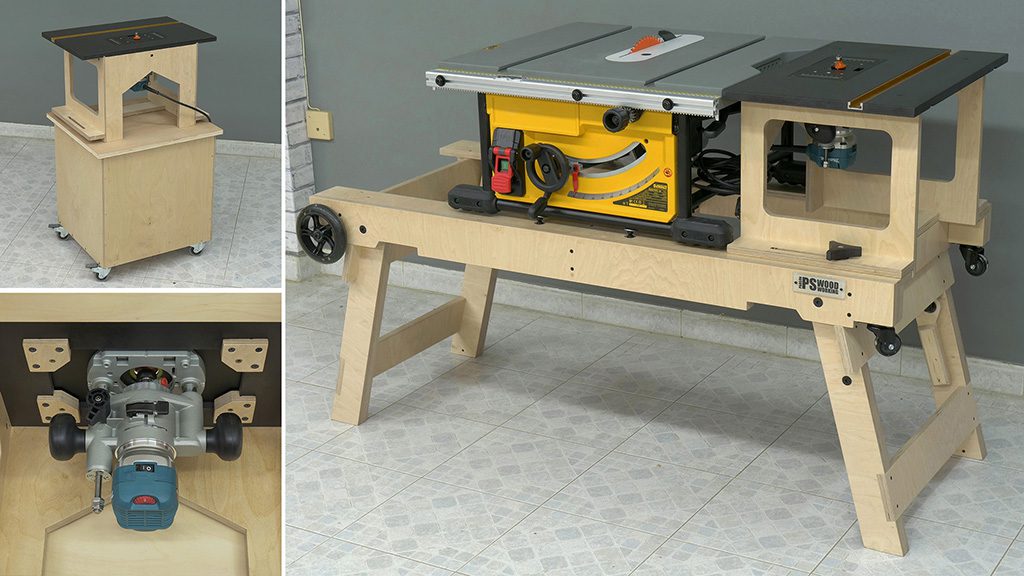
This is the 3D SketchUp model of the workstation which I made a few days ago and you’ll find included in the plans. It has three functions, a small drill press.

By turning it, it becomes a practical mini-lathe.

And by turning it again, it becomes a router table. It will be very useful for small operations; in my case, it will come in handy for my commissions as a luthier.
Workstation Plans
How to make a Rotary Tool Workstation:

Now I’ll show you how to build the plunge system. First I’ll cut all the necessary parts according to the cutting list included in the plans.
I drill the first holes for the ball bearing bushings, I’ll use a bit 1mm wider than the diameter of the bearings so I can later adjust them to the steel bar more precisely. I’ll also use double-sided tape to drill the two pieces.

I put the pieces together with screws, making sure they’re properly aligned and square. I’ll cut an HPL panel to make a base where the rotary tool can be inserted. We could also use hard plywood of a similar thickness.
I drill a hole for the Dremel’s neck, make sure everything is correct and screw the base to the body. I’ll also attach some supports for more stability.

After gluing on two pieces of plywood, I trim them with the band saw to adapt them to the body of the rotary tool. I also cut down this accessory that I never use which will allow me to fasten the dremel to the body. With the table saw, I cut a rebate for the hose clamp and screw the piece to the body.

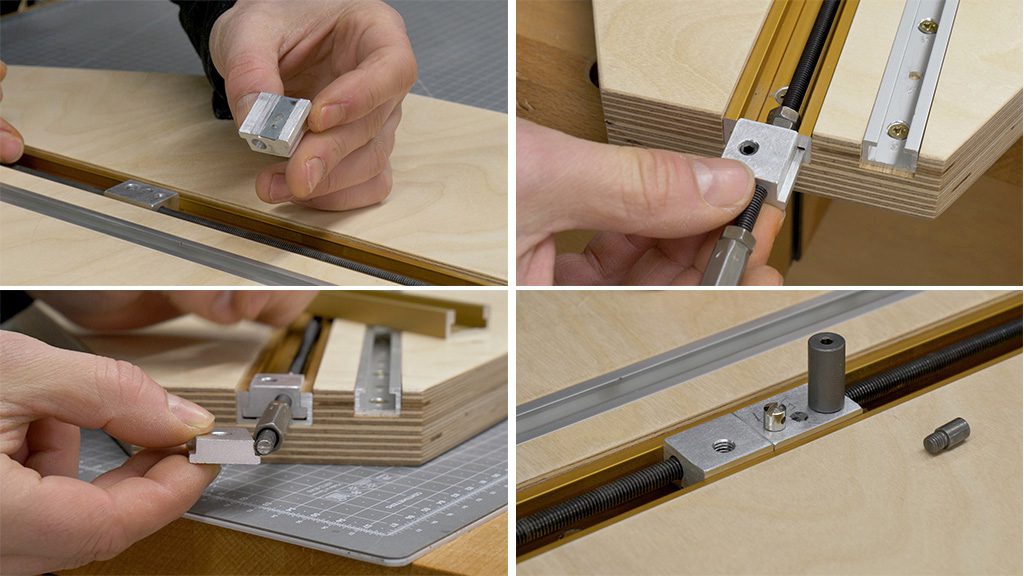
I’ll continue working on the body. I drill all the necessary holes and place the threaded inserts. With a bit, I predrill the exact position of the holes for the steel rod. Now that I’ve machined all the holes I can join the four plunge system pieces and cut a canal that will allow me to adjust the tool’s height.

I detach the body for now to place the spindle screw. I’ll need the base but not the top so that I can disassemble the system if I ever need to do so. I cut the steel rod to size and sand down the parts that will touch the adhesive to make the latter more effective. I’ll use polyurethane adhesive, though epoxy could work as well.
Little by little I insert the rods from the top, and ensure the bearings are centered and the system slides correctly. Once the adhesive is dry, I detach the top, wipe away any excess adhesive and place the springs.

Now I’ll make the piece that will lock the tool at a specific height. After machining it, I screw it to the body and ensure it works correctly. I’ll make the feed lever with a steel pipe. I flatten one of the ends, drill it and attach it to the plunge system.
In order to activate the lever, I’ll use a pipe clamp. Finally, I’ll install the hose clamp to fasten the rotary tool. Here you can find the second part of this article, where I’ll be showing a variety of ways in which you can use this tool. See you soon!


Your skills are amazing as well as the way you present the project Congratulation!!!!!
thanks Miguel!
I see what looks like a riving knife on your table saw, but I don’t see it in other videos. If it is a riving knife do you show installing it in other videos?
hi Rick, check this out:
Nice Project, man… I wonder how you can cut the HPL with the Bandsaw. I know this stuff….I made my crosscut sled out of it. It is incredible hard. Even a Carbide Circular sawblade gets dull in no time. Maybe the German HPL ist tougher the yours… Greats from Germany..
HPL can be cut easily on the bandsaw!