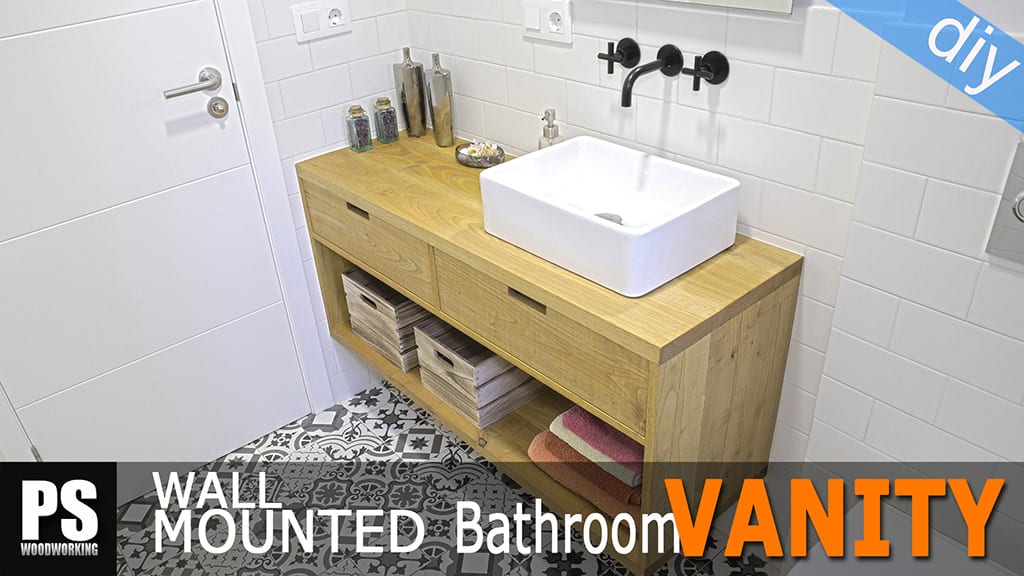
European Style Kitchen:

I’ve finished installing the kitchen I made in my workshop a few days ago. I believe I’ve achieved a pretty good result if we take into account that I built it with only a few hand tools and cheap materials.
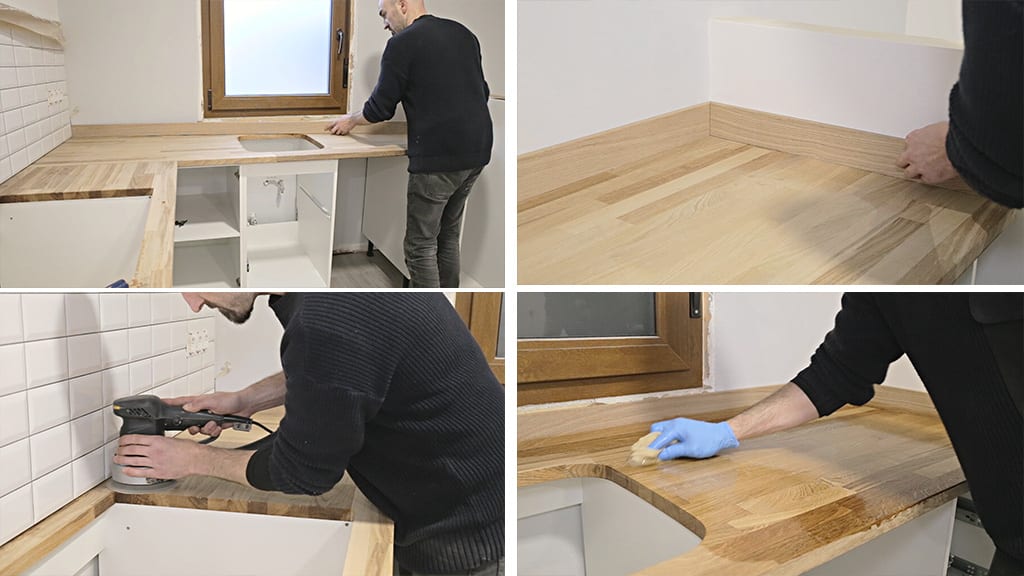
I’ve used an oak laminate countertop, which I found at a good price in a carpentry store. It has pieces of oak in all shades, giving it a unique look. I needed solid wood because the sink is below the countertop meaning the edge is visible. This way the kitchen is more original. I have also installed a flexible faucet.


I used waterproof MDF with a matte white lacquer finish to make the doors and plinth. The inside of the drawers is birch plywood. There is a little protrusion on the floor and to the left of the steel wire shelving because of the stair landing that I covered with laminate flooring, this way it’s barely perceptible.
I have used the pieces of wood left over from the kitchen countertop to make the tops for the steel wire shelving, I think it has been much more usable!

If you are interested in collaborating with my work, here you can buy and download the kitchen plans from my website. You can modify the SketchUp 3D model and make the cabinets bigger, change their position or make a new kitchen design.
European Style Kitchen Plans
European Kitchen vs American Kitchen:
I’ve seen some of you aren’t clear what the difference between a European and a classic American kitchen is, the kind usually installed in the US.
The main difference is that the cabinets ar frameless in European kitchens. There are no frames around the doors and drawers, making them easier and more simple to build.

Another difference is that in Europe we tend to use particle board with white melamine or faux wood grain to make cabinets, whereas in the US, bare plywood is used, which means the inside of the cabinets has to be painted after being installed in the kitchen.
In this picture we can see the cabinets before being painted and the appearance of a typical American kitchen once it’s finished and installed, with frames around the doors and drawers.
In the US they do not usually use adjustable legs, instead they make the sides of the cabinets down to the ground, which also makes installation difficult.
How to Install European Kitchen Cabinets:
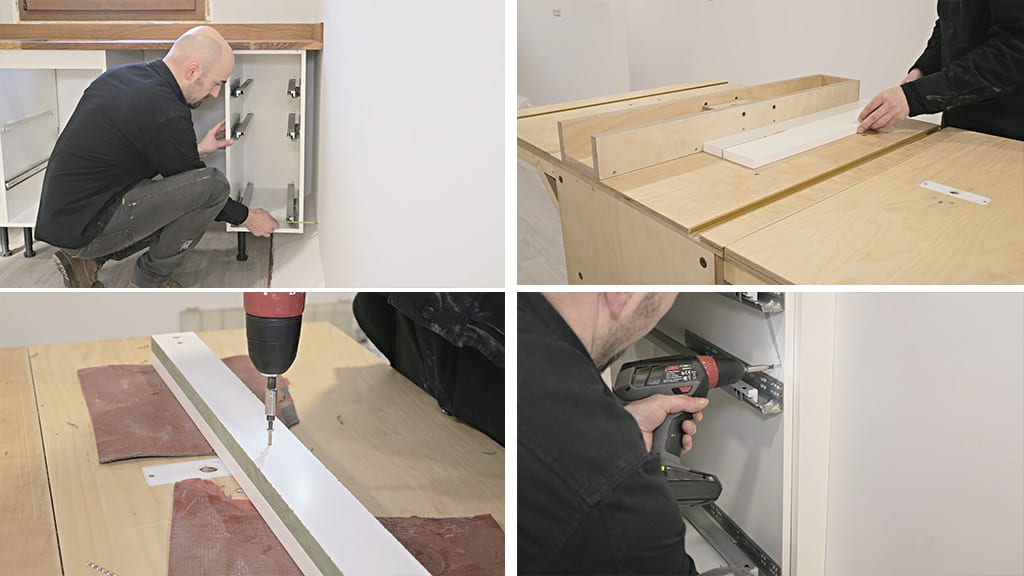
Installing this kind of European kitchen is a relatively easy task by joining cabinets together. I’ll start with the corner cabinet. First I turn it on its side to attach its adjustable legs, and preadjust their height. I put it in its emplacement and make sure it’s at the desired height and it’s level.
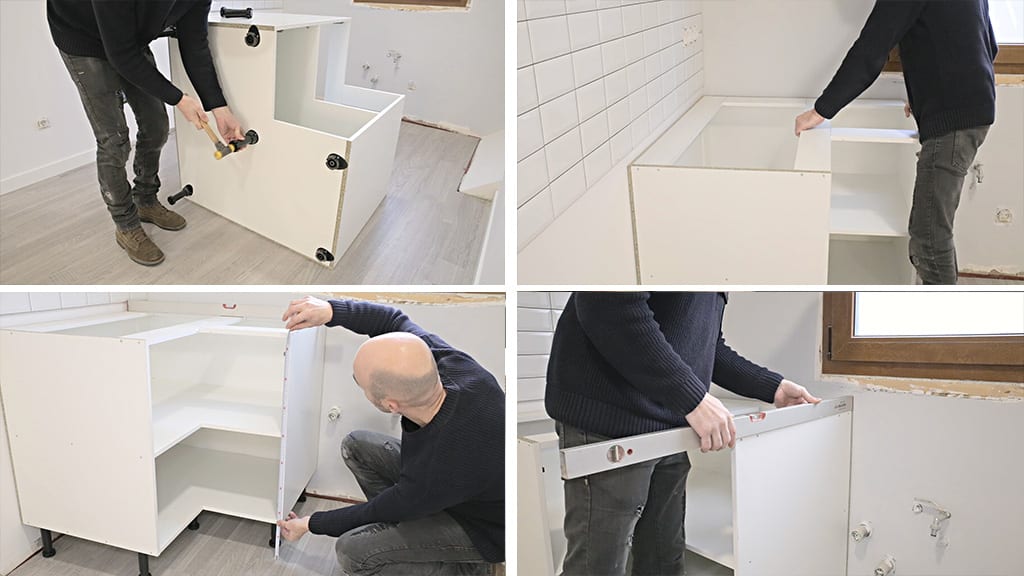
The adjustable legs make this step so much easier. When we finish adjusting it, we must check that all the legs touch the ground.

Now I’ll keep installing the rest of the cabinets in the same way, starting with the sink. I fasten them together with clamps, make sure they’re still level, and screw them together. We must try to put the screws in places where they’re not too visible. Now I’ll install the cooktop & oven cabinet(fourth photo).
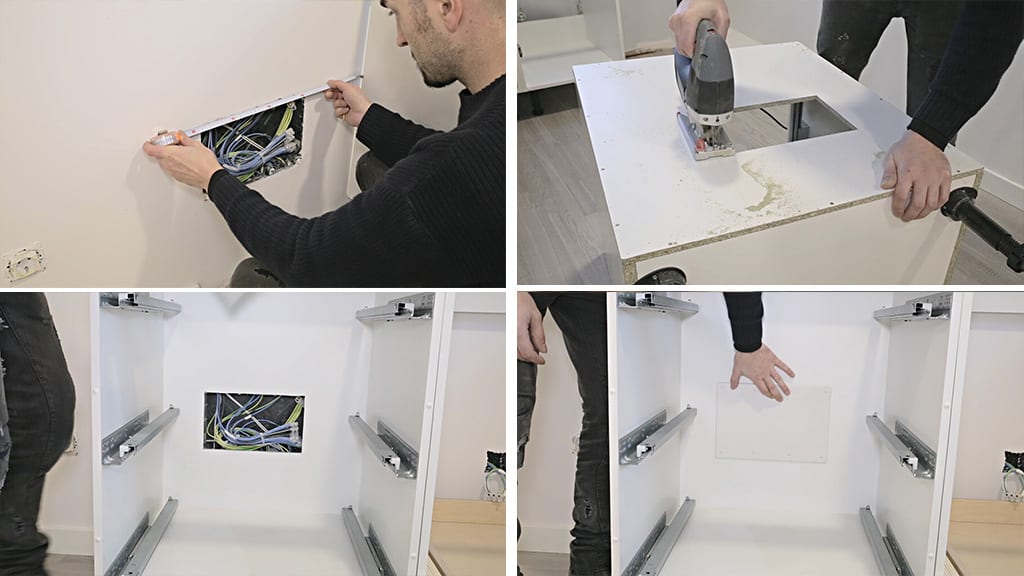
And now the drawer cabinet. There is a junction box here, so I’ll mark its position on the back of the cabinet to cut it off so that the junction box is accessible. Once cut, I install the cabinet like before and fasten the lid of the junction box to the back of the cabinet.
How to Install an European Kitchen Countertop:

This cabinet will go on the other corner of the kitchen. Because of the unevenness by the stairs, I can only use two legs; on the other end I’ll screw the cabinet to the wall. I make sure it’s level and aligned with the rest of the cabinets, and that I’ve left a big enough gap for the dishwasher. It is usually 45 or 60cm depending on the model.
It’s time to cut the oak countertop. I measure the length of the first part. There is an uneven section on the wall behind it, about 5mm over 30 cms, making it 10mm in total if we take into account the total depth of the countertop.
First I’ll cut it down to the desired depth, since it’s a little larger than necessary(first photo). I’ll use the circular saw and its parallel guide. Now I’ll mark the tilted part and machine it with the planer. Finally, I cut it at the necessary length. I put it in its place and make sure everything is correct.
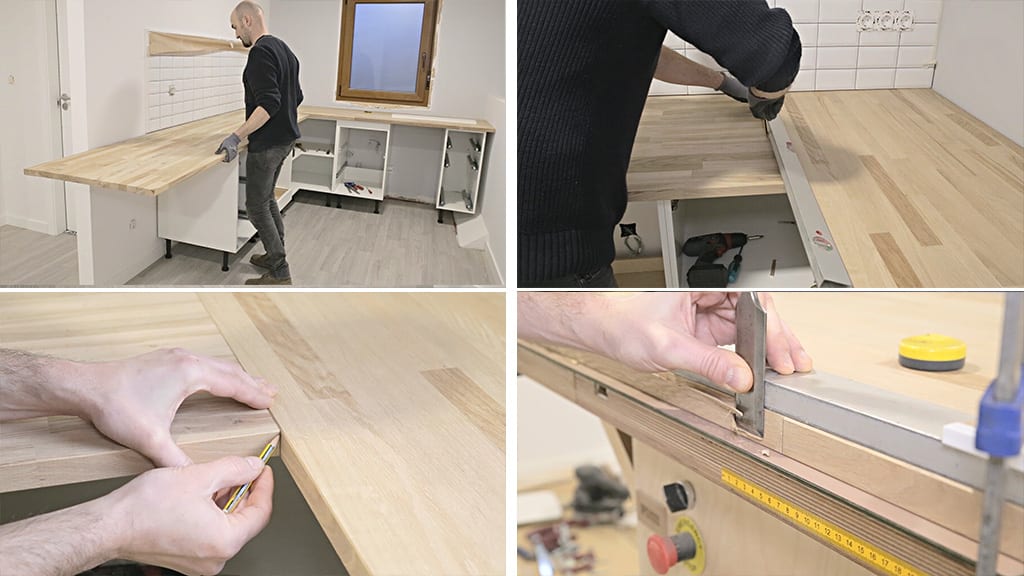
Now I mark the other part of the countertop. I put it in place and use a ruler to mark the cut for the joint with the other part, then I cut it and put it in its place again to mark the length of the part. I mark again and check whether it’s correct.
This kind of countertop has a bevel on the front which will leave a groove when joining the two pieces, so I mark the depth and cut the bevel with the help of a ruler and a chisel.

Now I’ll machine the joint between the pieces. I’ll use biscuits and on the bottom I’ll make some holes to place half moon nuts. This way the bond will be firm and level. I put the countertop on the cabinets again to mark and cut the holes for the sink and cooktop(fourth photo).
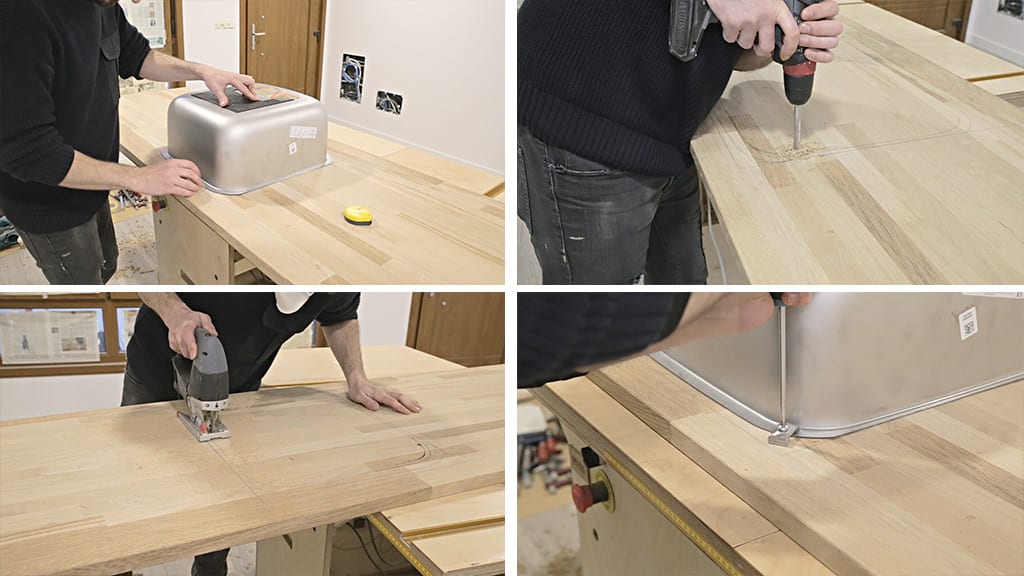
I’ll start with the sink. I’ve bought one that goes underneath the countertop, so the edge of the countertop will be visible. I mark its position and drill a hole with a bit so that I can insert the jig saw. I cut it with the jigsaw 2 millimeters away from the mark and finish the job later with a plunge router.
I’ll also put in the brackets that lock the sink in place. This way I can use the sink itself as a guide for routing. I mark the position of the brackets, drill holes and attach the threaded inserts.

I install the sink and prepare the router. I’ll use a flush trim router bit, which comes with a bearing that will run along the entire surface of the sink, leaving the wood aligned with the side of the sink. I taped over the sink with masking tape to avoid damaging it.

Since oak wood is quite hard, a more powerful router would be ideal, but little by little, making a few shallow runs, I can remove all of the wood. Now would be a good time to sand the edge and bottom of the countertop. After that I’ll apply some pure linseed oil on the underside of the countertop.

I put the countertop back on the cabinets, make sure it’s square and screw it to the cabinets from below. I’ll cut a hole for the cooktop in the other piece. Since this edge won’t be visible, the process is quite simple.
I install the second countertop part in the same way, and fasten the half-moon nuts’ screws. I measure and cut a hole for the faucet with a hole saw.
It’s time to fit the edging strip. I’ll be using this oak casing I had in my shop. First I’ll cut it down to size in my portable workshop, and then I’ll cut it at an angle with the slide miter saw.
Once adjusted, I glue it in with anchoring adhesive. Now I’m going to finish the top side of the countertop. First I adjust the joint between the countertops with a card scraper. Then I’ll sand the entire surface with P80, P120, and finally P220 grit.
I spread some pure linseed oil over the entire surface. It’s amazing how the color of the oak wood changes with just a little oil!
How to Install European Kitchen Accessories:
I’ll also fit this filler strip on the corner of the kitchen. I check its measurements at several points and cut it in the portable workshop. On the back I’ll fasten a leftover piece of MDF from cutting the filler strip itself, which I can use to screw it to the kitchen cabinet.
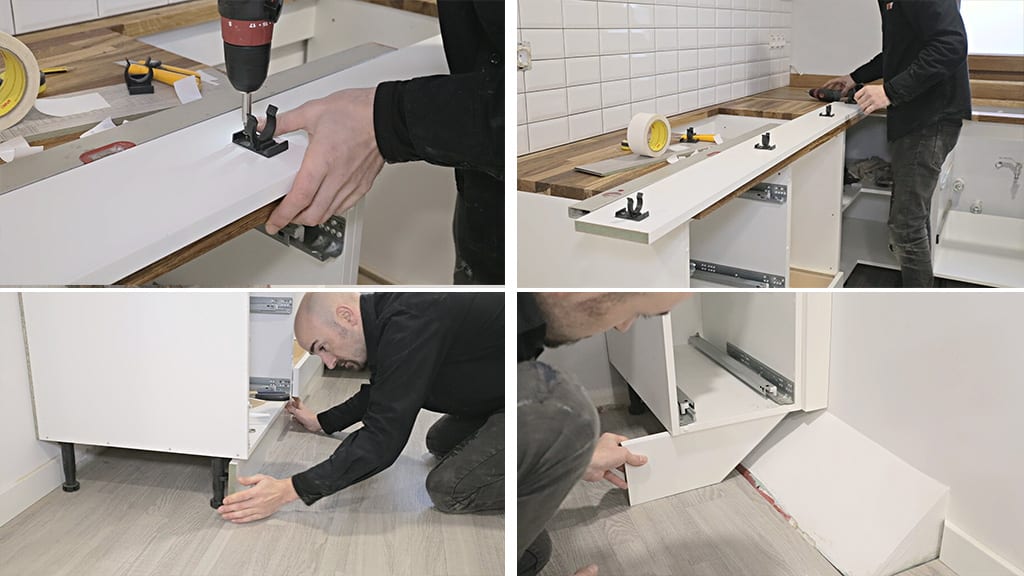
On the bottom of the kitchen I’ll fit a white lacquer plinth. After measuring it, I cut it with a sliding miter saw. I’ll use plastic brackets to lock it onto the cabinets’ legs.
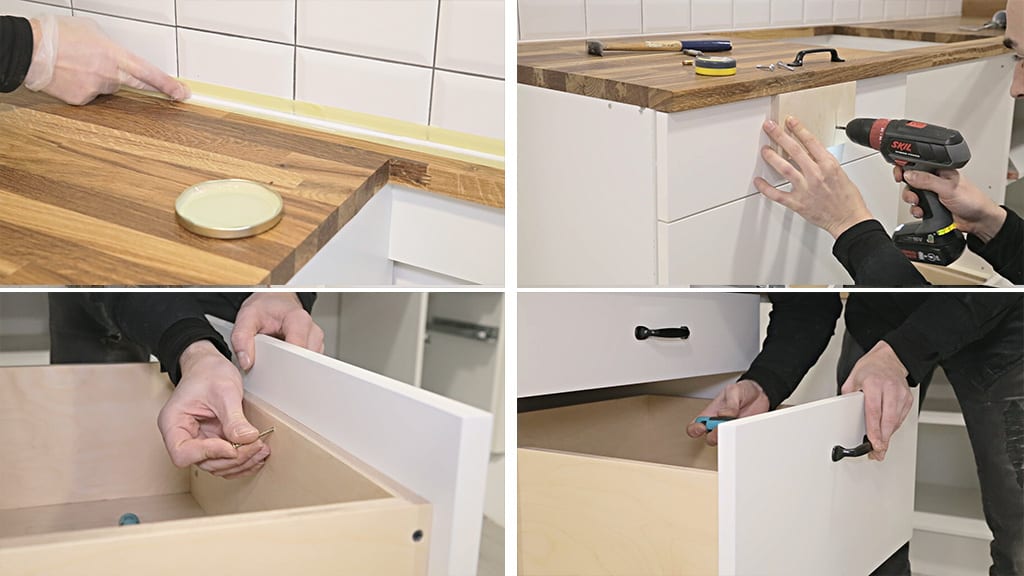
I’ll also seal the gap between the countertop and the tile with silicone. Now I’ll use an old trick which involves applying masking tape and rubbing it with a finger covered in soapy water. Now I can install the doors and drawers, along with their handles. I made a template to make this operation easier.
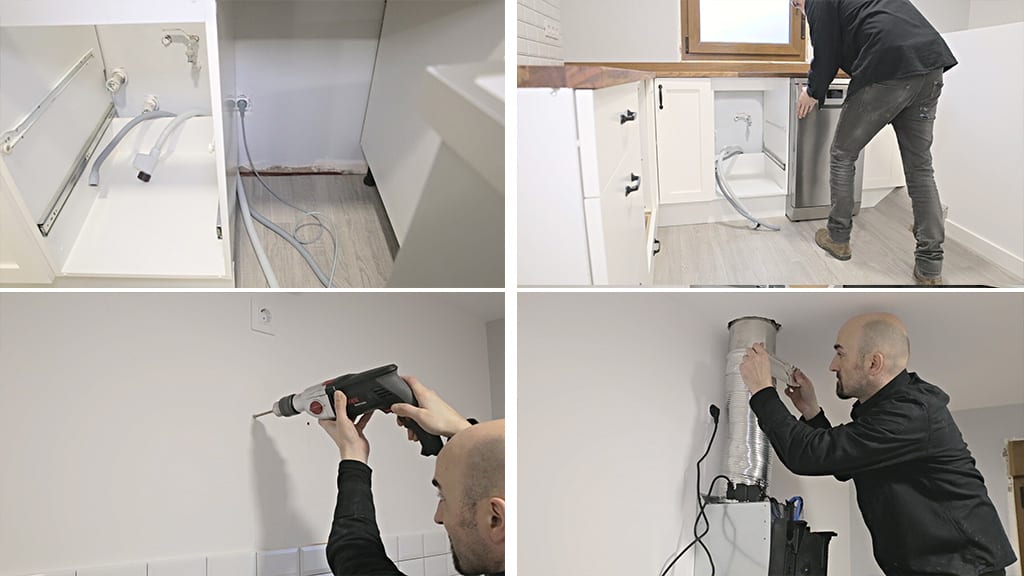
The last step is to fit all the appliances. We only need to plug them in and put them in the appropriate gap. Only the extractor hood takes a little more work. I check its position and make a hole so I can put it up on the wall. I fasten the extraction tube and the kitchen is ready to be used!

All that’s left is finish placing the rest of the appliances. For the cooktop it is only necessary put it in its hole. I make the electrical connections and I also insert the oven into its gap. I put a couple of screws on the front so it does not move(third photo). And the kitchen is ready to cook!


Well done! You did it in a workmanlike manner. I’m a professional kitchenplaner and authorized to judge! Only one tip for your dishwasher installing:
put a Strip of protective foil under the countertop ahead your dishwasher because rising damp. Also can’t see that you did Silicone between the sink and the countertop but i think so! Top Job like a pro ?
you’re right, thanks for the tip!
Very nice result and proof you don’t need to spend thousands of euro’s to get a beautifull kitchen. Well done.
thanks mate!
Great work! and that water tap is awesome, could you share the name of it? Thank you
hi John, check this out: