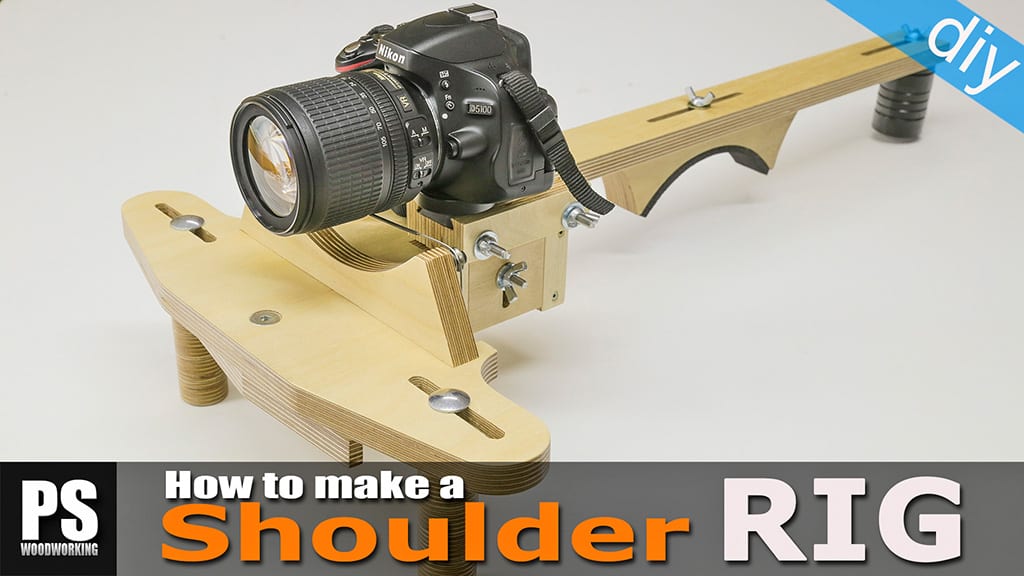
Stand for Dslr cameras:
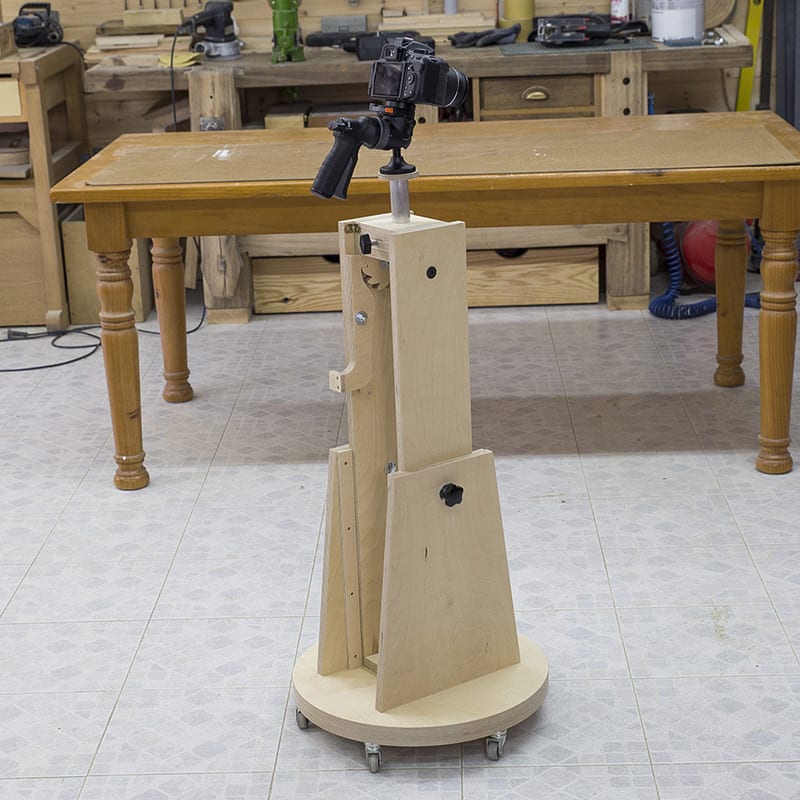
Some time ago I wanted to build a camera stand to shoot video in a faster, more comfortable way in my studio/workshop, and now I’ve finally finished it. I’m going to use it with the pistol grip ball head I’ve been used to attach to my tripod, making it much more versatile.
As you can see, I can adjust the camera’s height and also tilt it thanks to a lockable rotation head. In its normal position the camera is 110cm from the floor, and the maximum height reached by the support is 200cm. Of course the support will also be useful for photography, that way I will save time.
Studio Camera Stand Plans
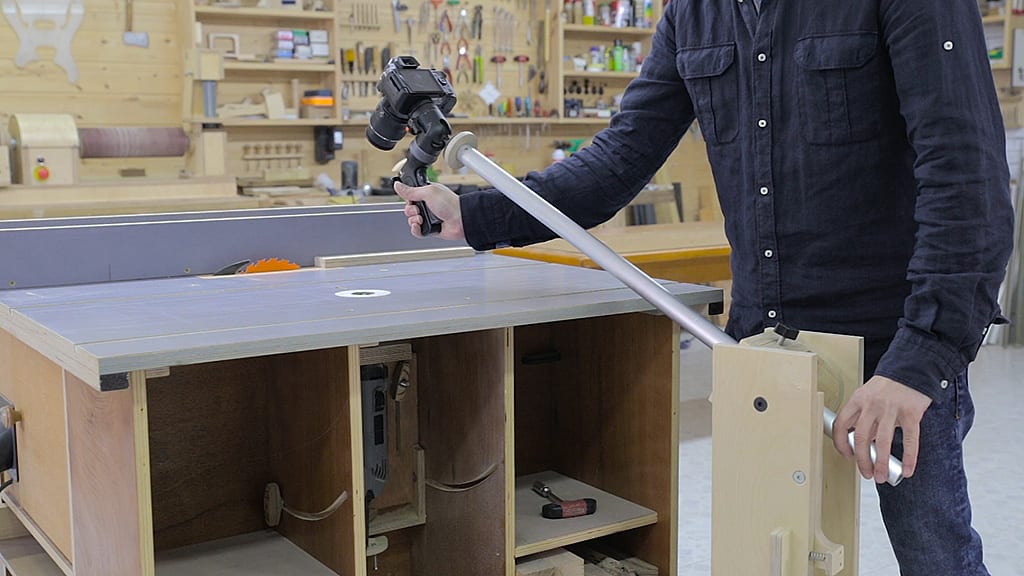
I’m mainly going to use it to record on a short height range, above my work tables, but sometimes I want to get overhead shots of the objects, such as in this case.

It will also come in handy when recording overhead footage of my work table. I have some more range for those occasions where I need a little more height than usual, between the two parts of the stand body.

I wanted it to be compact, both in height and in how much space it takes up on the floor, so that it wouldn’t get in the way too much and to speed up the recording process.
I’ve placed a 5kg weight plate on the bottom of the stand to act as counterweight, more than enough for this set up.

Thanks to the pistol ball head I can also shoot from many other angles, and even tilt the steel pipe all the way until it almost touches the ground, so I can record from there. Afterwards, all I have to do is flip the footage on a video editor.

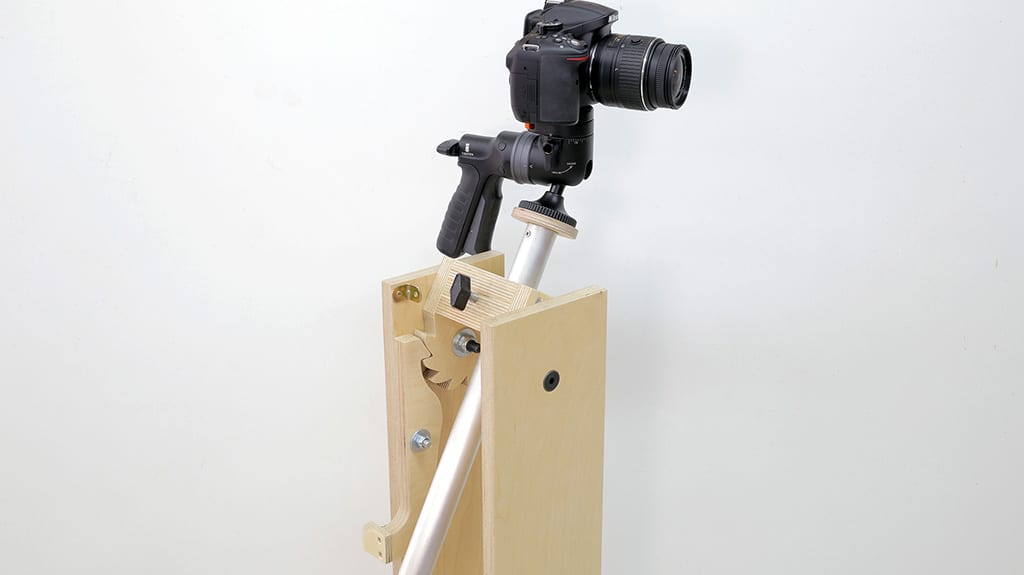
In order to be able to quickly attach and detach the pistol ball head, I’ve used this 1/4 – 3/8 male threaded screw. I’ve screwed it in and glued it to a couple of pieces of plywood with epoxy, which, in turn, are then glued and screwed to the aluminum pipe.


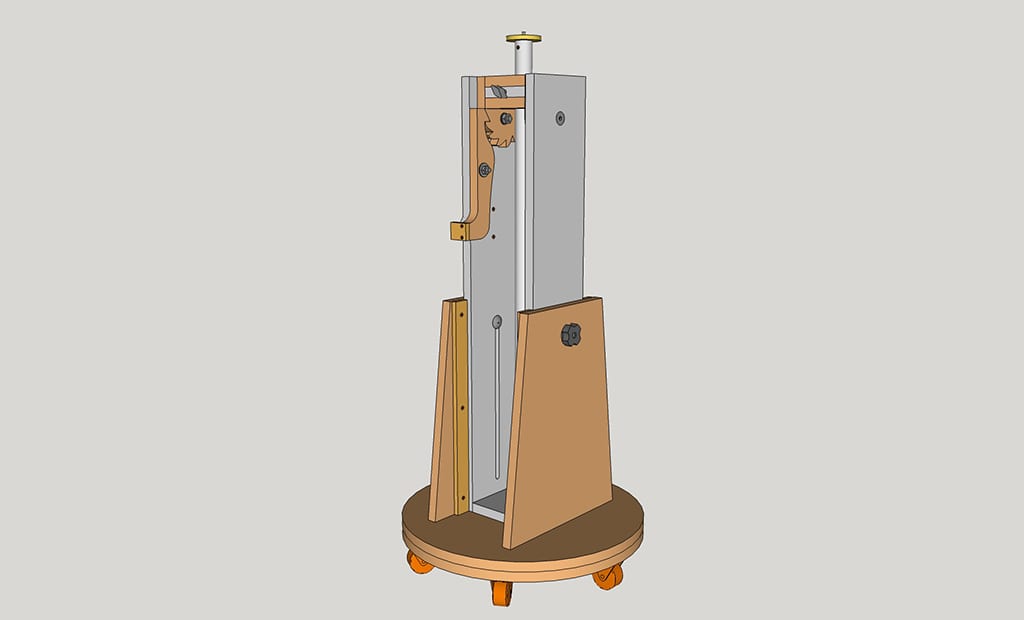
I’ve also attached a metal bracket to act as a stop for when I set the head back to its initial position, and I’ve used a recall spring for the rotational lock.
This is the 3D SketchUp file that includes the plans. If you are interested in making your own camera stand and collaborate with my work, here you will find the plans.
How to make a stand for Dslr cameras:

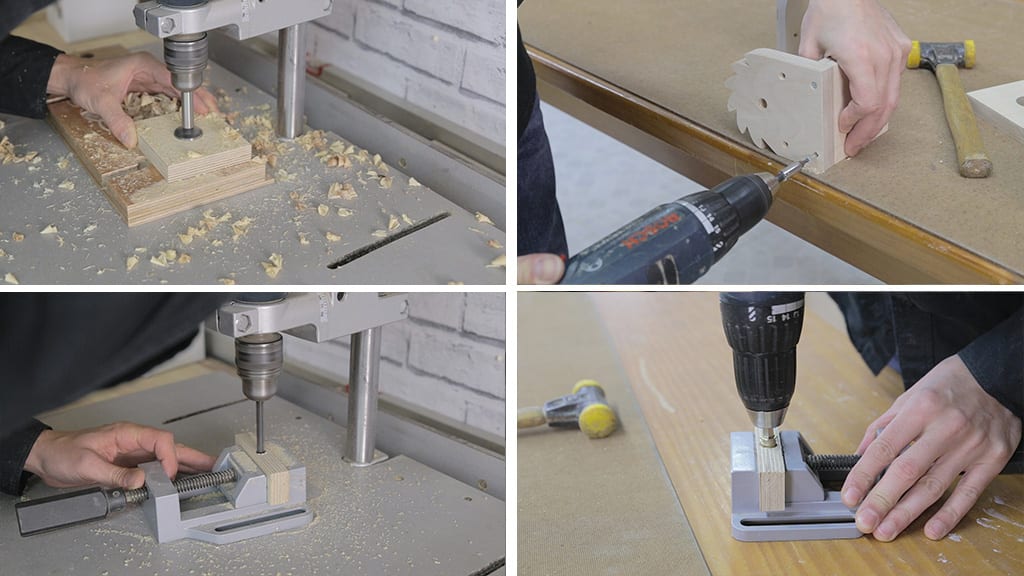
Now I’ll show you how I built it. With the table saw, I cut the two pieces that make up the bottom of the stand. Then I mark the diagonals to find the center of the piece, as well as the positions of all the screws.
I drill holes for the screws using a countersink bit. I also drill the center of the piece. This hole will allow me to rotate the piece on an axis in the band saw, and cut the two round bottom pieces.
I work out the radius of the circle by measuring it from the saw blade to the rotation axis, and cut the pieces little by little.
Using a jigsaw, I cut the bottom piece again. This recess will house the weight plate that will act as a counterweight. Now I can glue the two bottom pieces together. I cut the rest of the stand’s pieces and use this opportunity to sand all their edges.

With the router I make grooves to lift the support when needed. I run it through twice to avoid pushing the milling machine too hard.
Now we’re ready to put the stand together. First I attach these pieces that will act as a guide for the lifting system(second photo). Once they’re in place, I make sure it runs smoothly and then I mark and drill the position of the locking screw. I’ll use a mushroom head square neck screw so that it won’t turn when tightening the knobs.

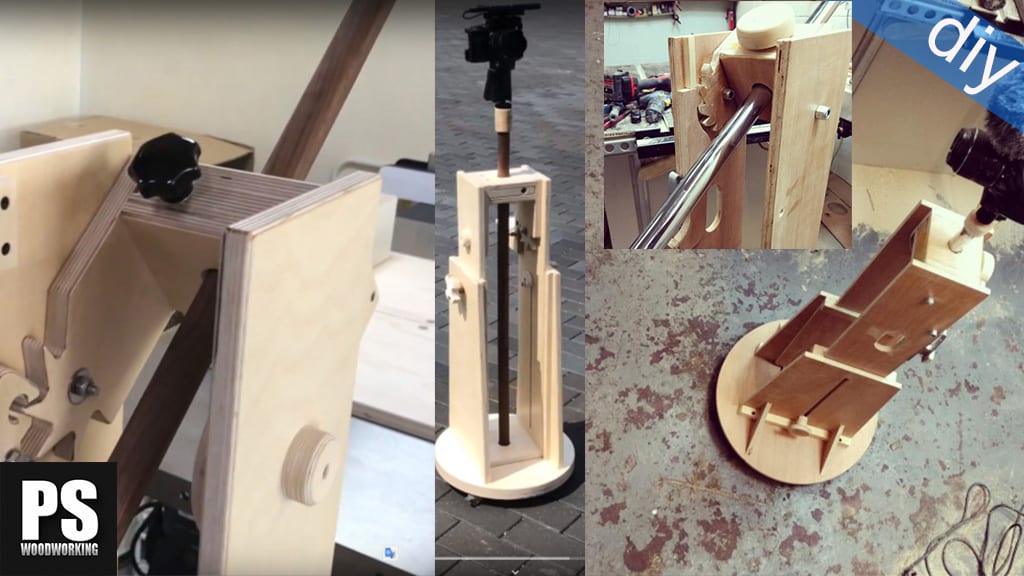
Having checked its position, I screw the lifting system to the bottom of the stand. Now I’ll build the upper rotation and tilt head. I glue the printable templates on the plywood, drill all the holes and cut the parts with the band saw. With the belt sander, I finish shaping the teeth on this part.
I drill holes in these other parts, through which the aluminum pipe will slide. I ensure the movement is smooth and put all the rotation head parts together with screws.
Now I’ll make the locking system for the aluminum pipe. I’ve drilled a hole in this part and put in a threaded insert(fourth photo).

In order to lock the pipe, I’ll screw this metal plate in(first photo). By tightening the screw knob, the plate will bend until the pipe is locked. We can stick a piece of rubber to the plate to ensure a better grip on the aluminum.
I’ve put the part in its place and attached the rotation head to the stand using two screws that serve as axis. I used self-locking nuts to stop them coming loose when turning the head.

Now it’s time to make the lever that will lock the camera and the aluminum pipe at an angle. I cut it with the band saw and make adjustments with the belt sander.
I mark the position of the screw that will function as rotation axis. I’ll also use a self-locking nut here. After placing the recall spring, I screw in another two parts to serve as handles so that using the lock lever is more comfortable.
I have also screwed a metal square as a stop for when I return to turn the head to its initial position, and that it does not pass turn. I also screw the six wheels. Finally, I’ll place the counterweight plate.
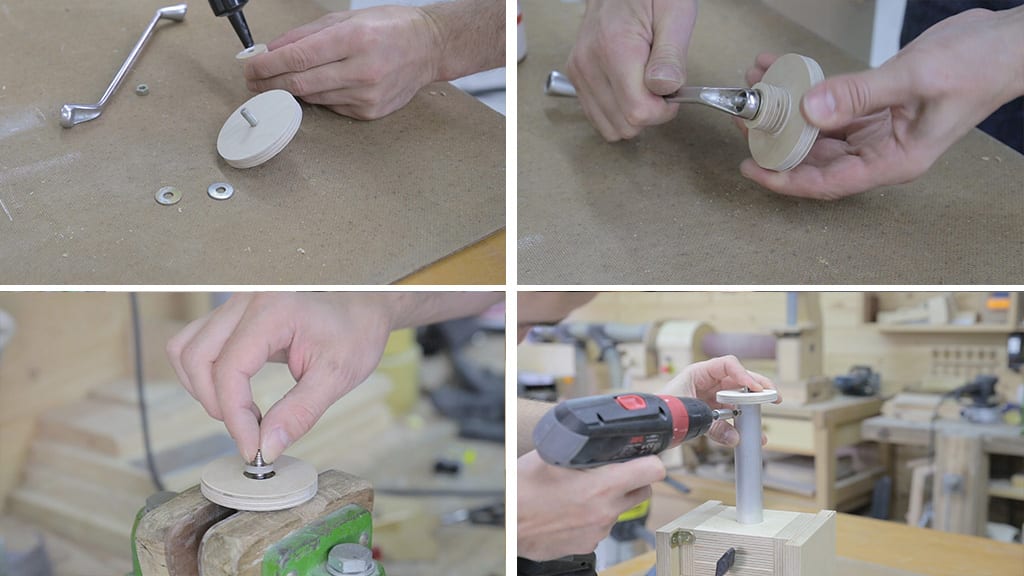
Now I just need to make the plywood base that will allow me to place the pistol grip ball head. I cut the two pieces using a hole saw bit and glue them together. I make holes in the aluminum pipe to hold this base.
In order to be able to quickly attach and detach the ball head, I’ve used this 1/4 – 3/8 male threaded screw(third photo). I’ve screwed it in and glued it to the pieces of plywood with epoxy, which, in turn, are then glued and screwed to the aluminum pipe. I will use other adapter that bring the camera ball head in its lower part. This is all for today, see you soon!


Great work! I would replace this metal bracket stop with wood. That’s the only part which disturbs the overall picture.
thanks mate, good advice