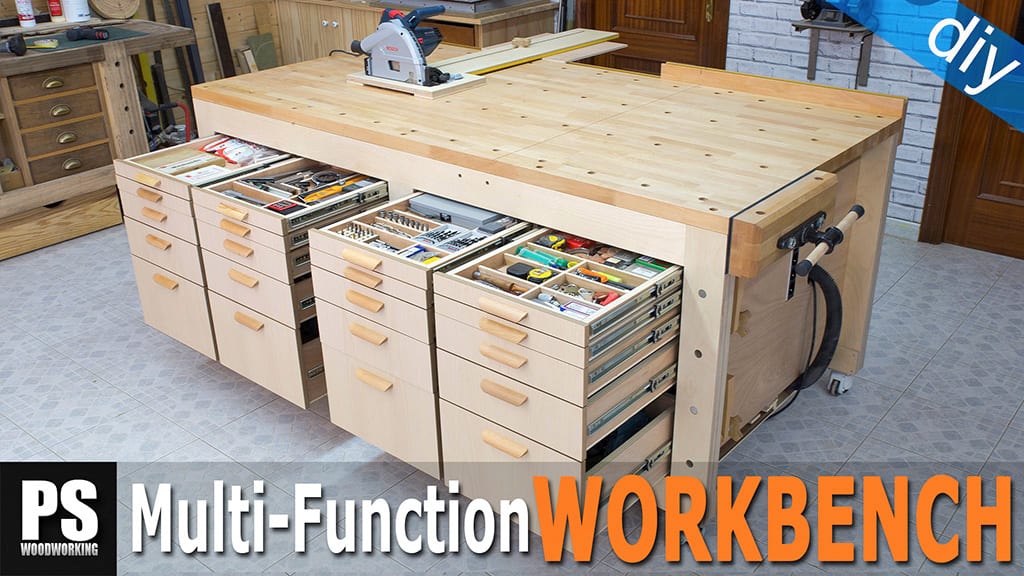
Welcome! this is my latest project. It’s a high capacity multi-function workbench. This is one of the projects I needed most in my workshop, because the bench I’ve been using until now is low and not very versatile.
A cross between a woodworking bench and a workbench, combining the advantages of both. It’s a robust bench with plenty of storage space to keep tools handy. I’m planning to put my vacuum in it to make it easier to remove dust while I work, while making it less noisy.
As always, I’ve tried to develop a model that is easy to assemble at home.
Approximate weight: 220kg (without storage)
Overall dimensions: 900mm high, 2000mm width and 1038mm depth.

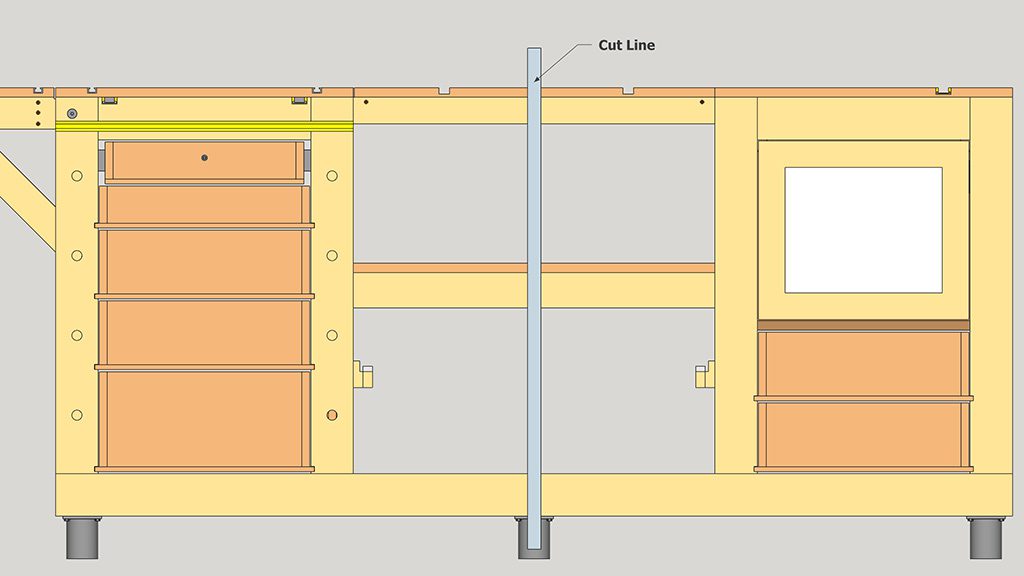
This is the 3D model of SketchUp included in the plans that you will find on my website. If you are interested in collaborating with my web or building your own workbench, here you can download them.
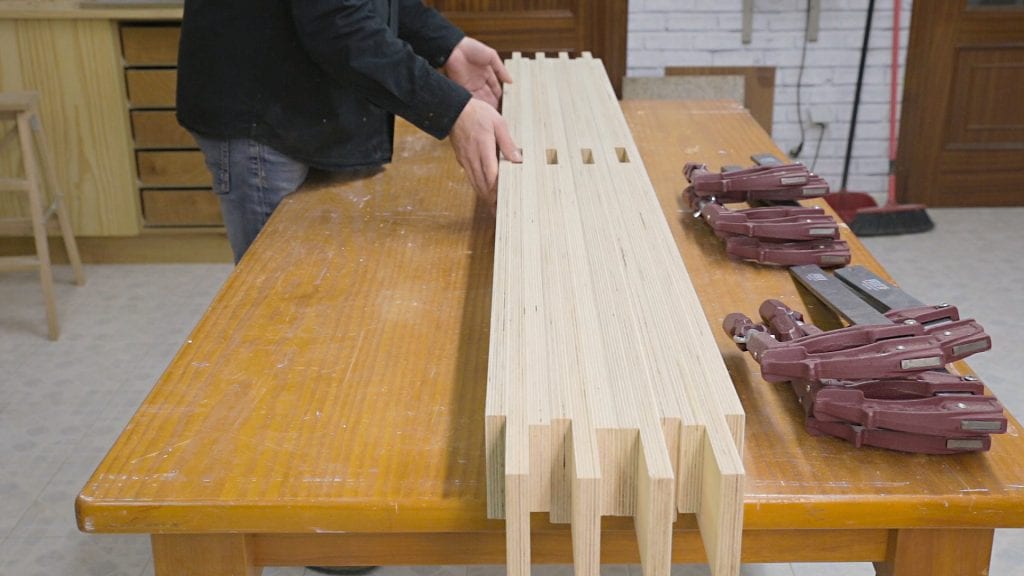
Instead of making it the usual way by removing material, this time I’ll do it by gluing pieces of plywood together until they are thick enough, leaving tenons and mortises.
It’s easier to do it this way if we don’t have a lot of tools, and you’ll be able to use any leftover plywood you have at home. The two outer frames are made of birch plywood, making the bench sturdy and stable. The rest of the pieces joining the frames are made of soft plywood, to make the total weight lighter.

A few days ago, while I was cutting the cabinets for my kitchen, I missed having a tool that could cut whole boards or large pieces in a faster, more efficient way, as well as making repeated cuts, which is why I also thought about attaching a cutting station to the bench, using a plunge circular saw, which you will see in the next videos.
DIY Multi-Function Workbench Plans
How to make the workbench:
Now I’ll show you how to build the workbench. Since this is a big project, I took the cutting list included in the plans to the place where I usually buy boards to have them cut.
This way I can ensure all the pieces are square and cut to the exact measurements, and they only charge a few cents per cut. They have also marked all the pieces with their reference to facilitate the process.

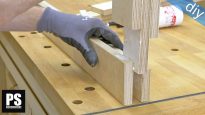
I’ll start with the frame. We’ll need a flat surface, or a straight alluminum jig to which we can glue them so that they’ll be straight when the glue has dried. In this case, I can use one of the ends of my workbench.
I cut a piece that will act as a jig to help me position the parts. I apply glue and use an air nailer so that the pieces won’t move while I tighten the clamps. We could also use that trick where you sprinkle sea salt on the glue.
Now that the four long frame parts are ready, when putting them together we can see they’re all straight. Now’s a good time to sand their edges.

Now I’ll glue the four legs of the frame. I’ll use the same method as before, using a jig to position the pieces and securing them in place with nails.

In order to finish the parts that make up the frame, I’ll make the two pieces that go in the middle, very similar to the legs.

Now I’ll ensure the tenons fit inside the mortises. It seems they’re okay, so now I can start assembling all the pieces that make up the frame. I’ll start with the long frame parts and middle parts. After putting in glue, I’ll clamp the parts down and make sure the joint is square.

I repeat the same steps with the rest of the frame pieces. To glue on the legs, I’ll have to put two clamps together because none of my clamps are long enough. When the glue is dry, I remove the clamps and plane the leftover material from the tenons. I also sand all of the frame’s surfaces.

Then, with the column drill I’ll make holes for the bench dogs. As you might have guessed, these holes could have also been drilled before gluing the frame together. After the first hole I make sure the steel rod slides in and that the hole is plumb.
I drill holes in the other frame for some threaded inserts that will allow me to adjust one of the benches rip cut guides. Also, I’ll apply two coats of matte water-based varnish.

Now I’ll start to assemble the cabinets between the two frames, giving shape to the workbench. First I make sure the pieces fit into the recesses in the frames.
I mark the positions of all the screws, drill holes and put all the parts together. You can’t see it in the video, but I applied glue on all of the joints. I also screw on the pieces dividing the cabinets and apply a coat of water-based varnish.
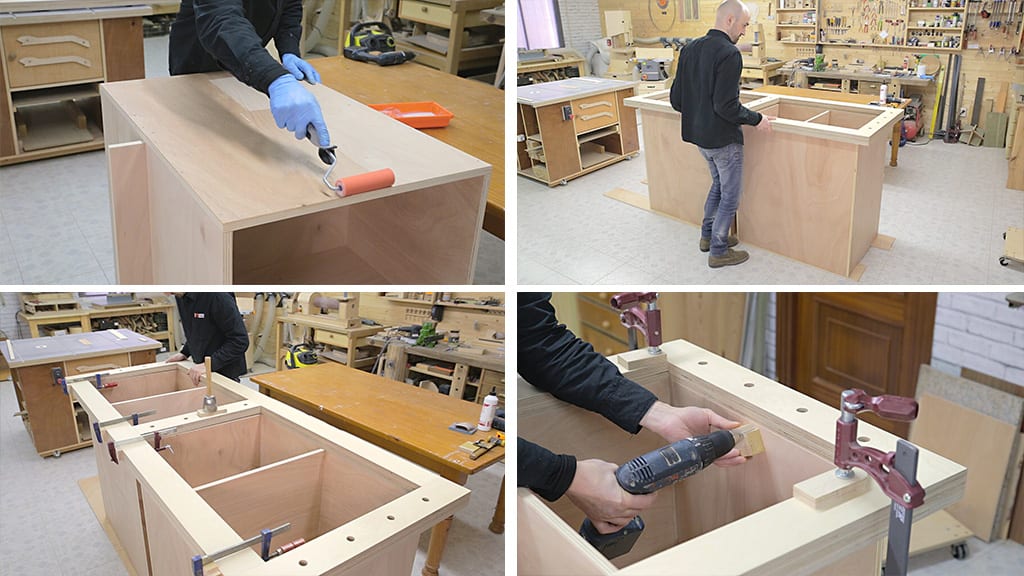
Finally I can put the frames and the cabinets together, the four parts that make up the structure of the workbench. In order to do that, I put the two cabinets on the floor and place the first frame on top. I’ll use clamps to make it easier to fit the cabinets into their recess.
I mark the positions of the screws, drill the holes and screw the on. I’m using screws in case I need to disassemble it some day, but glue can be used instead. I flip the bench and fit the other frame like before.

Before attaching the screws, I make sure all the surfaces of the frame are straight. Now it’s time to attach the wheels. I need a little more thickness, so I fastened four hard plywood pieces to the legs.
These are the wheels I’m going to install. I got them from the supplier Caster HQ to test them out. I saw them online a while ago and thought they would be a perfect fit for this bench.
By turning a gear I can raise and lower a rubber foot pad to lock and release the wheel, which will come in handy when I need stability when working on the bench if I want to keep in in one spot.
Also, they will allow me to level the workbech when it is in the same position for a while. This model can support around 1,000 kg per set, more than enough for this workbench.
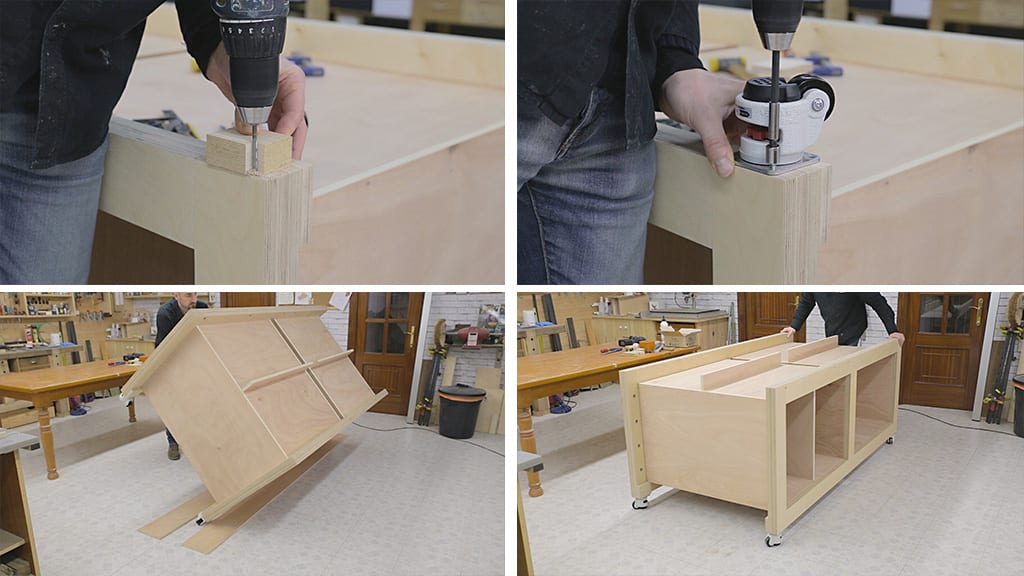
After working out their emplacement, I attach them to the bench with hex lag screws. I flip the bench over, and as you can see, the wheels work well. Of course, I could use a different kind of wheel of a similar height that can support around 600 kg. Here you’ll find the second article where I’ll show you how to install the workbench top and the rip cut guide.


I am interested in the purchase of the plans for this magnificent workbench if they are still available.
Do you have a website with other projects available?