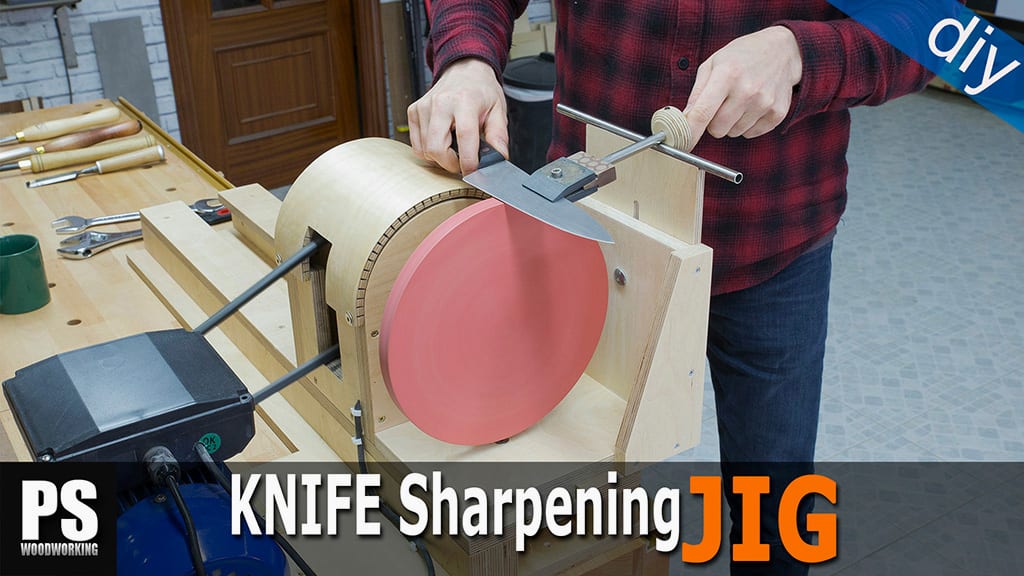
Today I will make a grinding wheel for the lathe so that I can sharpen all my tools, such as woodturning chisels and other kinds of chisels. I’ve come up with a system allowing me to change and tense the sandcloth in an easy and convenient way by simply turning a screw.
Some users have asked me why I did not make the wheel wider, making a wider one wouldn’t be a problem, but I think it’s easier to get a straight edge with this thickness.
I have also been asked if it’s dangerous to press the tools against the wheel while it’s turning due to the wheel’s canal. After lots of testing I haven’t had any problems, as long as the edge of the tool is above the wheel’s axis and you push gently. At any rate, it would be a good idea to install a switch so that you can reverse the lathe’s motion when necessary.

If you are interested in collaborating with my web or building your own grinding wheel, here you can download them.Here you’ll find the grinding wheel plans:
DIY Grinding Wheel Plans
Here’s a step by step guide of how to make it. I’ll begin by cutting the wheel out of a piece of plywood. It has the same diameter as a standard grinding wheel. I will also machine these other wheels to which I’ll attach an extension nut.

After machining all the pieces, I glue them together. When the glue has dried, it will be time to attach the coupling nut. I’ll use polyuretane adhesive, although I could have also used epoxy resin.
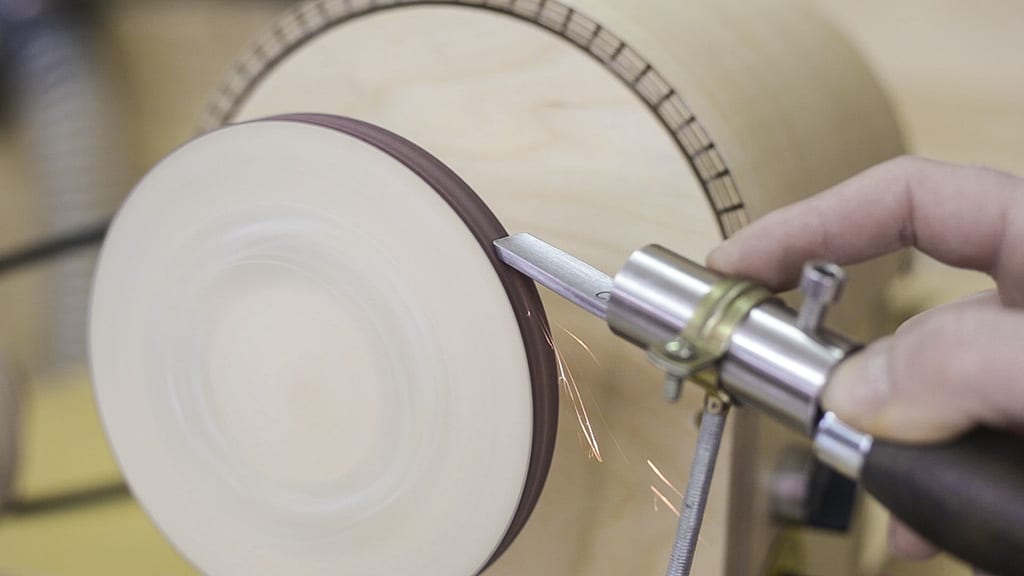
After two hours, I wipe off all the leftover glue and get ready to turn the wheel. I’ll adjust all of its surfaces to avoid any unwanted vibrations. For that, I’ll set my lathe’s speed to medium. 1500 rpm will be more than enough.

I will use a roughing gouge to leave all the faces balanced. The edge of the wheel must be at the exact right angle to achieve good results when sharpening.

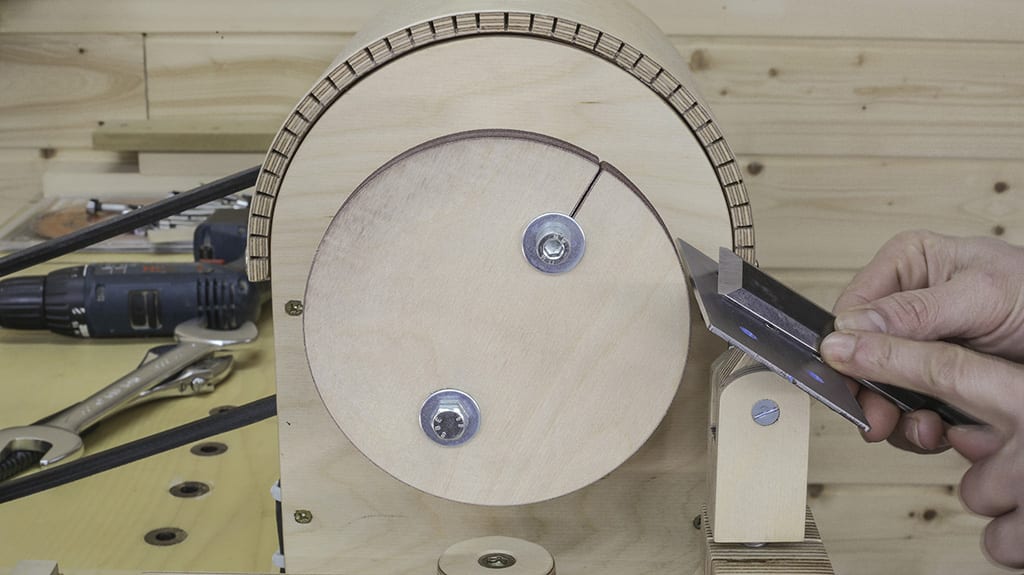
Here I’ll machine a hole 2mm wider than the diameter of the screw I’ll use. I prepare this groove for the sandcloth.

And now, using an angle grinder I machine this groove in the screw allowing me to tense the cloth.

I cut a strip of sandcloth of the appropriate length. To work out the length, I multiply the diameter of the wheel by pi and then add however much is missing to reach the screw hole.

As you can see, adding the cloth is quite easy. The screw destabilizes the wheel causing the lathe to vibrate. It’s nothing major, but still, I will solve it by adding another screw of similar weight on the opposite side.
Touching the screws while the wheel is in operation could be dangerous, so I will look for some plastic covers or something like that to cover them on both sides.

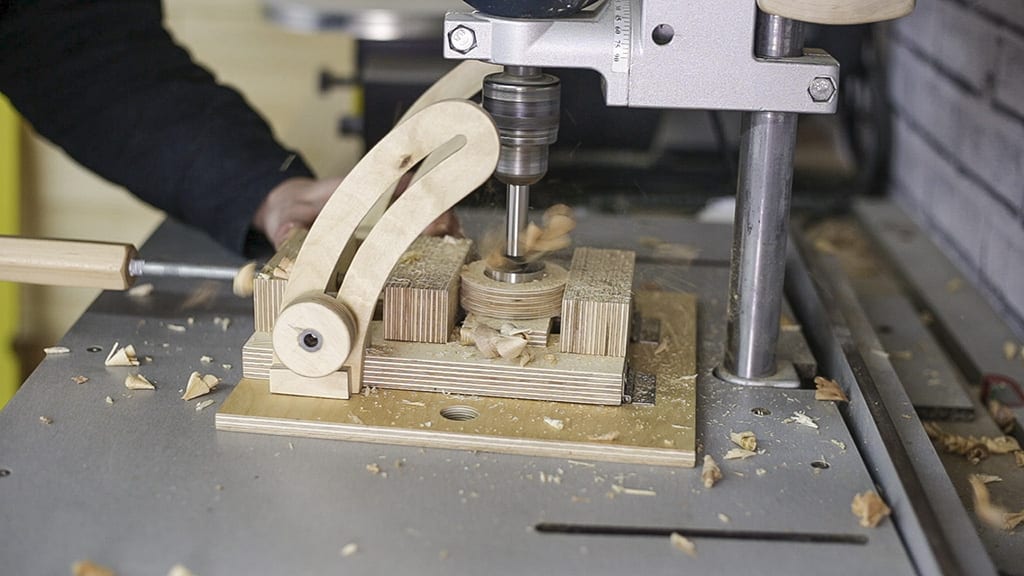
Now I will machine all the necessary parts to build the toolrest, as shown in video. Then I will also glue the threaded rod which will allow me to raise and lower the toolrest with polyuretane adhesive…

…and while it’s drying I will machine this iron plate I had in my workshop. I screw it onto this piece, allowing me to turn the toolrest and then I will sand the upper part to make it completely flat

I set up the whole system and after setting it to the desired angle I run a quick test. Everything seems to be working as intended! I’ve used P120 grit sandpaper, but for this kind of sharpening jobs, I think P240 at 1500 rpm would be enough.

Now I will prepare this accessory for sharpening round bowl turning chisels. The first tests seem to have gone smoothly.
And finally I will prepare another accessory to sharpen gouges with greater diameters with this hardware I had in my workshop. It’s a very simple design, and after several tests everything seems to be working well. I used a pipe clamp, an allen screw and a piece of threaded rod.
We will have to make rods of several lengths adapted to the chisels in our workshop, because not all of them will have the same radius of curvature.


Nice one. One of the best hacklife diy tool. I’ll create a grinding wheel soon.
thanks mate, send me some photo!
That was pretty awesome. I loved the mechanism you used to mount the sandpaper on the grinding wheel. Nice approach to the sharpening jigs for all the different lathe gouges! Thanks for sharing
thanks mate!