In this article I will show you this stand with drawers and wheels that I made for use with a jointer/planer combo or other small portable tools. I’ve used birch plywood, although a lighter kind of plywood such as okumen or pine could work as well, or even MDF.
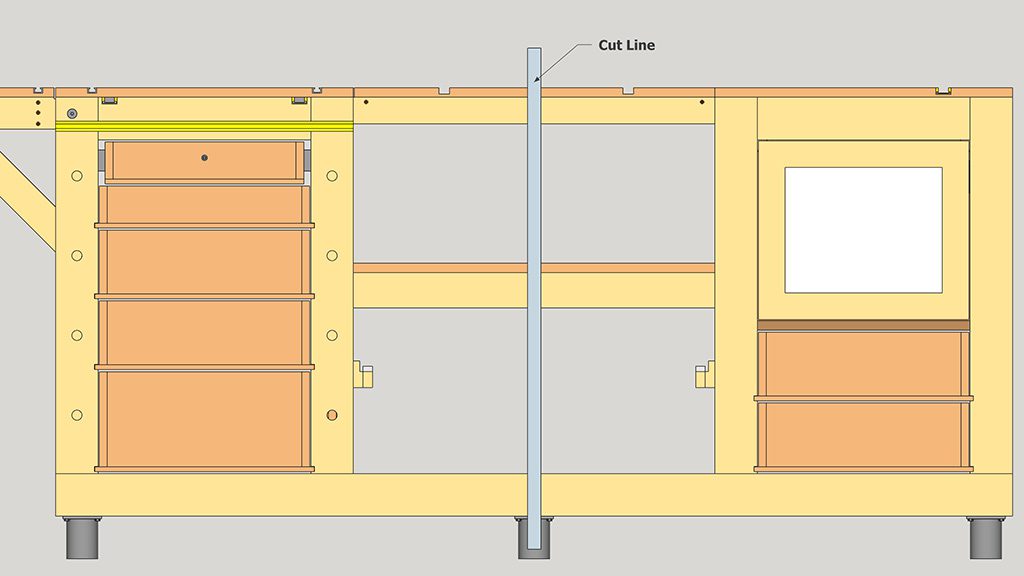
The drawers will slide along a groove machined on the side of the stand, saving me the trouble of installing slides.
Approximate weight: 15kg
Total dimensions: 568mm High, 500mm Wide and 450mm Long.
Jointer & Planer Stand Plans
This time I have not recorded a video about its construction, but its design is very similar to the base that I made a few days ago for my band saw.
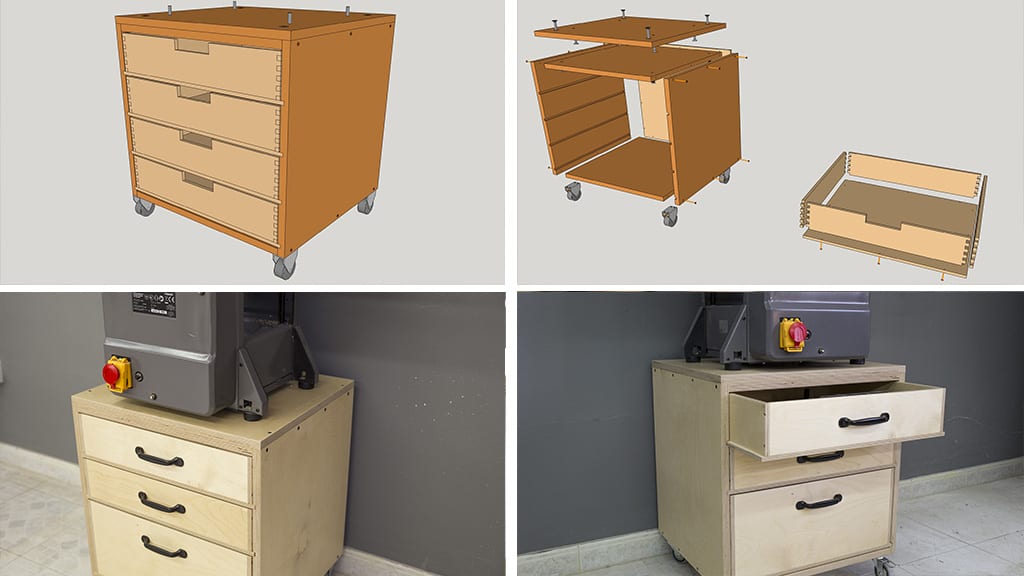
I have made some changes to the original plans that you will find on my website, for example I have not used box joints in the drawers, and to save time I have used glue and screws, although the result is also acceptable.
I have installed handles instead of machining them in the drawer itself, and I have made the lower drawer higher. In this way instead of four drawers this base has three drawers.
You can make the base identical to the plans, make these changes or other changes that you want. What you should keep in mind is that the worktable of the jointer should be about 900mm from the floor. This is the usual height to work comfortably.
For this you must take into account that this base measures 568mm high, it is perfect to use with a jointer/planer combo like the one you can see in the photos, which measures about 320mm in height. If you are going to use another type of tool, you may have to modify the design a bit to preserve the height.


I like the final look of the finished base with the jointer/planer combo on top. Thanks to its wheels the base will be very comfortable to use in my workshop. In this way I will be able to move it towards a more open space when working with large pieces.
Inside the drawers I have saved all the accessories of the planer, and thanks to its double plywood top it will be easy to remove the jointer/planer combo from the base when you need it.
As you can see in the bottom photo, I have reinforced the tilting fence of the planer because it was quite bended and unstable. I have used a steel rod and three screws that go through the original guide. The steel rod and the new plywood guide that I have installed.
With a good calibration/maintenance and some other small improvement like the one I have mentioned, this type of jointer/planer combo work very well!