I’ve spent the last few days trying to develop a sanding station for my homemade lathe. Since turning is not a very common operation in my workshop, I’ve thought about getting more use out of the engine by adding a belt sander and a small thickness sander.
For both tools will be enough 800 revolutions, the slowest speed of the three options that I have on my lathe.
In this article I’ll begin to build the thickness sander for my sanding station. As always, I’ll start by cutting all the necessary pieces following the cutting list. Here you’ll find the downloadable plans:
Useful dimensions of the thickness sander: 400x50mm
Length and width of the sanding belt: 915x50mm
Belt & Thickness Sander Plans
How to make a thickness sander EP1:
These are for the drum sander. I’ll sand all their surfaces to avoid imperfections and ensure better bonding. First I’ll put the pieces together with screws to prevent them from moving due to the glue’s viscosity. Them all we have to do is apply glue and tighten with clamps.

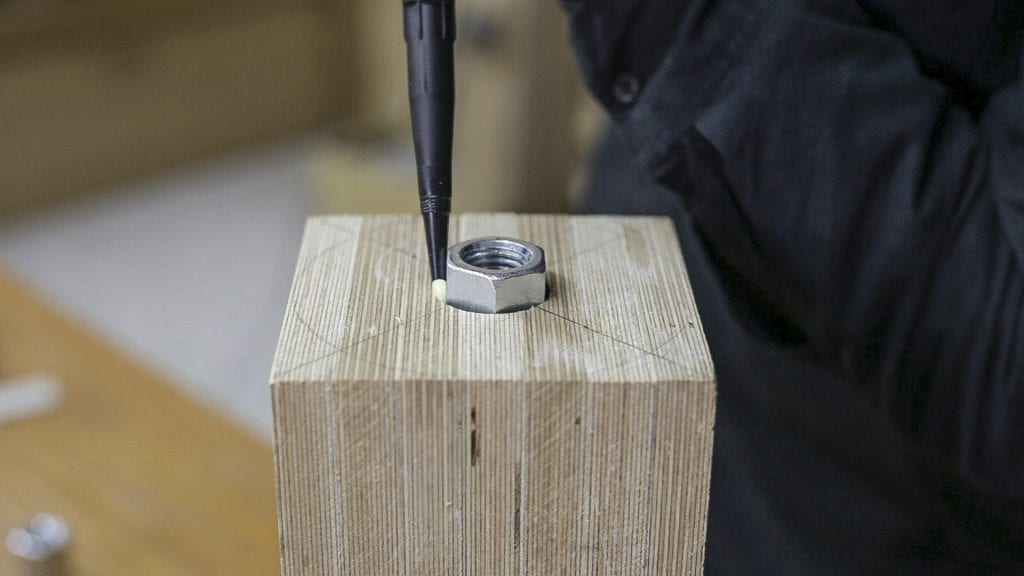
I’ll mark the center and the circumference of the cylinder and make a hole wit a drill bit in each head to insert a couplig nut.
This drum could be built in a different way, cutting the plywood in circles and then gluing them together until the desired length is obtained. Both methods are fine as long as the result is successful!
As you can see here, the union nut fits a bit loosely. I’ll fill the gaps with polyurethane adhesive, a bonding agent that sticks to all kinds of surfaces and hardens when dry. We could have also used some good epoxy adhesive.
I put the drum in its emplacement before the glue is dry. This way I can ensure both union nuts are aligned with the shaft.
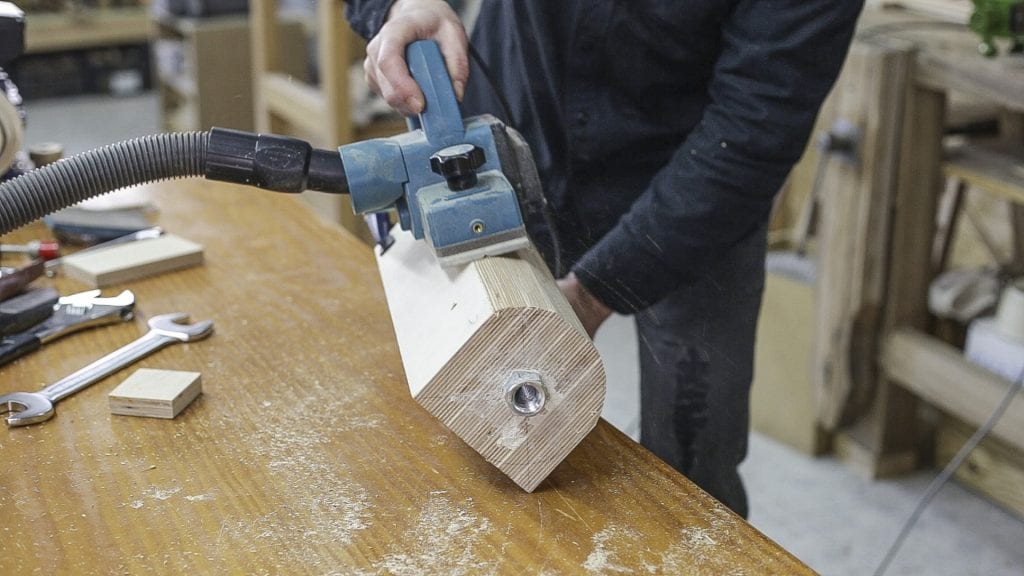
Once the glue is dry, I remove the drum, wipe off any remaining glue, and give it shape with the electric hand planer.
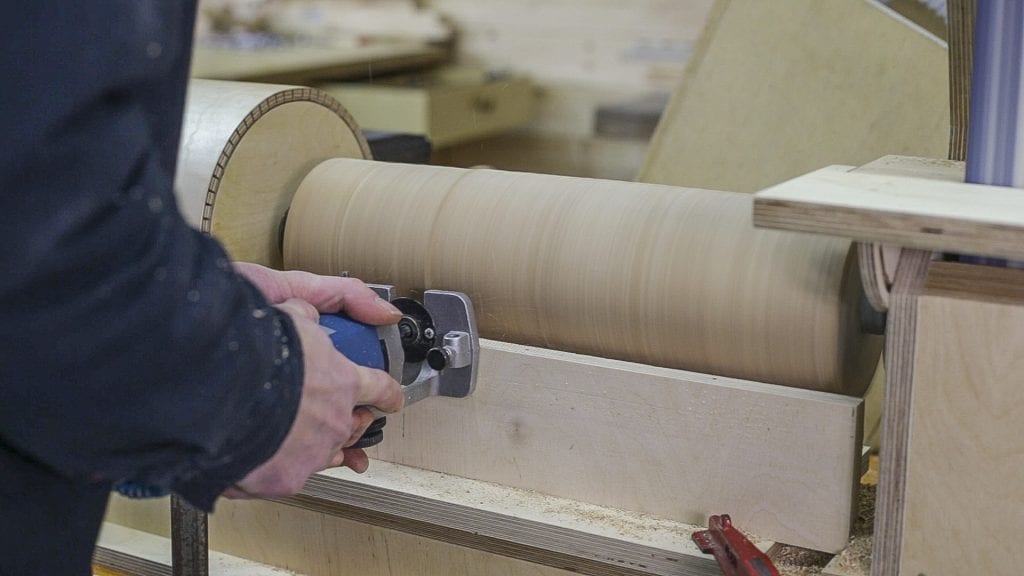
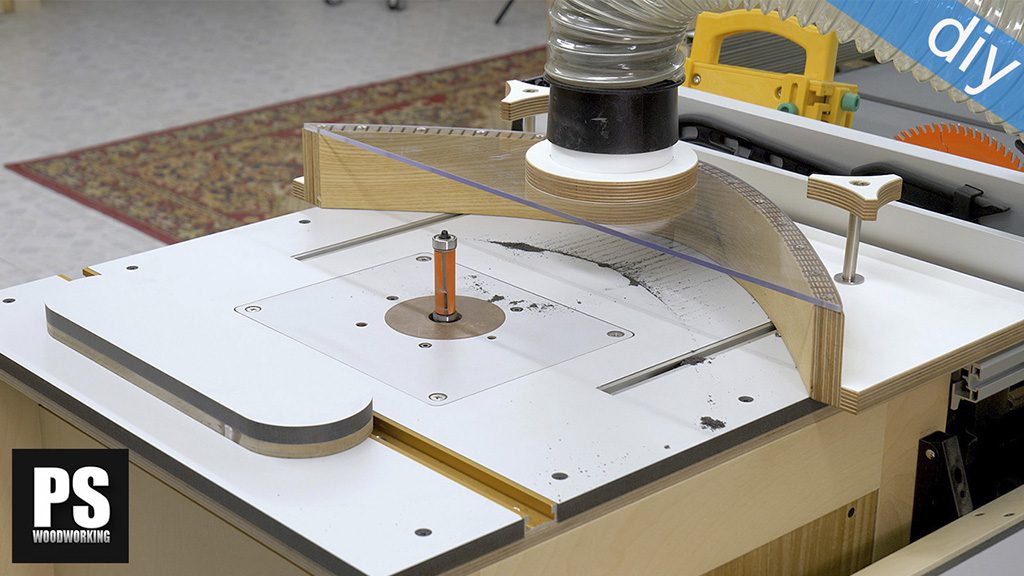
Now that I’ve achieved a rough cylinder, I’ll finish working it into shape on the lathe. I’ve prepared this template so that I can do it with a router and his follower. After trying it with the lathe switched on, I decided to start roughing with the lathe switched off, because it was too much for the router. After the first milling I can cut with the drum spinning, and the result seems to be pretty good.
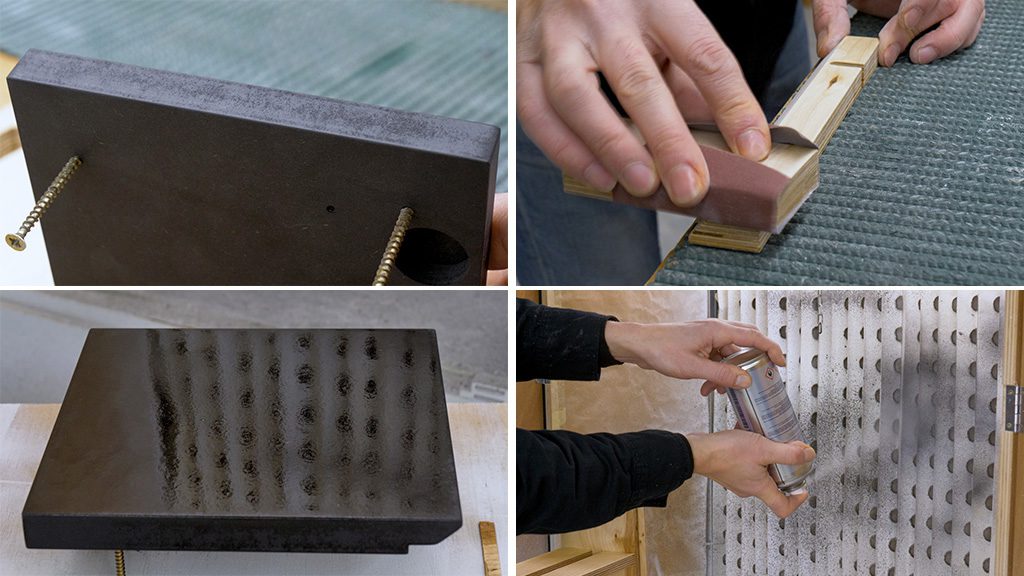
I’ll use contact glue for this purpose. After applying it on both surfaces I wait for about 5 minutes so that the glue won’t stick to my fingers, and then I can attach the Formica. Then I will mill the rebate for the hinges. I’ll do it on the 3D Router. I make sure everything turns as it should. Both pieces should match perfectly around the edges.
I’m going to carry out a test run of the finished table. It must be mounted from behind like this. The screws must then be tightened and the desired height is adjusted with the knobs. Later on, when I build a specific bench for the lathe, I will attach a threaded rod allowing me to more easily and more precisely adjust the desired height.
How to make a thickness sander EP2:
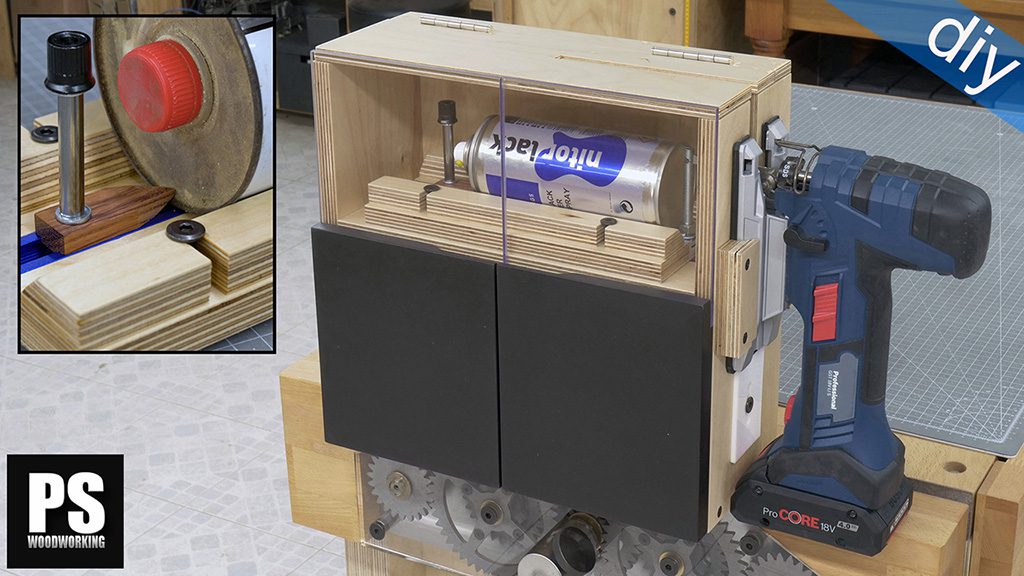
This is the fourth and last video in the lathe sanding station series. I’ll begin by making the dust cover for the thickness sander.

As you can see, I’ll use this PVC pipe for that purpose. I’ll cut it lengthwise and like this so that I can insert it in the sanding drum. Using a heat gun, I’ll try to bend the PVC into shape.
These are the covers for the ends of the pipe. They will also help me obtain a perfect bend. I’ll put them in place with screws. Then I’ll glue this 0.5 maple veneer. This is merely decorative, we could leave the pipe as it is or paint it. I’ll use contact glue, making sure there are no pockets of air underneath the veneer.
Now I’ll machine these parts that will allow me to insert the dust pipe. I give them a curved shape with the belt sander and glue them in the centre of the cover. I drill the PVC slowly, being careful not to break it. The plywood will function as guide.
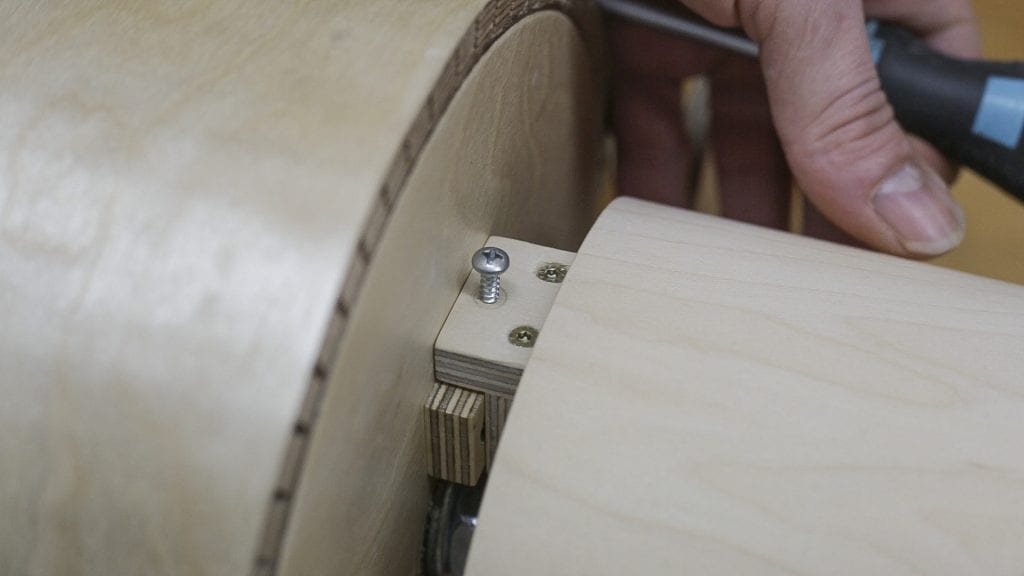
These L-shaped plywood parts will help me put the dust cover in its place. The cover must be attached and turned like this. A couple of screws will be enough to stop it from moving.
Now it’s time to adjust the sanding drum. I’ll use this piece of MDF to which I’ve glued some P60 sandpaper. I adjust the height and proceed very slowly like this. I’ve noticed that, for the cylinder to be even, I must remove about 2mm of wood on one of the ends, so it’ll take a few minutes before I can make it perfect.
The dust cover seems to be working as intended! Some of the thickest particles of sawdust do fall on the table, but most of it is sucked out, and I’m not even using a particularly powerful vacuum. Good thing, too, because this operation would blow sawdust all over our workshop.
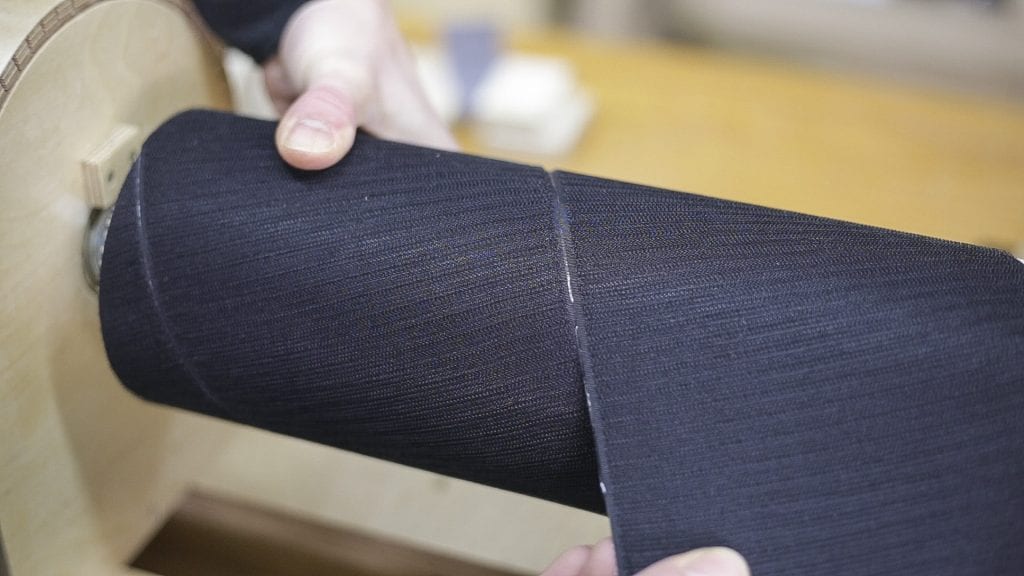
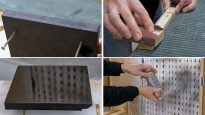
Now that the drum seems to be finalized, the next step is to glue this velcro strip to it. I cut this piece of paper to use as template. We should make sure the measurements are right if we don’t want to do it twice!
We must work out the circumference of the cylinder, which we can do by multiplying its diameter by Pi. The result will be this diagonal measurement. I cut the velcro and stick it like this.
The fact that it’s self-adhesive makes the job so much easier. I haven’t found any strips longer than one metre in my area, so I’ll have to put in on the end the piece I cut at the beginning. I’ll heat up its sticky surface a little to improve its adhesion. However, applying too much heat could render the velcro useless.

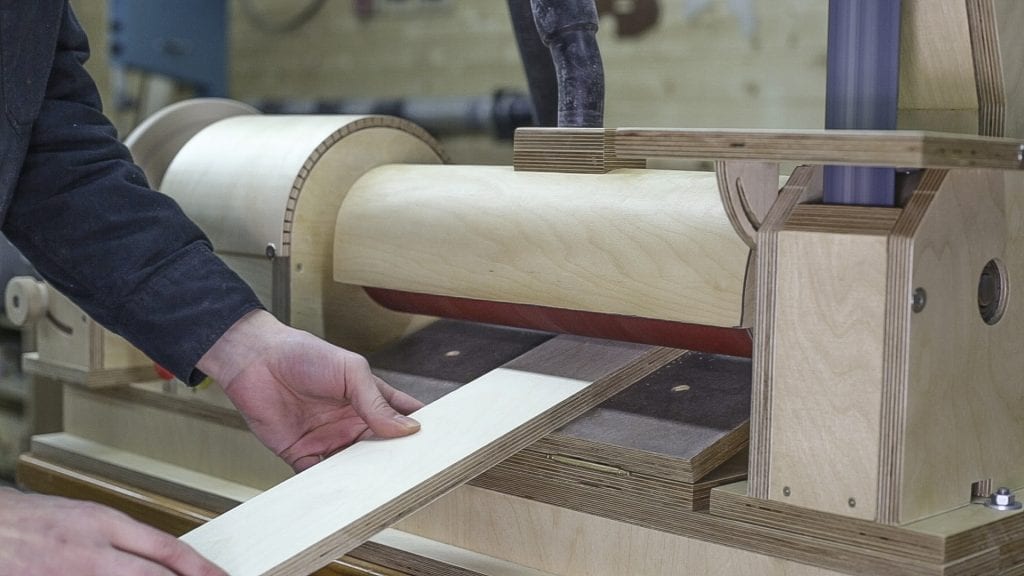
Now it’s time to cut the sandpaper. This diagonal must be as long as the one we worked out earlier. Then I put it in place like this. I’ll try it with P60 sandpaper because it’s what I have in my workshop, although P80 might be enough for this thickness sander.
The sandpaper itself will serve as template to cut replacements in the future. I’ll use the opportunity to sand the color off the formica. It was eventually going to wear away, anyhow. As you can see, it’s quite easy.
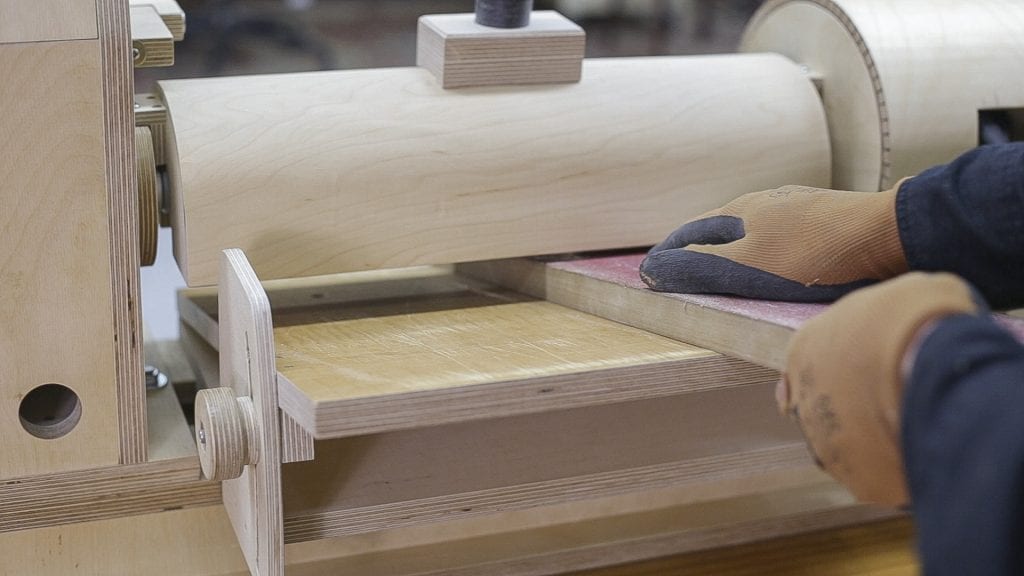
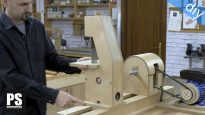
Now all that’s left is make sure eveything works! I choose the pulley configuration with the lowest revs, 800 RPM will be more than enough. I put the cover in place, adjust the height, and sand this piece of birch plywood, known for being quite hard.
The layers of the plywood allow me to see if the thickness sander is working properly, and that seems to be case! We must keep in mind that it’s not advisable to push the machine too hard. It’s always better to make several runs, especially if the pieces we want to sand are very wide.
Now I’ll try it with this wider piece of pine wood. I’ve marked its surface with a pencil to see if it works correctly… and it does. Another bit of advice to keep in mind is that once we insert the piece we want to sand, we must run it at an even speed and without stopping, because the sandpaper will damage the result if we stop proceeding.
I’ve also drilled this hole on the base for the sanding disc and made this cover to improve dust removal. The engine must be turned off before attaching the dust pipe and adjusting the thickness sander’s height, as the belt is too close and could be dangerous.


Fine work, I take off my hat!
thanks!
Great idea! I have a thickness planer, but sometimes wish I had a long drum sander. And, I am working on a project which requires very precise side to side tapering of relatively large pieces of wood (24 to 30 inch wide). This might just be adaptable for this use. Thanks for sharing.
Excellent!!