This is the second article about the construction of my new modular woodworking bench, a bench with great storage capacity that can also be used as a mobile tool stand. Here you’ll find the first article.
Modular Workbench Plans
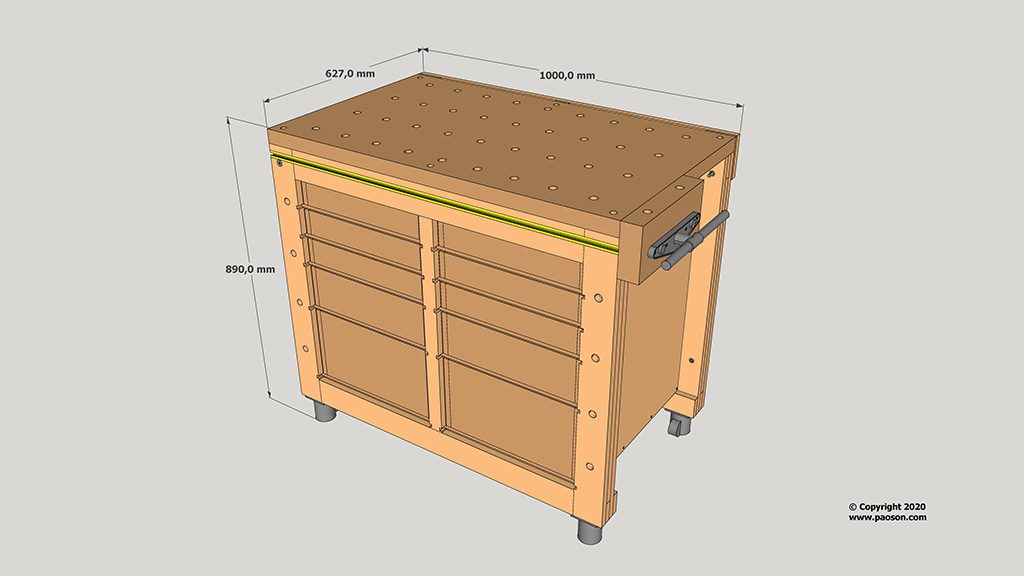
Here’s the 3D file you’ll find in the plans that you can buy on my website. It’s built using the same system as the Multi-Function Workbench I made, but this one is smaller, about 100cm long and 60cm deep.
Rather than making it by cutting away, we’ll be joining parts together. Making a modular bench was my first idea when I built the Multi-Function Workbench, and since some of you have requested plans for a similar but smaller bench that can be adapted for use in workshops with limited space, I’ve decided to go ahead and make one.
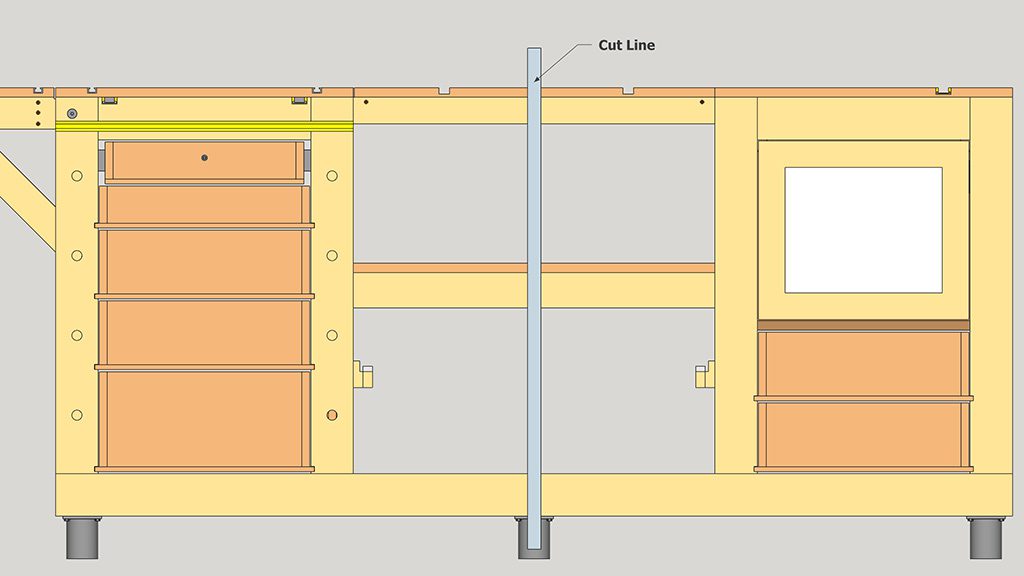
Since it’s modular, you can try different combinations. You can make just one, two that are separate or joined, three or even four. For now I’ll build two, though later I might make more.
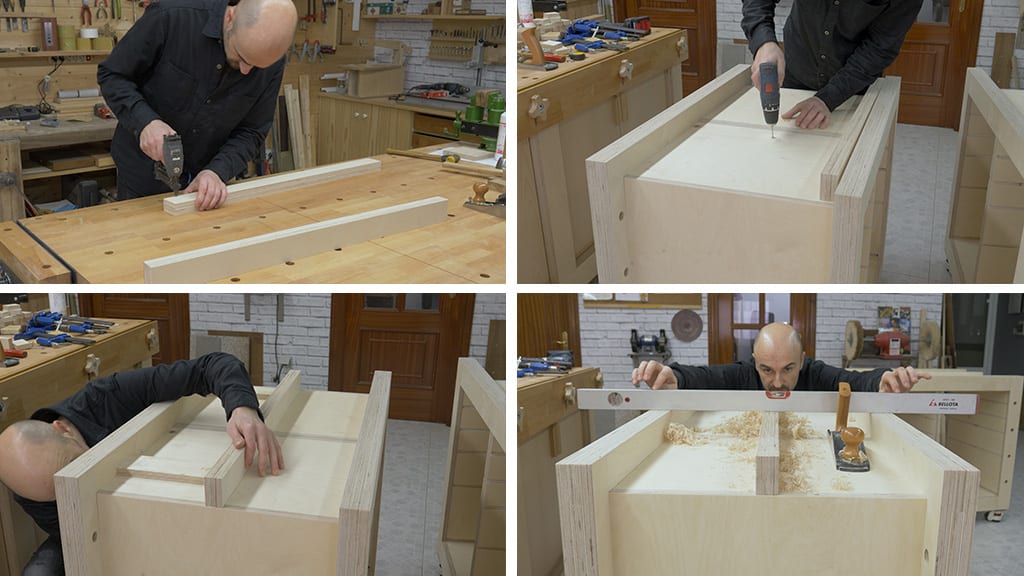
I’ll start this second part by gluing these two pieces of plywood together to make the bench top more sturdy. I mark their position on the bench and screw them on, and I’ll use wood glue as well.
I’d cut them a little too big, so now I have to trim them with a plane. Little by little I shave them until they’re at the same height as the frames.

Now I’ll glue some plywood strips to the fronts of the cabinets. First I’ll drill some holes in the fronts so I can attach some small pieces on the front of the bench. I’ll fasten them with biscuits and wood glue. Once the glue is dry, I’ll make the holes a little deeper for the bench dogs.
I’ll also cut some rebates in the parts where the drawers will slide, I’ll use a hand saw and a router. I’ll only do this in the front parts of the bench, the back parts will act as a stop when closing the drawers.

With the plunge saw and its guide rail, I’ll cut a groove to insert the T-track. I’ll use some pieces of wood as a jig so that the milling will be the same in both benches. Of course, we could also use a router here.
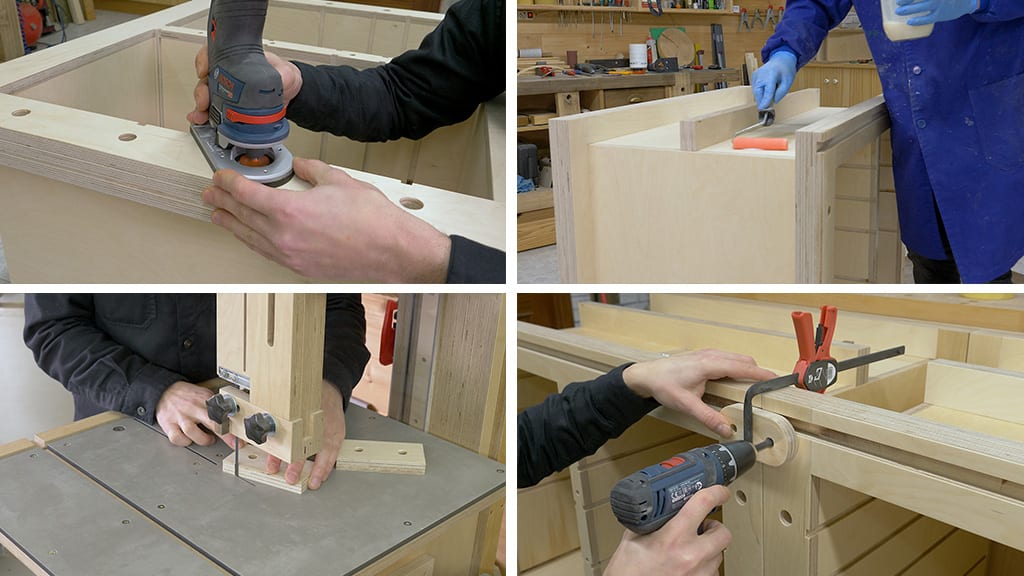
Now I’ll make a chamfer to the holes in the front of the benches using a hand router. Now would be a good time to apply two coats of water-based varnish to all the front parts of the bench. Then, I machine all the pieces that will join the modules together.
I drill some holes for the threaded inserts and shape them with the band saw. I place them on the frame to mark where the holes will be.

I’ll move the second hole one millimeter to the left, so that when I drive the screw, it will push the benches together. After placing the threaded inserts, I check whether the joining mechanism works correctly. It seems that it does!
The next step will be to install the bench tops. I’ll use the same beech finger joint board as in my previous multifunction workbench, and which, again, has been sent to me by the company Basic Madera. It’s precut, but I’ll use a plunge saw to adjust it to the bench’s measurements. I’ll cut it 2mm shorter on both sides to account for expansion.

Now, with the column drill, I’ll make holes for the hex lag bolts that will secure the top to the frame. I’ll use a bit with the same diameter as the washers. I will use up to around half of the board’s thickness.
I’ll finish the hole with a bit of the same diameter as the screw, and on the frame, a bit that’s 1mm smaller. I’ll make the back holes of the top bigger with a bit 2mm bigger than the screw I will use, and also to account for the board’s expansion. Now I’ll sand it down and apply two coats of varnish to the underside of the top
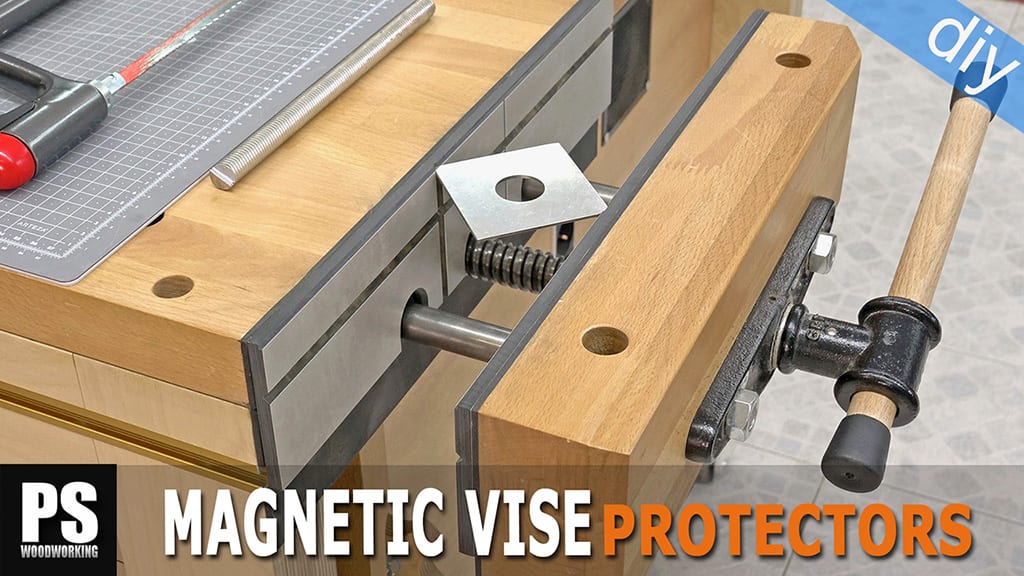
And now I can finally install the vise. Like I said in the previous video, I’ll install a new kind of gear-driven vise invented by Andrew Klein. I won’t go into too much detail on the installation process; Andrew has a few, very detailed videos on his Youtube channel. First I’ll clean and varnish the vise metal plate.

While I wait for the varnish to dry, I’ll mark the positions of two nuts and bushings on the underside of the top. I’ll join two pieces of plywood with screws to make the top thicker. The measurements of this bench are a little cramped for this kind of vise, but I think I’ll be able to adapt it.
I’ve cut a piece of plywood to acts as a spacer to screw on the bushings in their proper place. I mark the holes and place the screws. After the bushings, I’ll place the nuts in the same way.
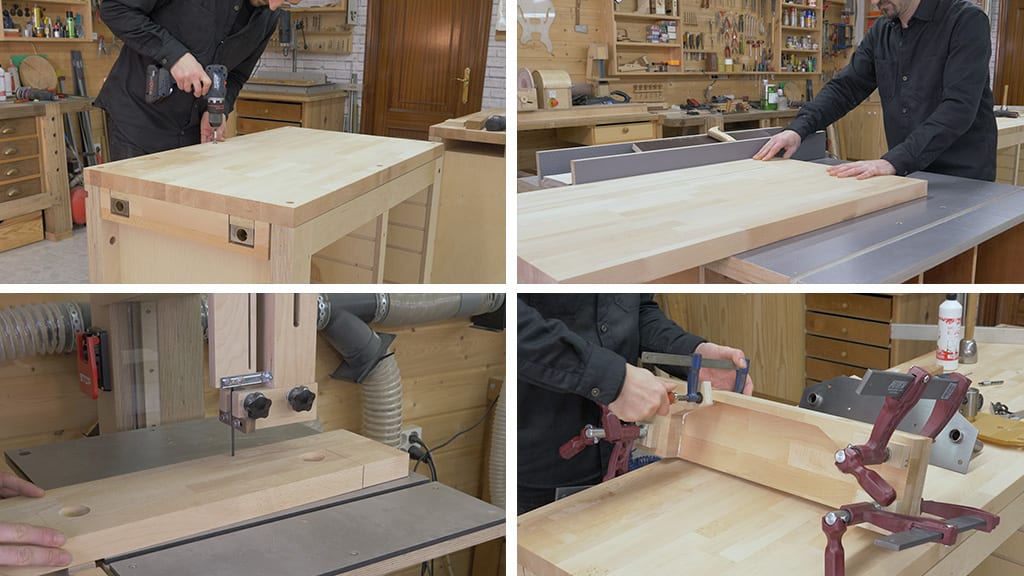
I’ve cut a piece of the same board I used for the top to achieve more support surface. I shape it and screw it to the bottom of the top. Now I can attach the top to the frame, and cut the wood for the vise’s wooden jaws.
I’ll shave it down to its required thickness with the planer. I mark the perimeter of the plate in the outer jaw and cut it with the band saw. Now I can join the two pieces.

Once the glue is dry, I mark and drill on the wood all the holes to install the vise. The next step is to mount all of the vise gears. The process is quite easy if you follow the tutorial videos.

In my case, I’ll also make a groove in the outer jaw to insert the acrylic of the vise. I’ll use a router, and some pieces of wood as a jig, although this would be much easier if I had the right router bit. Finally, I apply some oil-based varnish and glue the cork protectors to the wooden jaws.
That’s all for today. In a few days I’ll upload the third and final article, where I’ll be installing the drawers and demonstrating some possible uses for this modular bench. See you soon!


I’m interested in purchasing plans. Do you have alternate plans for the bench top as I live in the US and ordering from Europe will be cost prohibitive?
hello Mike, you could also use hard plywood/Mdf of a similar thickness, or even glue several boards together until they are about 40mm thick.
Just wondering what made you decide on the 100×60 dimensions. Is it for material saving to use one less sheet of plywood, or just general convenience in your shop?Would be nice to know the parts list before buying plans and building this. Based on parts list I can do a cost calculation.
hi Patrick, you’re right it is for material saving. It is also by proportions, I think it is a good measure to joint several modules, but could easily be resized. You will need one board of 18mm thick, one of 15mm and one more of 9mm to make one module, and what you want to use for the top.
How critical are the thicknesses? Seems like you can sub 19mm for 18mm ply based on availability without a significant problem, right (19mm is nominal 3/4″, whereas 18 mm is 23/32, which is a thickness that’s harder to find in hardwood)? Might require just a slight adjustment to fasteners?
hi Kenneth, take a look at the end of this article: