Bathroom Vanity Specs:
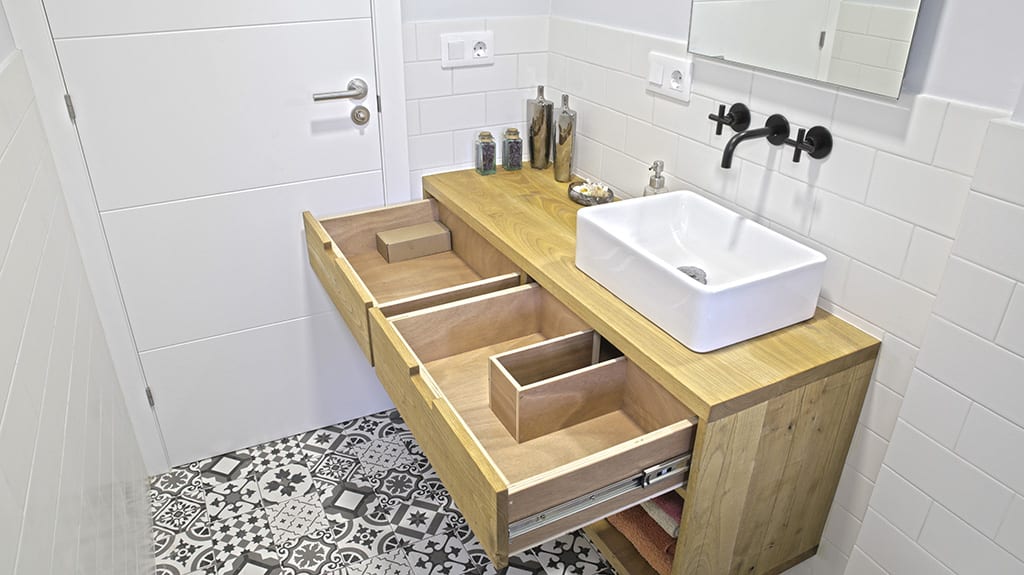
Today I’ll be showing you how I built this wall mounted bathroom vanity. It will look perfect in small bathrooms, such as mine, where open, hanging furniture helps create a sense of spaciousness.
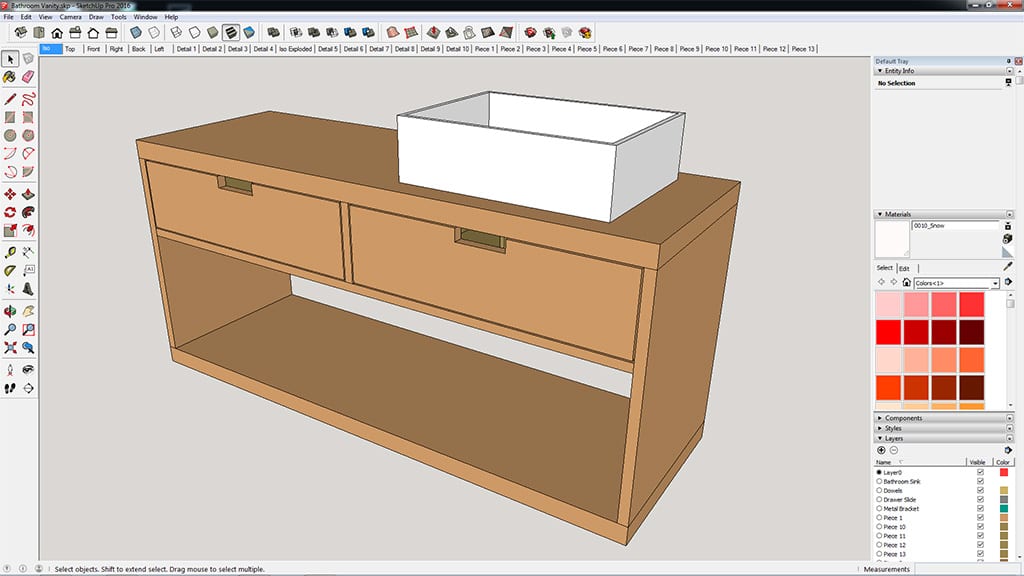
As always, I’ve made a 3D model to get an idea of how the unit will look, as well as making its construction easier. If you would like to make a similar piece of furniture or contribute to my channel, you can download the plans from my website.
I used lumber rather than boards when designing the plans, in order to make the construction of the unit easier. If you decide on using lumber, you only need to join pieces side-by-side until you obtain the desired dimensions, like I did..
Weight approx: 35kg.
Dimensions: 55mm high, 1200mm width and 400mm depth.
DIY Wall Mounted Bathroom Vanity Plans
How to make a Bathroom Vanity:
I’ll be using this chestnut lumber to build it. Veneered MDF could also work. In order to make the top and base thicker, we can glue two 20mm MDF boards together. If you opt for using MDF, you’ll need a few meters of edgebanding of the same wood as the board.
I think it will look nice if I paint it with an opaque matte color, for example white. If you’re going to paint it, you can use raw MDF; it’s cheaper than the veneered kind.

After cutting the lumber down to the required length, I’ll use the jointer to flatten and square two of its sides. Now I’ll use the band saw to trim the wood down to the proper thickness. I’m aiming for a sawcut look, so this will be the outer surface of the unit.

Now I select the best combination of pieces of lumber and glue them together using biscuits. Once dry, I can cut the top and the base to size. I repeat the same steps with the side pieces, but these will only be half as thick.

Using some more biscuits and clamps, I’m going to put together the four parts that make up the frame of the unit. If you don’t have a biscuit joiner, you can use dowels. By measuring the diagonals, I make sure the unit is square before the glue is dry.
After the glue has dried, I sand all the edges with P120 grit and rub linseed oil on all sides. Now you can see the sawcut look better.

Now I’ll move on to making the two inside pieces of the unit. I’ll use soft plywood, and I’ll cover the front edge with a strip of chestnut wood. I’m going to put them in their emplacement using this kind of joint with hidden screws.
I’ll use jigs to ensure the pieces are square. I join the two plywood pieces with screws and apply some linseed oil on them.

The last step is to build the drawers. I check their measurements and subtract the width of the slides I’ll be using. I cut all the necessary soft plywood pieces and join them with screws. Also, I’ll fasten the bottoms of the drawers.
I’ll make a recess in the drawer underneath the basin for plumbing. When I finish building the second drawer, I apply two coats of matte water-based varnish.
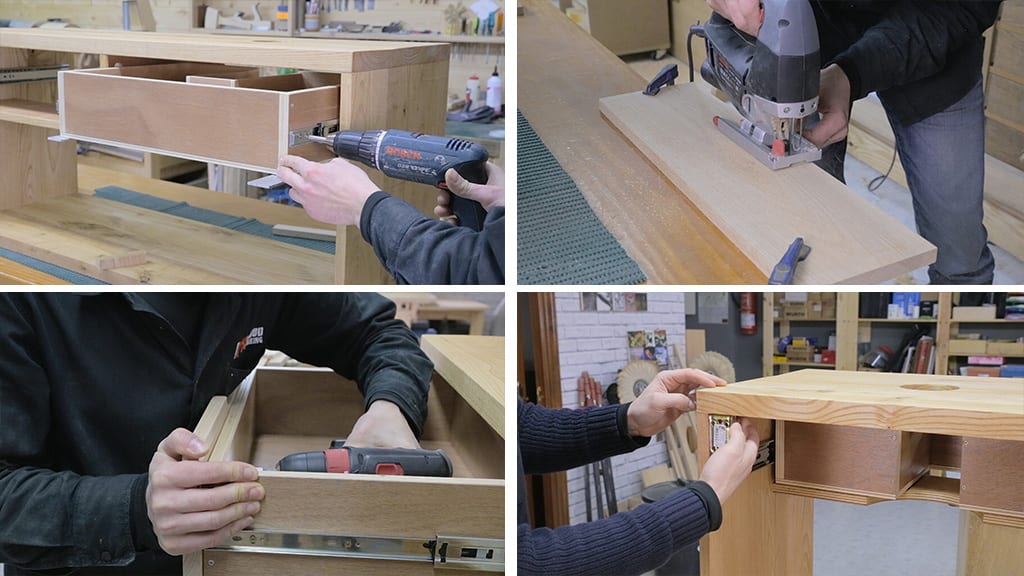
Now I can mount the drawers on the unit. With the help of a jig I fasten the slides to the furniture and to the drawers. I’m going to prepare the front sides of the drawers like before, with the same look. I also make a hole in them so that they can be pulled out.
I put in some screws to mark the position of the drawer’s front and now I can put them in place. Here we can see how linseed oil makes the wood look different, it really brings out the color of the wood! These metal brackets will help me attach the unit to the bathroom wall with screws.
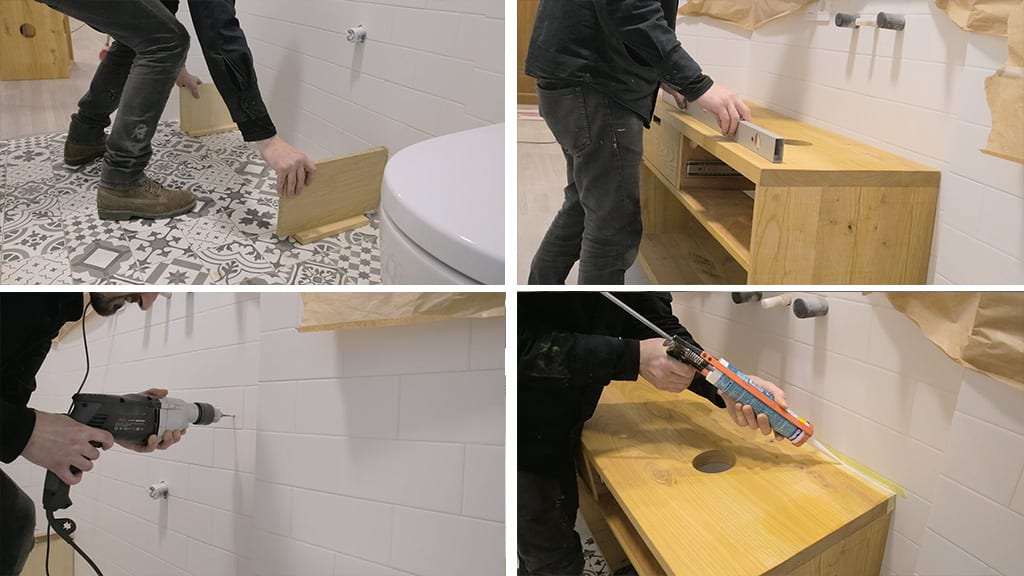
I made these two pieces that will make the installation easier. Now I only have to put the unit on them to mark the position of the holes in the wall and make sure the cabinet is square.
When drilling the wall, we must be careful not to pierce any pipes. Remember that in these kinds of bathroom cabinets, it’s the top of the basin itself that has to be at the usual height for this kind of furniture, around 850mm.
Now I put some silicone between the unit and the wall tile to prevent water leaks. I put some more silicone to glue the unit to the basin and, after installing the plumbing fittings, the job’s done!


question for you.. the drill on the wall (here in the US when using a drywall) to hold the vanity in place, should be on the wood stud?
hi John. Yes, in that case you must screw into the wooden or steel stud.
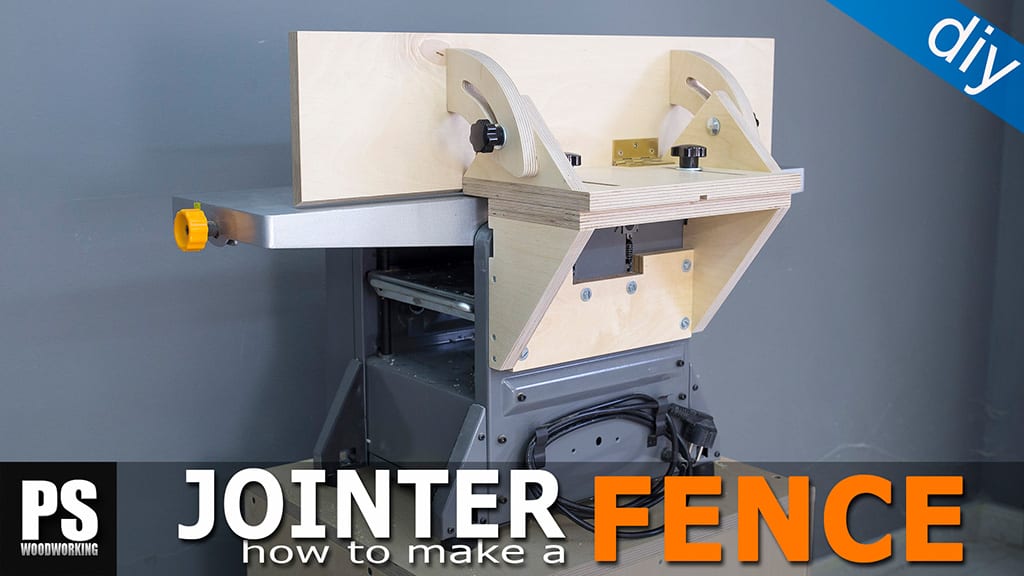
the vanity cabinet came out fabulous ! fa better than the commercial one. I recently bought your plans for the jointer fence and they worked great.
thanks Ben!