Share your woodworking projects!
-
Suso
- Posts: 2242
- Joined: Thu Oct 22, 2015 4:51 pm
Post
by Suso » Wed Nov 18, 2015 5:14 pm
-
LUIS FERNANDO
- Posts: 5
- Joined: Tue May 26, 2015 12:30 am
Post
by LUIS FERNANDO » Mon Nov 23, 2015 10:22 am
tienes mas proyectos en alguna web tuya
cual es
Gracias
-
bricabracwizard
- Posts: 5
- Joined: Mon Aug 31, 2015 2:27 am
- Location: Blue Mountains, Australia
Post
by bricabracwizard » Mon Nov 23, 2015 9:38 pm
Si te fijas en mi sitio de instructables: http://www.instructables.com/member/bricabracwizard/ te muestran cosas que he hecho y cómo hacerlas. Mi blog: http://steampunkwayoflife.blogspot.com.au/ tiene principalmente las cosas que he hecho con solo de Paoson 3D router que no he hecho. Espero que me entiendas esto que apenas estoy aprendiendo a español, por lo que la mayoría se hace con google.
-
Panelli
- Posts: 30
- Joined: Sun Dec 06, 2015 2:04 am
Post
by Panelli » Fri Jan 01, 2016 12:31 am
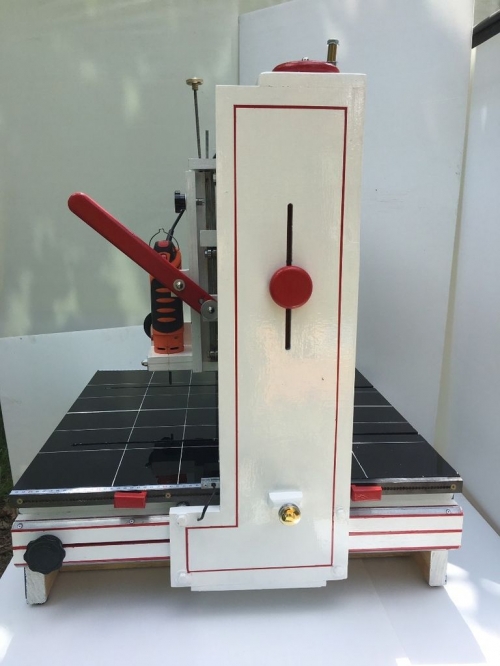
Nice work Bricabrac, I am just starting my build.
I notice two cranks for moving the X axis up and down. Was this to provide a way to adjust the Axis parallel to the bed?
What is the saw tooth material you used for the stops along the Y axis?
Thanks Nello
-
bricabracwizard
- Posts: 5
- Joined: Mon Aug 31, 2015 2:27 am
- Location: Blue Mountains, Australia
Post
by bricabracwizard » Fri Jan 01, 2016 4:31 am
Hi Nello, Thanks for the compliments. Yes I included 2 cranks for the Z axis for more accuracy, although one is fine...just a bit fiddlier to get it square with the bed. The bars along the X and Y axis were mild steel with 4mm holes drilled 5mm apart, these were laser cut by a local shop for accuracy. Cheers, bricabracwizard.
-
What?
- Posts: 2
- Joined: Sun Oct 16, 2016 8:14 pm
Post
by What? » Sun Dec 04, 2016 3:24 pm
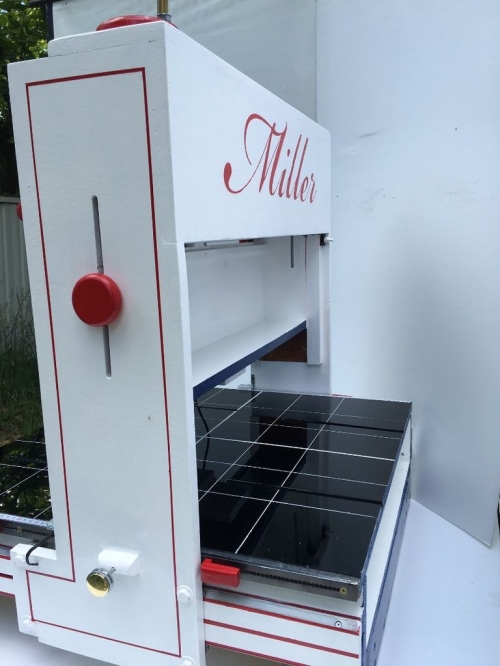
Well done Bricabracwizard! Your project looks really professional. What did you use for the shiny baseboard ?
Pete C
-
bricabracwizard
- Posts: 5
- Joined: Mon Aug 31, 2015 2:27 am
- Location: Blue Mountains, Australia
Post
by bricabracwizard » Sun Dec 04, 2016 7:41 pm
Hi Pete,
I have only just received this notification today 5 Dec 2016. In reply I used gloss black Formica which someone had thrown out. Thanks for the compliment and looking at my construction on Paoson's 3D router.
Cheers,
Michael (bricabracwizard)