Discuss topics related to the Portable Workshop
-
Cole
- Posts: 14
- Joined: Fri May 27, 2016 4:18 am
Post
by Cole » Sat Jun 04, 2016 1:54 am
I am from the US and will be working on this very shortly with a 2HP Dewalt. I want to use a box with a threaded screw to do the lifting.
stumpynubs.com/ has the design I am thinking of following. My table isn't done yet though and I have concerns of it not folding up correctly
-
info@paoson
- Posts: 43
- Joined: Thu Oct 15, 2015 5:35 pm
Post
by info@paoson » Mon Jun 06, 2016 6:20 am
Hi,
if you are talking about this one:
stumpynubs.com
It probably won't close... I am sorry.
Take a look at this, so you can see how you have to tilt it before close it:
youtu.be/2uKQqEMYwoU?t=520
You better go with an adapted holder like the ones I am showing in the first post.
-
Cole
- Posts: 14
- Joined: Fri May 27, 2016 4:18 am
Post
by Cole » Mon Jun 06, 2016 12:41 pm
The stumpynubs link you attached is correct. I really like his design for raising and lowering the router with a socket from the top side of the table. My thought was to attach the box and remove it each time. It is more work.
I wish I understood how to mount the router a little better. I looked at the pictures you sent and I do not quite understand how to do it. Some of those pictures have a different base cabinet than you and I am not sure how they work with your plans. You did attach one picture with a screw and socket to raise and lower the router and that one has my interest
-
info@paoson
- Posts: 43
- Joined: Thu Oct 15, 2015 5:35 pm
Post
by info@paoson » Tue Jun 07, 2016 6:25 am
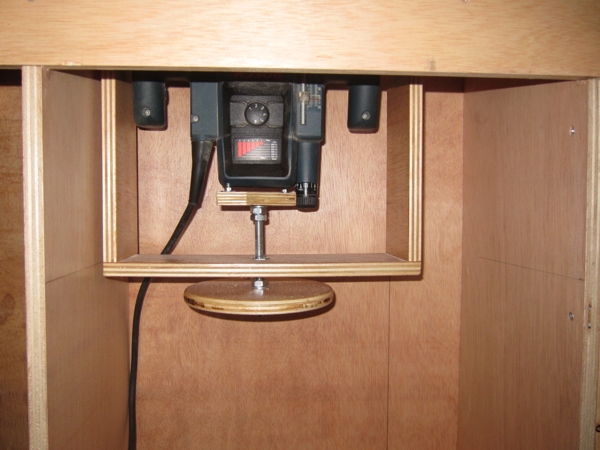
If you wanna go the easy way, with the original system included in the plans and using a couple of metallic brackets like these:

-
Cole
- Posts: 14
- Joined: Fri May 27, 2016 4:18 am
Post
by Cole » Thu Jun 30, 2016 12:28 pm
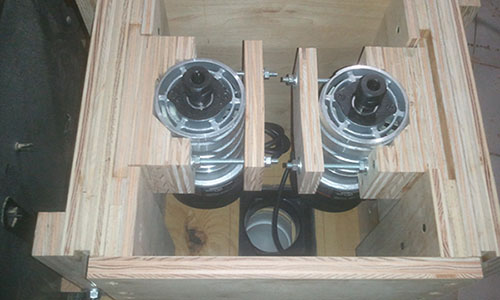
I followed your advice and decided to mount the router using your plans slightly modified to fit my router. I used hose clamps. I have a question about the miter slot that is next to the router. Your plans show the center of the router bit 141mm from the edge of the table top and since my router is bigger in diameter, the closest I was able to get was 150mm from the table edge. The miter slot next to the router is 75,7mm from the opposite edge of the table top. Since my router bit is 9mm closer to the middle of the table top, do I also need to move the miter slot 9mm over and put it at 66,7mm from the edge? Or, is the location of the miter slot not important and I can put it anywhere? Thank you! I am a few days from finished and I look forward to posting pictures!
-
Suso
- Posts: 2242
- Joined: Thu Oct 22, 2015 4:51 pm
Post
by Suso » Fri Jul 01, 2016 6:16 am
wrote:I followed your advice and decided to mount the router using your plans slightly modified to fit my router. I used hose clamps. I have a question about the miter slot that is next to the router. Your plans show the center of the router bit 141mm from the edge of the table top and since my router is bigger in diameter, the closest I was able to get was 150mm from the table edge. The miter slot next to the router is 75,7mm from the opposite edge of the table top. Since my router bit is 9mm closer to the middle of the table top, do I also need to move the miter slot 9mm over and put it at 66,7mm from the edge? Or, is the location of the miter slot not important and I can put it anywhere? Thank you! I am a few days from finished and I look forward to posting pictures!
Hi Cole Helget,
There's no problem with the location of the miter. This is small modification that no affect to the router position.
We are excited to see your pictures.
Thank you & have a great day.