Multi-Function Workbench Improvements

Discuss topics related to the Multi-Function Workbench
Post Reply
Suso
Posts: 2228
Joined: Thu Oct 22, 2015 4:51 pm

Re: Multi-Function Workbench Improvements

Post by Suso » Sat Mar 21, 2020 12:36 pm

Finger joint beech boards are very sensitive to humidity, especially beech wood, and especially across the width of the board, where more pieces of wood are in contact with each other.

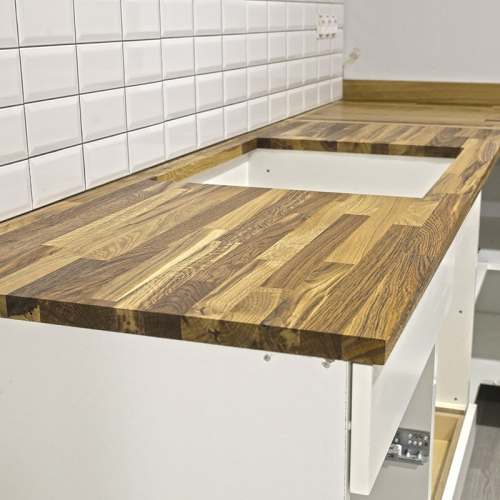
For that reason, I advise those who use this type of boards to leave clearance in the holes of the rear screws, those on the side of the doors, and not to overtighten those screws to allow that slight movement of the wood. Otherwise, the board can become deformed by not having space to move. After a few months, the board stabilizes.

Image


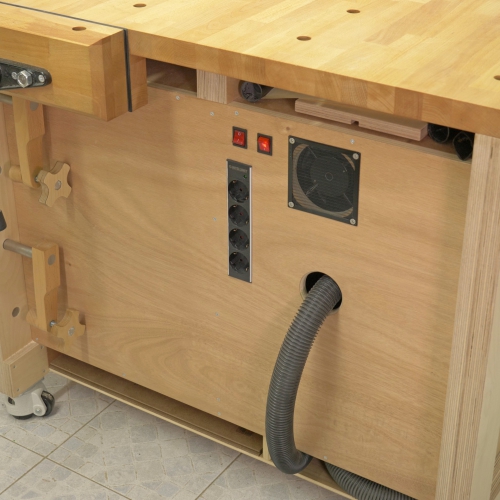
Finally, I have also installed an old axial fan for when I'll be using the vacuum cleaner for a long time. It will allow me to extract the hot air from the vacuum cabinet, since it was quite hot when used for hours. I've also installed two switches, one for the fan and one for the vacuum itself.

Image

Suso
Posts: 2228
Joined: Thu Oct 22, 2015 4:51 pm

Multi-Function Workbench Improvements

Post by Suso » Fri Apr 17, 2020 4:01 pm

Workbench improvements!
Today I've installed a couple of T- tracks on the front side. This will allow me to fasten pieces more comfortably:

Image

Image


I have also installed two more wheels, one in the center of each frame. It will only be necessary if you are going to load it with a lot of weight.

Image

PiedadKaster
Posts: 1
Joined: Fri Oct 09, 2020 10:36 am

Re: Multi-Function Workbench Improvements

Post by PiedadKaster » Fri Oct 09, 2020 10:37 am

This is good.

Suso
Posts: 2228
Joined: Thu Oct 22, 2015 4:51 pm

Re: Multi-Function Workbench Improvements

Post by Suso » Fri Aug 26, 2022 12:42 pm

I'm almost done editing a new video where I'll showcase some of the improvements I made on my Multi-Function Workbench, which I built around 3 years ago.This is an animation of the 3D Sketchup model included in the workbench plans, available on my website.

I used a construction-by-addition method to make the frames, which hold the two cabinets. The benchtop rests upon the frames. This system makes cutting the required parts and putting them together easier, and you can also disassemble it to do maintenance, or transport it when moving.


Suso
Posts: 2228
Joined: Thu Oct 22, 2015 4:51 pm

Re: Multi-Function Workbench Improvements

Post by Suso » Fri Sep 02, 2022 2:03 pm

Almost four years ago I made this Multi-Function Workbench and since then I've made some improvements to it which I'd like to show you. This is a short summary of the video I just posted on YouTube:


Suso
Posts: 2228
Joined: Thu Oct 22, 2015 4:51 pm

Re: Multi-Function Workbench Improvements

Post by Suso » Tue Sep 06, 2022 1:03 pm

This is the Rip Cut Guide of my Homemade Multi-Function Workbench. It’s a very convenient system for parallel cuts in relatively big boards! If you want to see this Rip Cut Guide in action, check my latest video on Youtube.


Suso
Posts: 2228
Joined: Thu Oct 22, 2015 4:51 pm

Re: Multi-Function Workbench Improvements

Post by Suso » Fri Sep 09, 2022 1:57 pm

Another snippet of the latest video on my channel, where you can see how I installed a hinged bracket for the track saw rail in my Multi-Function Workbench. I love this hinged bracket, it allows me to make precise cuts, and also, after lifting the aluminum rail, I can work on the bench as usual.


Suso
Posts: 2228
Joined: Thu Oct 22, 2015 4:51 pm

Re: Multi-Function Workbench Improvements

Post by Suso » Wed Sep 14, 2022 1:55 pm

I've edited this short video to showcase just how easy and quick it is to detach the hinged bracket for the track saw rail which I've installed in my Multi-Function Workbench. In just a few seconds, the bench will be back to the way it was as if nothing happened!


Post Reply