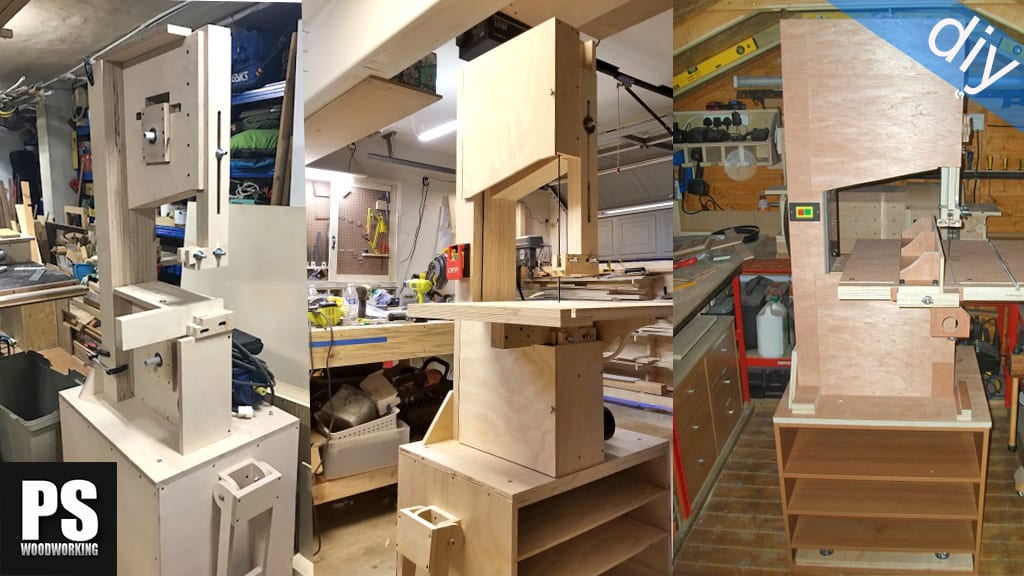
This is the third article in the series where I show you how I built my new band saw. I’ll be showing you how to make the guides for the blade and the saw’s table.

This is the 3D model of SketchUp included in the plans that you will find on my website. If you are interested in collaborating with my web or building your own band saw, here you’ll find the plans:
Band Saw Plans
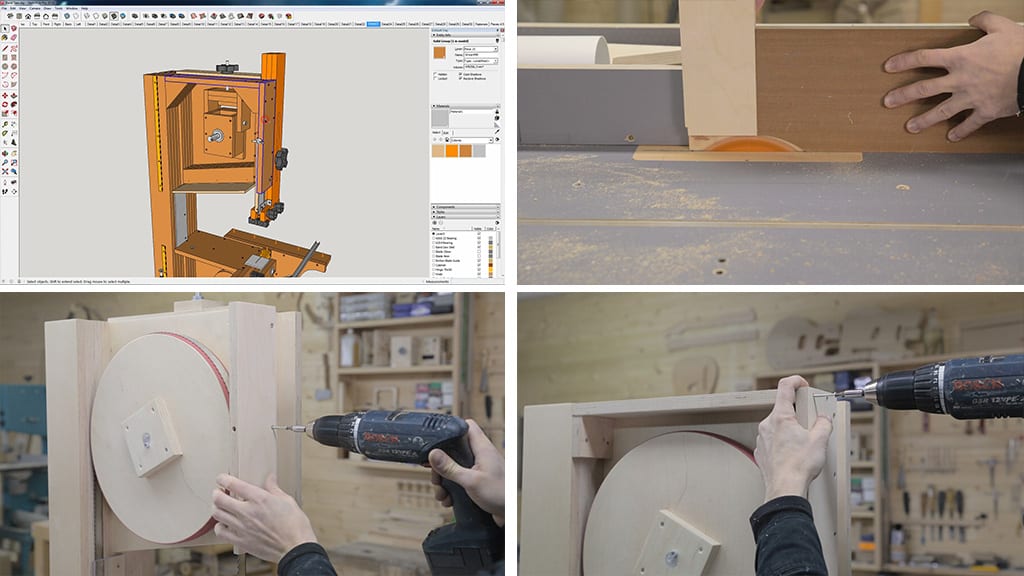
Before that I’ll start by putting these parts in the upper part of the saw. I make some rebates with the table saw so that I can lift the upper guide post all the way up, as well as a hole for a threaded rod which will allow me to lock the door.
Now I can screw it onto the saw. I also screw this piece in the upper part(fourth photo). In my design I had drawn some reinforcements for these corners, but after seeing how stable the saw’s body turned out to be I don’t think I’ll be needing them.
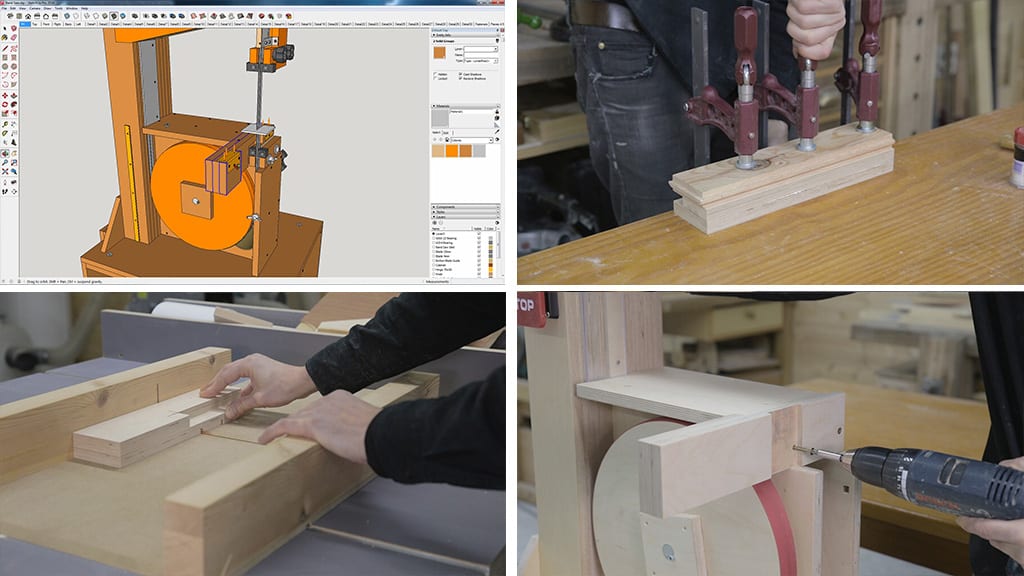
Now I’ll machine these parts that will support the hinges that allow me to tilt the table. I make the rebates according to the plans and glue the two parts in. Here I have to make this rebate so that I can adjust the blade’s lower guides more easily(third photo).
I screw the piece onto the saw’s body from above and from the side, this piece must be firmly screwed in.

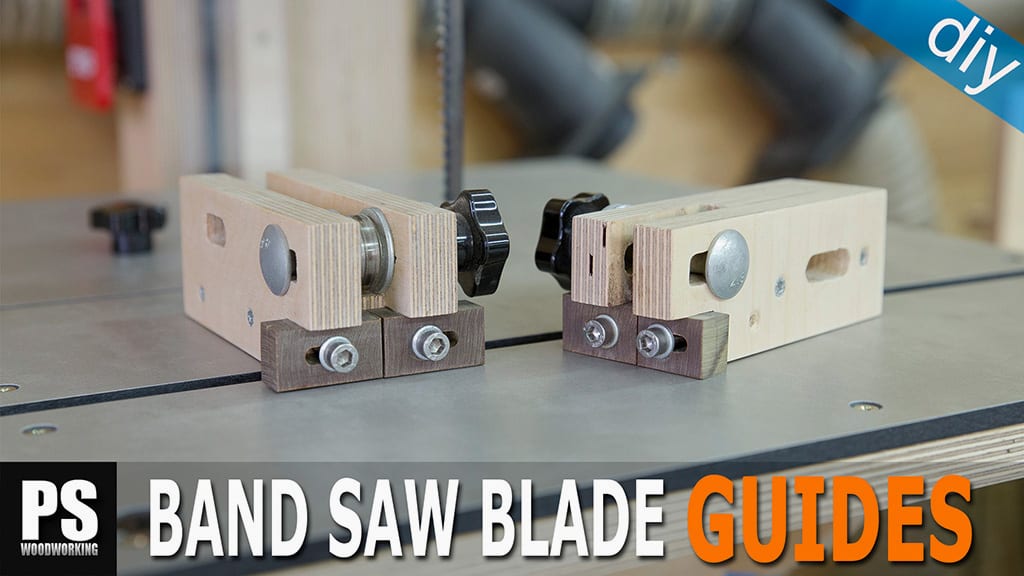
It’s time to machine the parts that make up the upper guide post. After cutting the three parts to size, I prepare the router to make a groove to adjust guide’s height.
After machining them, I can glue them together. I make sure everything has been made correctly and drill a hole to adjust the depth of the saw’s guide(fourth photo).
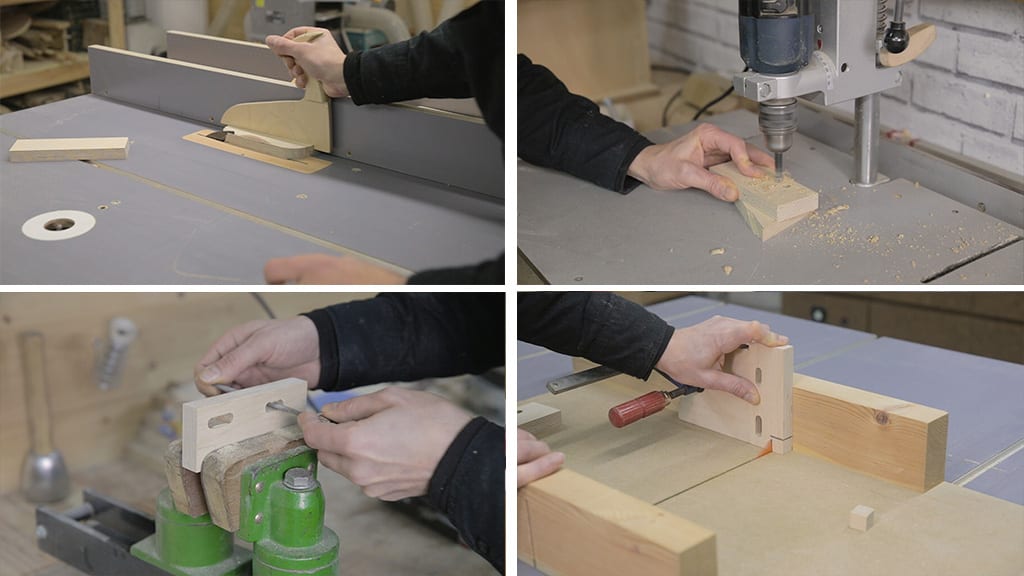
I’m going to cut the parts that make up the blade’s upper guide post itself. I drill holes according to the plans and finish the grooves with a jigsaw and files. I make this rebate with my table saw(fourth photo). This will be for the teflon pieces that act as guide for the blade.

Now I can glue the three parts together. When the glue is dry, I’m going to try the guide out. I put the bearing in place, and I also put in as many washers as necessary until the gap between the pieces has been filled(second photo).
This bearing will slow down the blade and stop it from going backwards when cutting with the band saw. Now I drill holes for the teflon parts that act as side guides for the blade(third photo).
The lower guide is quite similar to the upper one. It is also made of three parts that are glued together with a bearing in the middle. After machining them and putting them together, I can put the guide in its place. Using a bit, I mark the position of the threaded rod that will allow me to move it back and forth. I’ll glue the threaded rod to the plywood with polyurethane adhesive.
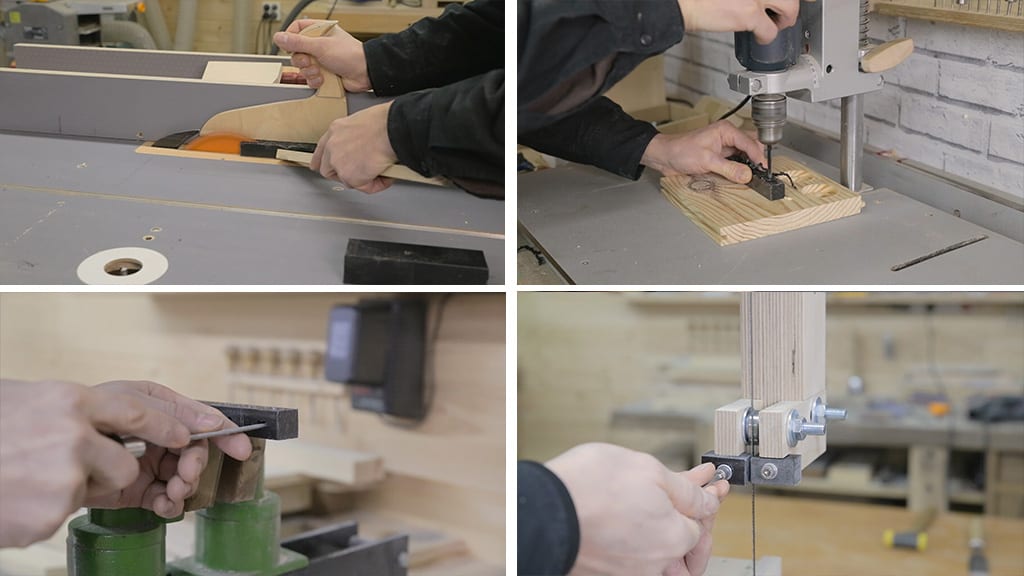
I’ll use this piece of teflon I had lying around in the shop to make the side stops. This material boasts a very low friction coefficient, which makes it perfect for the job, meaning the saw will not meet a lot of resistance. If you’re having a hard time doing this, you can use any other kind of hardwood you might have in your workshop.
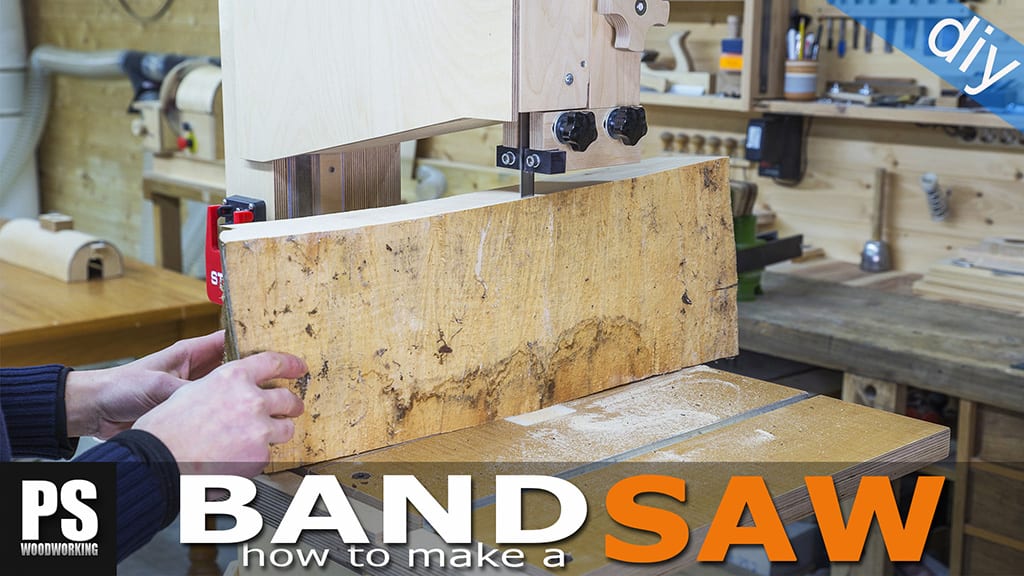
Now I can place them in the saw’s guide, both the upper one and the lower one(fourth photo). I’m going to put in a blade for a moment to test whether everything works correctly, and it looks like it does!

Now I’m going to install the table’s hinges. By placing the hinges topside down, I need A rebate for the axis of the hinge itself. After gluing the plywood pieces I can place the hinges. I’ll only use one screw for now in case I need to move them later.
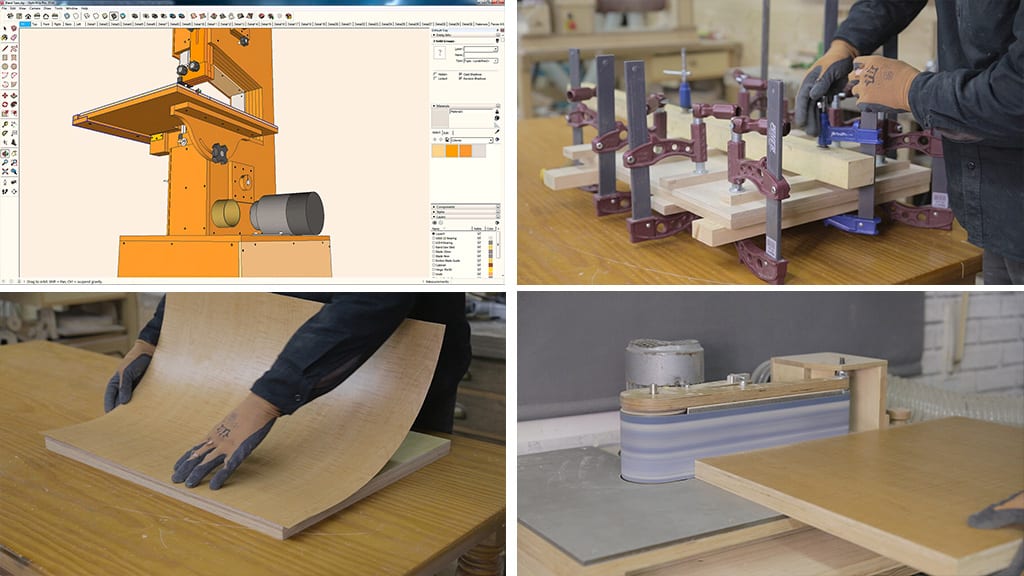
At this point I can machine the parts that make up the band saw’s table. In order to make it thicker, I’m going to glue these two pieces of plywood together(second photo).
Once the glue is dry, I’ll glue this formica sheet on the top, making it tougher. For that, I’ll use contact glue. Using the edge belt sander, I sand all the edges.

Now, with the 3D router I make a rebate in the place where the saw will be. I make several passes leaving a groove for the zero clearance. With the table saw, I finish machining the table.
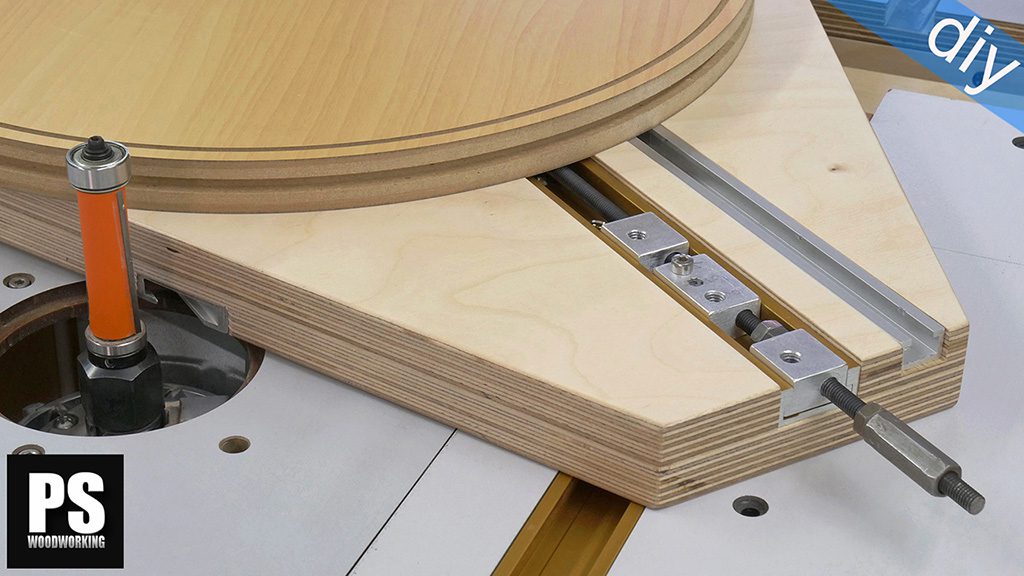
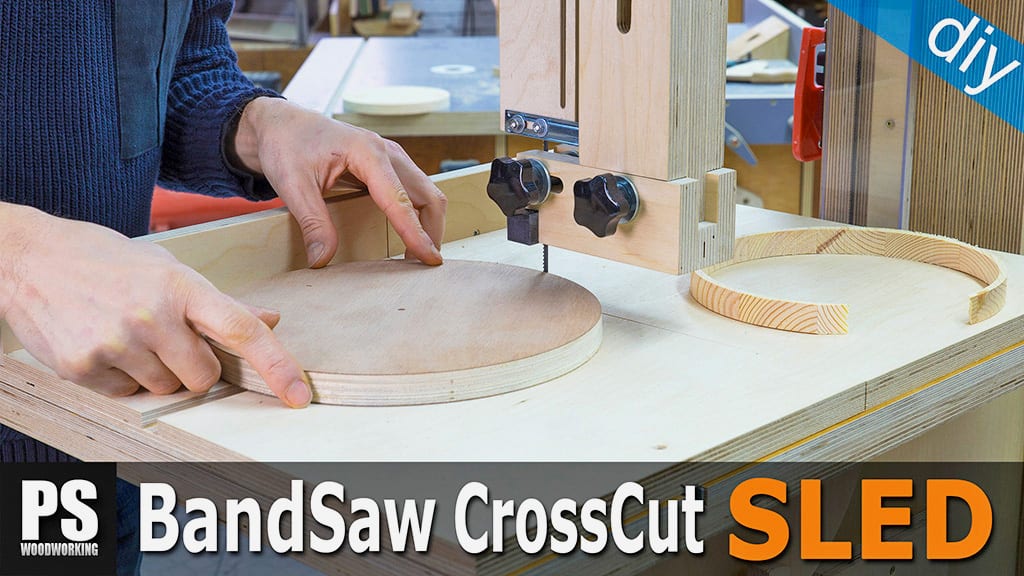
This cut allows me to place the blade in the saw(second photo). And this other groove is for a U-shaped aluminum piece, which will allow me to use a sled(third and fourth photo).
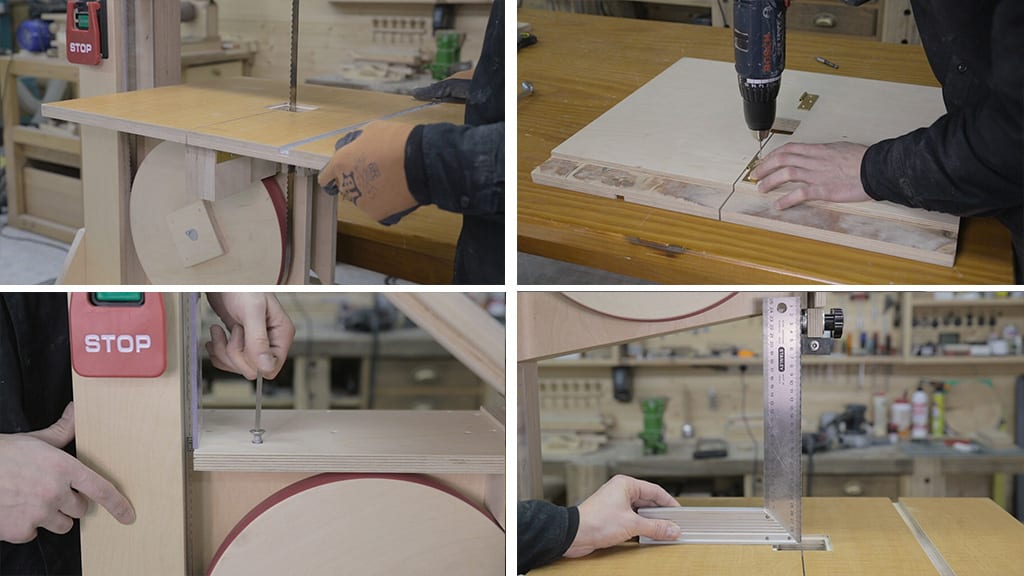
I set the table down on the saw, check if the size is right and mark the position of the hinges. I screw them in their place and check whether the table can be tilted correctly.
This screw will act as a stop and help me adjust the angle of the table. I can tighten it or loosen it until the blade is perfectly perpendicular to the table(third and fourth photo).

I’m going to screw this part in its place, but before that I’ll put in the screw that locks the table and the dust collection pipe. At this point I’ve almost finished building my new band saw. I’m going to attach the two doors using a piano hinge. With the table saw, I make a slot for the hinge, embedding it into the door.
I screw the hinge onto the door and, after checking the measurements, I screw the door to the saw(second photo). I’ve rigged up a system to lock the door in place using a knob and a threaded rod. It’s simple, but it does the trick!
I screw the last part in below the upper wheel. I’m also going to machine the zero clearance. I’ll use this piece of opaline methacrylate. I cut it to size and place it using the saw blade itself. The first cutting tests are successful!

This part will allow me to lock the table in place. After gluing the printable template on the board, I cut it with the band saw itself. It seems the saw is working smoothly, without any vibrations! I drill a couple of holes to machine a slot to allow the table to tilt(second photo).
I position it and put in a couple of screws. Once I’ve made sure it works as intended, I remove the table and I finish screwing it in. By placing these parts like this, the cutting table will be more stable.

I’ll use the band saw to make the four big knobs I need using plywood scraps I had left over from other saw parts. This one will help me tilt the upper wheel(second photo). The other three are the same, one lifts the upper wheel, one is for the guide post and the other locks the table at an angle.
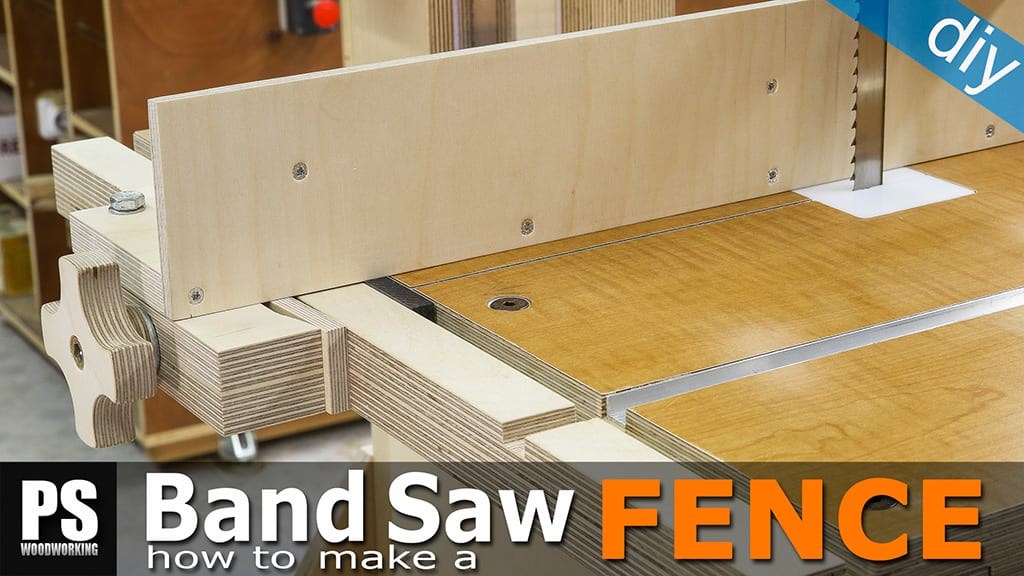
I’ll also place these parts in the front. They will give more stability to the front side of the table and allow me to lock the fence that I’m planning to build. I bore holes for the threaded inserts and then we can put it in its place.
I’ll have to remove it and put it back in again every time I have to change the blade, but the process is fast and easy.

Finally, I’ll build the saw blade guard for the upper guide post. With the table saw I machine these rebates on a piece of plywood(first photo). Then I drill a hole for a screw that will act as a guide.
I put a self-locking nut in it. In order to attach it to the post, I’ll use this metal bracket, it will allow me to adjust the guard in all directions(third photo). Lastly, I check whether everything works as intended. And that’s all for today!


Thank you for showing us how you built your Band Saw. Great videos, very well described and you make it look so easy :).
thanks Darren!
Please, what equipment and tools will I need to make this project? Does the wood measure 20mm in width?
I ask about wood because I need to check if I find it here in Brazil.
Thanks
hello Arnaldo, the board is 18mm thick. Here you will find the more specs:
This was great, thank you so much. I was wondering if you might have plans for a larger bandsaw with a 380mm cutting depth or about 14 inches tall.