On more than one occasion I’ve missed having an accurate circle jig and here it is. It will be perfect to make pulleys or wheels for my homemade tools or for any other project where I need round pieces of a relatively small diameter.
How does the DIY Incremental Circle Jig work?

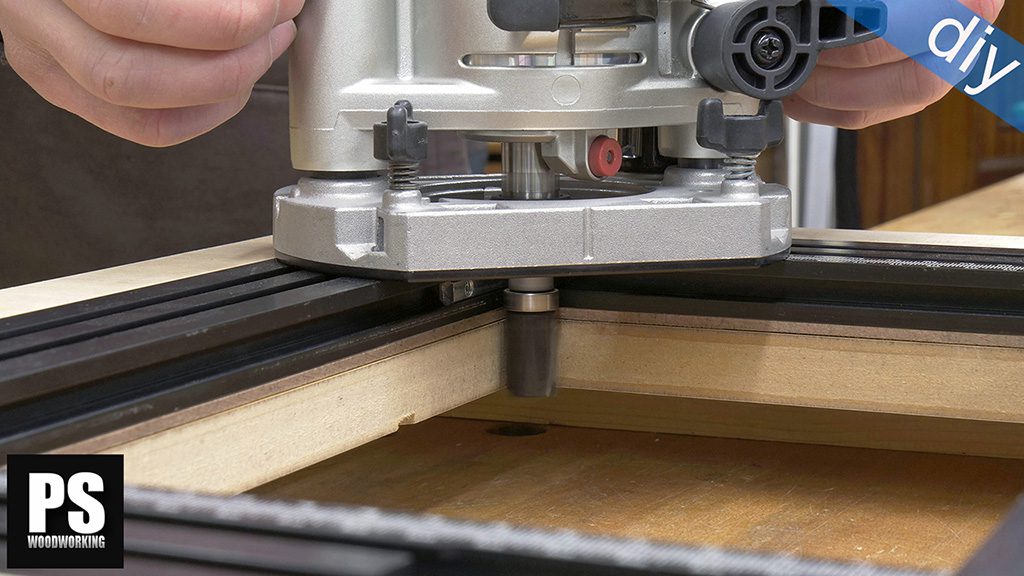
I screwed a slider on the bottom of the jig so that I can insert it into the miter channels of the band saw and router table. I also installed two pieces of a T-track profile so that I can hold the jig when necessary.
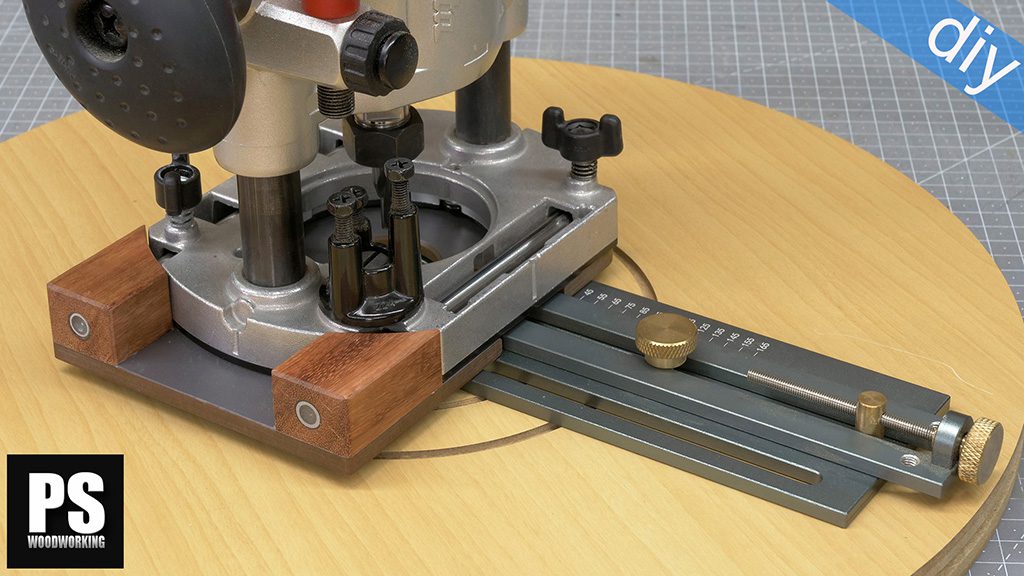
By turning a threaded rod I can accurately adjust the desired cutting radius. Each complete turn of the rod moves it 1 mm. I marked the coupling nut with some numbers to use as a reference.
I’m going to disassemble the mechanism so that you can better see how it works. By loosening some headless bolts I can remove the T-slot nuts. This piece that can you see in the fourth photo allows me to turn the threaded rod without it coming loose. As you can see, it has a hole that only goes halfway into it.
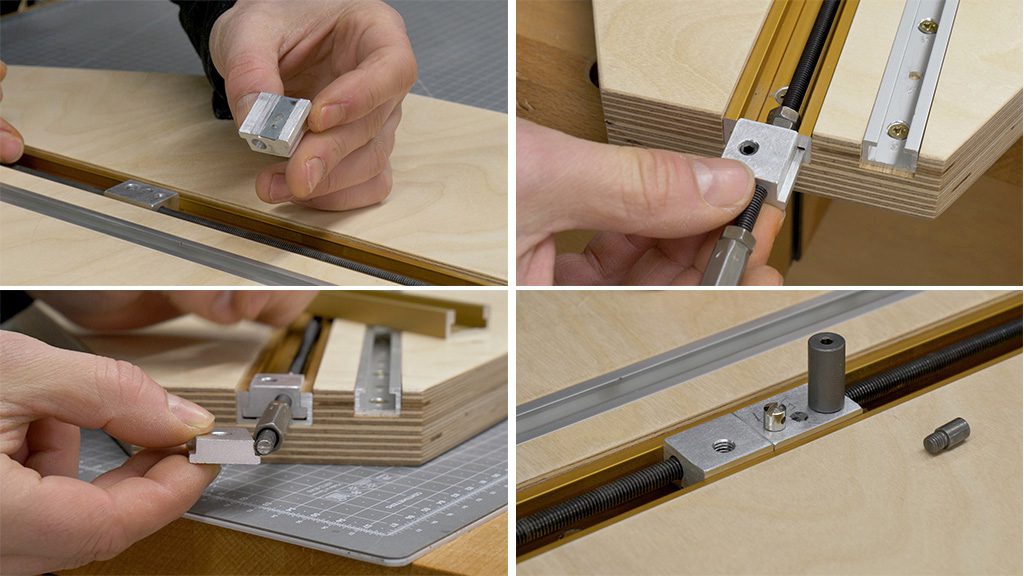
The second piece is the T-slot stop. It’s just like the other one, but it has a through hole and a metal plate on the bottom to avoid damaging the miter channel when locking it. On the side where I have to turn the rod I installed a T-slot nut like the two previous ones and two nuts that also act as stops.
There are similar T-slot nuts in the market but they only have 8mm walls, so I decided to make some thicker ones myself using an aluminum plate. You can see them in the third photo above.
In the fourth photo you can see the T-slider and the bolts I’ll use as rotation axis. I’ve made three threaded 4, 5 and 6mm holes. As you can see, while I was threading them, the 5mm thread tap broke. I’m planning to make this piece again.
It’s important that the bolts we will use as rotation axis have a wider head than their thread so that they can be firmly fastened to the slider. This way they won’t be able to turn or come loose when rotation the piece we’re going to cut.
The T-slider has a little play, but I’ve not noticed any problems because of it when using the jig. At any rate, the play goes away when it touches the T-slot stop.
DIY Incremental Circle Jig Plans

Here’s the 3D SketchUp file included in the plans for sale on my website. I’ll leave a link in the video description if you’re interested in making your own jig or contributing to my work.
DIY Incremental Circle Jig Plans
How to use the Incremental Circle Jig with the Band Saw?
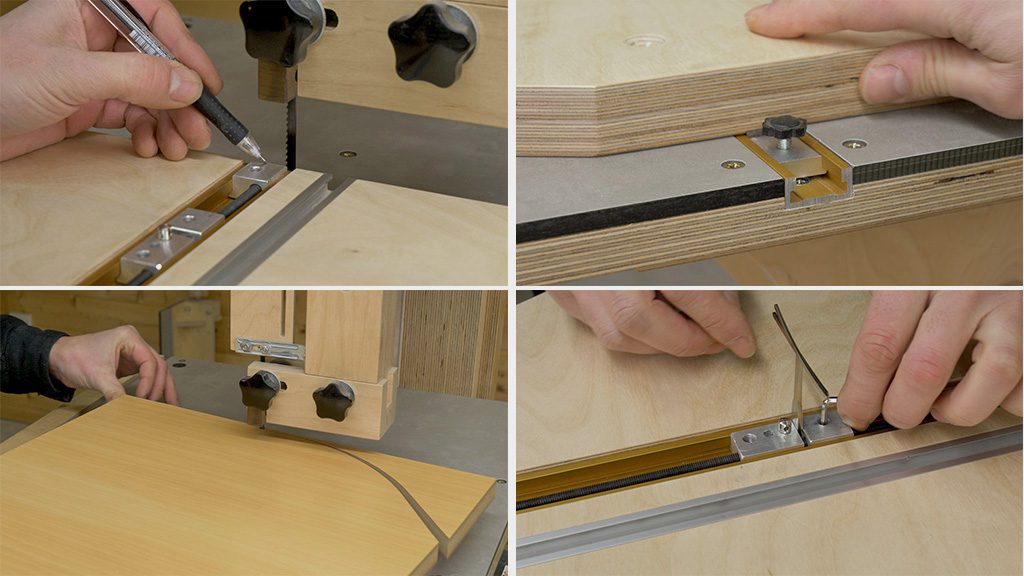
I’m going to do some tests to show you how the jig works. First off, I’ll insert the slider into the band saw’s miter channel. Next I’ll align the rotation axis with the saw blade. Out of convenience, it’s best to use a T-slot nut as a stop, but it’s not required. I adjust the rotation axis to the desired radius, as well as the T-slot stop.
I make a hole in the center of the workpiece where I’ll insert the bolt that will act as rotation axis. To cut the circle, I only have to move the jig up to the stop I had place, and then start rotating the workpiece. This jig can cut circles up to 50cm in diameter.
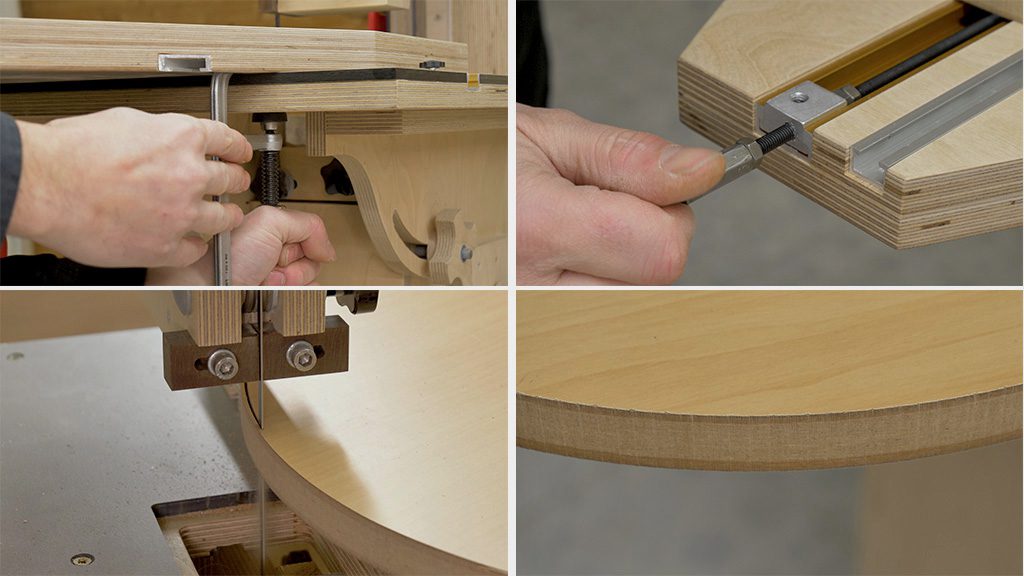
Now I’m going to move the T-slot stop about 3mm and hold the jig to the band saw table. I want to test whether it’s possible to cut without moving the jig. While I turn the piece, I slowly move the slider against the blade, and it seems that this way I can also cut circles without any issues.
I chose this MDF board with melamine on both sides because it’s perfect to ensure the quality of the cut. As you can see, and as expected, the blade leaves some saw cuts on the edge of the piece, and that’s using a fine-toothed blade.
On the bottom side of the melamine, there’s also some splintering. For some projects, cuts of this quality are enough, but if we need a perfect cut, the next step is to use the router table.
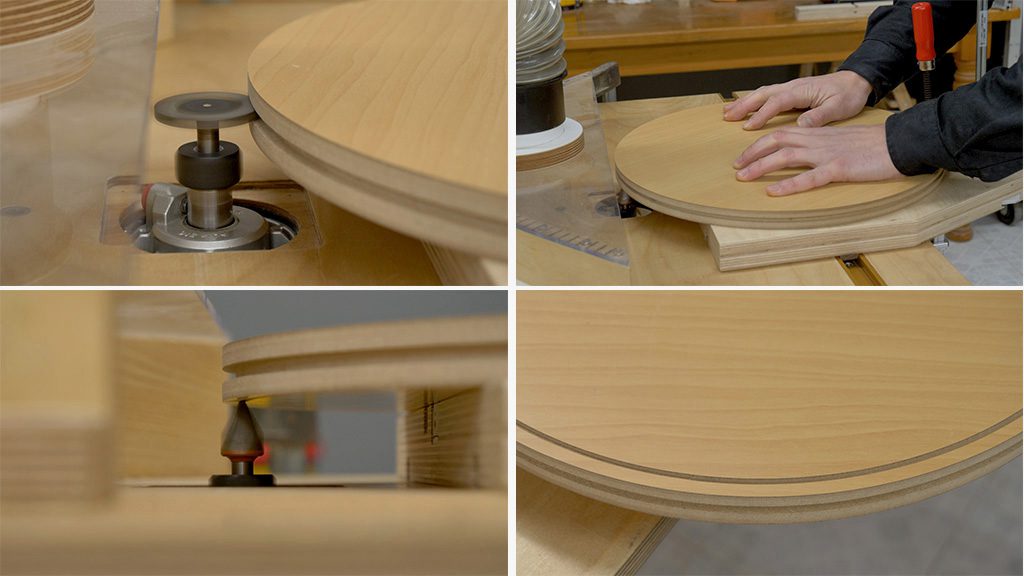
How to use the Incremental Circle Jig with the Router Table?

In this case I’m going to attach the jig to the router table from the start. Next, we’ll place the piece on the jig and turn the rod until the piece touches the router bit. Now I have to remove the piece and adjust the T-slot stop to the desired distance. In this case, I’m going to use a 2mm spacer.
I put the piece back on and turn the rod slowly until the T slider touches the T-slot stop, and then start turning the piece.
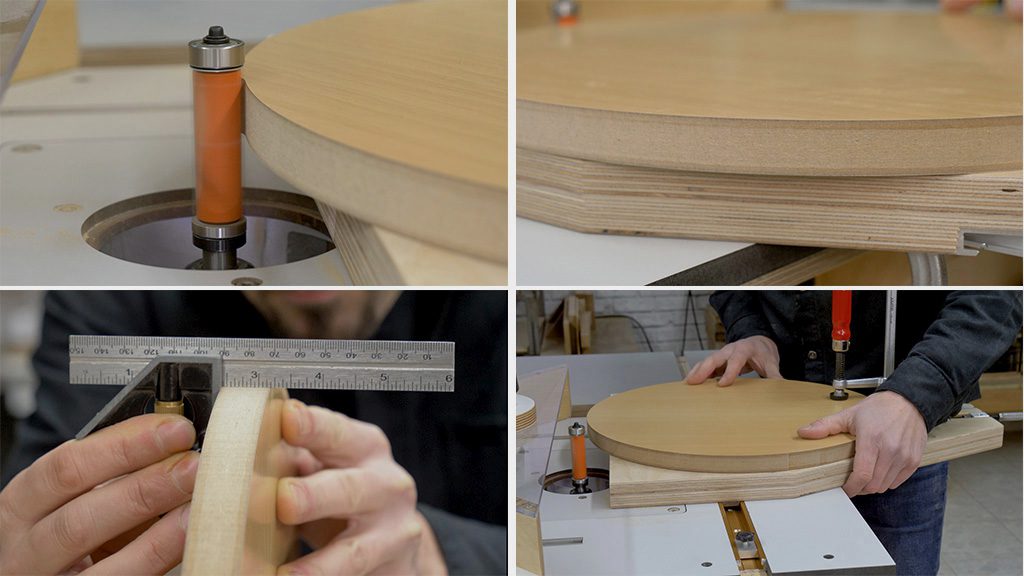
You can clearly see the finish is much better than with the band saw. The melamine hasn’t splintered at all and the edge is perfectly square.
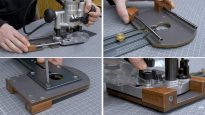
On the router table I can also use the jig by sliding it in its miter channel. In this case, it’s best to install a T-slot nut as a stop in the router table miter channel, as well as a clamp to hold the piece to the jig.
I’m going to try another kind of milling job, this time on my Portable Workshop’s router table. I’ll try to cut a 6mm deep groove on the edge of the circular piece. With a V groove bit, I’ll also try to mill the bottom of the piece. This router’s lift system is not very precise, but still I think I got a pretty decent result.
That’s all for today. In a few days I’ll post a new article where I’ll show how to use this jig without having to drill the workpiece, as well as to how to build the jig.


Very Nice Paoson, I wish I had something like that 40 years ago when I was refinishing table tops
thanks!
That’s pretty cool! I would still be afraid of it catching and coming off the pin while routing. What about an adjustable “roller” clamp somewhere on the track/jig? Something to apply medium pressure and keep the work piece a bit more “stable.” Just a thought. I still think it is a very good idea!
thanks! I thought about that, if you are going to make the circular piece on the router table then I think it would be necessary. But if you first use the band saw and you are only going to mill about 2 or 3mm I think it is not necessary.