About 6 years ago I built this homemade lathe using birch plywood. After using it for quite some time now, I decided to check its current state by using all of its accessories with practical examples.
Plans for the lathe with a disc sander and accessories:
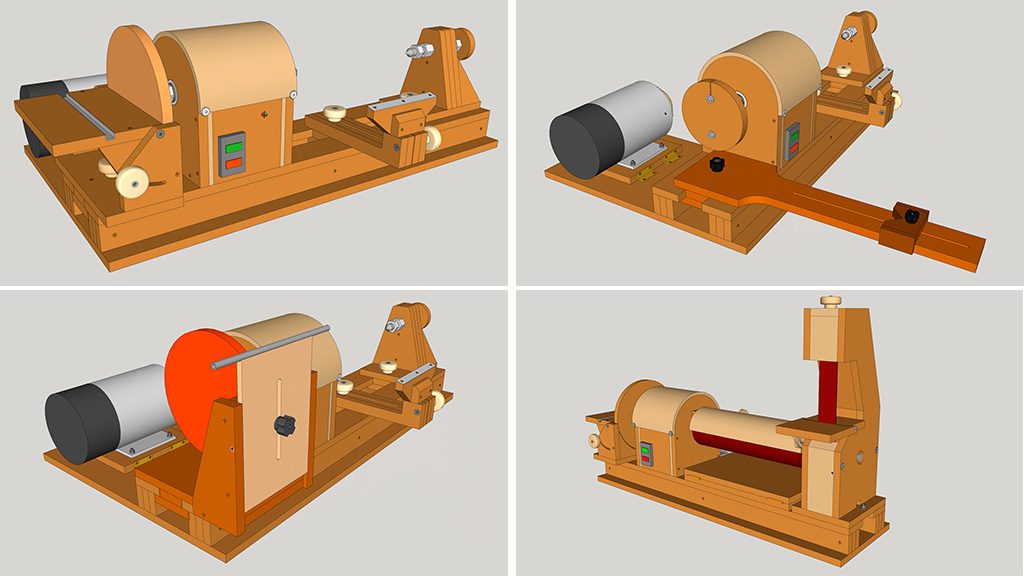
This is the 3D SketchUp model included in the plans for sale on this website. As you can see, I used plywood for the lathe bed, the headstock and each of the lathe’s accessories.
Lathe & Disc Sander Plans
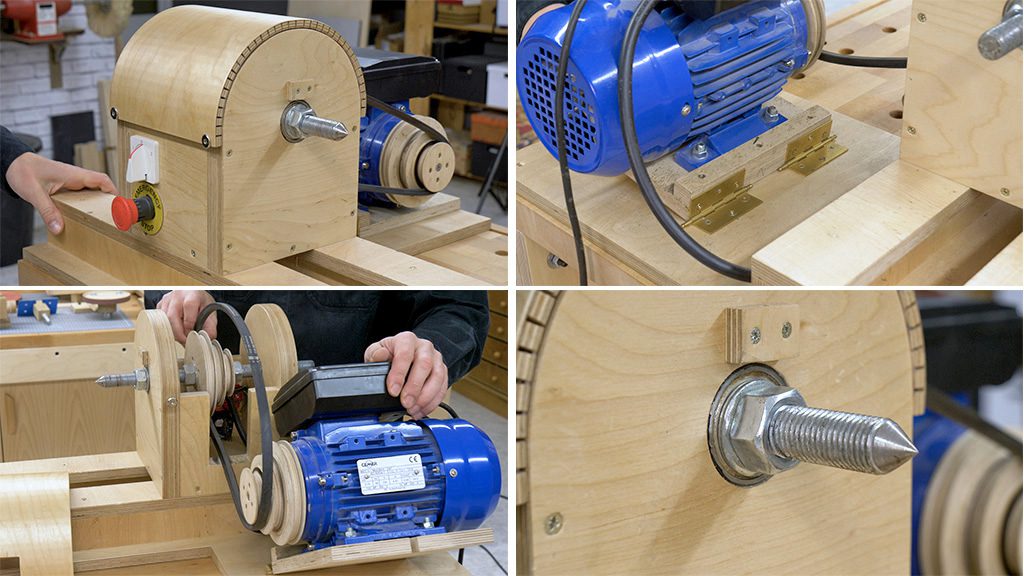
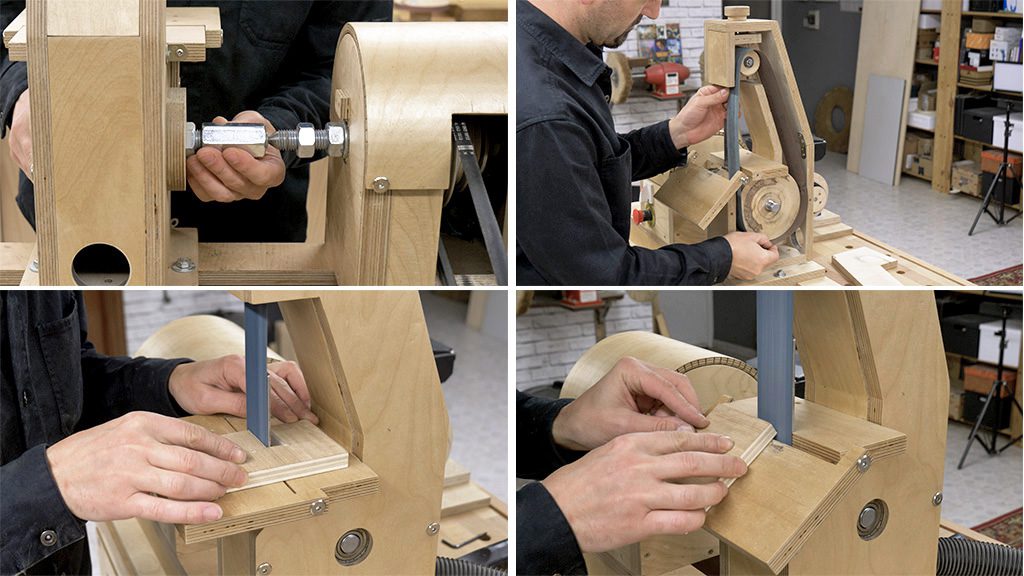
In order to operate this lathe I’ve installed a single-phase motor with 1 HP and 1500 rpm. The motor rotates the lathe shaft thanks to a belt and 3 plywood pulleys which allow me to adjust the speed of the lathe to each project.
I also used some ball bearing. They’re not ideal for these projects where the force is applied from the front, but they’ve withstood all the time I’ve spent using this lathe without any problems.
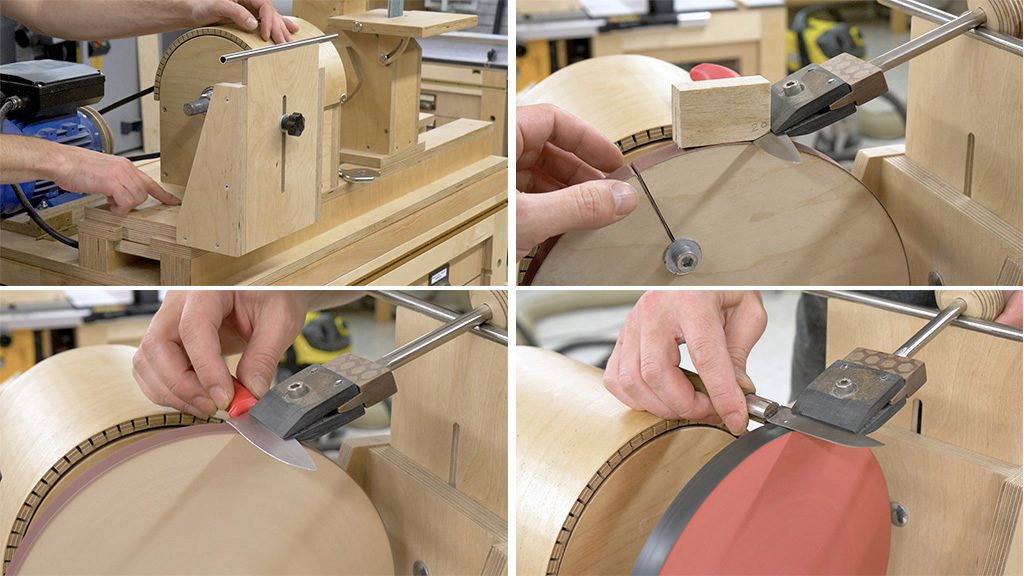
DIY jig for sharpening chisels with the lathe:
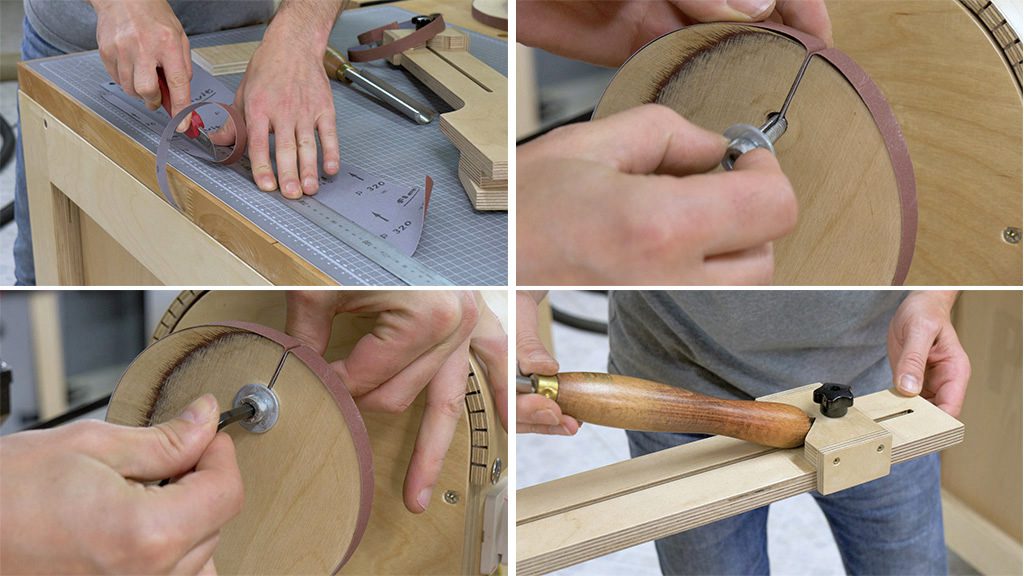
I’ll begin by showing you how to use the grinding wheel. I made it with a simple but ingenious system which lets me sharpen chisels with this wheel and sandpaper roll. To do this, I only have to cut the sandpaper to size and place it on the wheel.
To install the sandpaper I use a bolt on which I’ve made a groove where I’ll put the sandpaper. By turning it, I can tighten the sandpaper enough to sharpen woodturning chisels. Now I must place the jig, which will support the chisels.
I’ve installed a reversible switch which allows me to turn the lathe shaft in both directions. For this kind of sharpening, the wheel must spin in the opposite direction to how the chisels are placed. This system allows me to sharpen almost any kind of woodturning chisels.
If you want to see how to make this jig for sharpening woodturning chisels, you should check out this other article.
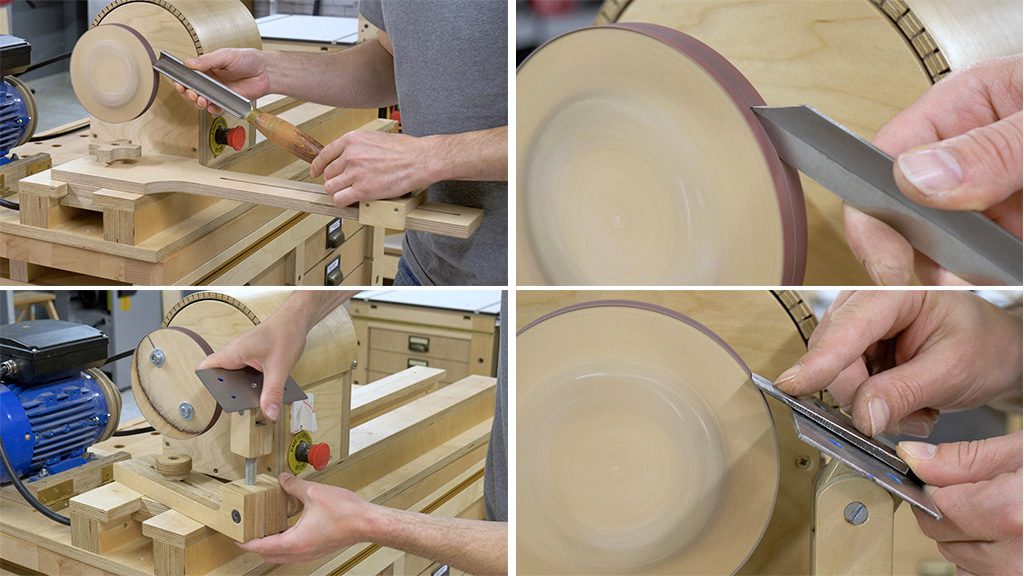
Using the tool rest but changing its base, this wheel can also sharpen common chisels. In this case, since I’ve used P320 grit, which is very fine, the chisel hardly needs to be sharpened later with a stone in order to cut correctly.
I also have another article that’s fully dedicated to showcasing how to make this grinding wheel for use with the lathe.
How to make a handle with the lathe:

Now I’m going to make a handle to showcase how to use the lathe and the chisels I’ve just sharpened. After cutting a piece of olive wood, I install the drive center I made with a coupling nut, the tool rest and the tail stock. I’ve marked the center in the piece of olive wood and place it on the lathe.
I whittle it down little by little with a roughing gouge until the piece is cylinder-shaped. I make sure it’s the right size and then do all of the other machining processes with the other chisels. With the lathe turning, I sand down the wood and install a bushing in the handle.
Homemade disc sander for the lathe:

I’m going to install the disc sander on the left of the lathe to finish making the handle. All that’s left is to apply some linseed oil, and here’s the end result (fourth photo). This handle will be perfect for a rasp I have in my workshop.
For some time now, I’ve wanted to reinforce the disc sander table, as it’s kind of beat up from all the years of use. I’m going to use this opportunity to glue an HPL sheet to it using contact glue. I’ll also test out the miter gauge, and everything seems to be working as expected!
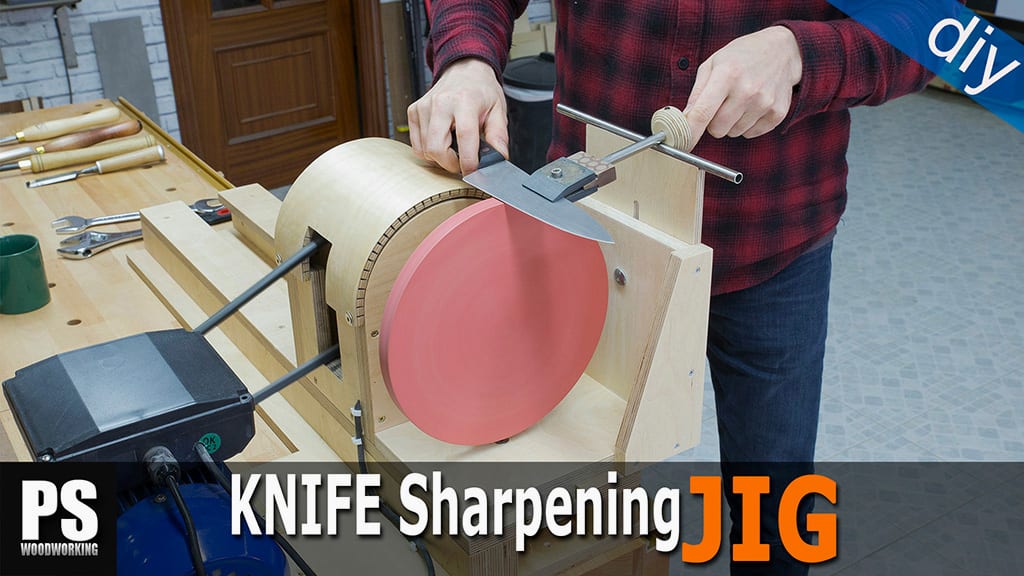
Homemade jig for sharpening knives with the lathe:
It’s time to demonstrate how to use this lathe to sharpen knives. First off, we have to remove the disc sander and attach the wheel and the knife sharpening jig. I took the famous Tormek sharpening system as an inspiration to make a knife holder. You can place it on the jig and it’s perfect for sharpening more safely and accurately.
I look for the correct angle by adjusting the height of the jig—it’s usually around 20 degrees. I activate the motor and in this case, the wheel will also spin in the opposite direction from us so that it won’t snag the knife. Besides this wheel with sandpaper, I also built another polishing wheel with MDF, which I use along with polishing paste.
If the knife doesn’t have teeth, you can skip the wheel with sandpaper and use the polishing wheel directly. The results with this system never fail to impress me. My knives had never been this sharp.
Here you’ll find the article I published some years ago on how to make this knife sharpening jig.
DIY Belt sander for lathe:
Now I’ll show you how to attach and use the belt sander. I’ve used a coupling nut to join the sander’s shaft to the lathe shaft. I’m going to remove the cover from the sander to do some maintenance and change the sandpaper.
The sander has a big wheel for traction and a smaller one to tighten the belt and adjust it’s position. This sander is perfect for sanding down rabbets where it would otherwise be impossible. Just like the disc sander, it has a folding table which allows us to sand at an angle.
If you would like to find more info to learn how to make this belt sander, check out this article.
DIY Thickness sander for lathe:
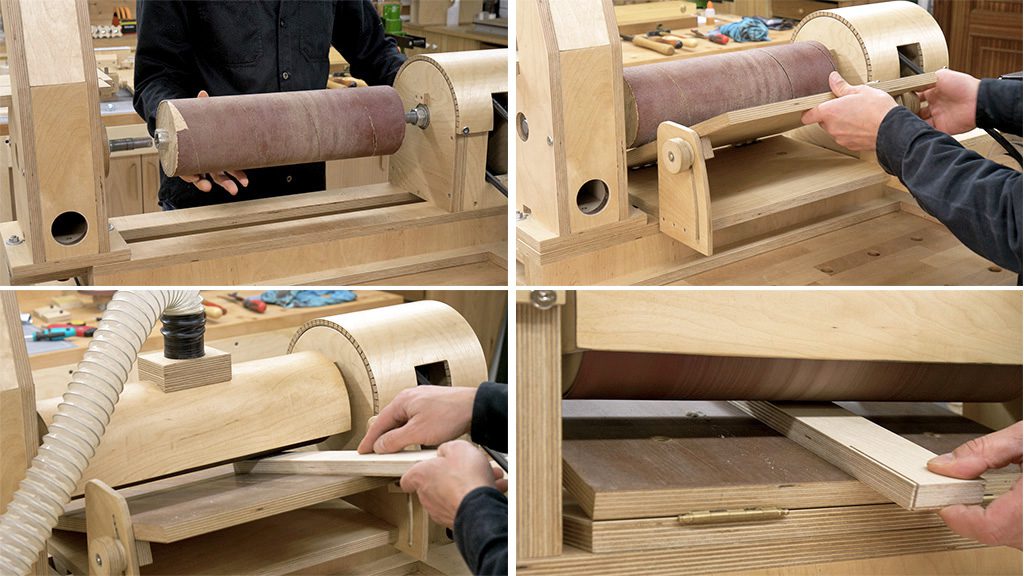
Finally, I’m going to install the thickness sander. I built a sanding drum that’s connected to the lathe shaft and the belt sander shaft. Once they’re connected, I must place the tilting table where the workpieces will be inserted. By tilting the table, I can adjust the distance between the sanding drum and the table itself.
After installing the dust cover I will run some tests. I don’t use this tool very often, but it’s perfect for a DIY workshop where small workpieces have to be sanded down every once in a while.
I also have another article on my website on how to make this thickness sander for use with a lathe.


Já adquiri dois produtos seus e estou satisfeito. meu único problema é não ter espaço para mais um, mais mesmo assim vc como sempre supera pela sua dedicação e estudo de novas ferramentas para agilizar os seus trabalho. Está de parabéns.
Um abraço,
Att, Annibal Bekman
obrigado Annibal!
So impressed with your shop made purpose-built tools and their design and fabrication.
thanks Sean!
I am surprised that you are able to drive the work with just a center in the head stock.
complimenti !! non trovo altre parole per la tua macchina all’infuori che hai avuto un’idea GENIALE !! E UNA COSTRUZIONE DA VERO COMPETENTE ! ti sarei grato se tu mi mandassi delle foto solo della levigatrice a nastro special mente il meccanismo dove lavora la ruoa piccola grazie ciao Carlo