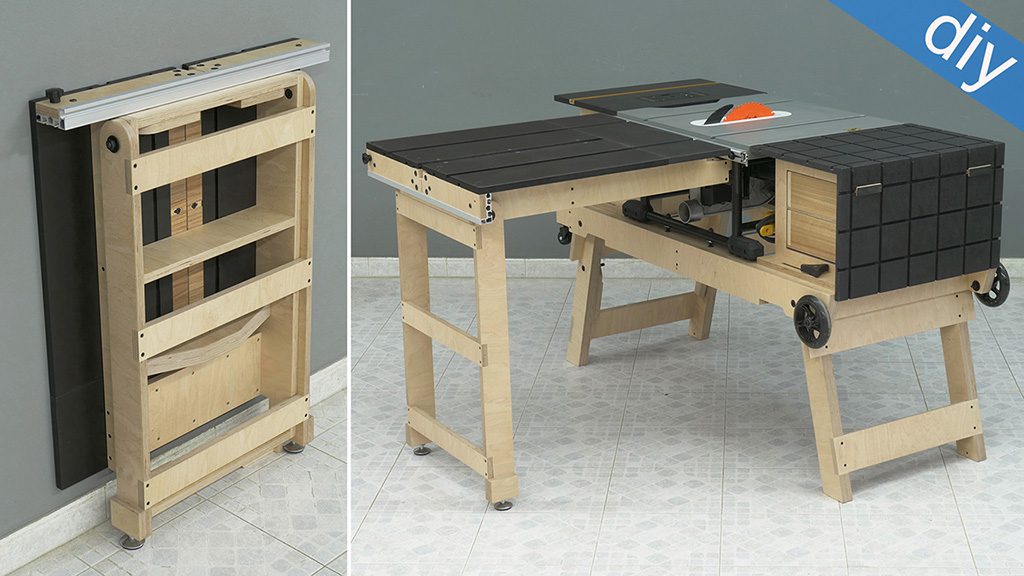
This is the second article in the multi-function workbench series. In this video I’m going to install the benchtop and make the cutting station. As you can see in this brief summary in the video, it’s very easy to operate and makes it possible to make repetitive cuts or cut bigger boards in a faster, more convenient and efficient way using a plunge circular saw. I’ll go over its functions in depth in the next few articles.
Approximate weight: 220kg (without storage)
Overall dimensions: 900mm high, 2000mm width and 1038mm depth.

This is the 3D model of SketchUp included in the plans that you will find on my website. If you are interested in collaborating with my web or building your own workbench, here you can download them. All the accessories are included in the plans.
You can also buy separately the rip cut guide plans to attach to your bench. Instead of making it the usual way by removing material, this time I’ll do it by gluing pieces of plywood together until they are thick enough, leaving tenons and mortises.
It’s easier to do it this way if we don’t have a lot of tools, and you’ll be able to use any leftover plywood you have at home. The two outer frames are made of birch plywood, making the bench sturdy and stable. The rest of the pieces joining the frames are made of soft plywood, to make the total weight lighter.
Rip Cut Guide Plans

First I’m going to install a few pieces of light plywood which will allow me to get some use out the small gaps at the bottom of the bench. After cutting all their parts, I screw them on. I can use these gaps to store protection boards for the top, or the vacuum tube, which I will later attach to the bench
Now I make sure the central part of the cabinets, which will later support the benchtop, is at the same height as the bench frames. It seems I have to trim it a little. It probably won’t be necessary, but I’m going to cut and glue on a few plywood parts to strengthen the central support and make it thicker.

Now I can finally attach the benchtop. It weighs around 60 kg, which means it’s not going to be easy. I set it down on two pegs on the floor and against the back of the bench, just like I will do whenever I need to put big boards on the bench in order to cut them. Of course, we could also use a hard plywood board of similar thickness, or even join several boards to get about 40mm thick.
It’s a high quality beech finger joint board sent to me by the company Basicmadera. It will be perfect for this woodworking bench/workbench hybrid, keeping it sturdy and stable when we are working. It’s made with strips of wood that are glued together and connected by finger joints.
With this kind of joint and since it’s hardwood, I think my benchtop will stay in perfect condition for many years. First, we have to precut it to size with a circular saw and a guide. I flip it over and apply a coat of matte water based varnish.

Now that it’s upside down, I’ll attach the vise as well I flip it over one more time, measure its exact position and drill holes to fasten it to the bench frames. I’ll use hex lag screws with washers, meaning the top half of the holes should have the same diameter as the washers and the bottom half should have the diameter as the screws. I won’t put screws in the central part of the top. I don’t think they’ll be necessary.

Now with the router with its plunge base I’ll leave the edges of the tops completely flush. I’ll use a flush trim router bit and an aluminum fence. I should make sure the back edge is straight in order to achieve straight cuts with my rip cut guide.
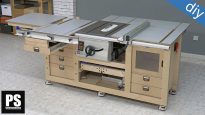
Now I measure the positions of all the holes in the benchtop where I can put holdfast clamps and dogs. I stop a few millimeters short of drilling through to avoid damaging the bottom of the benchtop. I drill the first hole and make sure the steel rod is plumb.
Now, with a router bit I can remove that little amount of wood left in the holes. It’s time to sand the entire surface of the benchtop and apply some linseed oil. I’ll use oil because it will make maintenance easier.

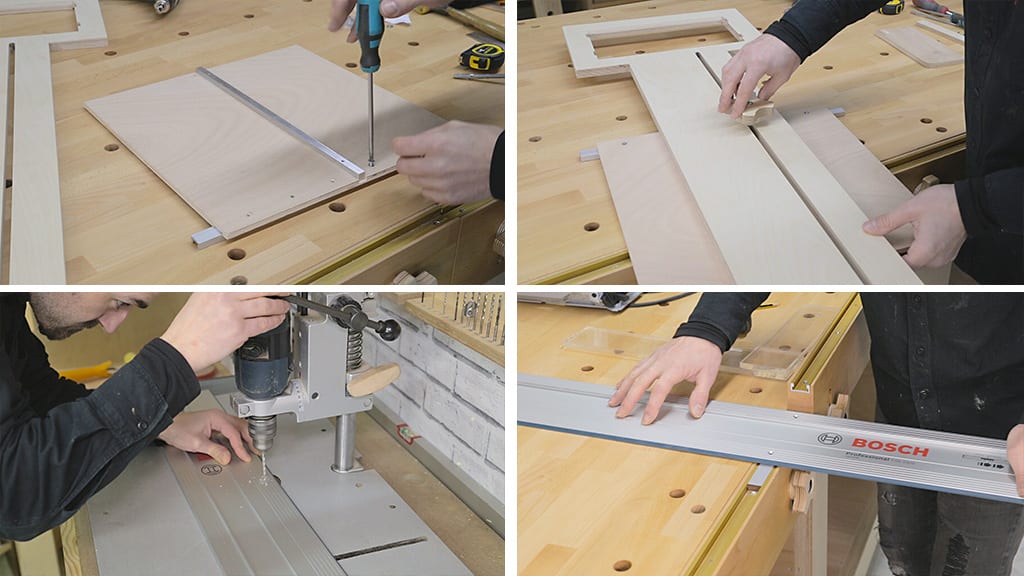
Then, using the leftover scraps of wood from the benchtop, I’ll make the pieces that make up the rip cut guide. I make them straight with the planer and cut them to size. I have to make groover to slide in the t-track guides.
We could also use a U-shaped aluminum profile here, like the one I installed on my table saw. With that same table saw, I’ll make the grooves in several runs.

After configuring my 3D router I’ll machine the adjustment grooves. They could also be made with a plunge router and a guide. With the router table I’ll make a rebate for the self-adhesive measuring tape. Finally, I apply some linseed oil on both pieces.
I already made grip knobs with hard plywood and a square neck bolt. You can see how to make them in other articles in my web. With them, I can attach the pieces to the bench.

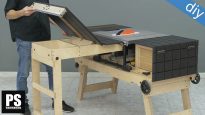
I mark and fasten the t-track guide screws and make sure the slider works okay. This model can be adjusted, by tightening a screw, the slider expands, reducing play. Next, I’ll make the rip cut guide. Then I mark the hole where the circular saw will go and cut it on the table saw.
I have to make some rebates for the circular saw’s knobs and a bezel for its body. Do the same operation on both sides so that I can use the circular saw in both directions. With the table saw I make another groove to achieve a more precise cutting size, and with the table router I cut a groove to lock the guide at the appropriate measurement for cutting.
I make the other part of the guide, making recesses for the slider and the aluminum piece that will allow for a more precise adjustment of the cutting size with the table saw, too.
Now I’ll prepare a piece of HPL to fit the guide rail that comes with the plunge circular saw in the bench and make cross cuts. Then I cut it on the table saw and finish it with the disc sander. I mark the position of the screws, drill holes on the rail and the HPL piece with the bit with less diameter to make a thread.
I also prepare this other piece to attach to the front of the workbench and fasten the rail on the other side. This way I can ensure the cuts are always square. I make a groove for the disc on the benchtop, about 2 mm deep.
I cut the piece of the T-track guide through which the disc will run when making cross cuts. Then I also cut some board strips that I can set down on the benchtop to avoid damaging it.

Now I’ll make another jig to cut angles, and try out the cutting station while I’m at it.

With the rest of the beech board I build the other part of the miter jig like before; and I also prepare a steel pipe to work as rotation axis. I put the pieces together with screws, glue the tube on and fasten the t-track.
Now all that’s left is to make the miter track stops. In order to make the process easier, I’ll milling a long piece of plywood with the router, which I will later cut down to size.

I make the rest of the rebates with the band saw, as well as holes for the screws that will acts as rotation axis with the column drill. I cut and drill holes in the aluminum pieces that go on the t-track guide, and that wraps it up for today.
In a few days I’ll post another article showing you how to build the holdfast clamps and workbench dogs. See you soon!


Goodness this is detailed!! Would love to add this function to my bench. Just got a track saw and this would be amazing.
thanks Ben!