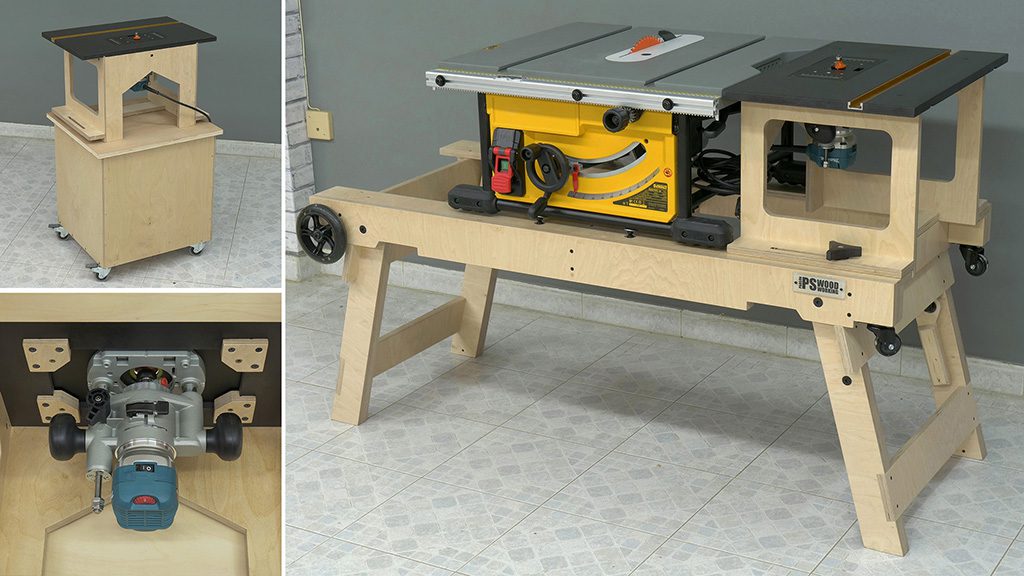
Welcome, this is the fifth article about my new folding woodworking workstation. Today I’ll be showing you how to use and build a crosscut sled to use with the saw.
This design is perfect for people who don’t have a lot of space available in their garage. It’s also ideal to take outside the workshop and have a table saw, router table and assembly table at your disposal wherever you need them.
Click here if you are interested in modifying this design to adapt it to your needs.
DIY Table Saw Outfeed Table & Crosscut Sled Plans
This is the 3D SketchUp file included in the plans available for download on my website. Below these lines you will find a button with a link if you’re interested in making this design or making contributions to my work.
Outfeed Table & Crosscut Sled Plans
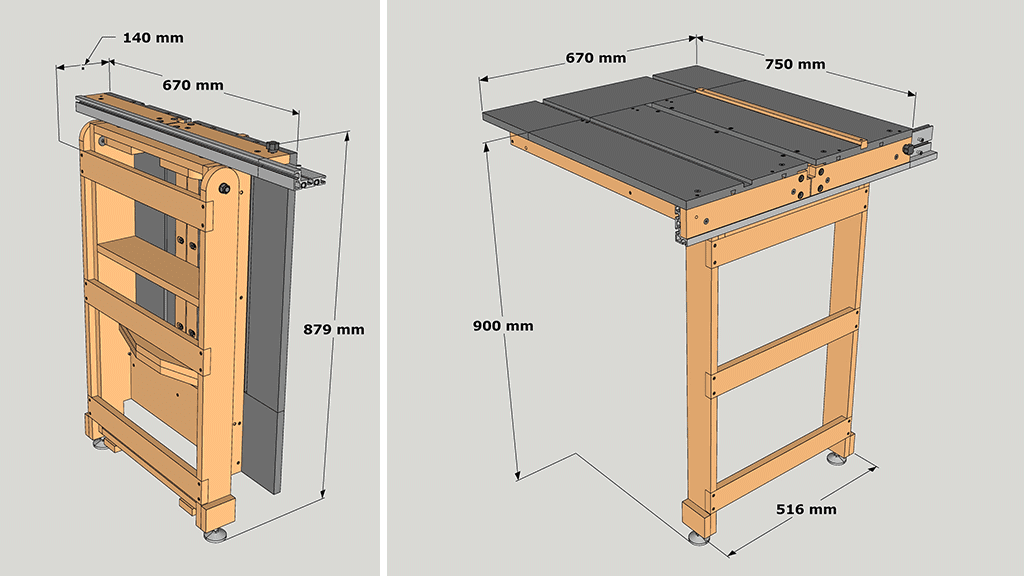
Homemade TableSaw Outfeed Table & Crosscut Sled Specs
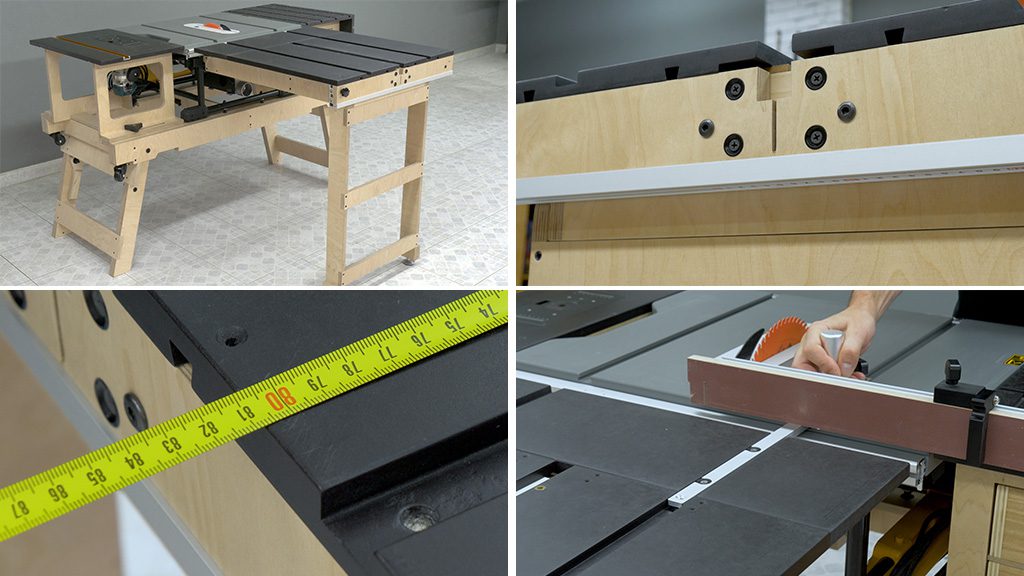
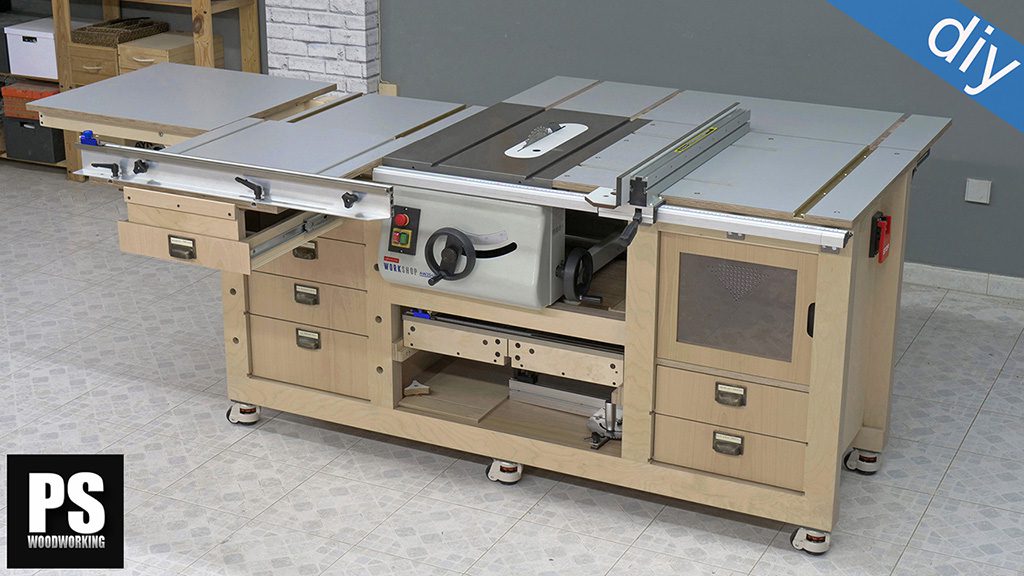
Thanks to its outfeed table, I’ve managed to obtain an 80-cm extra support surface at the exit point of the cut, or around 93 if we measure it from the back of the blade.
I’ve cut some channels in both outfeed table tops. They’re aligned with the table saw’s miter slots. This way I can continue using accessories such as the miter gauge and other jigs. I’ve cut them a little wider than the saw’s slots so that I won’t have space problems with the sliders.
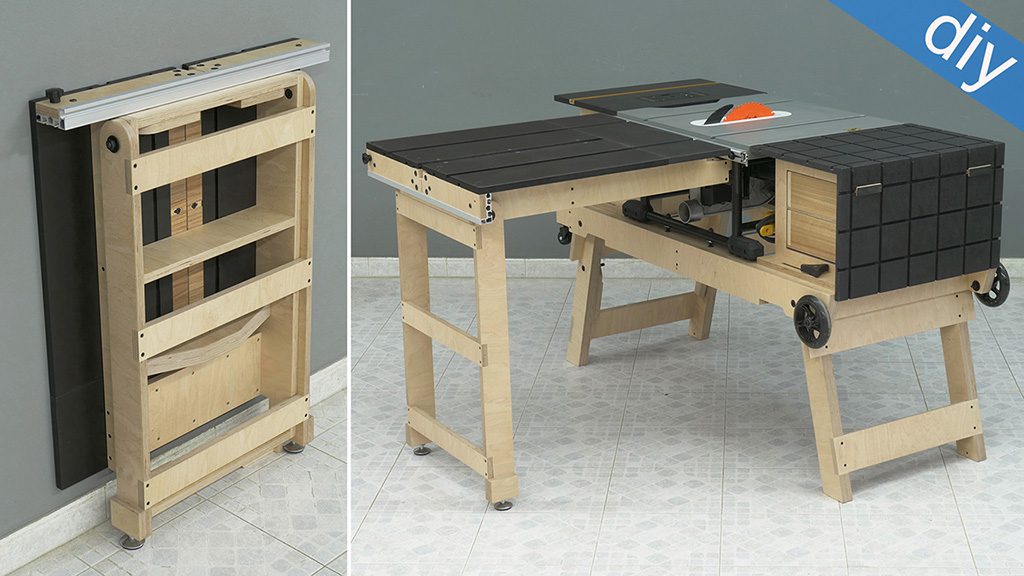
Like I said in the previous article, the sled is flipped over and is part of the outfeed table itself. This way I can always have it on hand when I need it. Apart from that, the other advantages of this system are the fact that you save on plywood and it will be easier to take all the accessories outside the workshop.
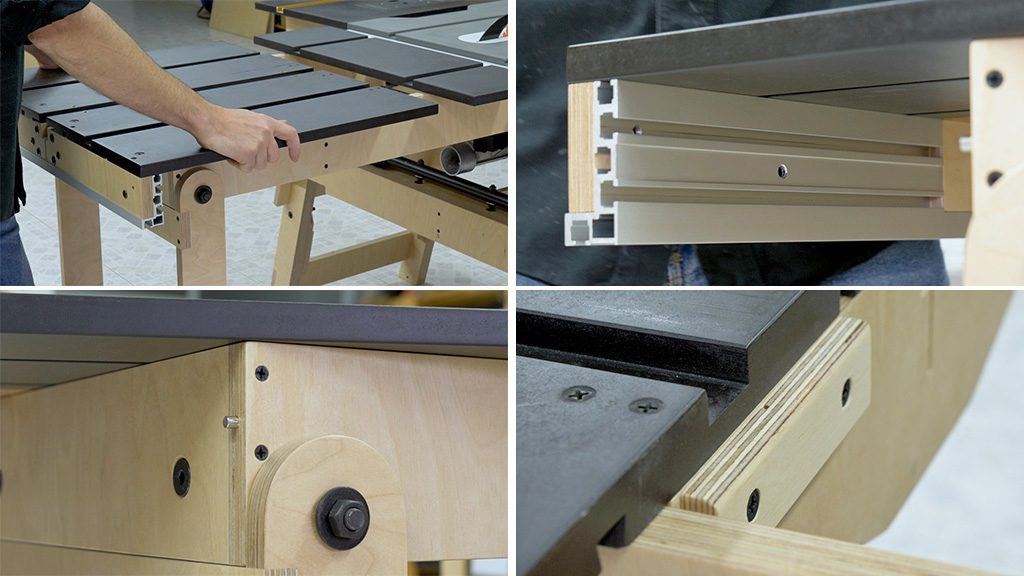
To hold the sled to the outfeed table frame, I’ve used two pieces of a steel rod. I also fastened two small bits of plywood with screws to the back of the sled. These parts are inserted below the front piece of the outfeed table and help keep the sled in place.
Leveling the outfeed table and the table saw is quite easy thanks to the two knobs and the two leveling feet I’ve installed on the outfeed table itself. Once it’s level, the table can perfectly hold around 80 kg.
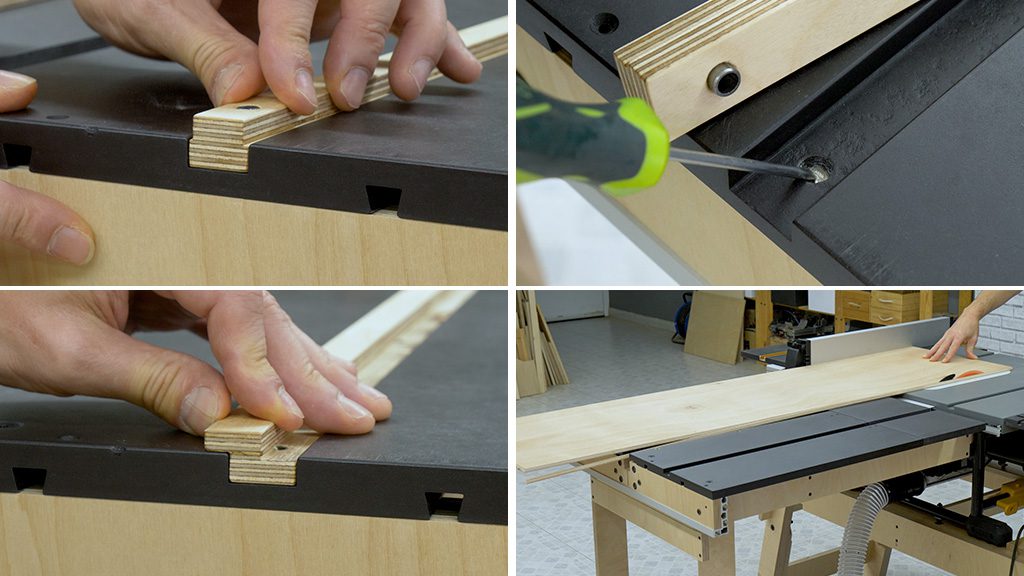
These are the two plywood sliders I made so that I can use the sled. I’ve designed them to be detachable so I can use the sled as part of the outfeed table.
In order to set them up more quickly and accurately, I’ve used some pieces of a steel pipe and some round neodymium magnets of the same diameter as the pipe. I don’t think the magnet is indispensable in order to use this system. Later on I’ll show you how useful the Z-shaped slider is.
Before showing you all the possibilities that this crosscut sled has to offer, I’d like to make some cuts to showcase the advantages of having an outfeed table such as this behind our table saw. After placing the fence of my Dewalt table saw, I’ll try to cut this plywood piece that’s around 170cm long.
Without a doubt, this table will help me cut relatively big boards in a more accurate and comfortable way. I’ll avoid the common problem of the board falling off due to an insufficient support surface at the exit point of the cut.
How to use the Folding Outfeed Table & Crosscut Sled
Flipping the crosscut sled over the table saw worktop is this easy, and so is using it to make all sorts of cuts. Undoing this process is just as quick and uncomplicated.
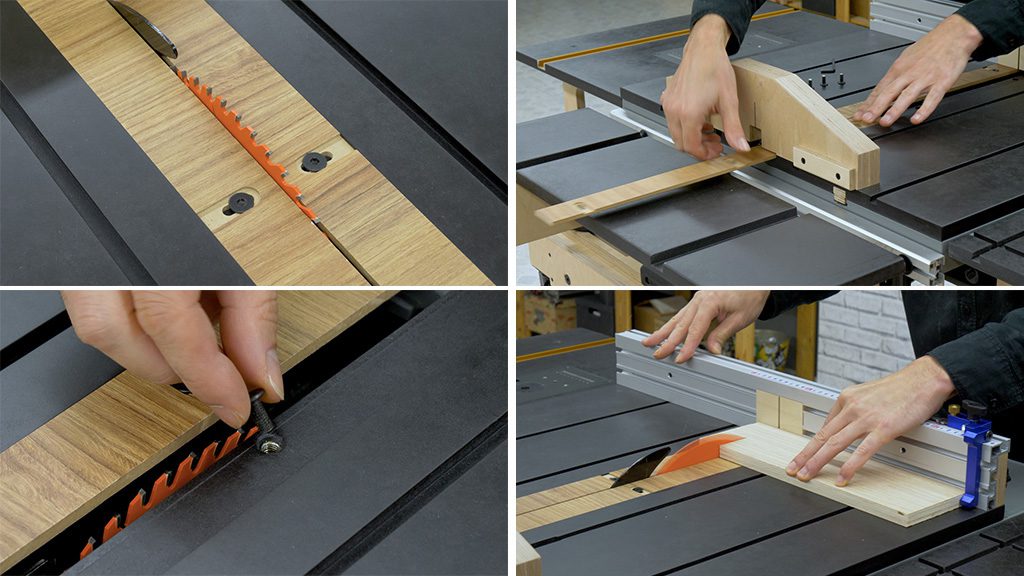
It’s time to take a look at some examples of the sled in operation. After flipping it over, I’m going to show you how to detach the sled’s zero clearance inserts. To do this I have to loosen some bolts and remove them through the back of the sled.
In the third photo you can see the threaded inserts I’ve installed so that I can adjust the zero clearance to the thickness of the blade. Besides, this system will allow me to readjust the zero clearance inserts to the thickness of the blade as they get worn down.
Now I’m going to fasten the track stop to the sled fence to make some cuts.
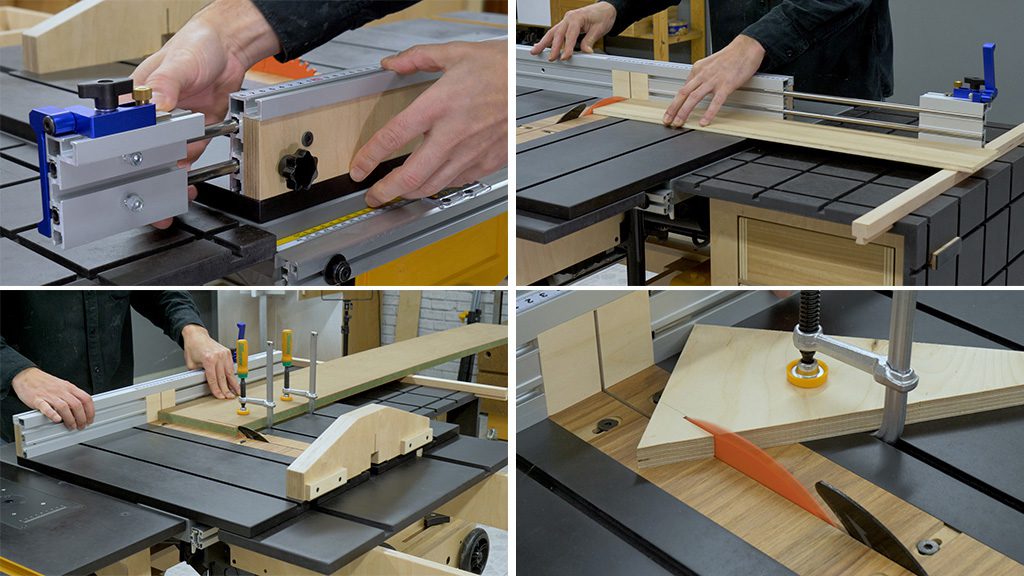
I made a fence extension so that I can extend the track stop and cut longer workpieces. In these cases, the wooden stops I made for use with the assembly table will come in handy.
By loosening a couple of bolts, I can use this extension on both ends of the sled. You can even make a longer fence extension so that you can cut larger workpieces, like this one I made for my previous crosscut sled.
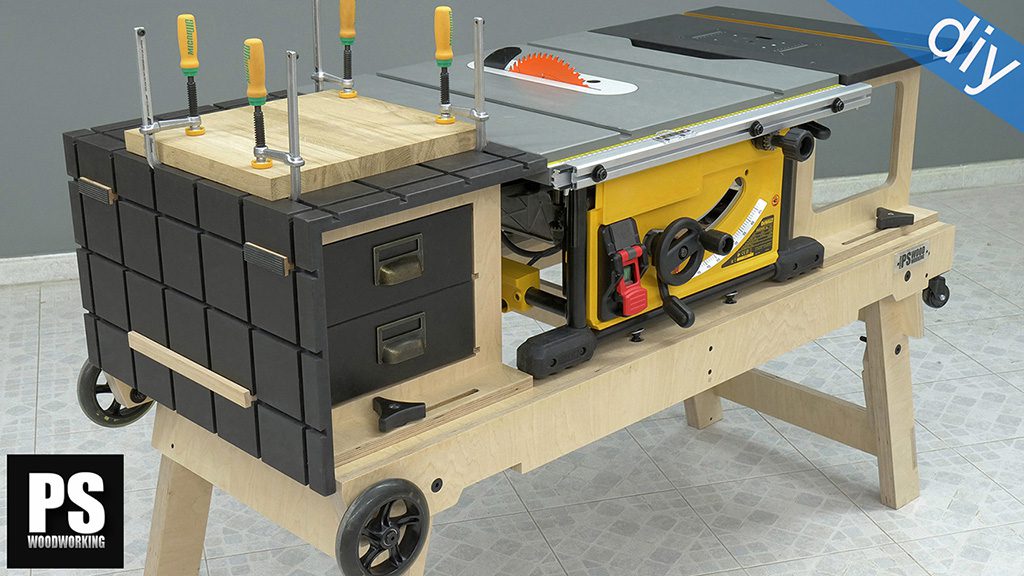
I can also use the assembly table’s dovetail clamps in this sled. They’ll be very helpful in order to cut large workpieces safely, or workpieces with irregular shapes.
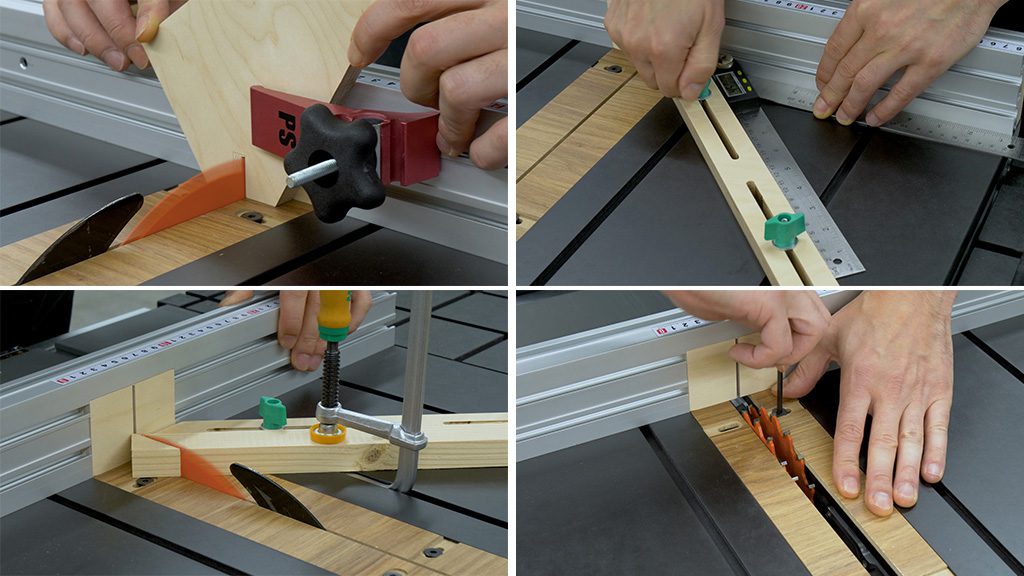
In the sleds fence I can also use hold down clamps to hold workpieces vertically.
These jigs I showed in the previous article on the assembly table will come in handy when cutting pieces at an angle on this crosscut sled. You only need to insert them into the two channels on the sled and find out the desired cutting angle.
Now I’m going to show you why I built another Z-shaped slider. It allows me to move this sled approximately 10mm to the right, making it possible to use a Dado stack. I’ve changed the saw blade. The next step is to replace the zero clearance with a different set meant to be used with this dado stack.
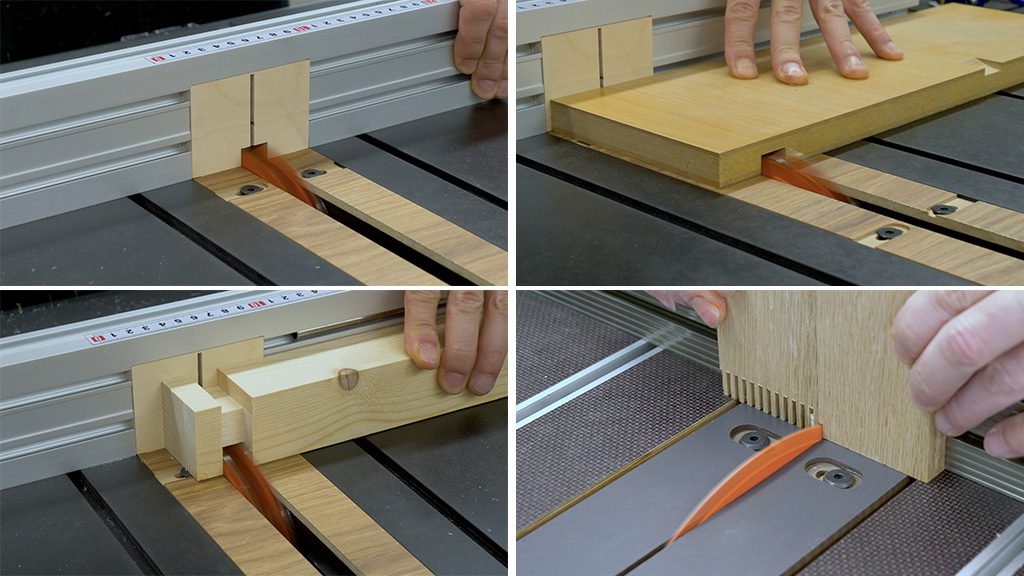
I’ve designed this sled so that it can be used with the whole set, meaning I can cut dados up to 25mm thick. After adjusting the zero clearance inserts of this sled, I’m going to swap out the other insert of the fence and run some tests.
As you can see, this system allows me to cut channels into sensitive materials such as this MDF board with melamine on its sides without causing tearout. I can also do other jobs like cutting tenons.
Just like the previous crosscut sled, by changing the fence’s insert, I can also use this sled to cut box joints.
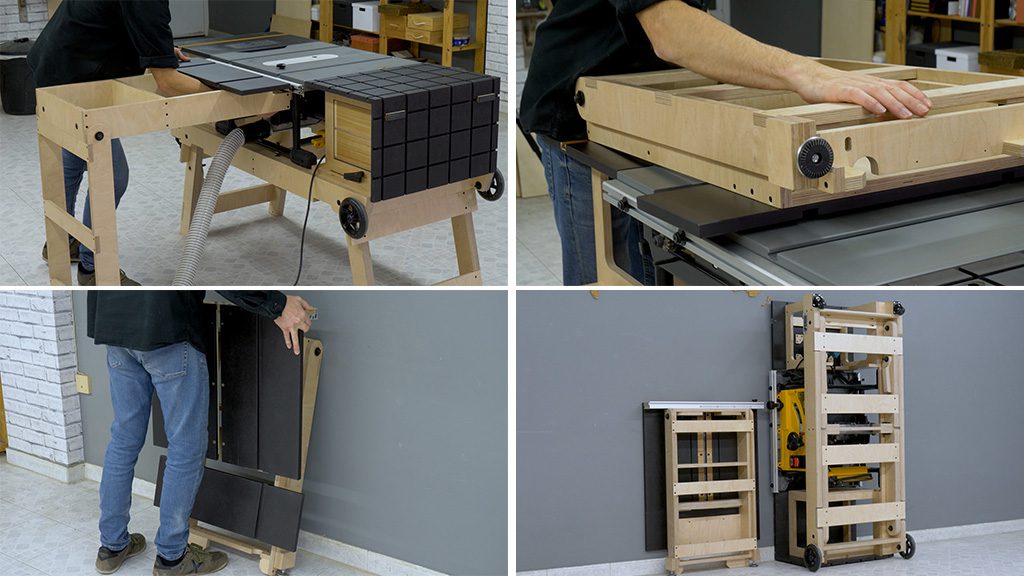
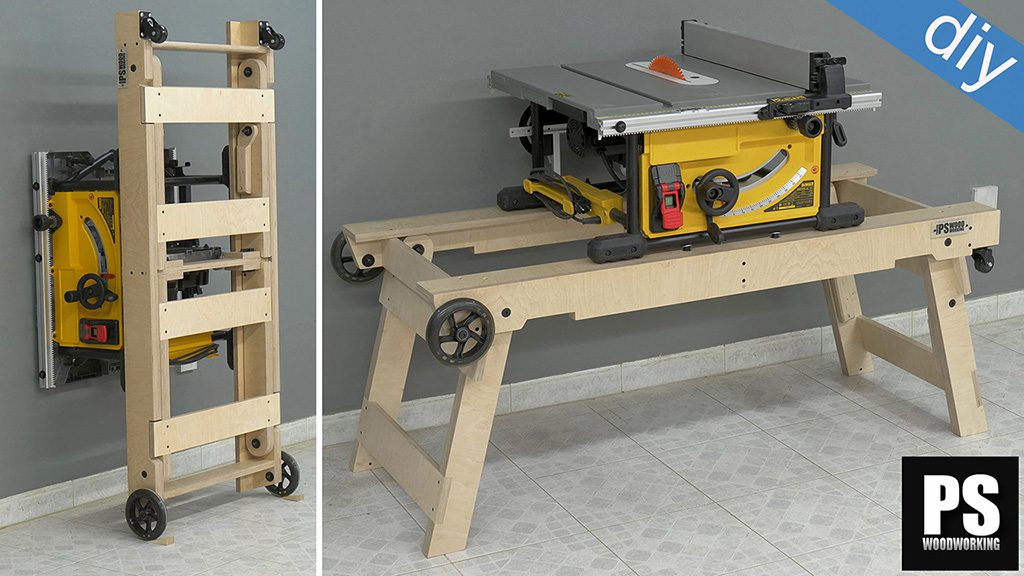
Now I’ll show you how to detach and store this workbench with these photos from my previous article. It’s also a very quick and simple process. The only change compared to the last video is that I can also store the crosscut sled while attached to the outfeed table once folded.
Another good idea to store the outfeed table once folded is to hang it on a wall, with the crosscut sled facing forward so that you can grab it and use it more easily.
Before moving on I’d like to talk about some other interesting points. In order to square this crosscut sled, you can use the 5-cut method. The fence is fastened to the base with four bolts that you can loosen, achieving enough play to move the fence as required.
Maybe the idea of storing your crosscut sled this way is not appropriate to your working style. In this case, you could consider installing a whole board as an outfeed table, by screwing it to the frame, and store the crosscut sled somewhere else, or not make it at all. This way you can screw the slider to the base of the crosscut sled, and you won’t have to cut the two channels.
That’s all for today. In a few days I’ll upload the next article in this series, where I’ll be showing you all this folding woodworking workstation can do. Thank you for reading this article until the end!


I was thinking, how is the crosscut slide going to be a outfeed and a slide as well? Obviously he’s going to have to make a removable t track guide. Then you raise the bar and make 2 so it still works for dado stacks! Genius!
thanks Kevin ! 😀
Inspiring! The washers you hammered into the sled, what are they called? Please share a link to them.
hi Pete, check this out:
Amazing build! Love the thought you have put into it. What is the black material the crosscut sled is made of?
thanks Kris, check this out: