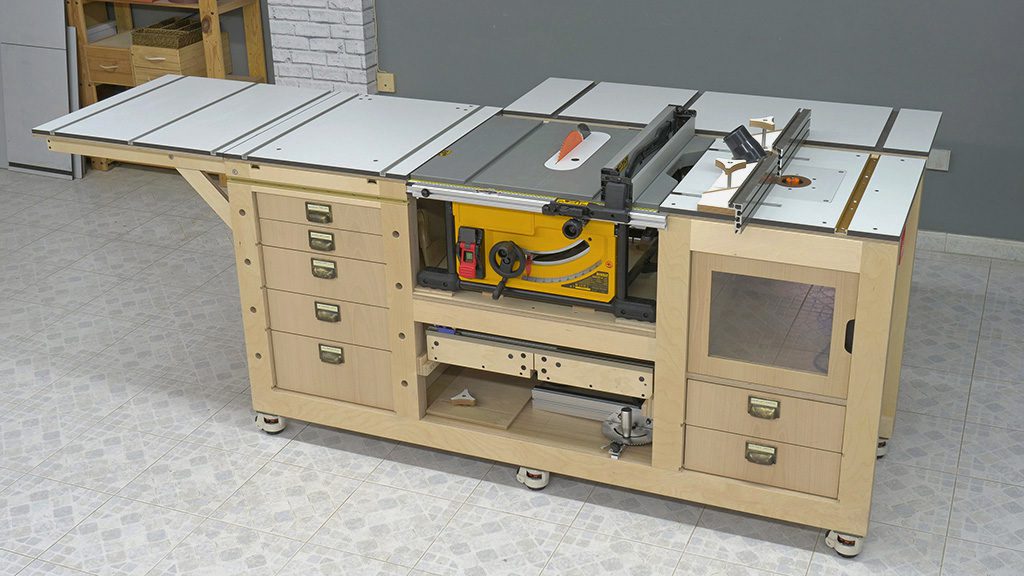
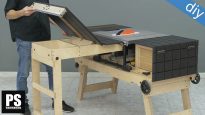
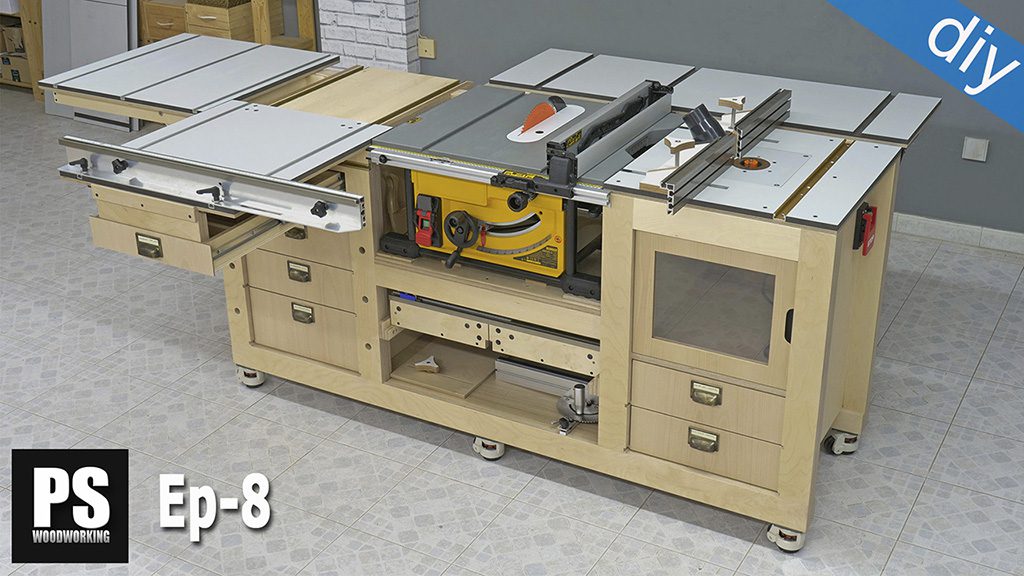
This is the second article about the modifications and about changing the bench table saw on my Mobile Workbench. I swapped the Dewalt jobsite saw with a cast iron saw with an induction motor.
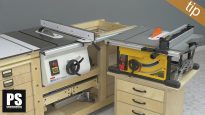
Before moving on, I’d like to say that both saws work perfectly with this workbench, and that for DIY projects, each one has its own advantages and disadvantages.
The main reason I decided to do this change is to show you how easy it is to adapt this design so that you can install a different type of table saw without the need to modify the bench frames. You only need to modify the worktables.
A few days ago I posted an article comparing both saws. If you’re interested in watching it, you can find it on the playlist I created with all the Mobile Workbench videos in this channel. I’ll post a link in the video description.
Mobile Workbench Plans
Specifications of the workbench with a table saw and a router table?
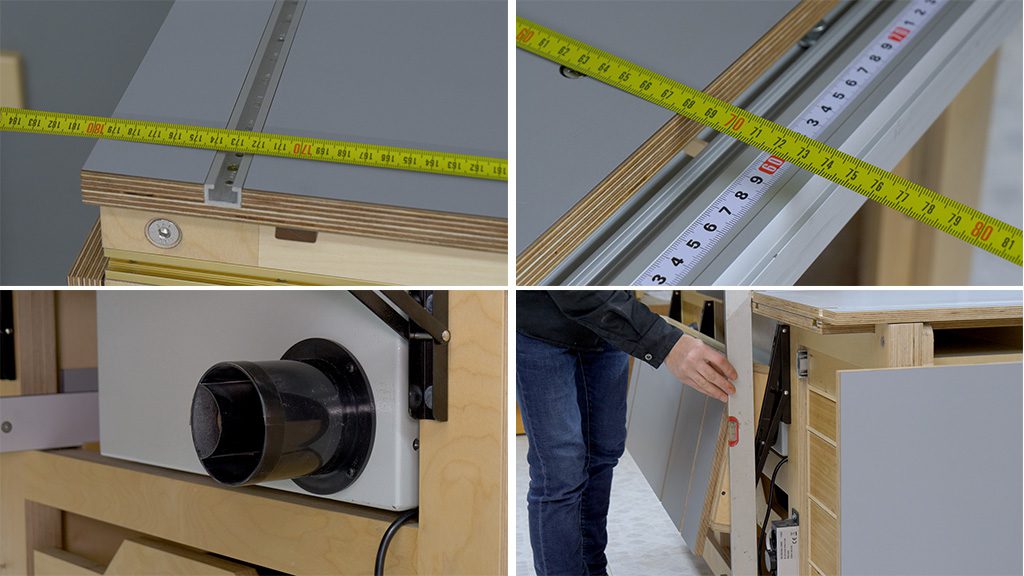
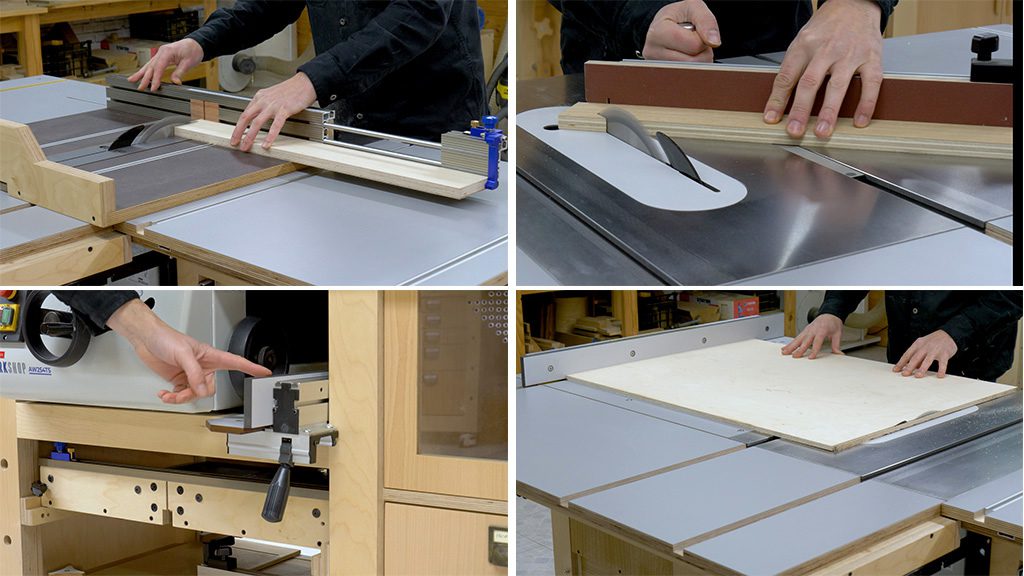
The width of the bench remains the same after these modifications, around 180cm. However, since the new saw is deeper than the Dewalt bench table saw, the workbench now has some added depth. About 68cm to the worktable, 74cm if we’re counting the fence.
The saw’s dust outlet doesn’t let me close the outfeed folding table fully. I’m planning to change the outlet so that I can close it all the way and make it so the workbench takes up less space when up against the wall.

I’ve also had to use a washer as a spacer to raise the outfeed table a little in the back. These kinds of folding shelf brackets always go down a bit more than you’d like in the back part, but thanks to this small modification, I’ve managed to solve this problem.
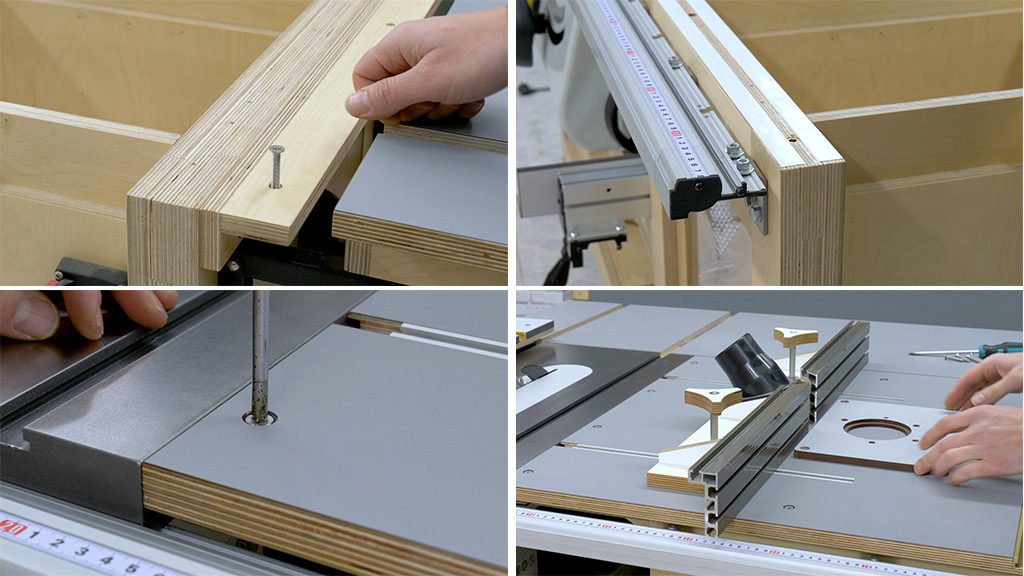
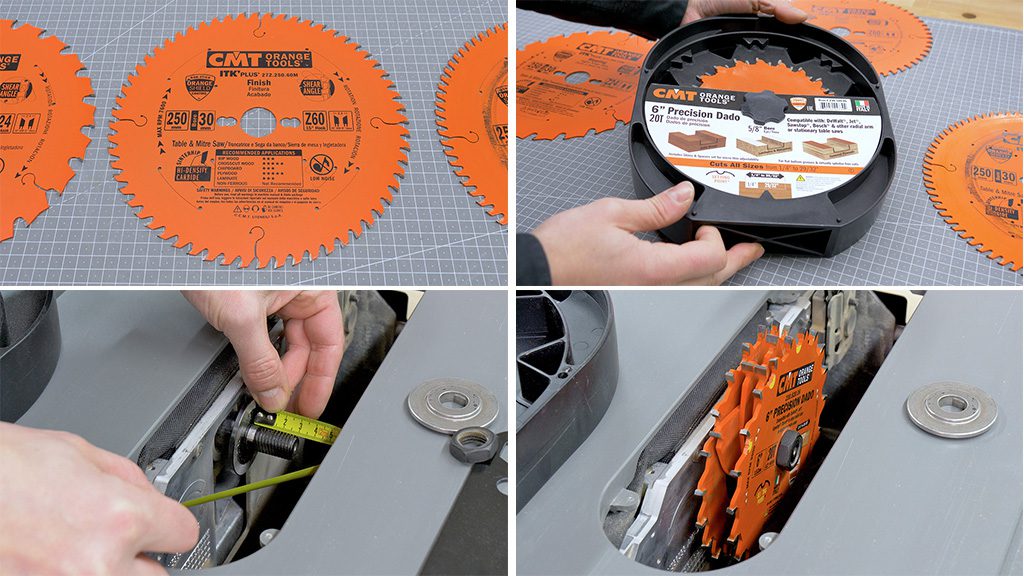
This is the new hard birch plyboard with grey HPL sheets on both sides I’ve used to make the new worktables of the bench. This kind of boards are a little expensive, but it’s worth investing more in the part of the bench that is subject to more wear and tear when working. Besides its hardness, the outer HPL sheet with melamine makes the pieces slide better when working on the workbench.
The position of the adjustable legs of the new bench saw has been determined. The worktable juts out about 25mm in the front of the bench. I made the plywood tops a little deeper so that they’re in line with the saw’s worktable.
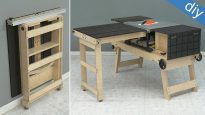
Router table modifications
Since this saw is less wide than the Dewalt, I’ve had to make a bigger worktable for the router. The good thing about this Mobile Workbench meant for one of the biggest bench saws in the market is that now it will be easier to adapt to almost any kind of bench saw, even if it has a wheel to tilt the blade on the side. You can even install any saw as long as it’s not over 35cm high and 68cm wide.
I’m going to remove the router worktable to see how I installed it. I used an L-shaped iron profile whose height I can adjust to attach the worktable to the saw. Besides allowing me to even the two worktables, this L-shaped piece allows me to hold the saw and stop it from moving when working.
I also made two other L-shaped plywood parts to achieve a bigger work surface, although I think for a hard board like the one I used to make the worktables, this won’t be necessary.
In some parts I had to use 0.5 thick PVC edgebanding as a spacer to lift the tops a little and make them even with the rest of the workbench. Since you can change the height of the saw’s legs, this design is almost completely adjustable and makes it easy to even out all the worktables.
This is the worktable I’ve been using for the router table. As you can plainly see, the new table is bigger. The idea now is to mill it so that I can place an insert plate to use the router, which I’ll be showing in the next articles.
Table saw sliding carriage modifications
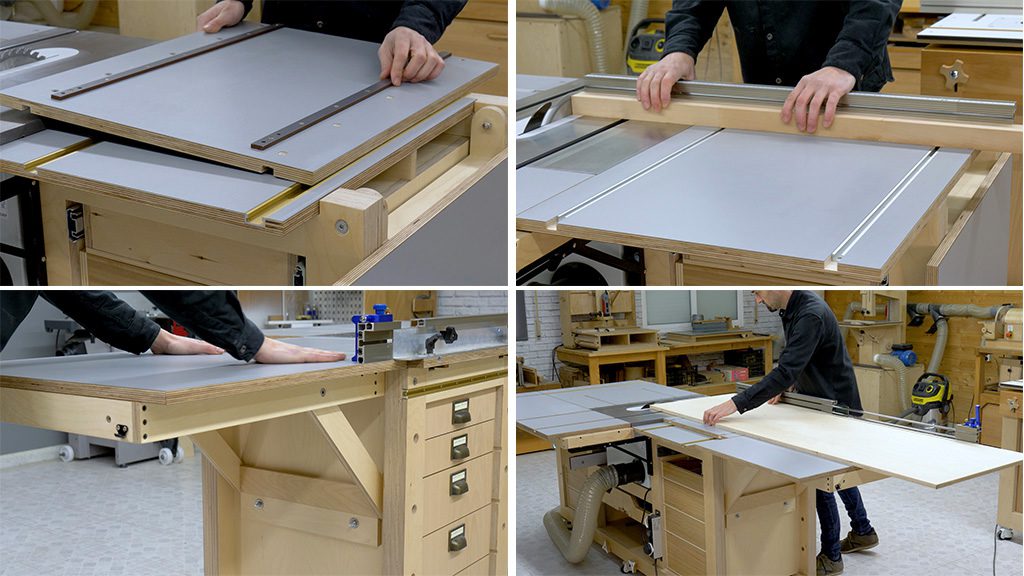
I also remade the base and the top of the sliding carriage. Now, both parts have melamine on both sides, and the carriage slides even better than before. Putting its fence in place is as easy as before, though I’m still planning to develop a system to make it square in a quicker and more convenient way.
If someone has any good ideas to solve this, it would be a great help. You can leave your ideas in the comments. This carriage, along with the side folding table, will allow me to cut relatively big workpieces.
Features of the table saw and the router table
I adapted the sled so that it can be used with this new saw. I have a article about the sled where I display all its possibilities. You can also find it on the Mobile Workbench playlist. Of course, with this new saw, I can continue using the miter gauge to make all sorts of cuts.
I used the gap between the saw and the frame to store the rip fence. This way I’ll have it on hand all the time. With this setup I can cut workpieces of to 88cm. The blast gate box is now dedicated to the router table. A tube goes inside the gap that houses the router, and another goes directly to its fence.
How to modify the Mobile Workbench?
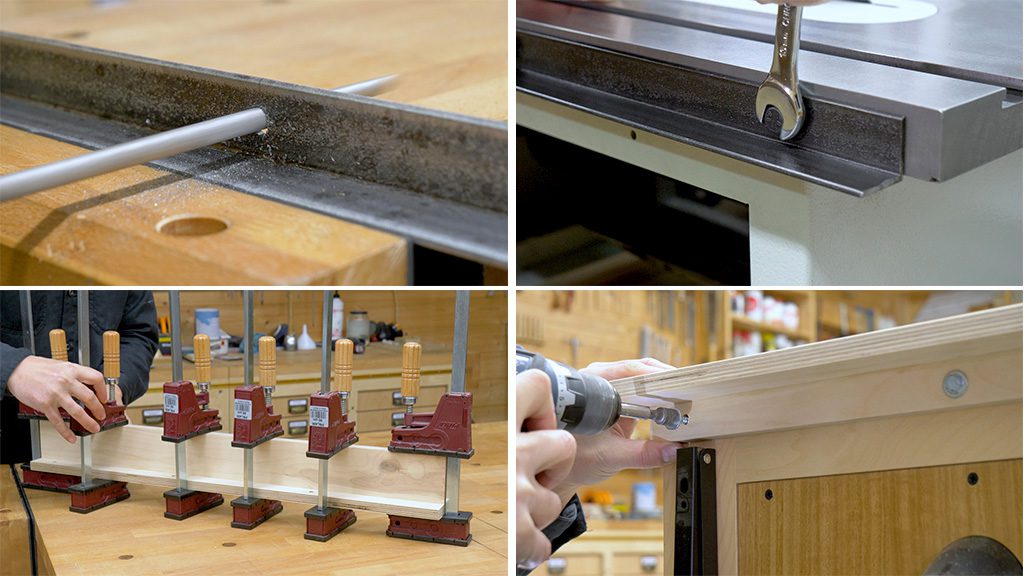
Now I’ll show you how I finished the modifications. First off, prepare the L-shaped aluminum piece so you can bolt it to the saw top. I drill some holes and make them wider with a rasp so I can make height adjustments. Now I’ll cut and machine the L-shaped plywood part for the back of the router table top.
Also here I’m going to make the holes wider so I can adjust its heigh. I’m going to use biscuits and wood glue. I remove the old top and mark the position of the holes. I’ll use hex lag bolts.
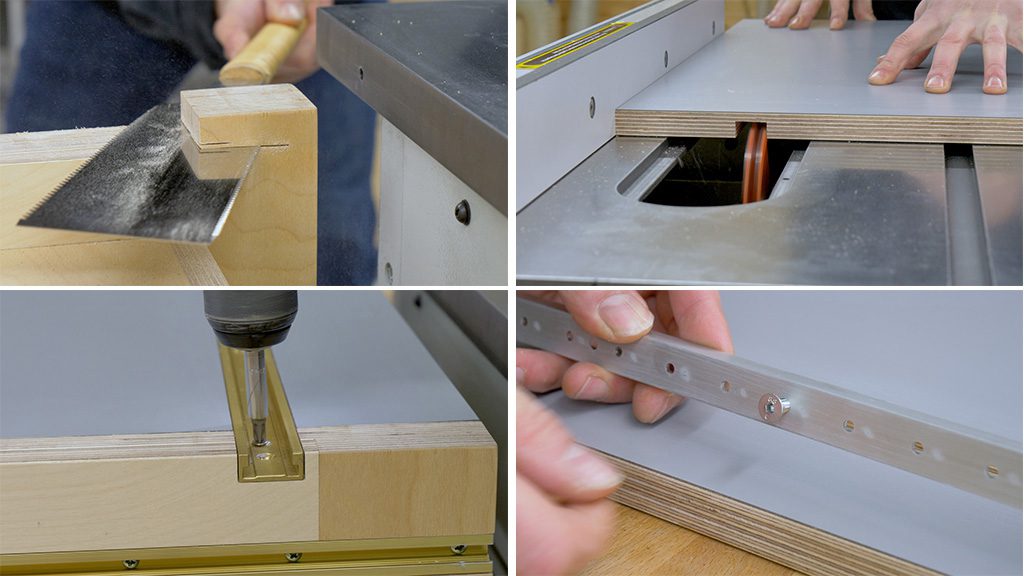
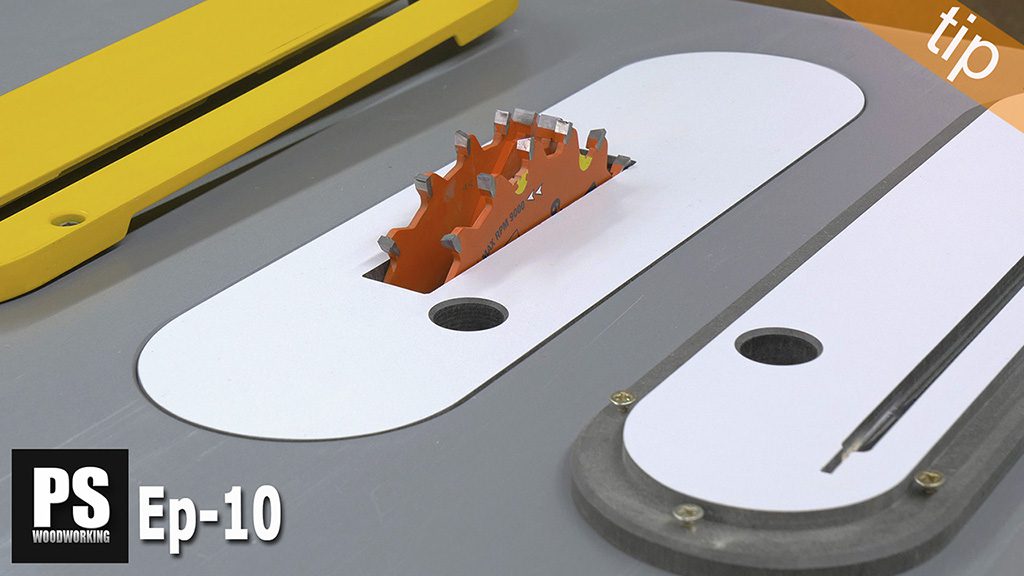
Like I said, I’m going to change the sliding carriage base. This time I’ll make this part a little bit wider than the last, so I’ll have to cut part of the bench frame. I made a chamfer with a 45 degree bit on all edges of the HPL board.
I mark the position of the miter channels and machine them with the table saw and a dado blade. Now, following the same process, I’ll make two rabbets so I can insert the T-tracks on the sliding carriage top. Since it’s not very thick, besides wood screws I’ll use flat head bolts. For that I had to thread some holes in the T-track profile.
I’m going to make a quick adjustment before screwing in the sliders to the carriage top. Once that’s done, I can screw them in as usual, with cyanoacrylate, washers and wood screws. Now that I’m done modifying the sliding carriage, I’ll use it to mark the correct height of the table saw. I’ll use its adjustable legs to level it with the carriage.
It’s time to change the side folding table. I’ve screwed on two pieces of wood so I can hold the new top from below. This time I won’t install T-tracks, that’s optional.
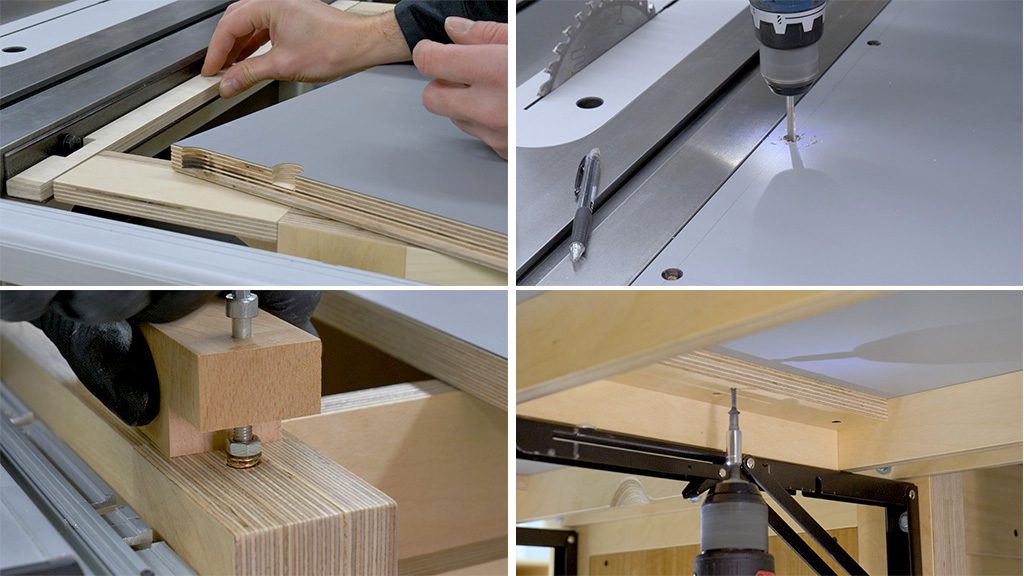
Now I’m going to install the top for the router. I have to make a rabbet to avoid the iron profile, as well as some non-through holes for the bolts. I drill the holes for the bolts that will hold the top and use them to mark the other holes in the iron profile and the bench frame.
After threading the profile and placing the threaded inserts, I can make another dado for the miter channel and the T-track profile.
All that’s left now is to adjust the outfeed folding table in the back. I make some checks and it seems I’ll have to raise the folding shelf brackets by a few millimeters. After making some dados so I can use all the accessories of the table saw, I can finally attach the top of this folding table with screws.
Finally, I’ll stick self-adhesive measuring tape on the table saw fence, and also screw on this simple piece to store the fence more comfortable. Here you will find the first article of this series.


Man! I just love this bench. And now the modifications for the new saw. I’ve following along, of course, with this project and all others.
I was reminded of the ingenious feature, how the drawer below supports the sliding table. So darn cool! I’d love to have the opportunity to work with this bench. All the features seem to operate perfectly, smoothly, and precisely!
thanks Mark!
I found the workbench very interesting does it available ex stock and how much does it cost?
Hi Suso, Thank you so much for sharing this great improvement, very inspiring. I have planned for months to make myself a workbench like yours, and luckily I’m an axminster circular saw owner too ;o). Considering your choice of using hard birchplywood with HPL double-sided for worktable, how much minimal thickness should you recommand ?
hi Chris, I think at least 18mm thick
This workbench is my next build. Wish me luck, I’m gonna need it!
Hi Suso, I have purchased your workbench plans and have been working on the project for a couple of weeks. But I just realized that I my older Dewalt DW744 saw has table top dimensions of 26 1/2″ x 19 1/4″ so the fence rails cannot slide past the edge of the workbench frame. Any suggestions on how to get around this? I was thinking of cutting rabbets on the front and back of the frame to allow the rail to move left and right, but maybe you have a better idea.
hi Jeff, if it’s not too much that’s a good option. Other option is to do the same as this user. Send me some photos, I’m interested to see how you manage.