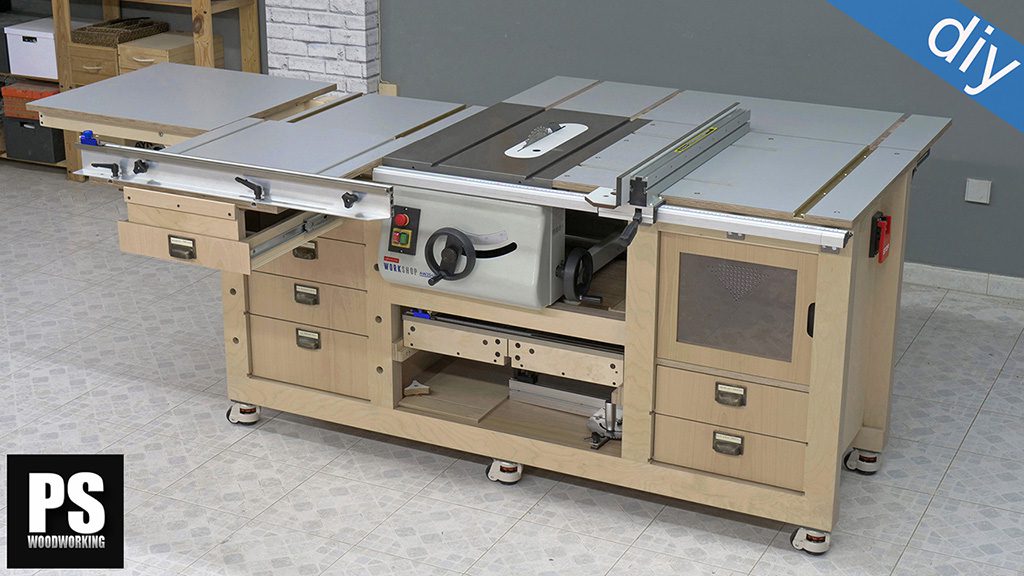
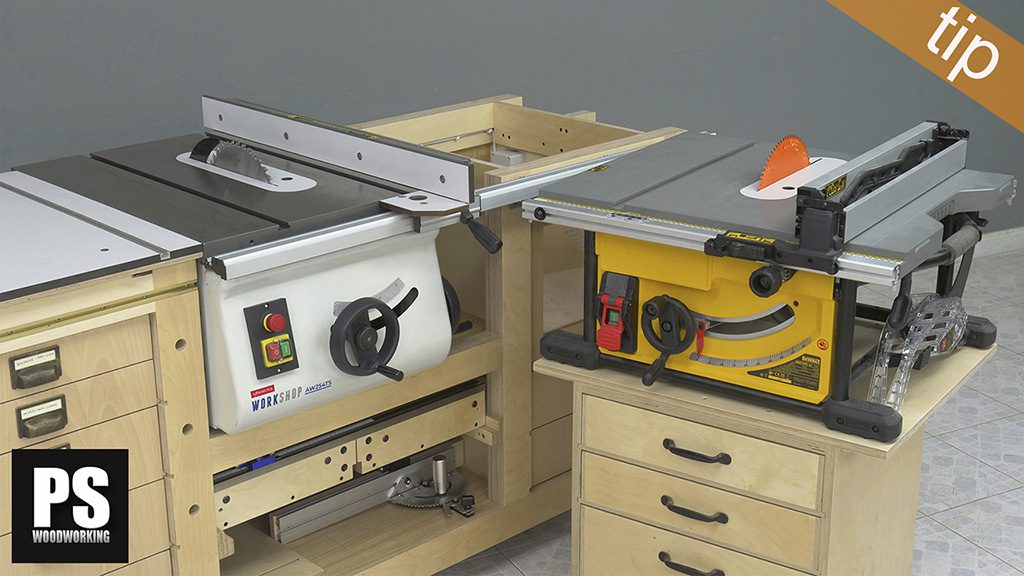
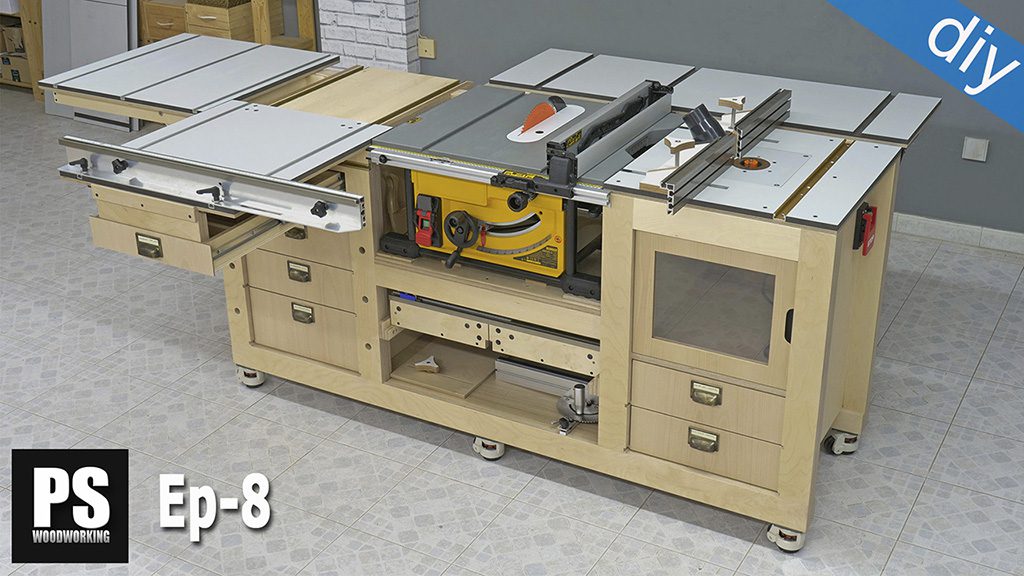
After a year using my new Mobile Workbench with a table saw and router table, I’ve decided to swap the saw for one with a cast iron table and an induction motor. This is the first of two articles where I’ll be showing how to make this change.
With this new bench table saw I’ll have the same functionality and can do the same jobs as the previous Dewalt saw, but with the added advantage of a robust cast iron table and a silent and stable induction motor.
What’s inside a cast iron table saw?
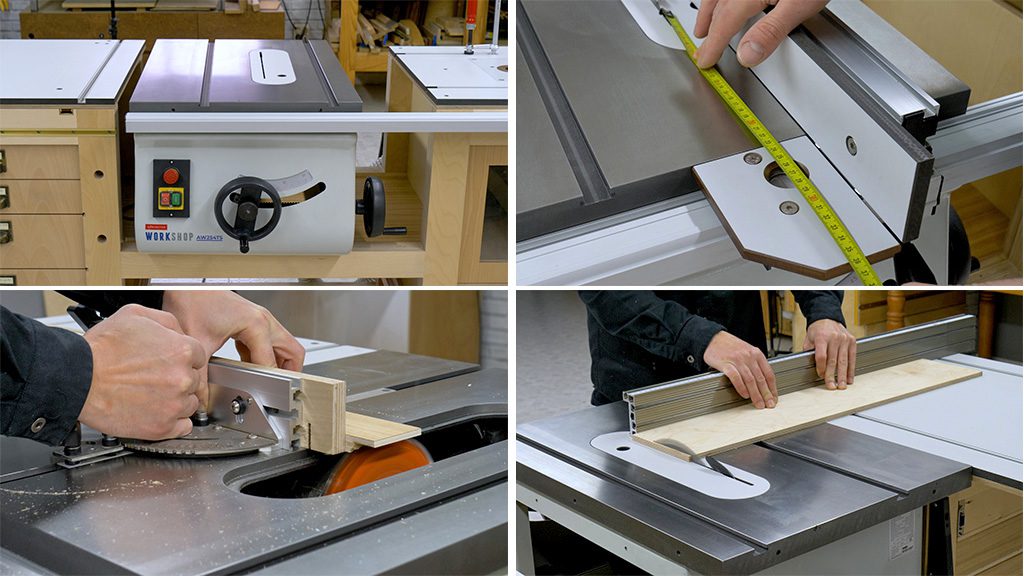
This is the new bench saw I’m going to install. The online store Axminster sent it to me so I can try it out on my Mobile Workbench. In the next article I’ll be covering it in more detail.

By turning this side wheel I can tilt the blade up to 45 degrees. With this other front wheel I can lift and lower the blade. This is the plate we will use to cover the saw on the bottom of the cabinet. Its own adjustable feet can be used to hold it in place. These legs will come in handy to level the rest of the Mobile Workbench’s tops with the saw worktable.
The saw measures about 365mm in height. Before anything else, I’m going to do some calculations so that I can install it on the workbench in as easy and convenient a way as possible. It’s truly a great fit for this design.
How to swap a bench table saw?
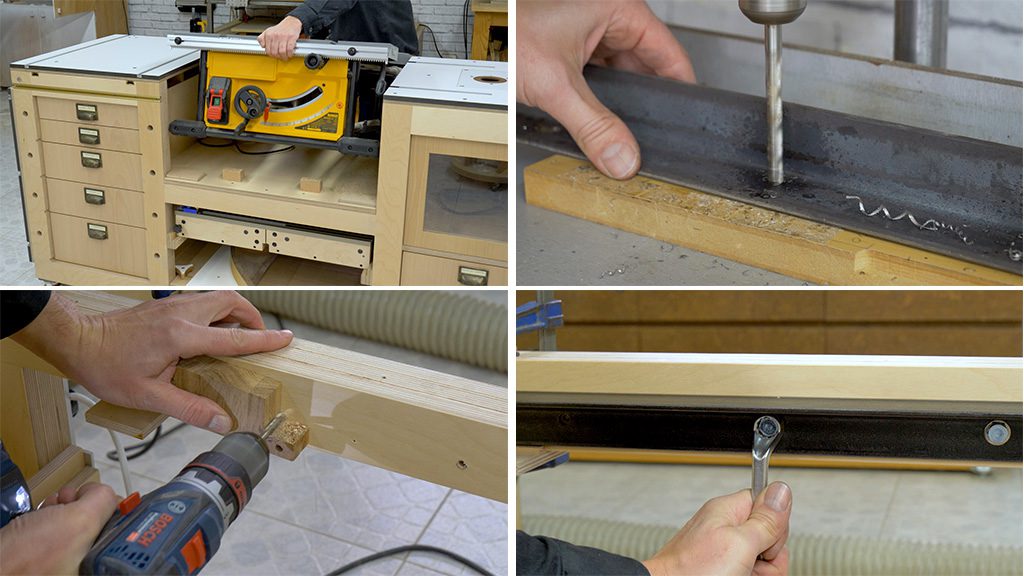
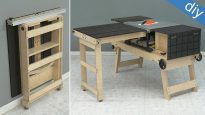
I’m going to remove some parts of the bench to work more comfortable, as well as the saw I’ve been using. The legs fit tightly in the gap between the two mid rails, so I’ve thought about using an L-shaped iron piece to support them. I’m going to use a 40×40 L piece with a 4mm wall.
I drill some holes to fasten it to the bench. First with a 5mm bit and then with an 8mm. This handheld drill turns too fast for these kinds of jobs, but little by little I manage to drill all the holes.
I apply a couple of coats of black paint and once it’s dry I use the L piece to pre-mark the holes in the mid rail. I’ll use 8x50mm hex lag bolts. It’s a rather heavy saw at 90 kg. With this system I believe I can distribute the weight of the saw more evenly in the central part of the bench.
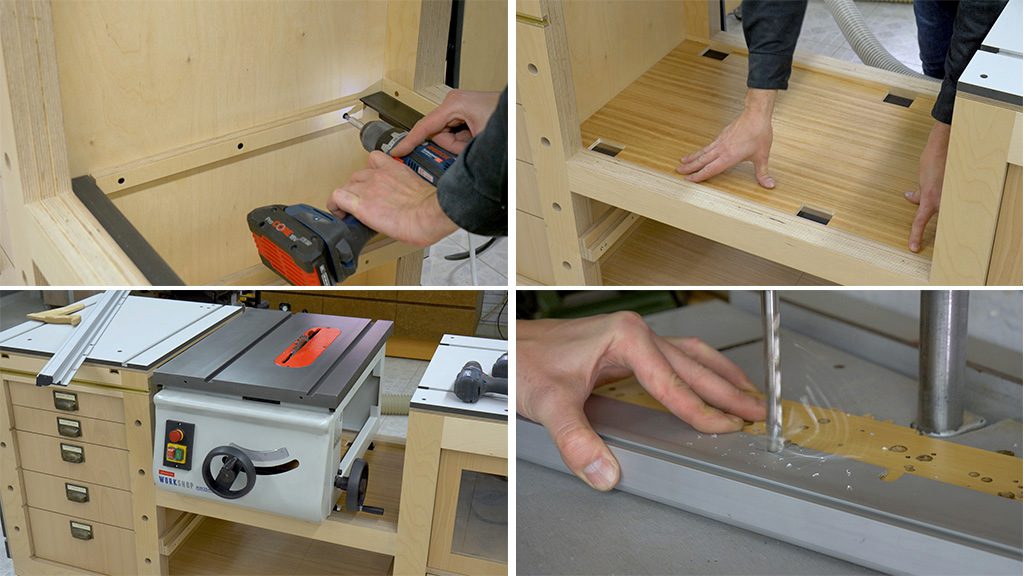
I’m going to cut a piece of 9mm plywood to cover the gap underneath the saw. I’ll make some cuts in the piece for the legs. I want to place the saw on the two iron L pieces, rather than on this plywood part. I’m also going to screw two strips of plywood on both ends to achieve a greater support surface.
I’ve just realized I won’t be able to install the lower cover for the saw because part of it sticks out and would overlap the mid rail, but I don’t think it will be a problem. With the help of another person, I’ve put the saw in its emplacement. Now I’m going to install the fence’s aluminum profile.
How to install an infeed table on a table saw?
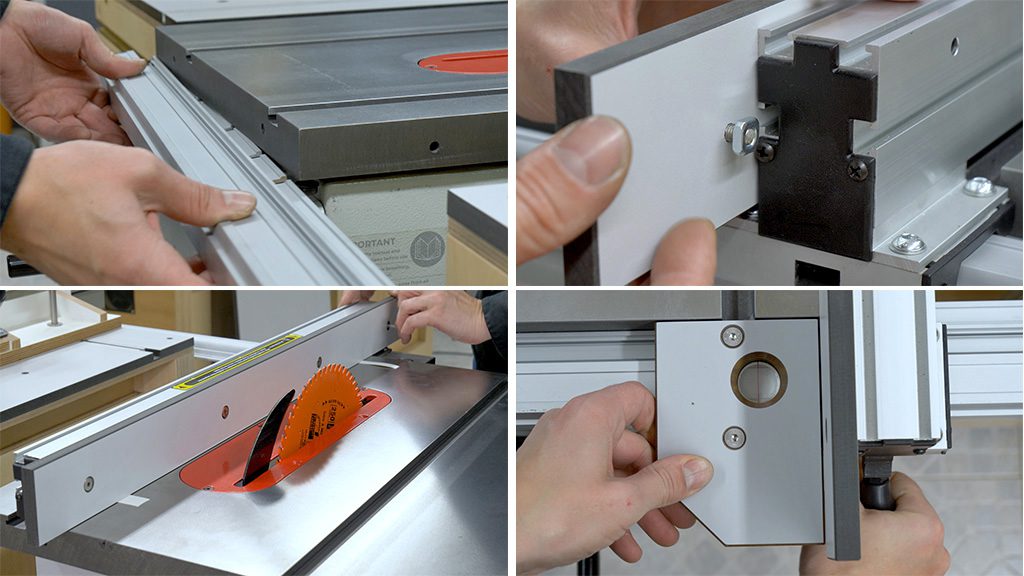
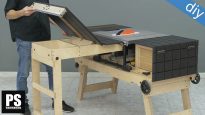
This saw comes with an 800m fence that just wasn’t enough for this design. I’ve ordered a longer one from Axminster. They sell it along with an extension table I’m also not going to use. The profile is fastened to the saw with two bolts under the worktable. I have to make some new holes on the fence because it is designed to be attached to the center of the saw, and I need it to be to the right.
Now I’m going to make sure the saw is calibrated. The blade appears to be perfect out of the box. To calibrate the blade we must loosen four screws on the underside of the worktable so that we can turn the table to the appropriate side.
I’ll also take a look at the fence. It seems like it needs a small adjustment. To do that, I have to loosen these four screws to turn the fence in the appropriate direction. I’ll make this adjustment at the end of this modification.
I’m going to cut a strip of a board to attach to the side of the fence. I’ll use the same board I used to make the worktables. Any board will do, but it’s best to use one with melamine or HPL on both sides for smoother sliding when cutting.
I make four holes for the screws and I’m also going to chamfer their edges. To assemble this piece in the fence we can use normal nuts or this square nut, especially made for jobs like these. Before tightening the screws, I’m going to install two 0.5mm thick pieces of PVC to separate this piece and the worktable.
Now I’m going to cut a piece of HPL to install on the front of the fence. With this infeed table, I’ll have a bigger support surface when cutting pieces against the fence, which is essential for these kinds of small saws.
I drill a hole so that I can keep using the cursor, and another two to fasten the piece to the fence. This fence’s aluminum profile is perfect for this job. With this new infeed table, I have an additional 150mm of worktable before the blade.
How to install a cast iron table saw fence?
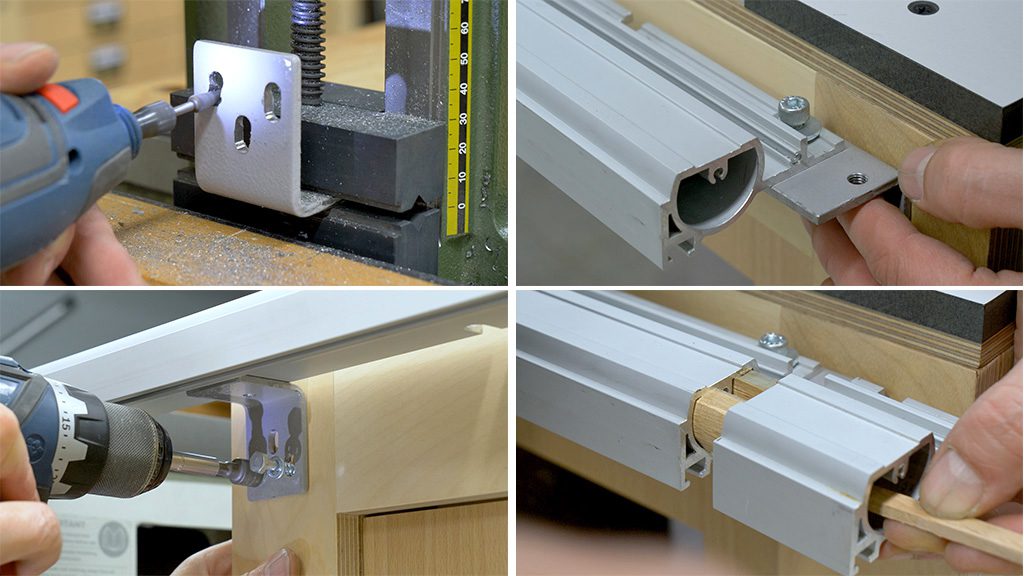
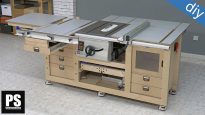
It’s at this moment that I decided I’m going to place the saw next to the sliding carriage. The only problem is that by doing this the fence’s aluminum profile doesn’t reach the right end of the workbench. I’ve thought about extending it with a small piece of another profile that came with the saw.
I’lll use some sturdy 4mm thick metal brackets I had in my workshop to fasten the fence to the workbench. After cutting them to size, I’m going to make their holes a little bigger so I can adjust the height of the fence when needed. On the top of the brackets I’ll make a threaded hole for a 6mm bolt.
Here as well I’ll leave a few millimeters of slack so I can move the fence left or right. The last bracket will allow me to hold the smaller profile piece. I make holes in the frames of the bench to attach the brackets. For now, I’ll only put two of the three bolts. In this case I’m going to use 6x30mm hex lag bolts.
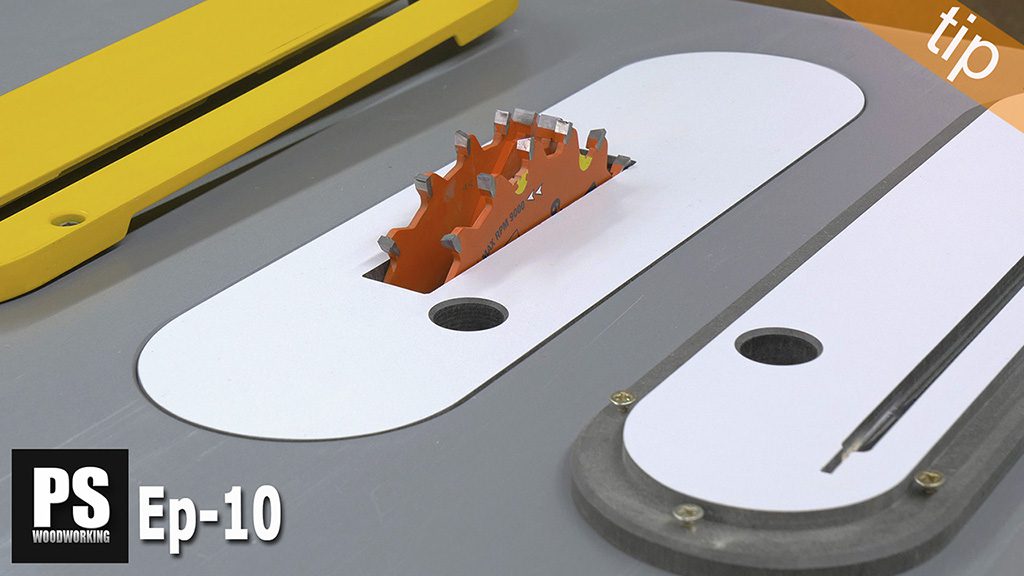
I’ve made some new zero clearances following the same process as I did with my previous saw. The one that comes with it out of the box is rather warped. Also, making custom zero clearances has a series of advantages I touched upon in a previous article in my website.
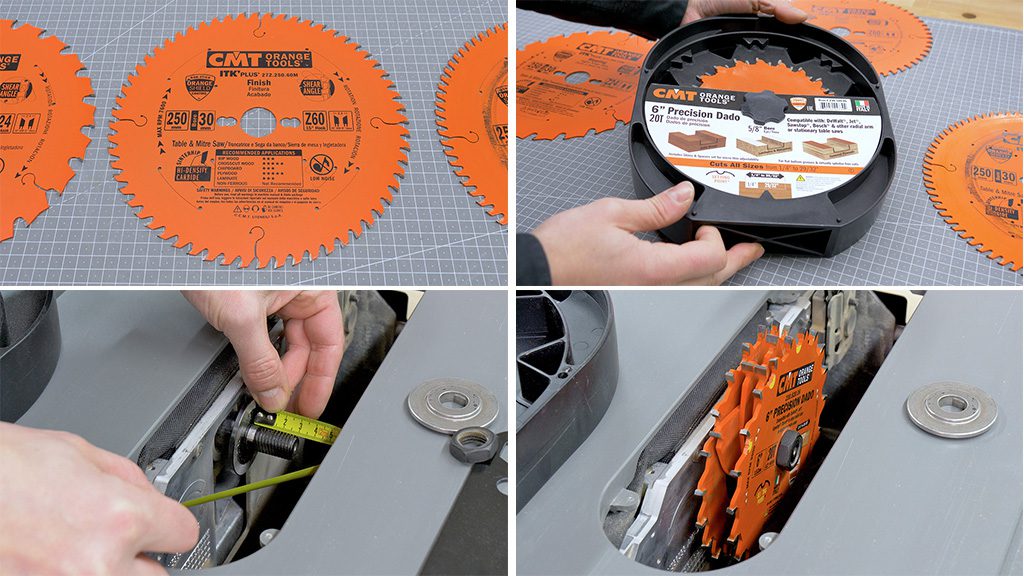
How to modify a table saw shaft to use dado blades?

The shaft of this saw is only 20mm long, so it’s not meant to be used with dado blades. I’ve thought about making a small modification so that I can use them, at least in part.
I only have to trim down the end of the shaft by 4 tenths of a millimeter so that the blade can fit in and touch the washer on the side of the shaft. I’ll use a rasp and check every now and then to make sure I don’t go too far. It’s important to do this step without turning on the dust collecto. A spark could go into the tube and cause a fire.
Ideally, we should remove the shaft and do this with a lathe, but since that would take too much time and effort, I have to chamfer the central hole of the blade to avoid the slight curve that’s left in the shaft. Since its shaft is so short, I can’t use all the blades in this dado blade set.
After placing the blades and the nut, we must have about 2 or 3 mm of the shaft free. In my case, I managed to place the blades to get a thickness of 14 mm. For most of my projects, that will be more than enough. Be careful when using dado blades and doing this modification, it will most likely void the warranty of your saw.

It’s time to adapt the sled to this new saw. First I’ll remove the sliders. Now I’ll premark its position by leaving the blade in the middle of the sled. I’ll use the fence as a guide so I can put the sliders back, ensuring the sled is square with the blade.
I insert the sliders in the saw miter channels with some washers acting as spacers. I apply some cyanoacrylate and put the sled in its emplacement. After a few seconds, I can remove it and screw the sliders back on.
Now that the blade is closer to the sliding carriage, I have to move the carriage fence to the left. I’ll only have to drill a new hole and extend the channel by about 40mm. After removing all the parts, I drill the holes and make sure everything’s working properly.
That’s all for today. In a few days I’ll post a new article showing how to change the worktables to adapt them to my new saw. See you soon!

Hi, I would like to purchase your bench design to replicate but am interested with the new Axminster saw upgrades. Will you update the project? If I buy it now, will I have to buy it again later or will there be an upgrade of older plan? Thanks and lovely job
hi Fabio, yes, I’m going to add another folder with the necessary modifications