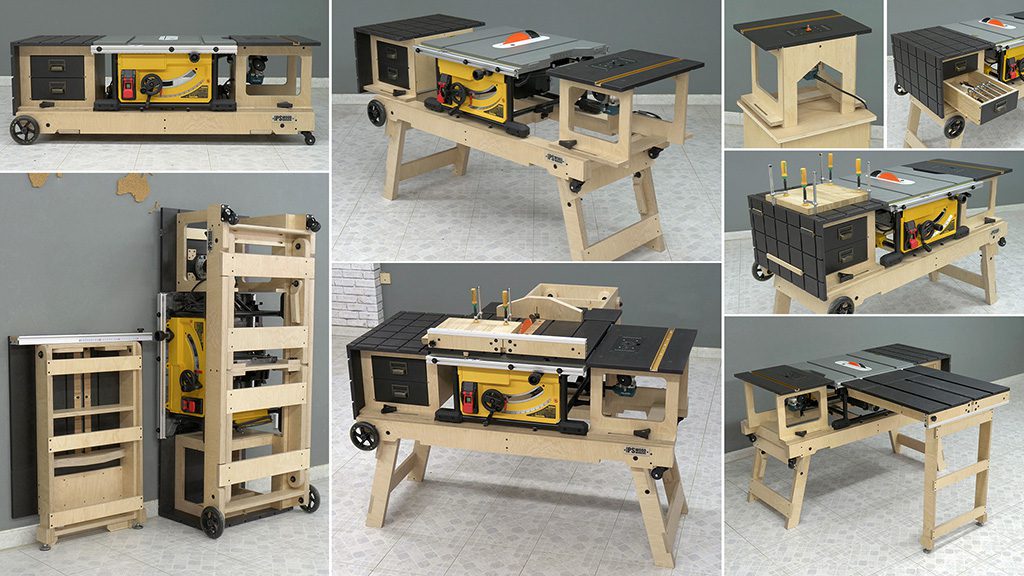
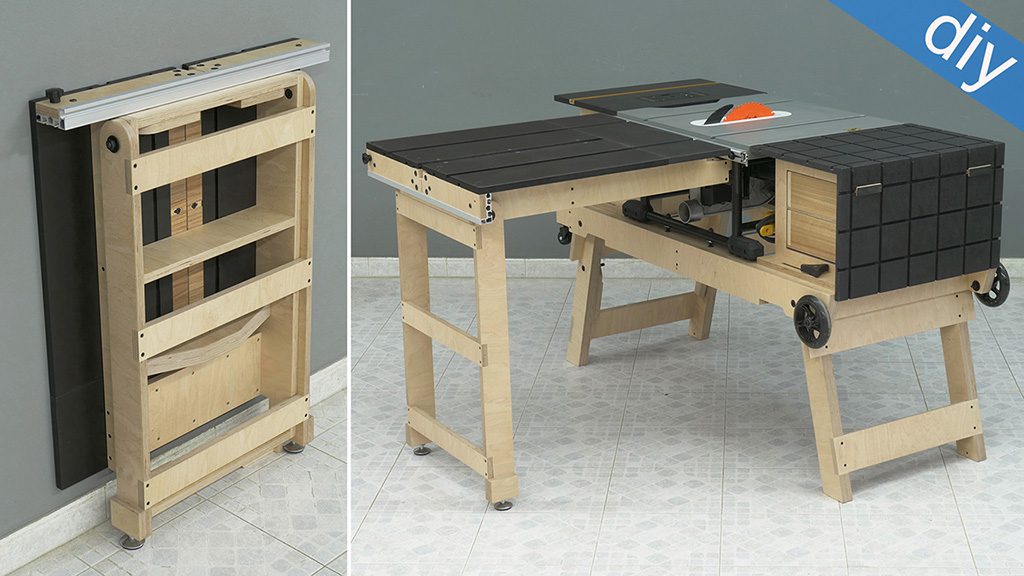
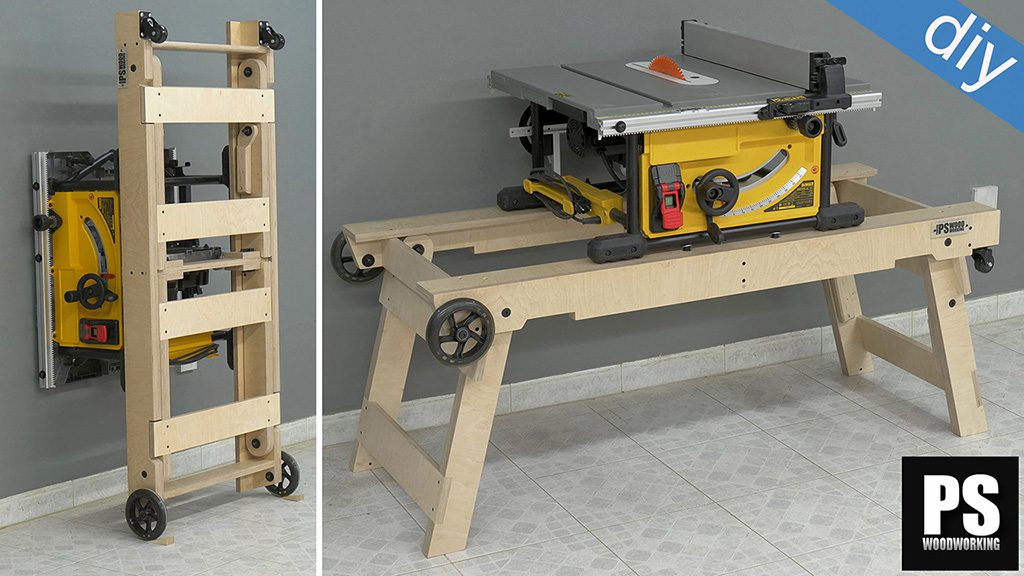
Lately, I’ve been receiving quite a few messages with questions related to my new Folding Woodworking Workstation. The most common question is about the possibility of installing other jobsite saw models.
In this new article, I’ll try to answer these and other questions, such as the possibility of making the folding stand and modules using other kinds of boards.
What boards to use to make the Folding Woodworking Workstation?
In principle, you can use almost any kind of wooden boards available on the market, but each type comes with its own advantages and disadvantages. The weight, robustness and stability of this tool will change depending on the wood we use.
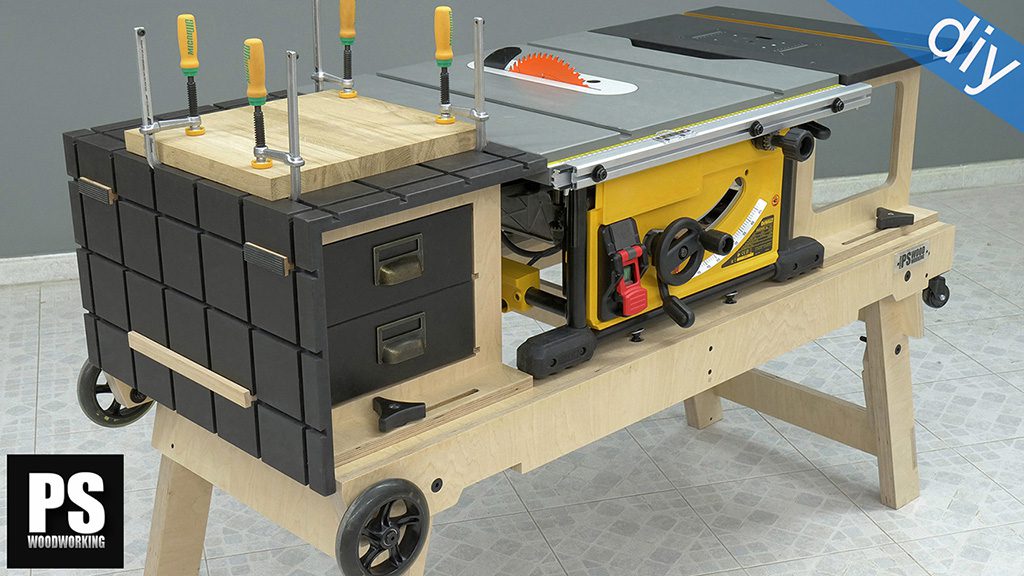
In my case, I’ve use hard birch plywood to build all the parts of the workstation except for the tops, which are made of a kind of black-tinted MDF called Valchromat.
This material is similar to a standard MDF board which is tinted in various colors during its manufacture. I decided to use this wood due to purely aesthetic reasons. It is a slightly expensive board, and difficult to get outside of Europe. On their website you will find distributors by country.
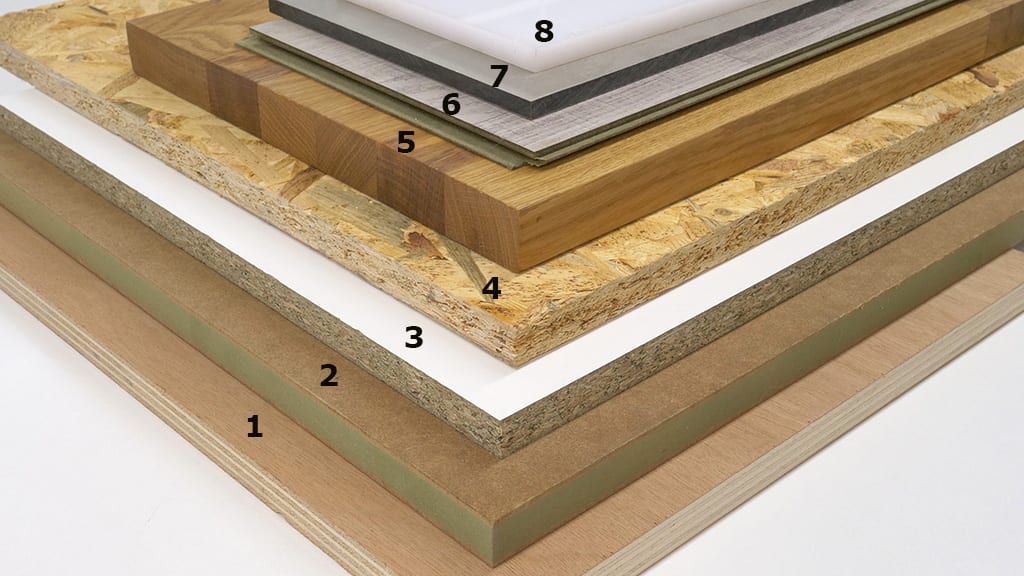
In section N.5 of this article, you’ll find all the information you need on the advantages and disadvantages of using different kinds of boards to make homemade tools.
For the workstation’s table saw folding stand and modules, besides hard birch plywood, you can also use light plywood such as poplar, okumen or pine. This will allow you to reduce the total weight of the tool, but you may lose some robustness and stability.
If you do projects outside of the workshop, you might want to reduce the total weight of this tool a little using light plywood. If you’re barely going to leave your workshop and prefer a stable tool, you’re better off using harder and heavier plywood, like birch plywood.
You can also use MDF or chipboard. These two types of board are quite heavy. In the parts where you need to glue several pieces together to achieve more thickness, you won’t be able to use any boards containing melamine or HPL on their surfaces.
If you’re going to use anything other than hard birch plywood, you might want to reinforce the two folding stand parts labeled as FW4. You can screw on a second part that’s just like FW4 on the outer surface to make it thicker.
For the drawers, try to use light plywood—12 to 15 mm thick for the sides of the drawer and 5 to 9 mm for the bottom.
To make the tops of the router table, assembly table and outfeed table, you can use almost any kind of board.
Unlike before, in this case it’s best to use a board with melamine or HPL on its surfaces. The workpieces will slide better and the tool will be more resistant to wear and tear.
Ideally, the tops should be 18mm thick and made of hard or soft plywood, with melamine or HPL on its surfaces. An MDF board with melamine or HPL on its surfaces would also be perfect.
Using chipboard with melamine or HPL on both its surfaces is a little less advisable, but no less valid.
The boards you use to make all the parts of this tool should have the same thickness as the boards in the original design to avoid making modifications.
What bench saws to use with the Folding Woodworking Workstation?
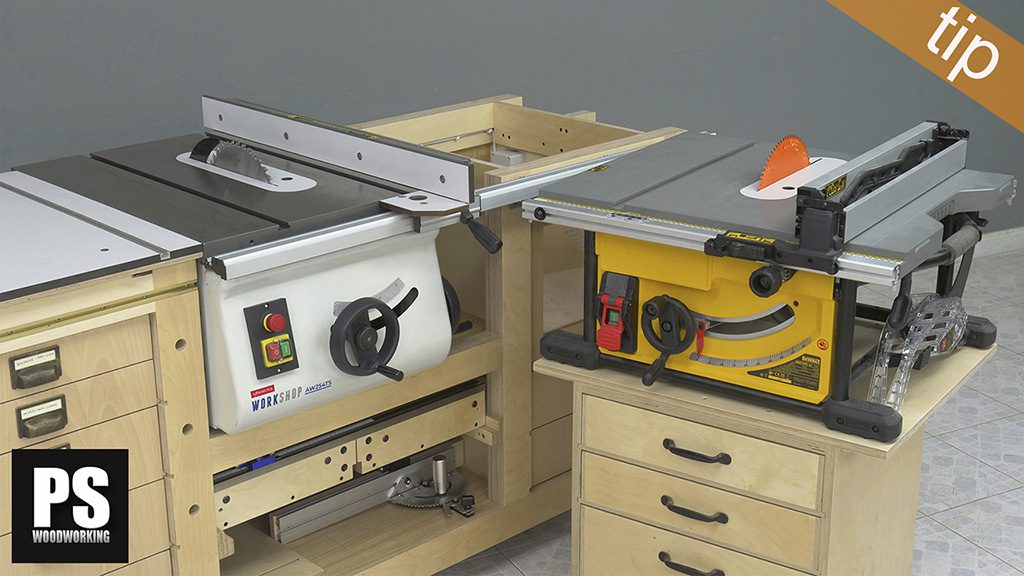
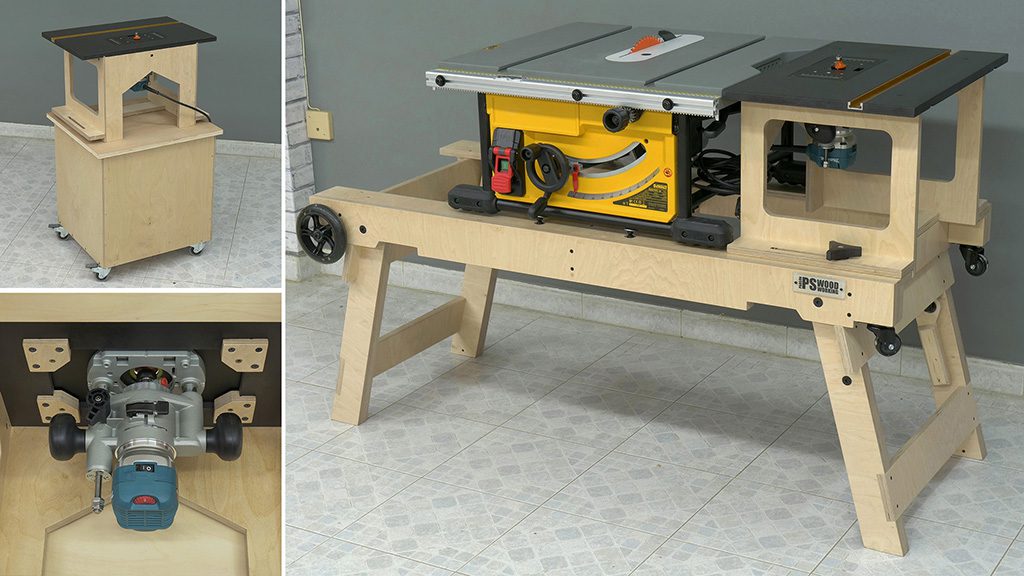
I believe the perfect size and weight for this design is the saw I used, the Dewalt Dwe 7492-QS. It’s a jobsite saw that weighs around 25kg. Its worktable is 675mm wide and 650mm deep. Its height is around 330mm.
The picture above is from a different article where I compared this saw with another bench saw with a cast iron top. Even though it has a smaller table, due to the materials it’s made of, it weighs around 90kg. As you might have guessed, it’s not the right saw for this project.
My advice would be to not go too far above the weight and size of the Dewalt saw I used. I think it’s going to be easy, as the Dewalt Dwe 7492-QS is one of the largest yet lightest jobsite saws on the market. Try not to install a saw over 30kg.
I also wouldn’t advise installing a saw that’s too small. Not only would it perform worse, the modifications required to adapt it to this design would be too complicated.
How to modify the plans for the Folding Woodworking Workstation?
First of all, you should familiarize yourself in depth with the design and the plans. Watch all the videos carefully and read all the support articles included with the plans.
The next step is to print out the cutting list included in the plans. You’ll be able to see the dimensions of each part, their reference numbers and their position within the design. In this article, you can find more information on how to use the plans available on this website.

Now I’ll try to explain three different situations you might run into when trying to install a bench saw that’s different than mine. You may find only one of the issues, or three at the same time. The image above shows the dimensions of the gap for the bench saw in the original design.
If your saw is a little over 330mm high, I think it’s best to try and solve this small issue by adding the difference to the top of the parts labeled AT1, AT 8 and RT1. Although, like I said earlier, I don’t think you’ll find a jobsite saw that’s much higher than 330mm.
In these four parts you can leave everything else as is, such as the measurements of the interior cuts. Only the top part of these pieces will end up being a little wider. You will also have to add the difference to the legs of the outfeed table, labeled OFT 7.
This is one of the options to make this workstation higher than 900mm, which is how high the original design is. But if this is inconvenient for you, you can make it 900mm high again by subtracting from the folding stand legs, with reference number FW10, the same height you added to AT1, AT 8 y RT1. In this case it’s not necessary to lengthen the legs of the outfeed table labeled OFT 7.
If your saw is lower, the difference will probably be small, maybe 30mm at most. What I would do is to make four plywood parts to use as spacers between the legs of the saw and the folding stand, in order to lift the saw by however much it takes.
You may want to build a system for leveling the bench saw top with the module tops on both sides using the spacers themselves. Four pieces of a threaded rod screwed from above onto the spacers, and the nut and washer system I’ve used could be a good solution.
The advantage of doing it this way is that if some day you decide to replace your saw with a bigger one, you probably won’t have to do any major modifications. You’ll simply have to remove the spacers.

If your bench saw is wider than the one I’ve used, you’ll have to add the difference to all the parts that touch the red line in the picture above, taking the 676mm in the original design as a reference.
I wouldn’t modify the outfeed table. I believe the difference with your table saw will be too small and it won’t be worth the effort. In this case, you would only have to lengthen the pieces labeled FW1 and FE3 as much as necessary.
This is the second method if you want to make this project higher, which is to lengthen the legs as much as necessary. If, for example, you want to give it an extra 50mm in height, you should lengthen the legs by about 50mm, as well as lengthen the pieces FW1 and FW3 of the folding stand twice as much—in this case, almost 100mm.
Do note, however, that if you use the same saw I did, you’ll have a gap between the saw and the two outer modules. You can solve this by making the tops of the two outer modules longer. It’s the option I’ve drawn in green bove.
I would imagine your intuition is telling you that in order to install a saw that’s less wide, we must do the same steps but the opposite way. Well, not quite. This isn’t possible because we wouldn’t be able to fold in the folding stand legs. They need to be as big as in the original design in order to work correctly.
We can’t shorten partes FW1 and FW 3 wiithout also reducing the legs so they can be folded in, and all of that will end up reducing the total height of the tool.
One option is to move the two outer modules closer towards the center, towards the saw, and leave the resulting distance equal on both sides, on the ends of the folding stand.
Another option is to make the tops of the two outer modules bigger until they make up for the difference between your saw and the 676mm gap in the original design. It’s the option drawn in green in the picture above.
A small gap will be left between the saw and the two outer modules, but the good thing about this is that, if someday you replace your saw with a bigger one, you’ll barely have to make any modifications.
I believe in either of these cases it’s not necessary to reform the outfeed table. I’m sure you’ll find a way to adapt it to your design and avoid having to modify it.
You could also consider making both outer modules larger, but this modification would be more complicated and it wouldn’t allow you to replace your saw with a bigger one in the future quite as easily.
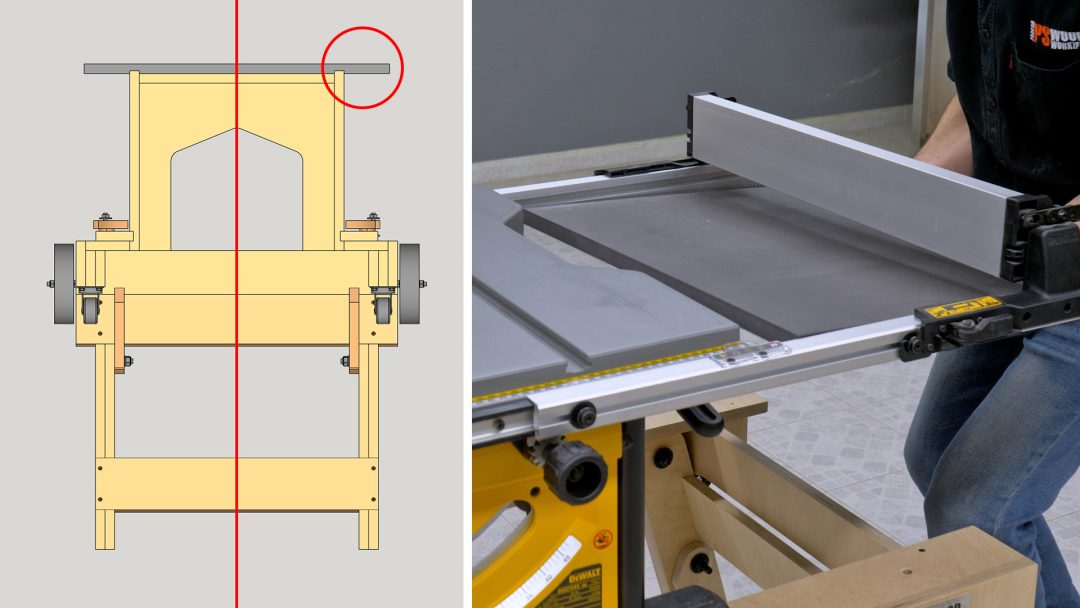
Almost all jobsite saws have two aluminum profiles in order to extend the fence. Such is the case with my Dewalt, as you can see above.
You’ll need to make the depth of the router table top and the assembly table top about 5 millimeters lower than the measurements of your saw between both aluminum profiles. In the case of my saw, this is around 575mm.
If your saw is less deep, you have two options. The first one is to modify the total depth of this folding stand. Due to safety concerns, I don’t think it’s advisable to lower the depth of the bench by more than 80mm.
To do this, you’ll have to subtract the difference to all parts that touch the red cutting line in the picture above. The reference measurement in this case is 570mm:
Folding stand: FW 4, FW 5, FW 8 and FW 9
Assembly Table: AT 3, AT 4, AT 6, AT 7 and AT 8
Router Table: RT 3, RT 4 and RT 7
The second option is to subtract the difference only to the back of the router table tops and the assembly table (the red circle in the picture above) and leave the rest as is in the original design.
You can also subtract half of what’s necessary to each end of the tops instead of subtracting all from the back, and leave the saw centered with the folding stand.
If you’re going to center the saw this way, you may have to fasten with screws some other plywood parts to the folding stand in order to support the saw legs.
The advantage of this method is that, if someday you decide to replace your saw with a larger model, you’ll only have to make both tops for the outer modules again.
If your saw is deeper, I’m sure the difference will be negligible and I wouldn’t modify anything—I’d only center the router table and assembly table tops between the two aluminum profiles of your saw’s fence.
If you follow the two links below you’ll find examples of this bench made by other users. They might just help you come up with new ideas for modifications.


Anyone know where to get black MDF like this in the US?
check this out:
Hi
First of all, I would like to congratulate you on this great project.
I am planning to buy the Dewalt table saw. Do you know the difference between the 7492 and the 7492-QS -> weight only?
Thanks.
hi Chris, I think they are the same saw, but in some places they shorten the name.
Hi there, I am always amazed by the quality of your work and the ingenuity of the designs. I have a Makita 2704 table saw, weighing a bit more than 30kg (37kg if I am not mistaken) with the following dimensions: L: 665mm, W: 766mm, H: 344mm. Would the current design work (dimension and strength)?
hi David, I don’t think you will have problems due to those extra kilograms, but you will have to adapt the design to those dimensions
Again I’m always stunned by the quality of your materials! Common materials like MDF and plywood but you really found and budgeted for the absolute top quality. Combined with your craftsmanship, everything looks so good in closeup!
thanks mate!