Welcome back. As promised in my previous article, I’m going to show you how to build and use this bending iron I made a few years back to bend acoustic guitar sides. Of course, it can be used to bend any kind of wood, although certain things need to be taken into account, which I’ll do my best to explain now.
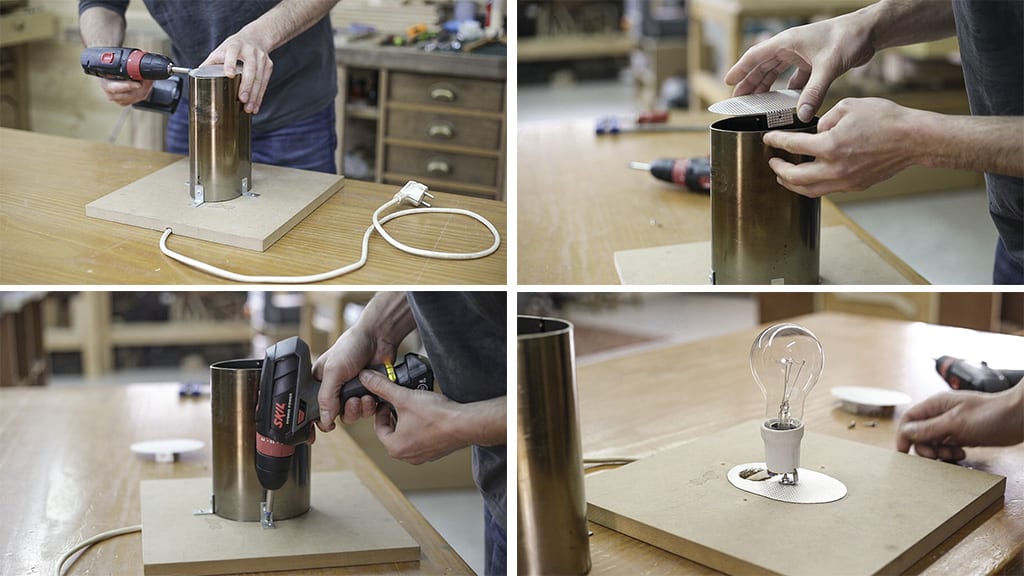
First I’m going to disassemble it so that you can take a look at how it was built. As you can see, it’s merely an iron pipe screwed to a piece of Mdf with a powerful light bulb inside.
I’ve attached an aluminum covers on both ends so that the heat doesn’t escape so easily and in order to save time and energy. I’ll dismantle them so we can get a good view of the interior and the lightbulb. I’ve aacttached the pipe to the base with a metal brackets that I will also remove.
Here’s the interior(last pic). A simple lampholder is screwed to the base, which, by the way, is a bit loose. I might as well fix that now. We will have to use an old incandescent bulb, about 150 or 200w, although we could also use an oven bake element and its potentiometer, too, to adjust the temperature.
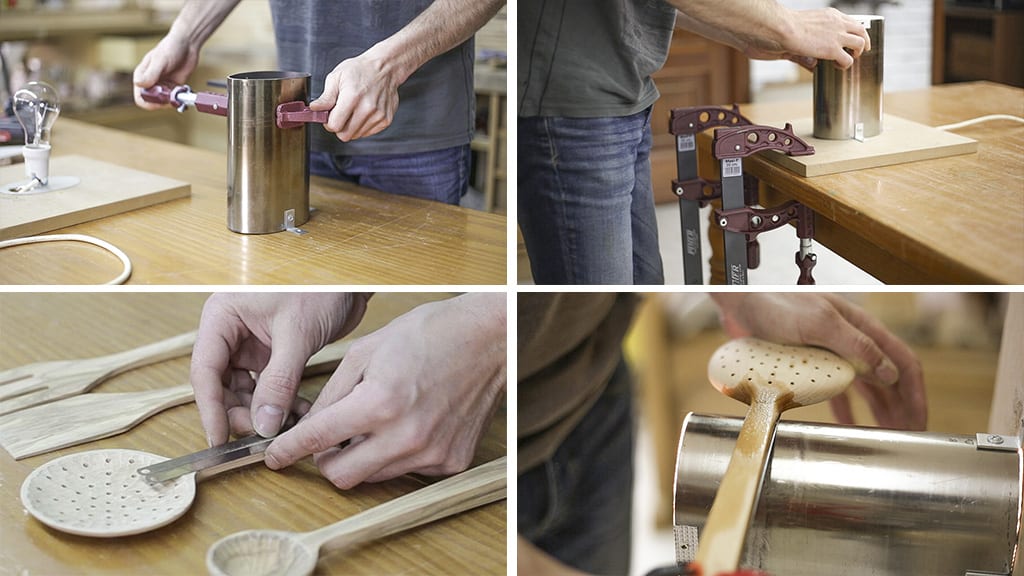
As you might have guessed, the pipe was a cylinder at first, exactly 120mm in diameter. I’ve reshaped it with two powerful clamps such as these ones to achieve different ratios of curvature to work with. We could have also used a pipe with less diameter, it depends on the work we do.
I’ll reassemble the bending iron in order to show you how to use it. It can be attached to a bench, as shown in the second pic, although for me it’s more convenient to push down and that’s why I place it on my workbench vise.
We should plug it in 5 minutes before using it to allow the bulb to heat up the pipe. Then I’ll mark the part I’m going to bend on the skimmer I made a few days ago. Also I’ll use a thin metal sheets to avoid burning and damaging the wood.
We spray plenty of water and start the process. When touching the steel, the water will bubble, once it stops, we must soak the wood again, every 20 seconds in this case.
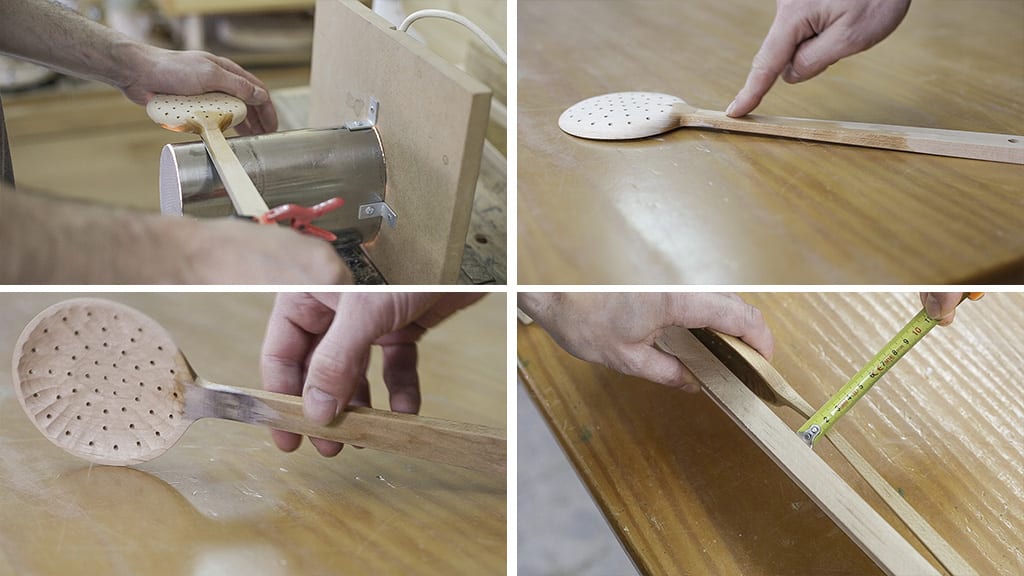
At the same time, I’m pushing the skimmer down relatively hard and turning it within the marks I made earlier. We must apply pressure being careful not to snap the wood, so it’s best we don’t rush it.
After about 5 minutes, I’ve managed to bend it this much (second pic) but I still want a little more, so I’ll continue. As the name implies, hard maple wood is quite hard, and the part I want to bend is about 8mm thick, so the whole process will take about 20 minutes.
Still, I think it’s worth it because of the amount of material and time it saves. As you can see, there are all kinds of marks here (third pic) all the more evident due to the light colour of the wood, but they can easily be removed with sandpaper. In the last pic you can see the board I used to make the skimmer, and the amount of wood I’ve saved… about 15mm!
In addition, by bending the wood this way we get more resistance than if we cut the wood, because we don’t cut the fibers and the continuity of the wood veins.