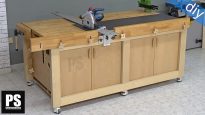
This is the presentation video-article of my new multipurpose woodworking bench. As you can see in the summary of the video, I’ve attached a cutting station that will allow me to cut whole boards, make repetitive cuts or miter cuts in a more comfortable way.
Multi-Function Workbench Plans
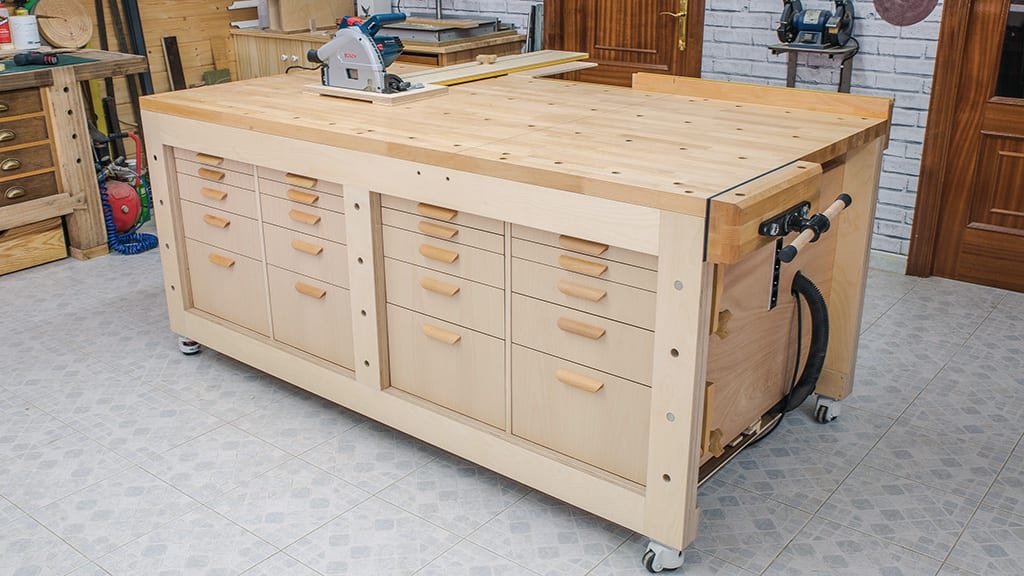
It’s a cross between a woodworking bench and a workbench, combining the advantages of both. It’s a robust bench with plenty of storage space to keep tools handy.
In this new article you will find some improvements that I’ve made some time after finishing it and how to install a hinged bracket for my plunge saw’s aluminum guide.

Instead of making it the usual way by removing material, this time I’ll do it by gluing pieces of plywood together until they are thick enough, leaving tenons and mortises.
It’s easier to do it this way if we don’t have a lot of tools, and you’ll be able to use any leftover plywood you have at home. The two outer frames are made of birch plywood, making the bench sturdy and stable. The rest of the pieces joining the frames are made of soft plywood, to make the total weight lighter.
I’ve also installed a vise on the front and made some bench dogs and holdfast clamps which I can use on the top or the front of the bench to hold pieces or tools.
Approximate weight: 220kg (without storage)
Overall dimensions: 900mm high, 2000mm width and 1038mm depth.

This is the 3D model of SketchUp included in the plans that you will find on my website. If you are interested in collaborating with my web or building your own workbench, here you can download them.
If you’re interested in making this bench, I recommend watching all the videos for my modular workbench. The design is very similar, but some steps were different and you might find ideas that are better suited for your tools or the way you work.

I’ve installed a vacuum system with an automatic on/off switch inside the bench, thus reducing the amount of noise it makes while working. I’ve fitted two power strips that can take the wattage required by the vacuum system and another power tool.
One of them supplies electricity without switching on the vacuum, and in the other I can plug in several tools that will activate the vacuum automatically. I’ve left a gap under the bench where I can store the vacuum hose when not in use.
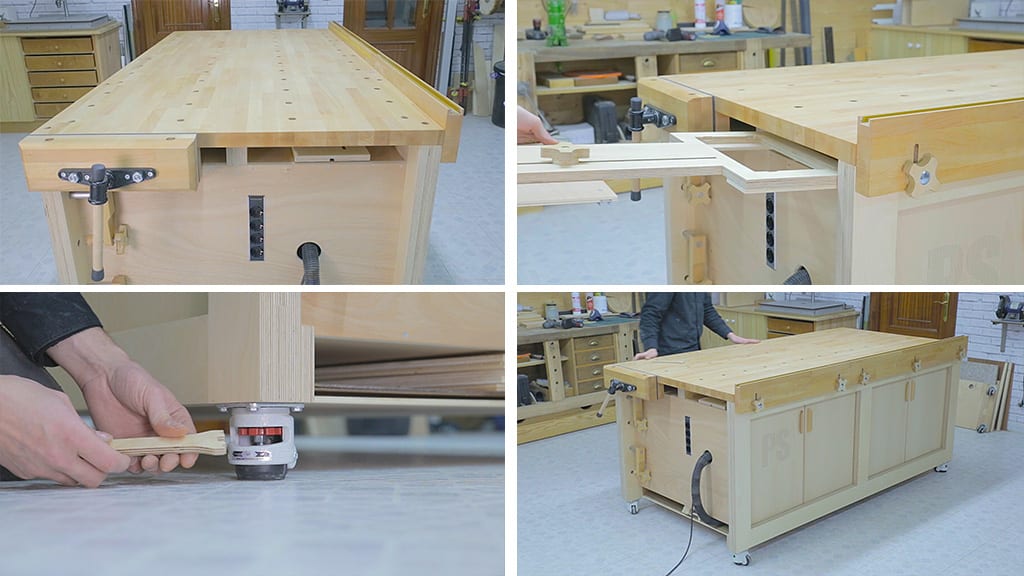
In these gaps I can store the protective boards so that I can work on the bench without damaging it, as well as these thin guides. The vacuum and the hose usually take up a lot of space in workshops.In my case, I never know where to store them so that they won’t get in the way while working. This way I’ll always keep them handy while avoiding that problem.

The workbench offers a lot of storage capacity so we can keep our tools handy and in one place. It has 20 drawers in the front and doors in the back. Under the benchtop, there are also gaps where I can store the rip cut guide and other thin guides.
I used high-quality beech finger joint board to build the benchtop, sent to me by the company Basicmadera. Of course, we could use hard plywood of a similar thickness, or even glue several boards together until they are about 40mm thick.
I’ve also installed these folding wheels sent to me by the manufacturer Caster HQ. I believe they are the perfect complement to this bench. By turning a gear, I can raise and lower a rubber pad to activate and deactivate the wheels, which will definitely be useful in order to provide stability or mobility to the bench when necessary. They will also allow me to level the bench when it’s going to be in a fixed position for some time.
How to make the workbench:

I’ll show off some of its functions by building the doors and drawers for the bench itself. Here are all the drawer parts. Since we’re dealing with a large number of drawers, I’ve configured my 3D router to speed up the process. I make some countersunk holes for the screws in half of the pieces.
Now I hold them with the vise to sand their edges more easily. I also sand all of the surfaces and apply some matte water based varnish. I made a simple jig that will allow me to put the drawers together, I fasten it to the bench so that I can drill and put screws in the rest of the pieces much more quickly.

I’ve already installed almost all of the bench’s drawers and I’ve left the last drawer column for last to show you how to place the slides. I’ve cut several jigs with the appropriate distance between slides.
I also use a piece of wood as a jig to leave them all at the same depth. In order to screw on the drawers, I follow the same steps, put jigs between the drawers to leave them at the desired height, starting from the bottom. I’ll use a piece of wood as a jig to screw the slides to the drawer and so that they are all at the same depth when closed

This is the vacuum system I’m going to install inside the bench. Since I don’t have a lot of height to work with, I’m going to remove the wheels that come with it. I work out the position of the hole where I can insert the hose and drill with a hole saw.
I round off the edges with the router to avoid damaging the hose. Now I’ll cut the drawer doors and fronts from this veneered beechwood MDF.

I mount it on the bench after placing the protective boards on the top and I adjust the height of the rails on which the rip cut guide slides, they must be at the same height as the board. Then I put the plunge circular saw on the guide.
I could attach a fastening system here, but in this case, the plunge circular saw fits in so tightly that it won’t be necessary. I set the desired cut measurements, as well as the depth of the cut, and then I start cutting gently, pushing the saw and the guide at the same time to achieve a clean, accurate cut.
Here we could also use a circular saw without a plunging system, although these kinds of plunge circular saws are more comfortable. In order to cut whole boards, I’ve thought about making an attachment for the bench’s sliding rails, but after some tests I noticed that stopping the cut and sliding the board is enough.

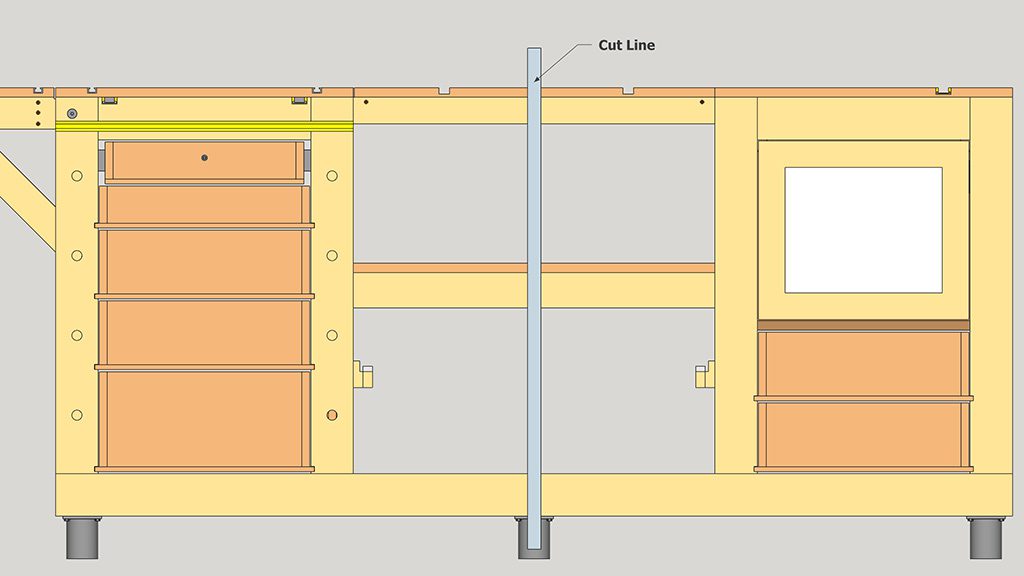
Now I set the cutting station to make cross cuts. In order to do that, I remove the protective boards, set the longest rail to the maximum height and the shortest to the same height as the board we are going to cut.
I insert the aluminum rail that comes with the plunge circular saw and put this stop on the front so that the aluminum rail won’t move and achieve square cuts, and then I set the cutting depth and now I can cut the drawer fronts and doors.
The cutting is very smooth, and thanks to the body of this circular saw and the vacuum, there is barely any dust. I’m going to precut the four pieces from which I’ll cut the drawers, this way the wood’s grain will look consistent. Once I have all four pieces, I attach the miter track stops and set them to the required measurements.
I also cut the four drawer doors. All the fronts are ready, and as you can see, the cuts are very clean and the grain in each front matches that of the drawer that’s below. With my homemade CNC, I’ll make a few holes in the vacuum door so that it can let out air more easily. Now I’ll sand all the sides and edges and apply two coats of water based varnish.

And now I can already screw on the fronts of the drawers. First I take measurements and drill the holes for the screws. I fasten a couple of them, which will stick out about 2mm. I’ll show you this old trick involving using playing cards as spacers to leave the necessary gap between the fronts.
I place all the fronts, fill the gap with cards. Then divide the number of cards that fit in the gap between the total number of gaps. This way all of them will be evenly separated. I put two even stacks with the same number of cards that fit under the fronts. Then I hit it to mark the screw’s position on the front.

Attaching the fronts like this is pretty straightforward! I drill holes for the door hinges and screw them on the bench. I adjust the hinges so that the doors are properly centered.
That’s all for today. Don’t forget that you can buy and download the plans for the workbench from my website. See you soon!


You have some really great projects and videos – definately thinking out of the box – very well documented and explained.
I now live in Southern Spain, but finding wood suppliers is a nightmare. I’m currently having a workshop built, and I will be getting your plans for this project as well as some others you have, but where or who can you reccomend for supplying wood, wood products and carpentry tools?
Before the start of the year (Brexit nonsense), I have been importing my handtools.
hello Bob, thanks for your kind words. I’m going to leave you here some articles, in all of them you will find interesting information:
How to use and understand DIY plans
Why should I build my own tools?
Types of Boards used in Woodworking
Where to find woodworking tools and materials
Can you share a link or now details on the tool you use for adjusting the wheel height.
hi Wesley, check this out;
Hello, for the Mobile Workbench with Table Saw & Router Table, is POWERTEC 71568 Aluminum Miter T-Track with Miter T-Bar a good option for the sliding carriage?
Regards,
José
hi Jose, I think so!
Hi Al,
your projects are fantastic. I want to make a desk like yours, but I would only use beech plywood. Will it be too much trouble?
Thank you Pavel
hi Pavel, beech plywood will be perfect!
Hello Suso,
I downloaded your plan, very good and nice work.
I would like build this workbench, and firstly i need a lot of tools. e.g clamps.
I haven’t nothing clamps so this is i need buy too.
Can you say me how much and what typs clamps, you used during construction?
I saw more the all videos, but i didnt see good the typs.
I hope you can help me.
Thanks
Have a nice day