This is the third article in a series of four about the improvements I’m making to my multi-function Portable Workshop. Today I’ll show you how to use and modify the router table’s tilting lift system.
Plans for the homemade router table tilting lift system:
These are the tilting lift system plans for sale on my website. They’re included in the plans for the Portable Workshop, but you can also find them separately, so that you can attach it to any worktable. Besides the CAD files, you’ll find much more information, such as printable templates that you can stick on the boards to make the job easier.
How to use the router table’s lift system?
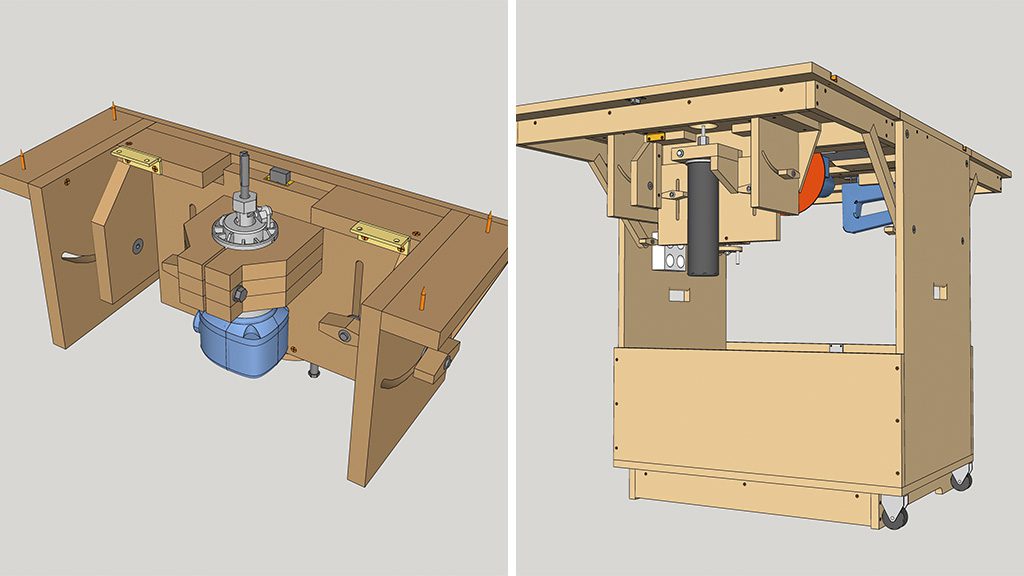
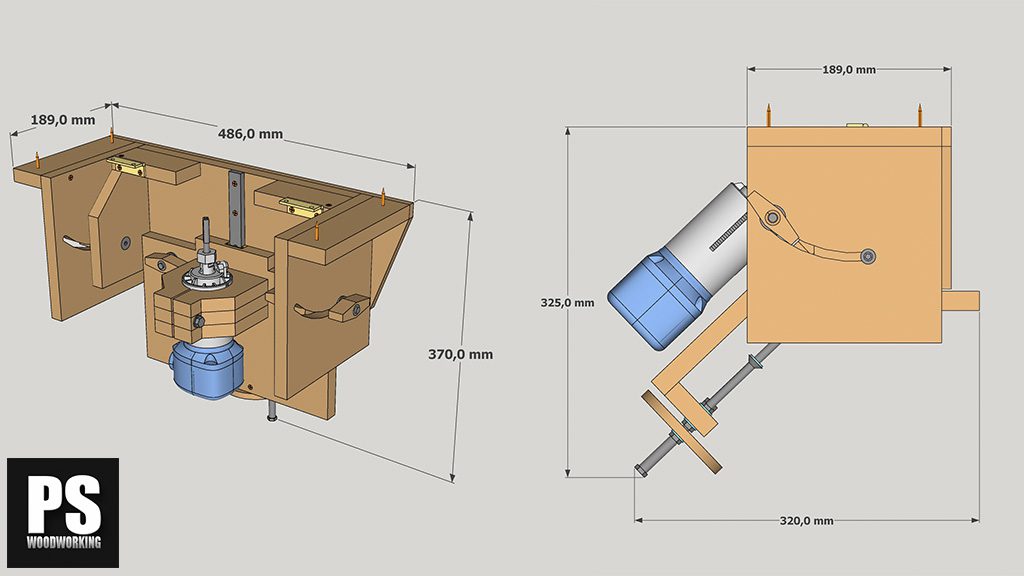
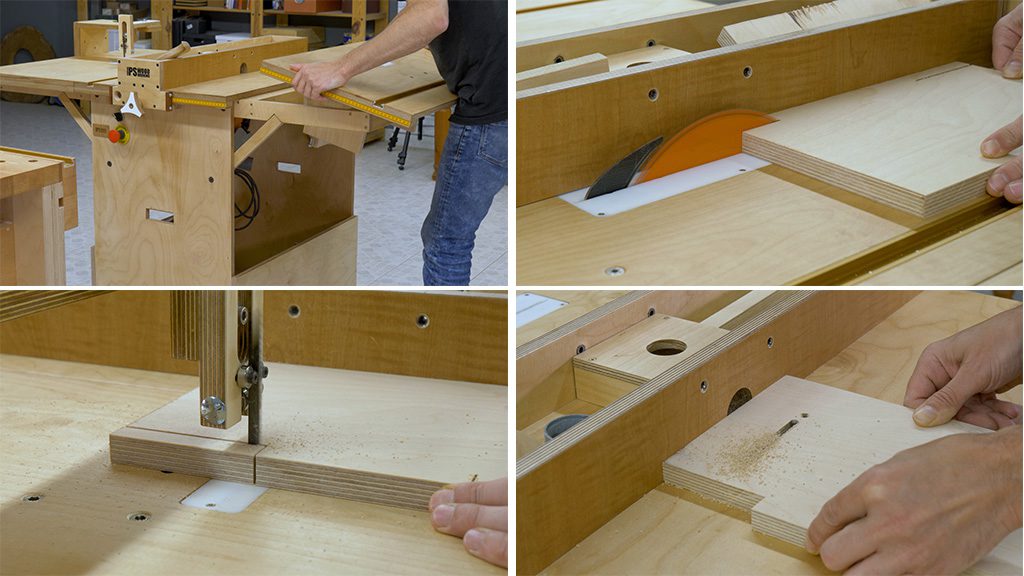
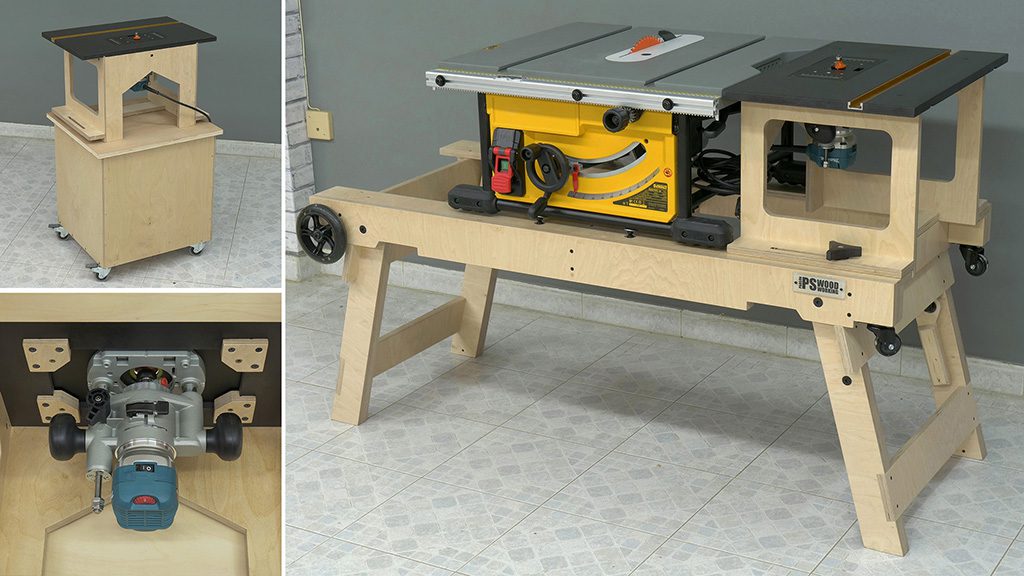
I’ve installed the router in the left folding table of the cabinet. The system allows me to lift and lower the router thanks to a threaded rod. I can do almost all kinds of router projects, which are only limited by this handheld router’s average power. The Portable Workshop’s fence and dust collector make the router more comfortable to use.
I can also tilt the router to get the most out of my bits and do more kinds of router projects. In order to tilt it, I have to lift the router as much as possible in the spindle mount. Once tilted, I can adjust its height and make cuts such as these.
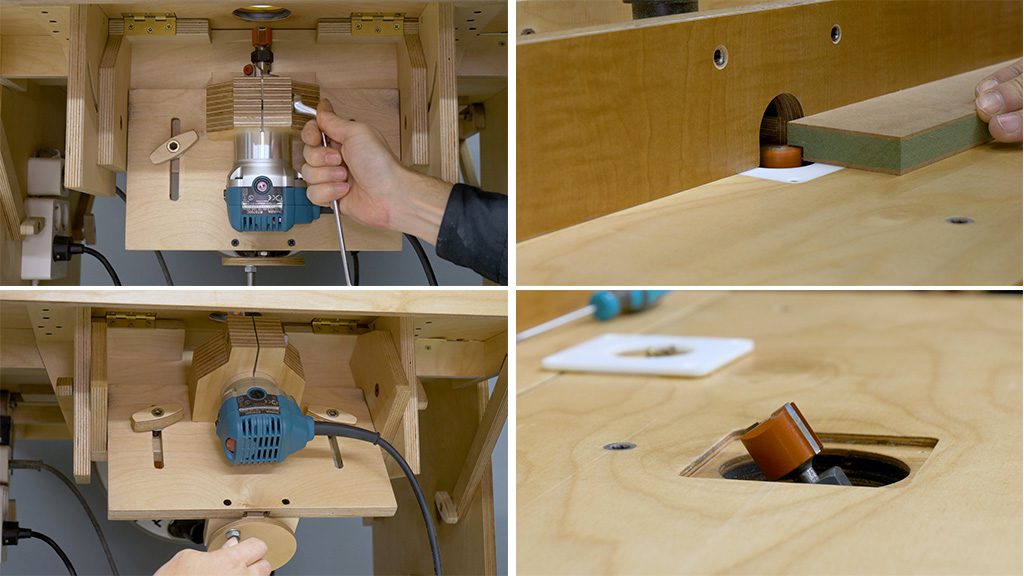
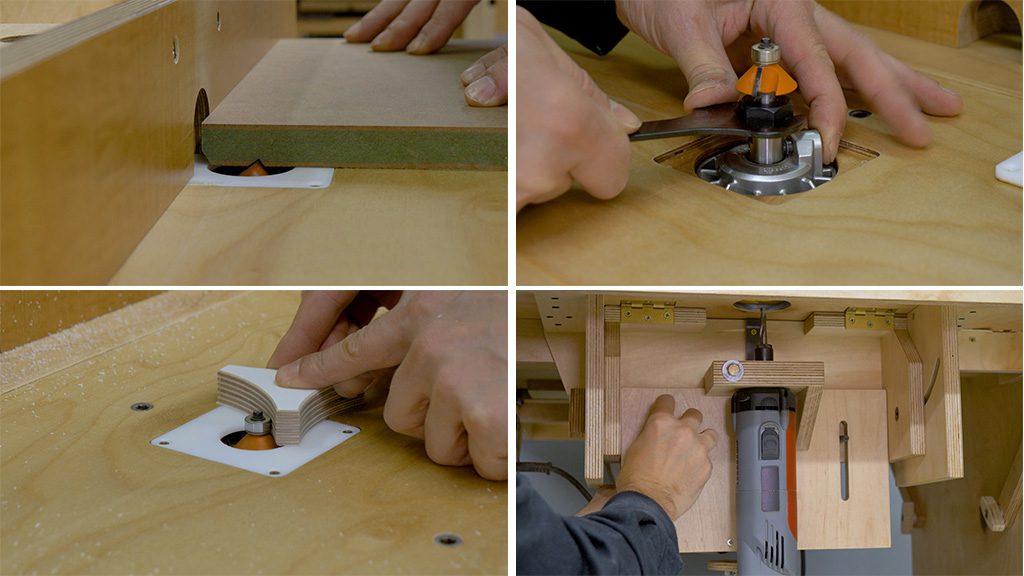
The recess in the top lets me lift the router enough to change the router bit comfortably and easily. I’ve made several inserts so I can swap them according to the diameter of the bit.
Another interesting function of this system is that I can swap the panel and the spindle mount to use different kinds of routers. The process is fairly quick and convenient. This router has a 43mm collar, and it’s the one I’ve been using until now.
Once installed, it provides the same options as the previous router. I can also use the usual accessories for this kind of homemade router table, such as the miter gauge. I can use featherboards, as well.
How to improve the router table’s tilting lift system?
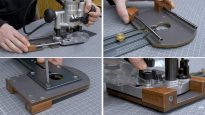
Now I’ll show you how to make all these improvements. First of all, we have to remove the top of the router table. I’m also going to remove the panel I was using to hold the router with the 43mm collar. I’m going to cut and machine another panel like that one to use with the Makita router.
With the drill press, I make some holes to machine the channels that will let me adjust its height. I finish making the channels with the router itself in several passes.
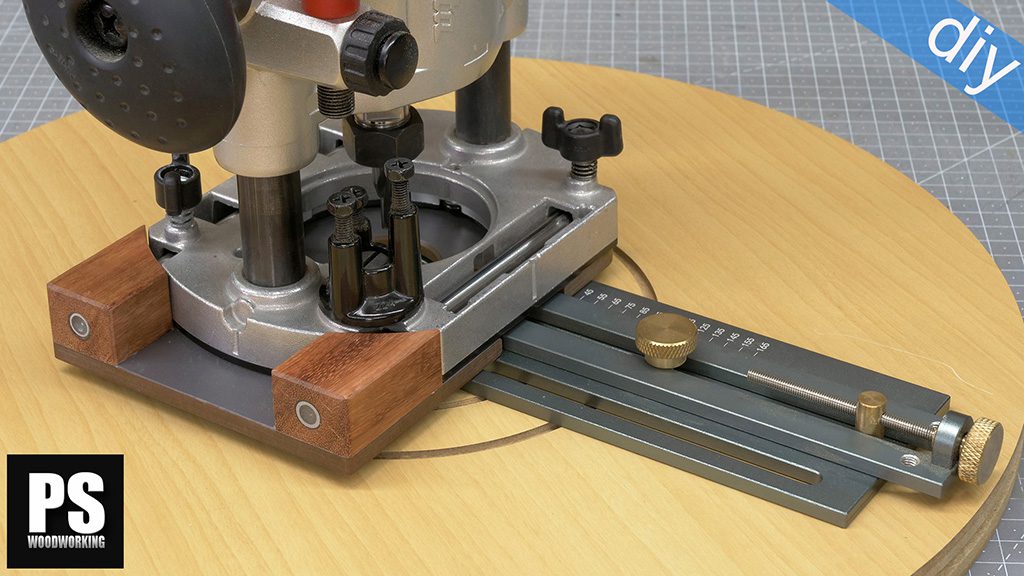
I’ve cut a piece of steel pipe to insert into the piece that will act as a shaft to raise and lower the router. I apply some wood glue and screw it to the panel. I’ve cut a new round piece and I’m going to place all the bolts that will allow me to lift and lower the router.
How to make a spindle mount for the Makita router?
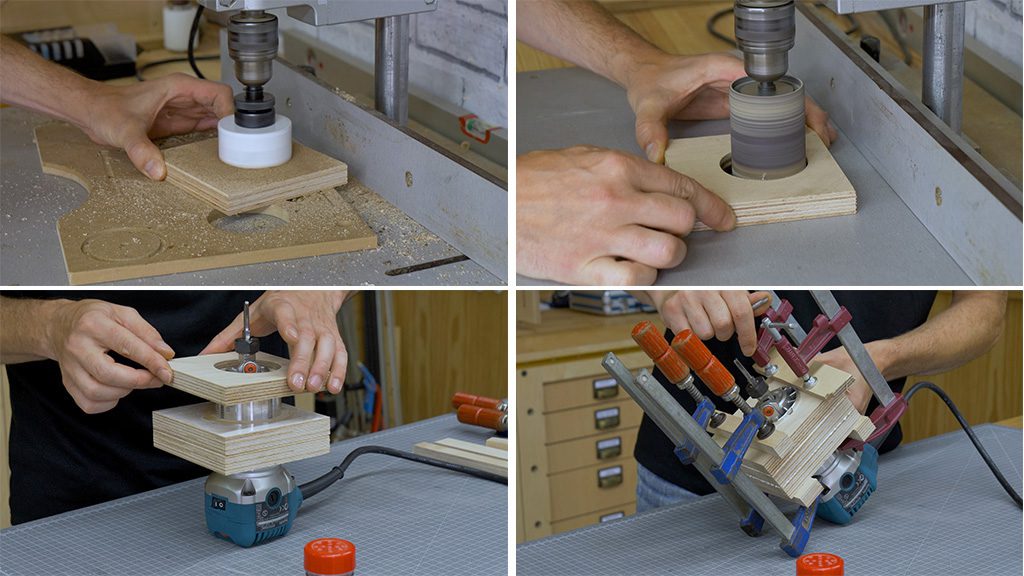
I’m going to show how to make the spindle mount for the Makita RT0700C. After cutting the required parts, I make some holes with the drill and a hole saw. I have to widen the hole by a few tenths of a millimeter, and I’m going to do it with the sanding drum.
These holes could also be made with a router and a circle guide, or with a 65mm diameter drill bit. Now I can glue the three parts together. I’ll use the router itself as a guide shaft, and a little salt to stop the pieces from moving when holding them down with clamps.

Once the glue is dry, I make sure the edge of the mount that’s screwed to the panel is straight and square. As this is not the case, I’ll fix it with sandpaper stuck to a piece of a board. I finish shaping the spindle mount with the table saw and the jigsaw table.
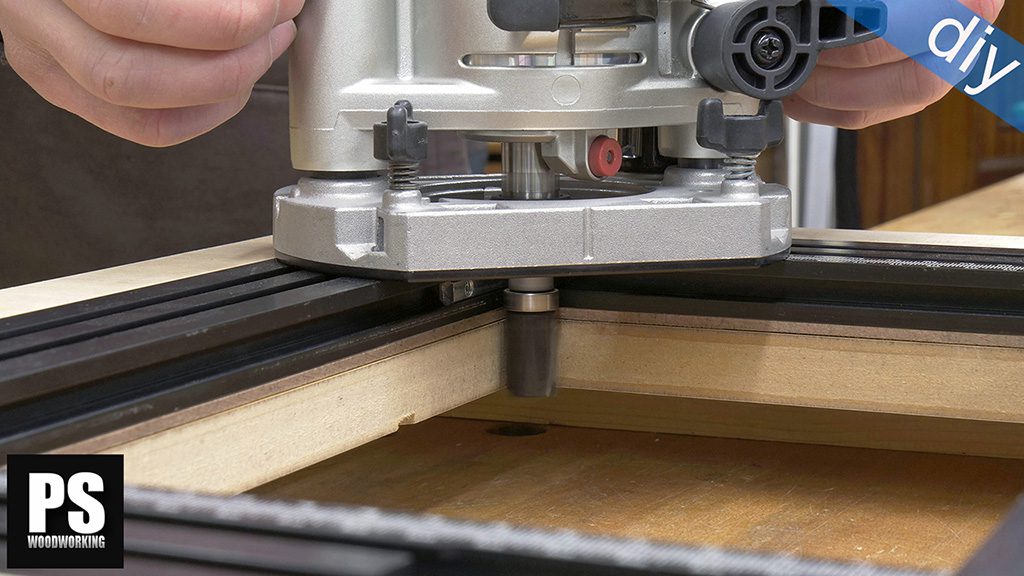
Now’s the time to make the hole for the bolt that will hold it. I’ve made it a little bigger on the side where I’ll put the threaded insert. After placing the insert, I make sure everything works as intended.
Now I’m going to fasten the spindle mount to the panel. I’ll use a spacer as a guide. I’ve made some holes in the panel that will serve as a reference to drill the spindle mount.
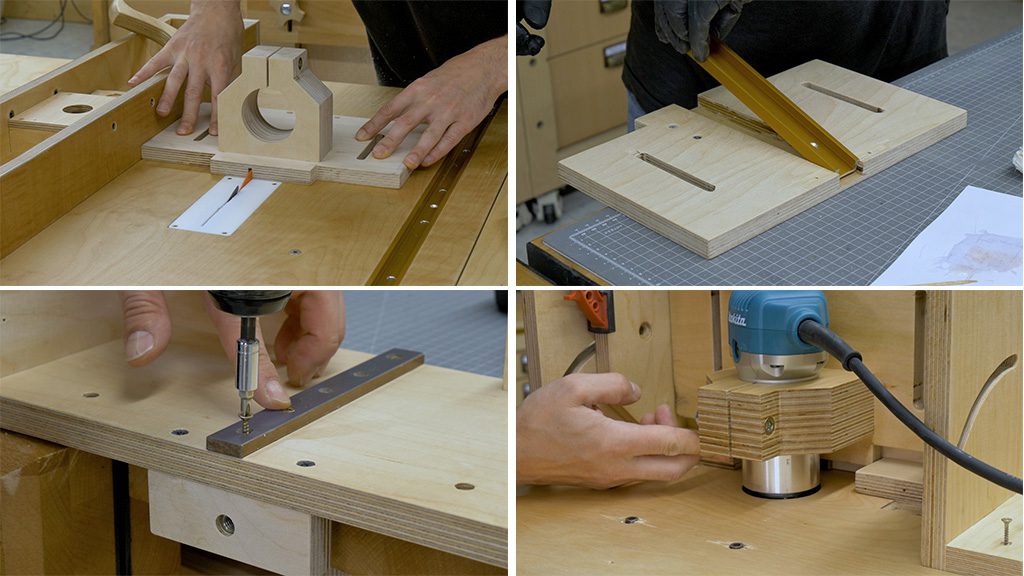
At this time, I’ve thought about using a miter channel to achieve more accuracy, so I have to remove this piece I had previously fastened so that I can make a groove in the table saw.
I glue on the channel with epoxy and now I’ll cut the slider out of a piece of HPL. I’ll use cyanoacrylate and some washers to screw the slider in its emplacement.
How to install a tilting lift system for a homemade router table?
I put all of the parts of the two panels back together and make sure they’re working correctly. Before screwing the whole router lift system to the underside of the top, I have to make sure the router is aligned with the top hole. When that’s done, I can also fasten the hinges.
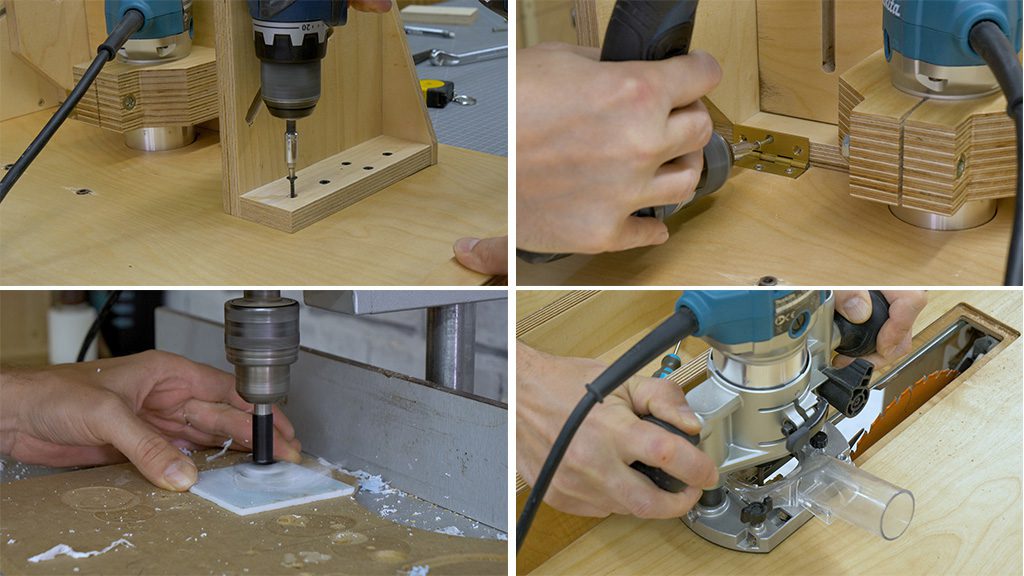
I run some tests to make sure everything’s aligned and working properly, and since that’s the case, I can screw the top back onto the Portable Workshop along with the whole router lift system. Before doing that, I’m going to install this threaded insert so I can use the fence with the router table.
Now I’m going to make some new inserts with white acrylic. They’re going to have holes in different diameters so I can use them with all sorts of bits.
I’m also going to make a new zero clearance for the table saw, and while I’m at it, I’ll make the one I’ve been using until now a little bigger with a router and guides.
That’s all for today, in the following article I will make a summary and test all the improvements I made to the Portable Workshop.


I really love your bits and in this case I bought your first portable Workshop and it’s awesome the way it works!
I’ll try this new upgrades!
thanks mate!
Awsome! Good to see you back mate!!
What model of Makita router you use?
thanks! check this out: