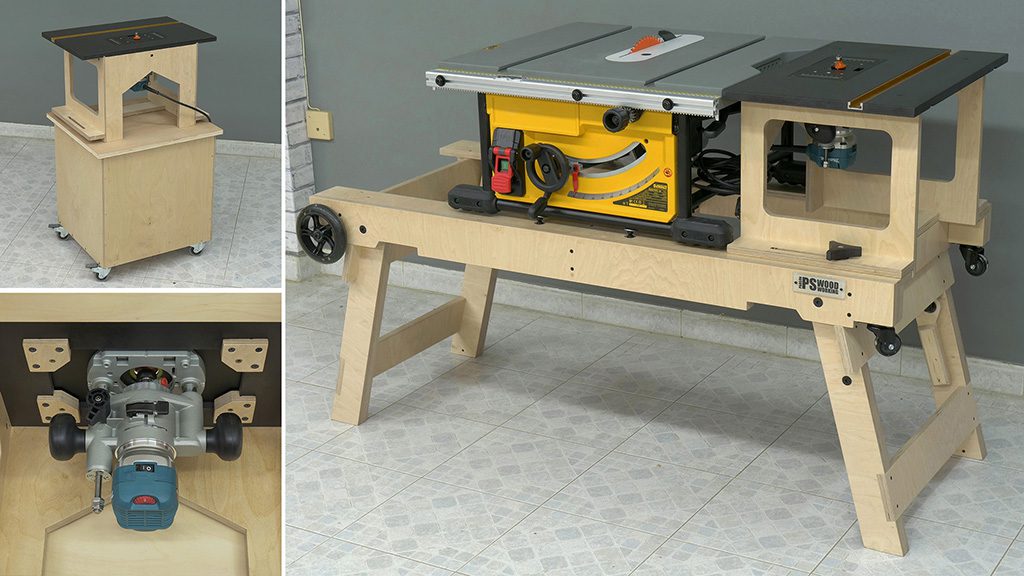
Welcome, this is my latest project, a handheld portable mortiser which will allow me to cut mortise and tenon joints in a fast and convenient way. This is an indispensable tool in every DIY or woodworking workshop. Before going into how I built it, I’ll show off some of its main features.

This is the 3D model included in the plans, which you can buy and download on my website, if you’re interested in making your own mortiser or supporting my work.
It’s a fairly complex with very small pieces, which means you will need to have some experience and some tools in good condition to achieve a good result.
Mortiser Plans
Approximate weight: 1.6 kilograms (without router)
Overall dimensions: 280 x 160 x 160mm
Diy Portable Mortiser Specs

I’ve called it X-Motion Portable Mortiser in reference to an innovative system that lets me move the router in the X axis by turning its front handle. I’ve installed a couple of springs to achieve the necessary recoil to push the router back to its original central position.
Apart from that, the extra tension exerted by the springs makes it easier to mill wood. Originally, I thought of using four springs – two on each side -, but after a few tests I noticed that one spring per side is enough.
If the mortiser doesn’t go back to it exact original position, it shouldn’t be a big issue. The cuts will always be centered in the mark I made in the acrylic of its adjustable height fence. The total X-axis range on each side is 15mm and the movement can be adjusted with this screw fitted with another spring so that it won’t move due to the vibration of the tool.
So, the total length of the mortises will be 30mm plus the diameter of the router bit we use. For example, if you use a 10mm bit, you can make mortises up to 40mm long. In my case, I’ve locked the X-axis movement to 10mm on each side, which I think will be more than enough.
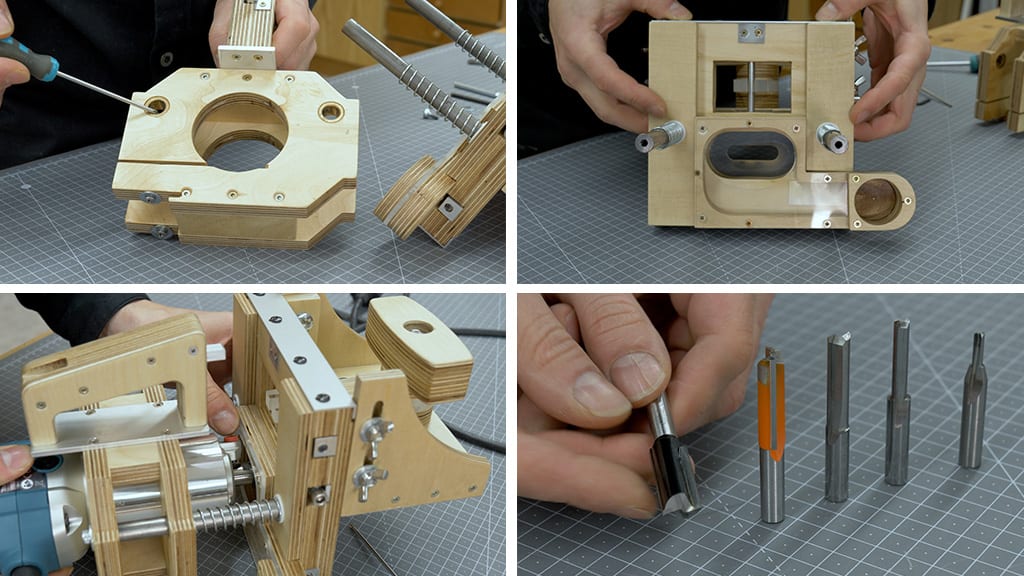
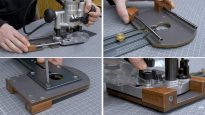
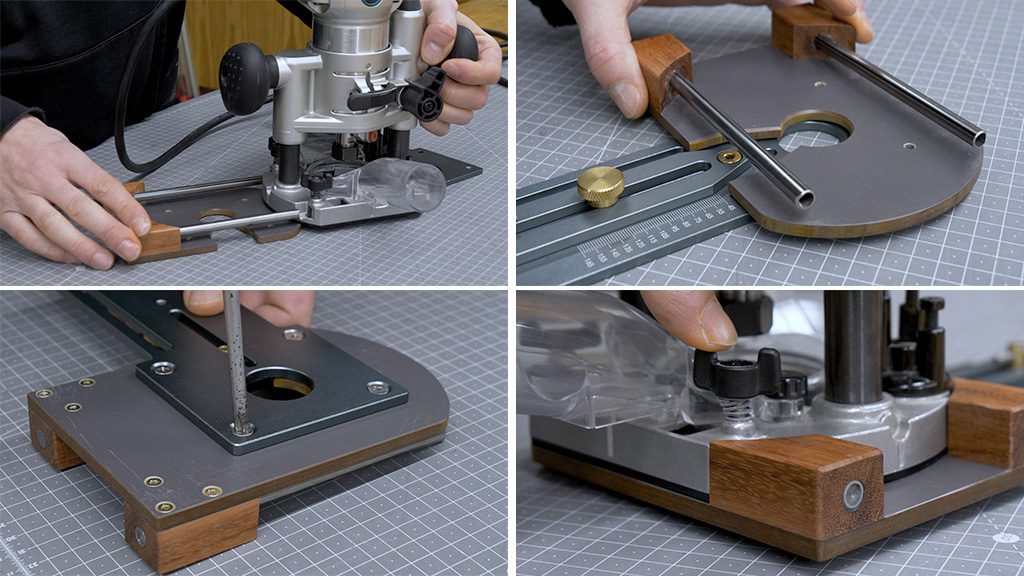
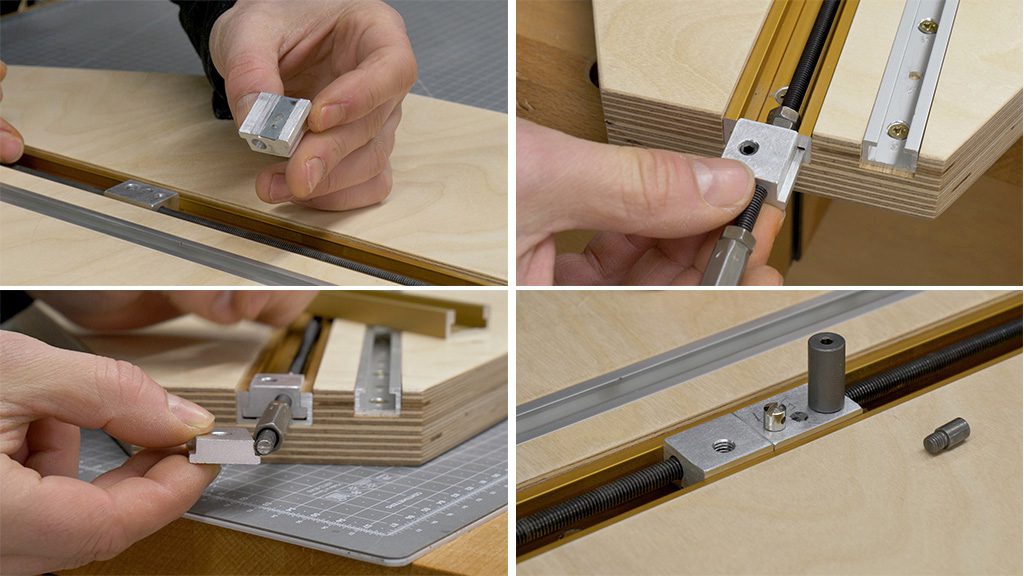
These are the L-shaped aluminum pieces (fourth photo) that will act as guides for the X-axis. I cut some grooves in them so that I can adjust the hardness of the motion.

With these wing nuts I can adjust the height of the fence (first photo). Its maximum height is 35mm, which means I can cut mortises in the center of pieces up to 70mm thick. I cut a piece of metallic measuring tape to adjust the height of the fence more accurately, where zero is the center of the router.
If I want to make a mortise in the center of a 40mm thick piece, I’ll have to adjust the height to 20mm on the measuring tape.
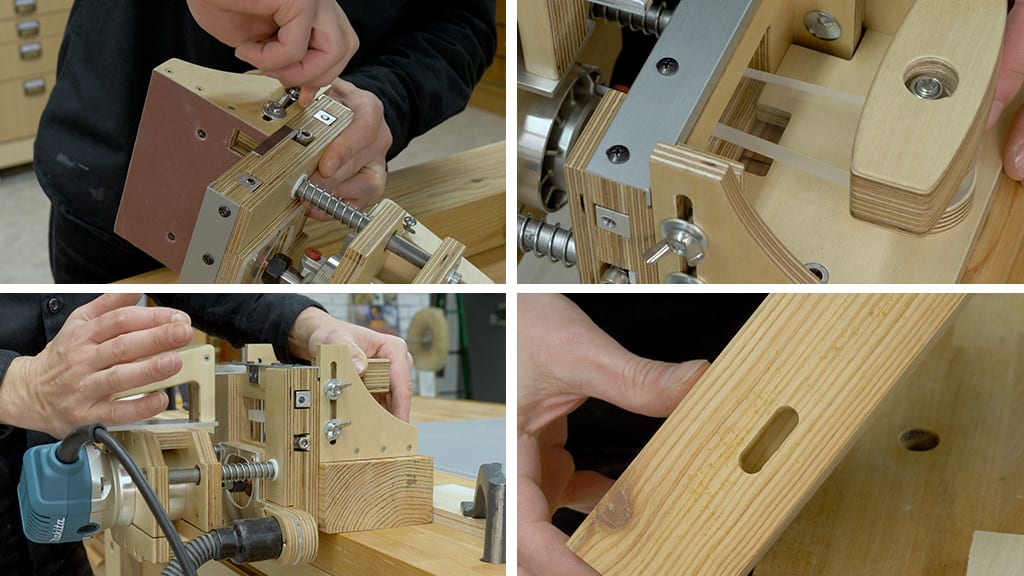
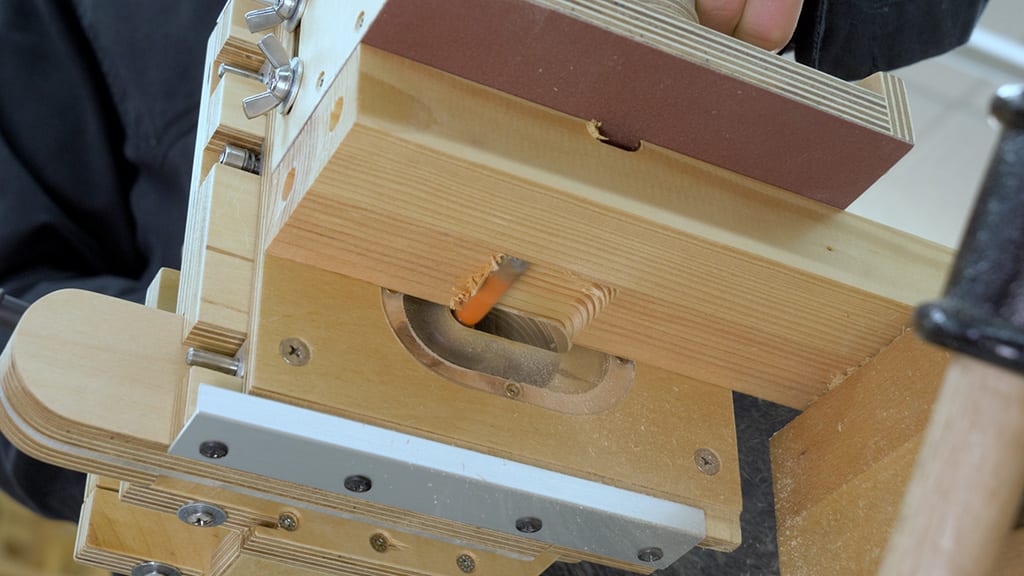
I glued sandpaper on the base of the adjustable height fence to achieve a better grip, and I’ve also installed two threaded inserts which will allow me to attach these two pieces to cut mortises into smaller pieces.
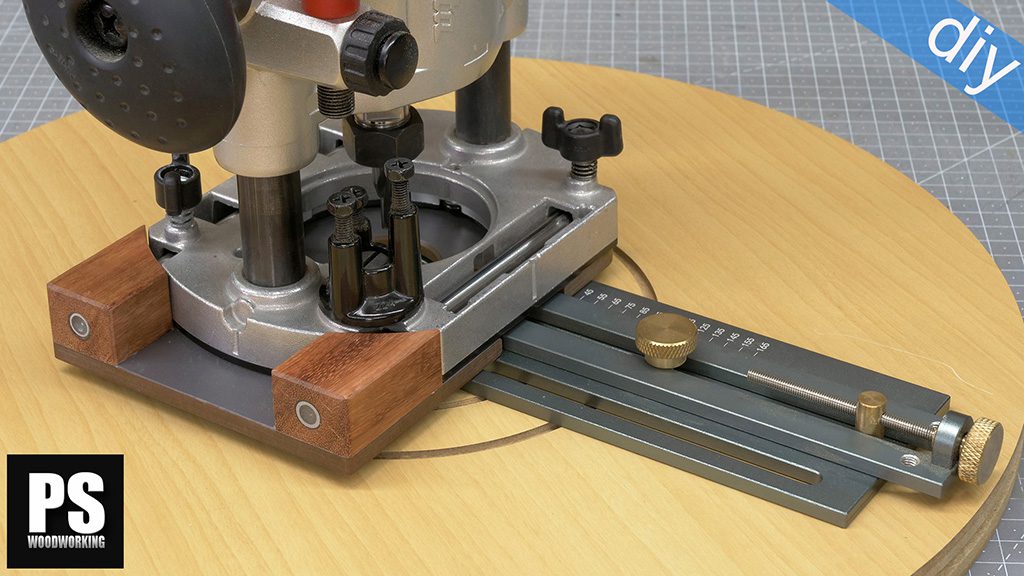
Another indispensable element is the depth stop. I’ve made it out of a spring and a little aluminum square bar, with three depth steps, one every 10mm, for a total milling depth of 30mm. I think that’s enough, but with some adjustments and the right bit, we could cut mortises up to 40mm deep.
We could also make another, more granular square bar, with 5mm steps. The handle can be detached to make adjustments or use a different square. By loosening these two screws (fourth photo) I can remove the router.
This router has a 65mm spindle mount, but this design allows me to use the router with a wider spindle mount, up to 85mm.
The mortiser is easy to dismantle and reassemble, which makes it easy to build or to repair any parts if necessary. I’ve used some self-lubricating sleeve bushings to also achieve depth motion in axis Z. I’ve also installed a dust collection system which works really well!
Mounting the router on the mortiser is very easy. This model has a part the juts out at the front to lock the router’s rotation and to loosen the bit, we must turn it to one side so that it won’t get in the way while working and to achieve deeper cuts. Once the router is in place, it’s easy to change bits without removing it.
These are the kinds of bits I’ll be using(Fourth photo). They’re double flute and straight. I’ll use 4, 6, 8, 10, and 12mm, but other diameters can be used. We could also use roughing spiral bits.
They cut better and allow us to remove wood more efficiently, besides leaving some grooves in the wood which make gluing it easier. The only problem is that they’re impossible to sharpen in our workshop.
How to use a Portable Mortiser

To attach the bit to the router, you only need to activate the Z axis and insert it through the front of the mortiser. Once it’s been attached, it’s easy to adjust the bit’s position in the router in relation to the mortiser. That is why I made this stop which allows me to leave any bit 3mm away from the front of the mortiser.
With this, and using the depth stop, I’ll always mill deeper every 10mm. Now I’ll show you how to use the mortiser by doing a few tests. First, I’ll mark with a pencil the position of the mortises I have to cut.
Now I’ll measure the thickness of this piece of pine wood to adjust the height of the fence. Whenever we’re working with this mortiser, we must always hold down the workpieces firmly because in order to achieve good performance, we must exert a lot of force.
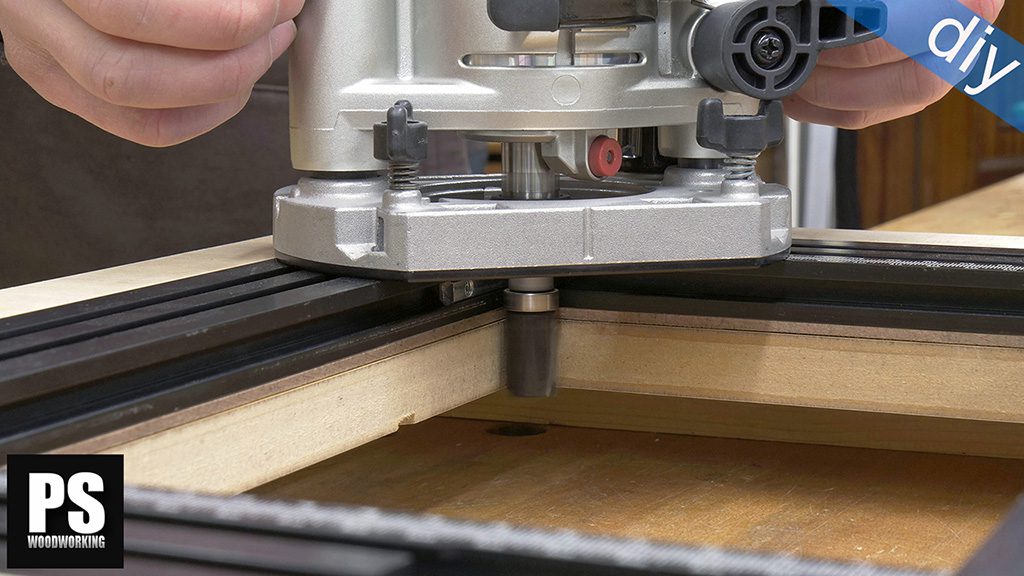
I adjust the Z axis depth stop and position the mortiser on the mark (second photo).
To move in the Z axis, we must push forward with our right hand as low on the handle as possible. The X motion is done by turning the handle with the left hand on the front of the mortiser, using, at the same time, the weight of our body, by tilting to one side or another. The process is quite easy to replicate after a few tests.

Now I adjust the height of the fence again to account for the thickness of the new piece I’m going to mill. I hold it firmly on the workbench and proceed just like before.
Making these kinds of mortises with a router and into the end grain is significantly more complicated and requires a little more time than if it were done the other way, but with a little practice, you can get good results. Now we only need to test the joint, and it seems to be perfect!
I made tenons in my workshop with left over pieces of beech wood from another project. I rounded the edges out with the table router. Of course, I could also use this mortiser to make dowel joints, I only need to lock the X axis with the screws and proceed just like when I cut mortises (fourth photo).
In this lower shot, I’m going to make an open mortise, where we can see the mortiser in operation more clearly and how long it takes to make a mortise.

In order to show off how the mortiser works, as well as all it can do, in a little more detail, I’m going to make a little stool using ash hardwood. I’ve cut all the required pieces to size, and in this case I’ll be making 10 and 6mm thick tenons.
After marking the position of the mortises, I proceed like before with the 10mm bit.
Now I’ll use a 6mm bit to cut the rest of the mortises. Since some pieces are small, I’ll use the mortiser’s attachments which will help me cut them in a more comfortable and accurate way.

Now all that’s left is to cut the tenons to size and glue all the parts of the stool together. I’ll also use some 10mm pieces of tenon to screw on the stool’s seat.
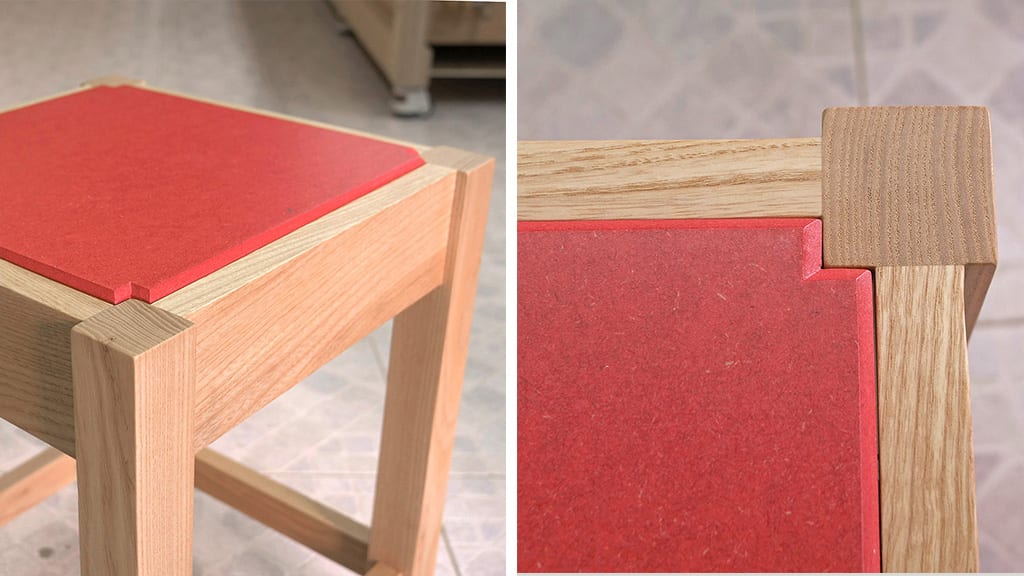
I think the result is acceptable, and I managed to build it in a reasonable amount of time! In case you are interested, here you will find the plans of this stool.
I suppose you all now there is a portable mortiser by a famous brand on the market, this homemade version could be a good option for a workshop that doesn’t use a mortiser too often. If we make the tenons in the workshop we can save quite a bit of money, since it’s a fairly expensive tool!
How to make a Portable Mortiser

Now I’ll show you how to build the portable mortiser. First off, we must cut all the pieces to size on the table saw. I’ve also printed the templates on paper to glue them on the board and mark all the cuts and machining processes.
I’ll start by building the adjustable height fence and the X-axis drive handle. I’m going to use double-sided tape to join all the pieces that are the same, so that I can machine them all at once. This way, I’ll make sure they’re exactly the same size.
I drill all the holes and machine a groove for adjusting its height with the 3D router. We could also do this with a handheld router and guides.
I sand the edges with the disc sander and make sure they’re square. I also drill the holes for the drive handle and for the threaded inserts and I also cut and machine the rebates to install and acrylic plate that will allow me to center the tool.

To join the pieces together more accurately, I’ll use a piece of glass and cyanoacrylate as a support. When the cyanoacrylate is dry, I’ll drive some screws to strengthen the bond.
First I’ll fasten one of the round plywood parts with a nut, on which the drive handle will pivot. I screw the acrylic on the other part of the handle, fasten a locking nut and make sure everything works as intended.
It’s time to machine the two sliding pieces that allow for X-axis movement. Once more, I glue them together, drill all the necessary holes and machine them. I finish the job with a jig saw and make them exactly the same with the disc sander.
Like earlier, I’ll join together and screw the small pieces to the big board. I’ll also glue on another two pieces of plywood to make this piece thicker. Once the glue is dry, I’ll apply a couple of coats of nitrocellulose lacquer so that the pieces will slide better.
 !
!
I’ll also prepare the dust collection system. I’ll cut and machine the plywood pieces, and also the transparent acrylic one. Finally, I’ve noticed it’s not easy using the tool when cutting mortises into small pieces, so I’ll install a zero clearance on the front of the mortiser.
And that’s all for today. I’ll see you soon!


The design is incredible, both the x axis motion and one finger depth guide are genius. Thank you for the well edited and to the point video as well.
thanks Sonny!
I have both a 500 & XL Domino and at last a viable portable diy alternative great work ?
thanks Neil!
Hi! Great build. I am very interested in buying the plans, but before I do I would just like to know what the size of the smooth rod is that you use for the Z axis? I would like to check if I can find it in my country before I buy the plans. Thank you!
hello mate, the self-lubricating bushing sleeve brass should be 12mm in diameter inside. They can be any length between 10 and 30mm, and the wall should be 1 to 3mm thick. Here more info about where to find them:
Briljant heeft u ook een bouwtekening?
yeah! check this out:
hello Pro, You can share SU file for me ??
Boa noite.
Sou Augusto
Gostaria de saber se você vende esse gabarito?
Olá, só vendo o projeto:
Where do you purchase all accessories?
hi Eric, the aluminum profiles in local hardware stores. The plans include a fastener list.
Thanks
I really like the way you work. I’m just a beginner in woodworking but I learn so much watching your videos ! So, I would like like to thank you, and i hape that maybe, some day, I could build something usefull by my hands !
Hello
Congratulations for this very nice job.
Just a question, why did you put a handle on the front for the Y translation, doing it with the handle of the router would have required too much force?