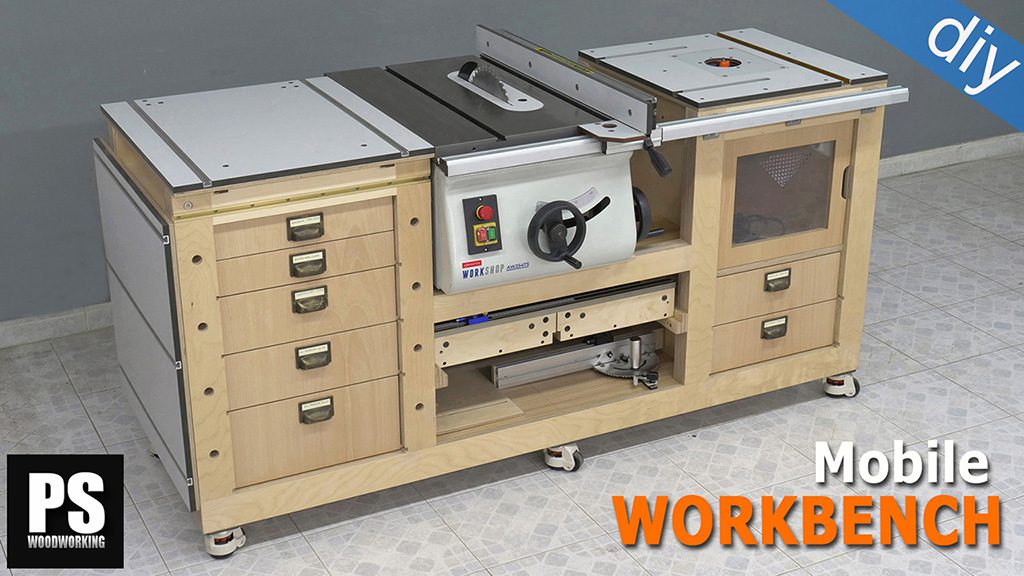
This is the first video-article in a eight-part series where I’ll show you how to build a robust and versatile woodworking bench to which I’ll also attach my new bench table saw and a router table.
Workbench Plans
Mobile Workbench Specs
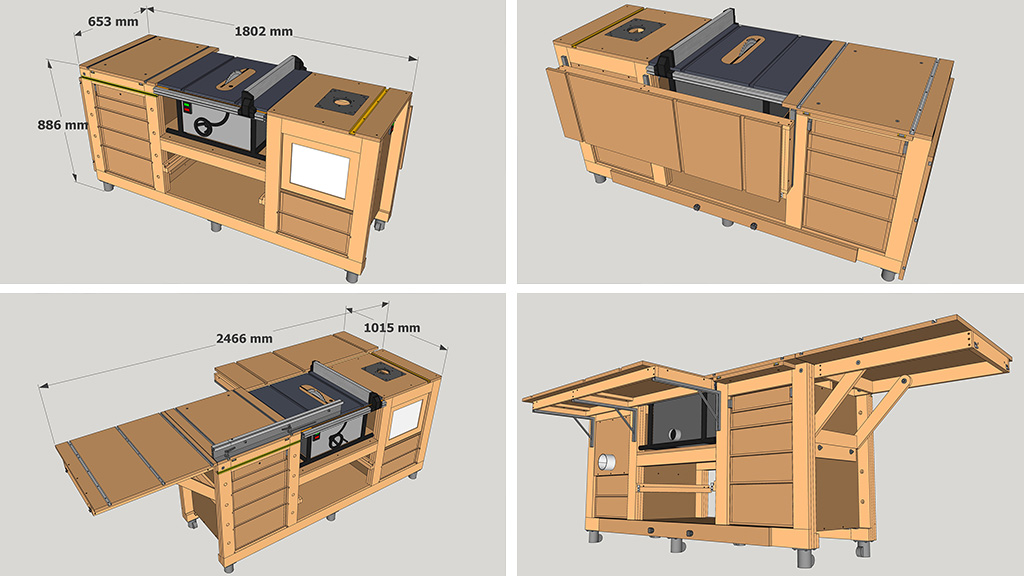
This is the 3D SketchUp file included in the plans, available on my website. As you can see in the animation, I’m going to install two folding tables to save space when I’m not using my bench, as well as to have more space to work when necessary. I’ll also make a sliding carriage for more accurate and comfortable crosscuts.
Approximate weight: 120 kilograms (without bech saw and router)

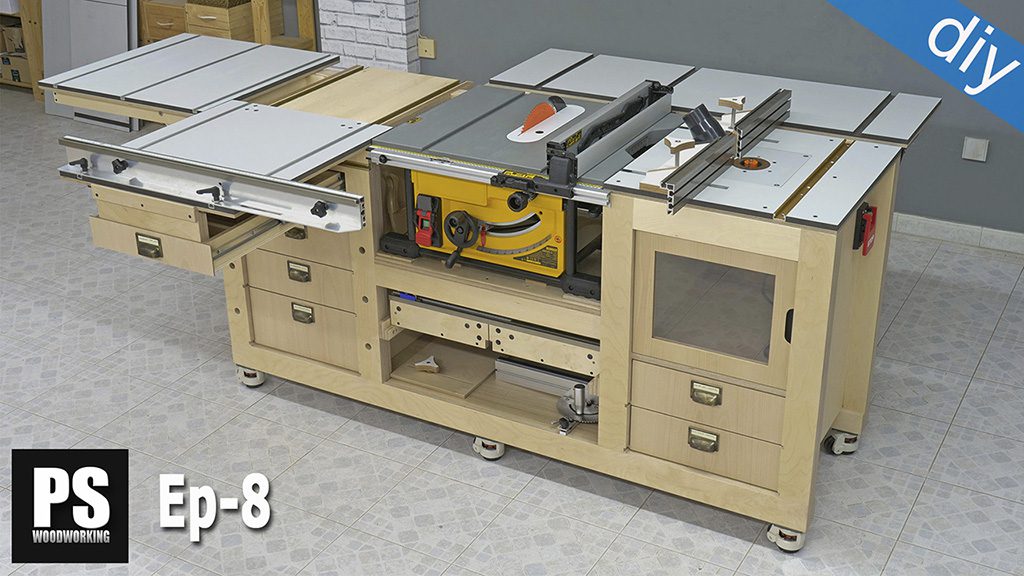
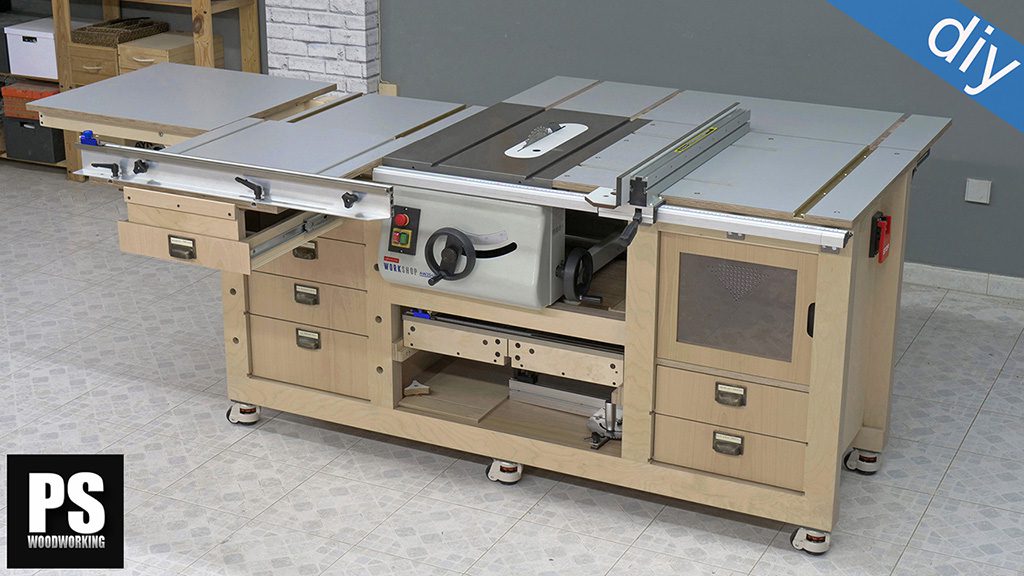
In this picture you can see what the bench looks like once the frame parts and cabinets are joined. I’ve also installed retractable wheels and put the bench saw in its emplacement.

I’ve used the same construction method as in my previous woodworking benches. As you can see in the modular bench in the first picture, the main differences are the gap in the middle for the bench saw and the fact that this time I’m using 18mm thick plywood for the top rather than beech finger joint board.
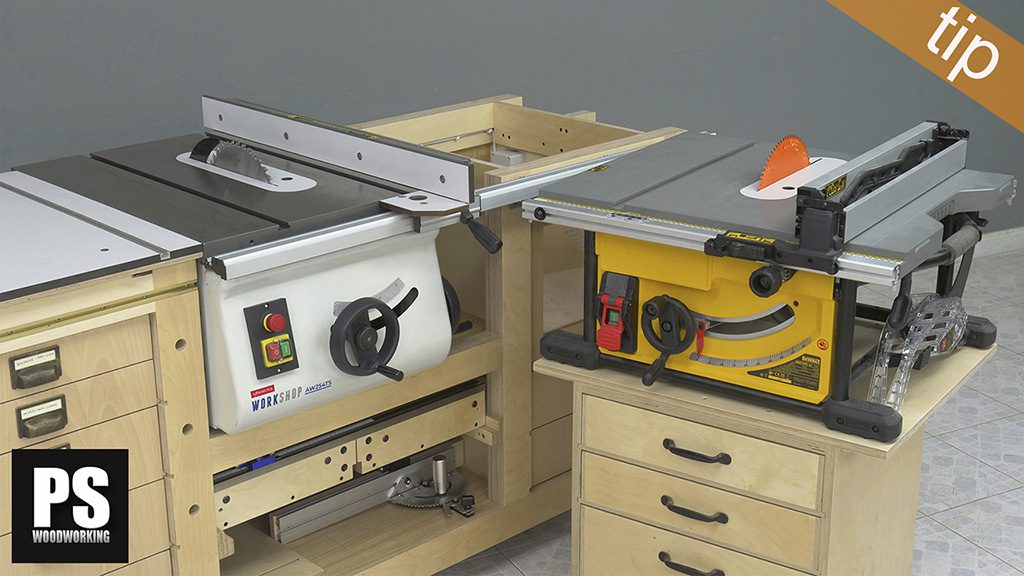
These plans are for a DeWalt DWE7492-QS bench table saw, to install other models you may have to make some modifications to the plans.
Here you’ll find an interesting article where I explain how to install a different bench saw model and how to use other kinds of boards to make the workbench.
How to make the frames and cabinets of the workbench

I’ll start off by showing you how to build the frame. First, we’ll make the four outer legs. I’ve cut a piece of wood, which I’ll use to space the pieces evenly. I apply glue on the wood and use nails to secure the pieces.
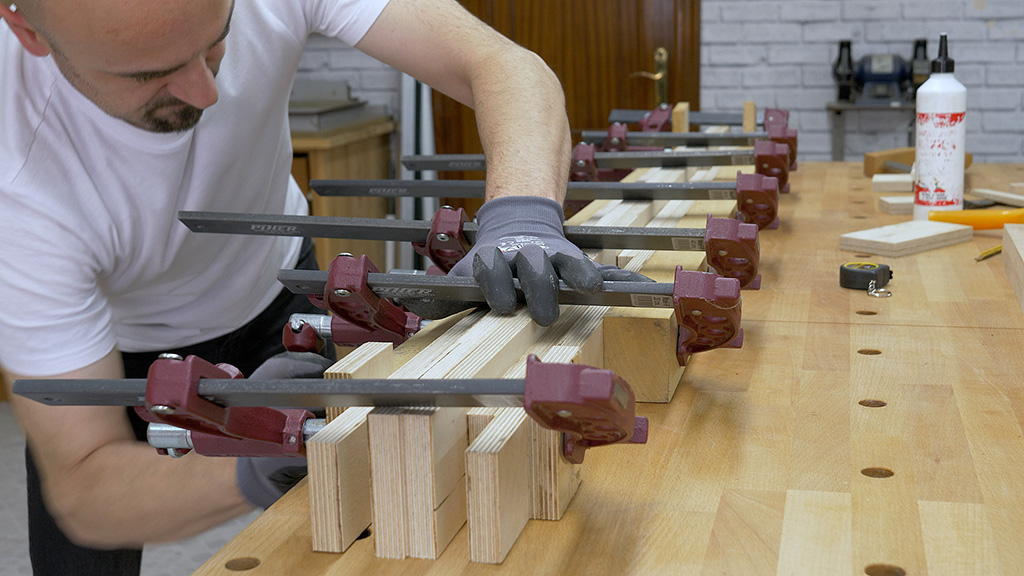
I clamp two legs at a time. Don’t forget the legs must be symmetrical.

I’ll run some tests to see how good the mortise and tenon joints are, and they seem to be perfect. With a hand plane, I correct the inner rebate of some of the legs which needed it.
In order to assemble the frame, I need to drill some holes in the legs. Some 20mm diameter holes for the holdfast clamps. And some more holes for the folding table axis on the left side.

Now I can start putting together the parts that make up the frame. I’ll do this bit by bit, joining one of the long bottom rails with the two legs and the short top rail.
I put low pressure on the clamps, and finish tightening them little by little once they’re all in place and after making sure they’re square. Once the glue is dry, I turn the frame to glue the mid rail on.

First I drill some holes for some dowels that will strengthen the bond. I’ll sand down the inner side of the frame, now that it’s more convenient.
Now onto the inner cabinets. First of all, I’ll make sure the pieces are proper size by inserting them into the frame rebates. With the table saw, in several runs, I make channels for the drawers to slide on. I’ll definitely need a dado blade for these cuts.
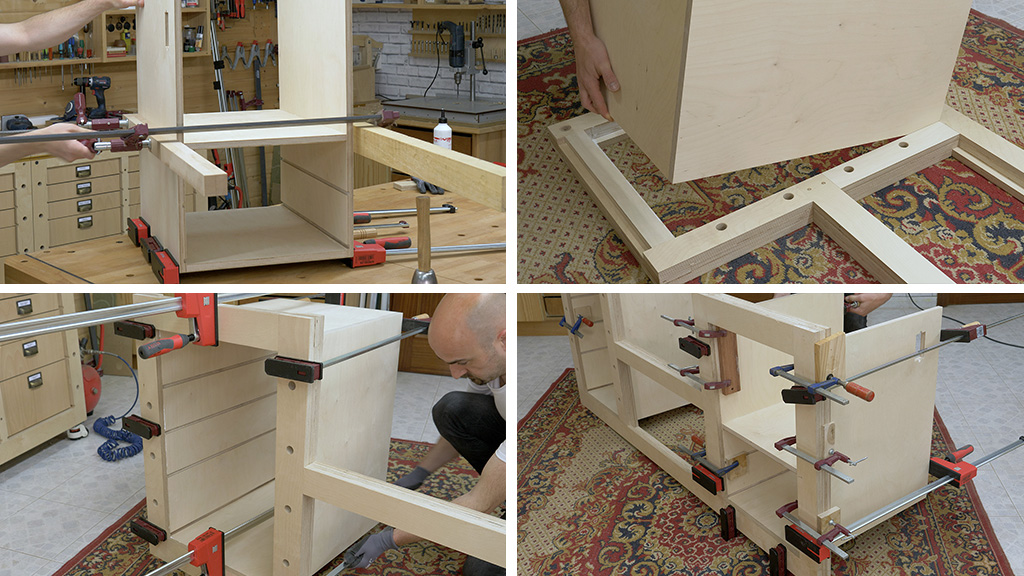
And now comes my favorite part–joining the modules with the frames. Before using glue, I make sure the cabinets fit into the rebates. I apply glue, insert the cabinet and put pressure with clamps.
How to make the electrical installation of the workbench

Now is also a good time to finish the electrical installation. It’s quite simple. I’ll use a rack mount power strip and an emergency paddle switch. I fasten a junction box with screws to protect the back of the switch, as well as an outlet for the router.
After screwing a power strip to the bench and checking all the connections, I make sure everything’s working correctly. That’s all for today. In a few days I’ll upload the second article, where I’ll be showing you how to make a sliding carriage.
Hello, Do you know if this would work for the Dewalt DWE7480 using the same dimensions on the plans??
I think you will have to do some modification. Take a look at this article:
i have the same table saw 7480. I have your plans, where would i find modifications
thank you
Hi good evening
I wanted to know what file I was getting. In AutoCAD SketchApp or … what?
both, and more. Check out this article:
Love the Video, i think i will subscribe… How long did this take you to build (without including filming)
thanks Nathan! I think about 60 hours (without including filming)
Hi, I have bought the plans for the large bench but need some clamps.
What do you call the maroon clamps with the grips that rotate? And where might I get them in the UK
hi Rod, they are from Piher brand, check out this post
Fantastic, Thanks.
Good, I’ll like to have it if possible.
I bought the plan and and 1st plywood to start cutting for the four outer legs. But without the cad and so forth, it is confusing which block to use for spacing. Any suggestions??
hi Kevin, you need to cut a piece of 80x62mm. These two measurements will serve as a template for all the joints. Looking at the plans it will be easy to find out where to use each of the two measures.
Interested to hear about what lead you to this setup. Did you find the other table saws you built lacking in some way and decided to do with the Dewalt? Asking as I too am considering whether to build a table saw using a circular saw, or go with a setup like this. Be good to hear your thoughts on the options. Which one do you use now?
hi Justin, it is possible to make a table saw using a inverted circular saw and perform as well as or better than this mobile workbench. All you need is to use quality materials and work fine.
Thanks. Which do you use on a daily basis? This one, or one of your others? Also is the Dewalt quieter than your circular saw based table saw’s?
I am using this mobile workbench daily. Both have a similar sound level, quite high.
Thanks
Are the plans for the cross cut sled included in the workbench plans?
hi Troy,
yes, they are included. Here you will find everything included in the plans.
Hi, I have some 15mm plywood sheets. Do you think they could be used to build the table?
Thanks
hi Luca,
yes, but you will have to modify the dimensions of some piece. Here more info:
Hi
Great build. Just a question please. How to find the exact high between te table saw top and the top of the other tables?
Thanks, you are very talented!
Leonardo
hi Leo, you can use spacers, or you can do something more complex but precise like I did in my last workbench. Here you can find it.